Author Archive: Andrew
Flying Pig Half: The Good, The Bad, The Awesome, and the Ugly
The Good
- The all-star game stuff is awesome
- The song playing while my wave started: You’re an all-star and Uptown Funk
- The song playing at mile ~0.75 (by Great American Ballpark): put me in coach
- The song somewhere around mile 4: something that sounded like 90% Black Sabbath mixed with 10% of Nirvana
- During large parts of my run, I felt like Mario Andretti in the Ave Maria Indy car commercial
- The lady with the large heavy-looking bell. Seemed like she should have looked around at nearby people with those puny little cowbells and mustered up her best Aussie accent and say “that’s not a bell, THIS is a bell!”
The Bad
- Getting injured two weeks before the Little Kings Mile. I got a pull/strain/something in my upper hamstring (AKA my butt) that put me out of commission for two weeks. I never knew running could be such a pain in the ass sometimes! (lol!)
- People walking less than a mile in (I totally get it during the hill, but if you were going to walk, don’t start with 2:00 – 2:05 runners!)
- Someone near mile 5 was giving out small water bottles. I saw no less than 4 of them in the race course. Twisted ankle (or worse) waiting to happen. I know their heart was in the right place, though.
The Awesome
- Signs:
- “Every Hill is a mountain of opportunity”
- “Run Like Morgan Freeman is Narrating”
- The crowd – it never ceases to amaze me how many non-runners come out for this. People can be awesome sometimes.
- Not signs:
- The couple with “1st 1/2 marathon” on their shirts. I saw at least two people say good things to those two before I did.
- The PR Bell
- Ringing the PR Bell!!!
- Using my own keys to the race to have an awesome race!
- The finishers area, complete with chandeliers. There’s something cool about being in a dirty urban setting (the post-race area is the service area for the Great American Ballpark and the US Bank Arena) and seeing chandeliers.
The Ugly
- Two days of soreness after the race
- The bar I selected for that post-race beer. I don’t like being ignored.
The Race Report – Little Kings Mile
Race conditions were warm and sunny, race began at 8:00 PM on Friday night. I had walked to and from the Expo and my office prior to the race (about a mile). Race was operated in one major heat and two additional heats for 5 elite women and 5 elite men. The course was new this year.
The Course
My strategy was to start well and kick it in around the corner of Central and Mehring (the last intersection on the course). Finishing time was 7:17.
The Race Report – Flying Pig Half Marathon
Weather: mid-50s at the start, low 70s at my finish.
Clothing and Accessories: I wore a tank top and shorts. I wished I had an old sweatshirt to have over me that could have been tossed to the side and ultimately donated to Goodwill (they collect cast-off clothing at the start area). Only accessories were my phone, three packs of Gu (Root Beer, Vanilla, and Chocolate, the Root Beer one was consumed in the corral), and 3 Advil stapled to/in my fuel belt.
The Race: I spent the first 6 miles just staying with it. I admired the sunrise and generally kept moving at a good pace without too much exertion. I kept the same attitude during the uphill climb into Eden Park. I kept a not-close eye on time. Took water at 4, 5, 8, and 9. Took energy shots around mile 5 (in downtown) and 9-ish (in the area where volunteers were handing out the energy bars). Pushed it during the downhill, but not so bad I couldn’t talk, I saved that for miles 12-13.1.
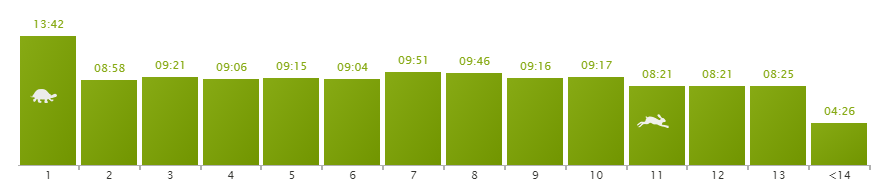
Lap times. Ignore mile 1, this started before the race did.
Looking at the pace, I’m happy with it all. I didn’t expect the first part to be in the low 9s, nor did I expect the middle part to not break 10 minutes per mile. And I followed my own keys and saved some for the end, which is where those 3 sub-8:30 miles came from.
Final time: 2:01:11. PR of 16:23!
Cheers!
BBBC Farm Report
The Hops…
-
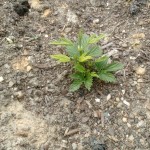
- Tettanang Hops
-
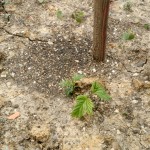
- Columbus Hops
-
- Centennial Hops
So I figure I’m going to make a lager at the end of summer when those Tettanang hops are ready.
The Brewery
I was reading up in Mastering Homebrew and noticed that the Wortsplosion was probably caused, in part by using vinyl tube instead of silicone tube… I think. I need to check, and probably still need to see about either getting some hose clamps or just replacing the fittings with something more heat resistant.
I’ve been at work on a fermentation chamber controller.
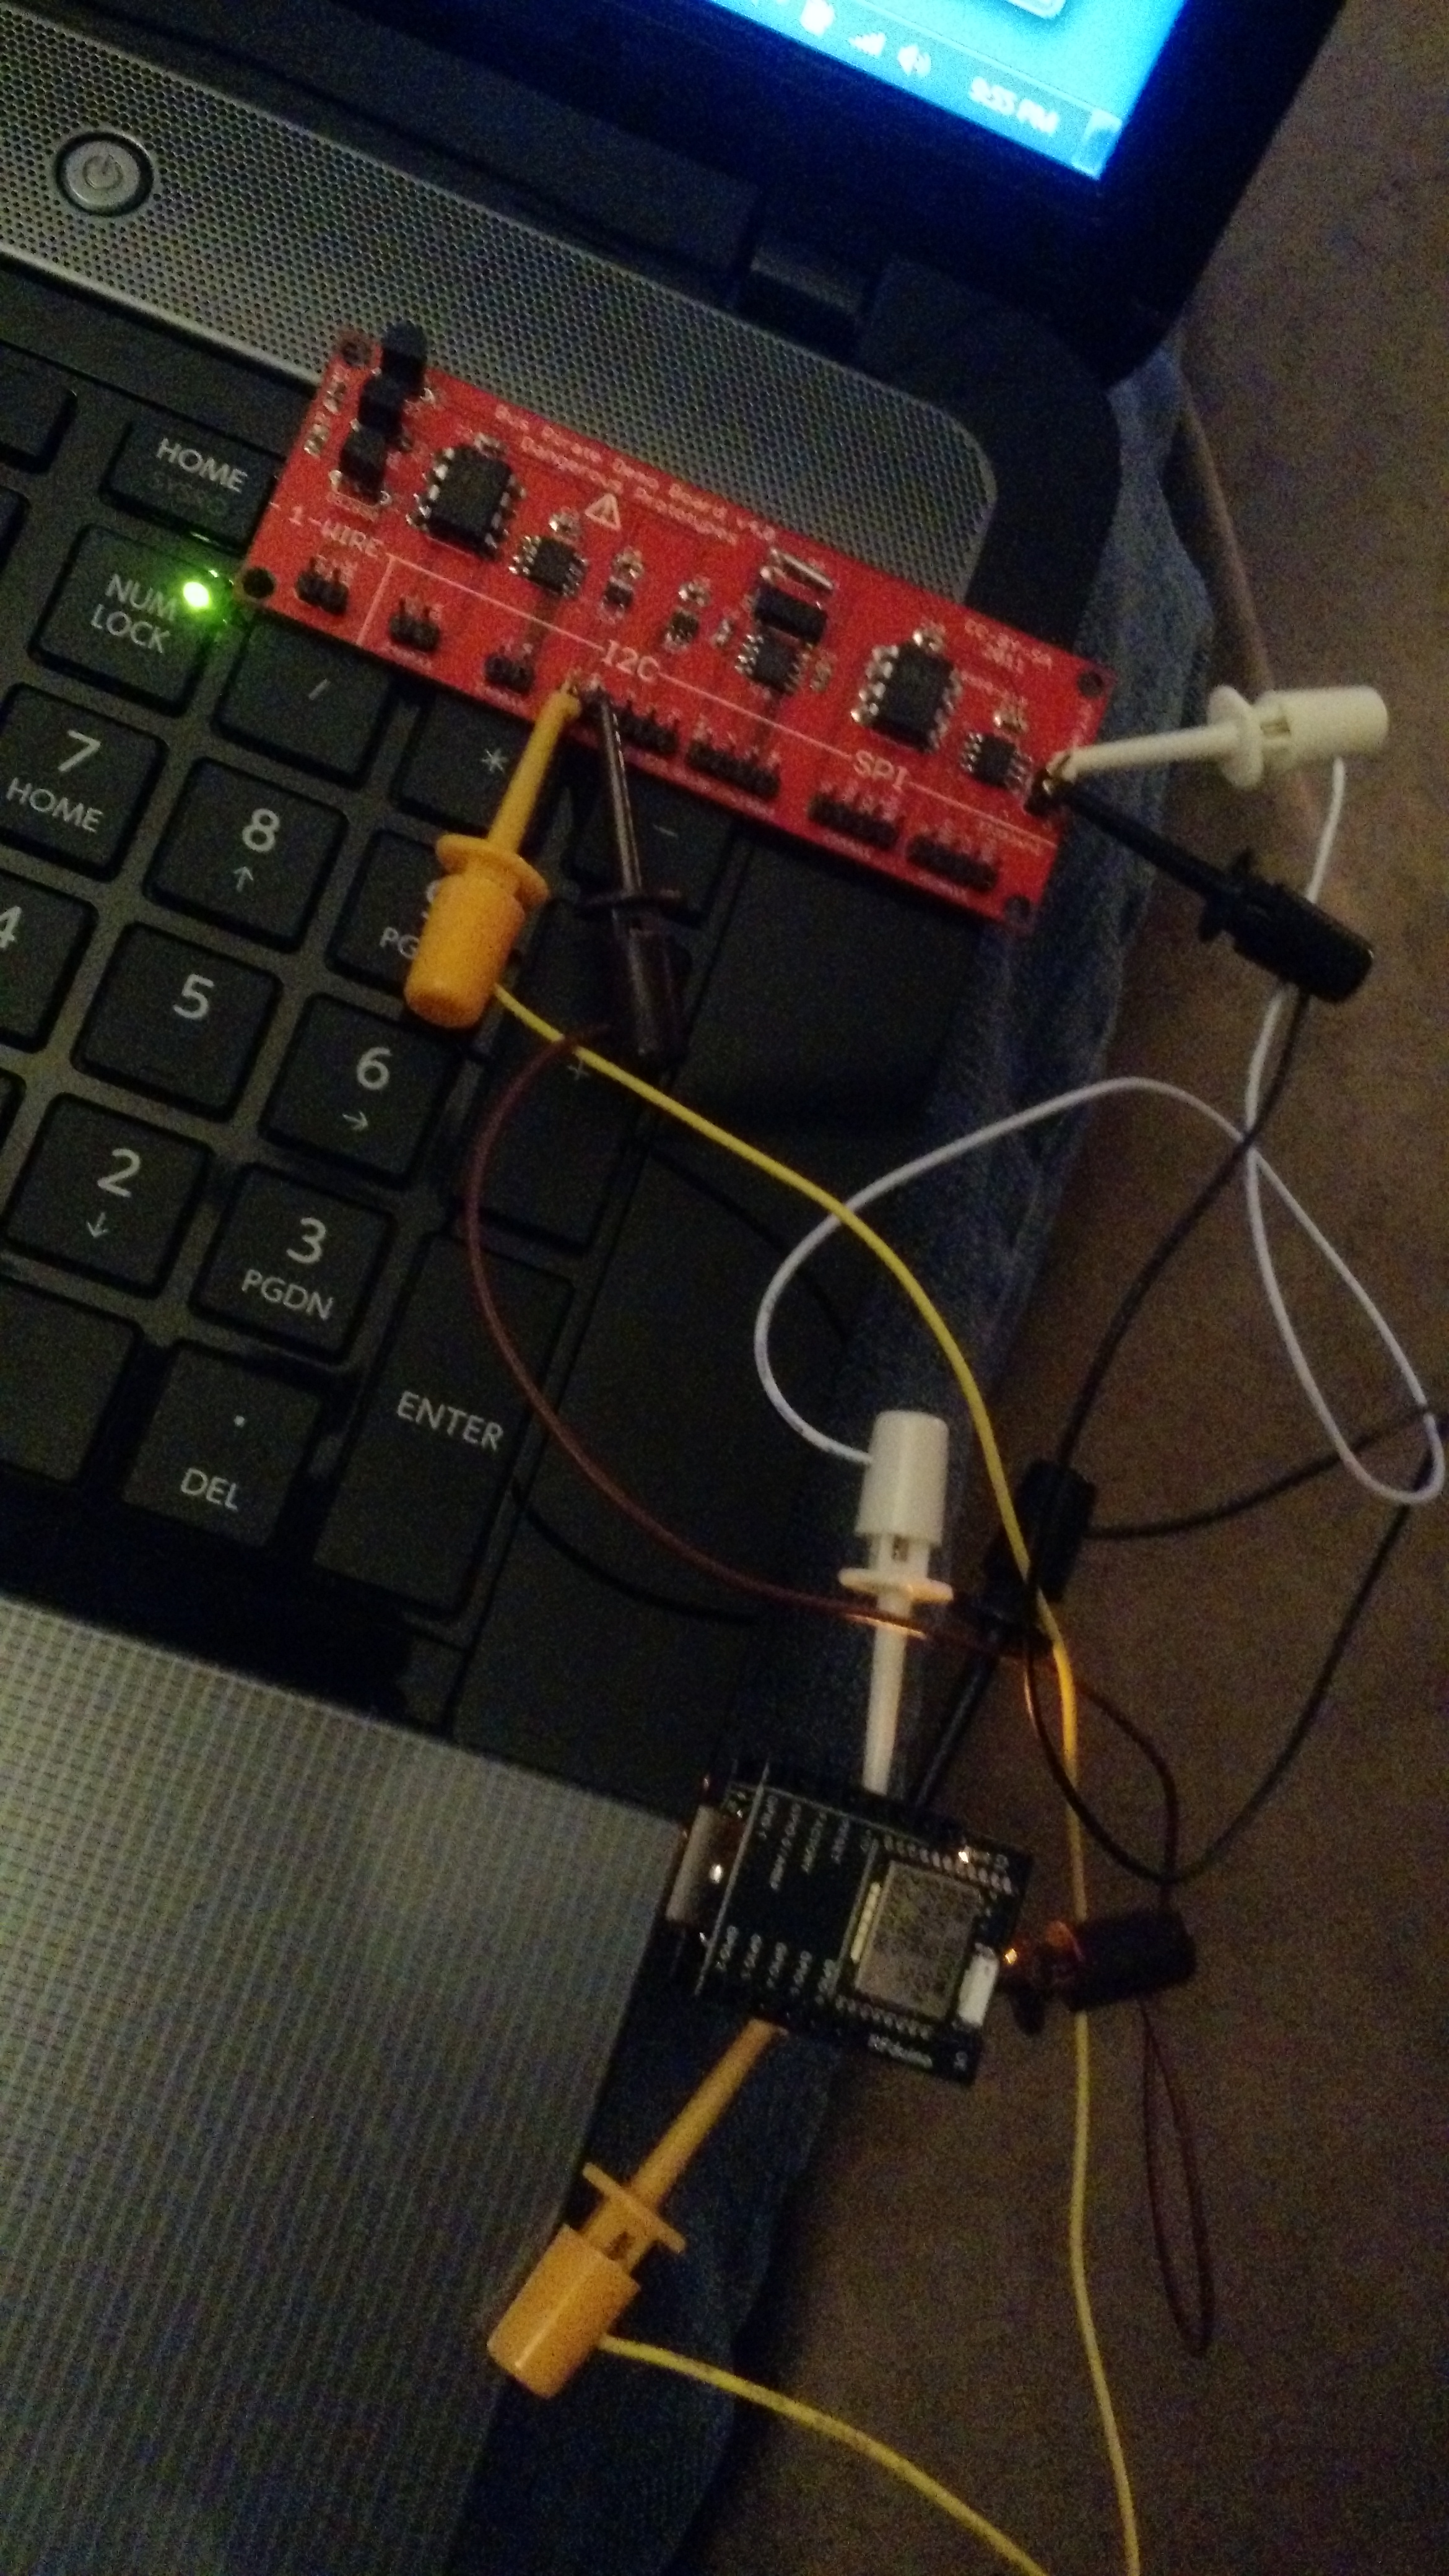
Test setup with an RFduino and a TC74 temperature sensor.
After a little false start with a sensor that absolutely will not work with 3.3v, I found a sensor that does work and I think I have a solution in mind. The RFduino might be a better way than an ESP-8266, but we’ll see. I still have the option to use this sensor and the Raspberry Pi. Also on that thought, I updated the Brewery IoT page. Even more so, the behind-the-scenes stuff works, too – with encryption, even.
Brewing
Tomorrow (by the time this posts) is Brew Day. It’s also the day between the Little King’s Mile and the Flying Pig Half Marathon. I am going to be resting, since I already figure that a lingering injury may make my half a very painful experience and if there’s a snowball’s chance in Hell that I might be miraculously healed I want to be at my best. I might see about brewing the following weekend. I hope everyone taking part in Brew Day has a wonderful time.
In related thoughts, I just (before typing this) drank an amber ale that I think had too much caramel malt in it. I also saw something recently (I don’t recall where) that indicated an over-reliance on caramel malts in general, so I think my next brew – probably another IPA – will have no caramel malt.
Another thing I want to do is to dry hop Bud Light to try some hops by themselves. I know for sure I’d want Amarillo, Chinook, Columbus, Centennial, Cascade, Mosaic, Equinox, Fuggle, Liberty, Northern Brewer, Simcoe, Williamette, and Green Bullet (list subject to change). Bud Light has so little flavor that the hops shine through really well ;-).
Cheers!
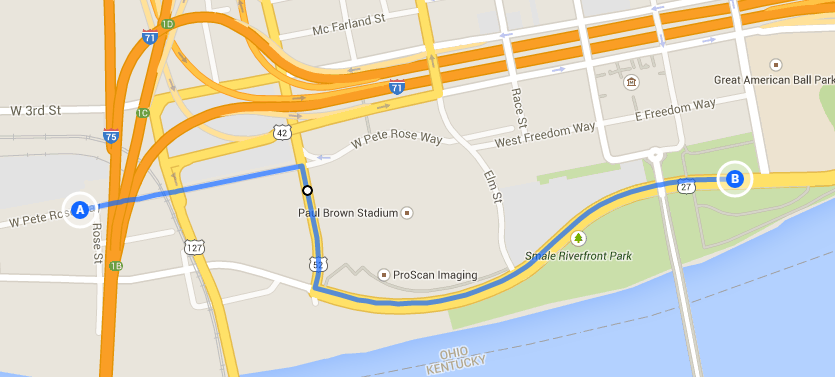
Keys to the Race: Flying Pig Half Marathon
Initially while watching the Boston Marathon and seeing them do a “Keys to the Race”, I thought the concept of “keys to the {race|game|etc} was getting overdone. It might be, but strategy is critically important when you’re running a long distance.
I’ve had the luxury of working near the course and have been practicing on the course, so I’ve come up with my three keys to a successful race.
1. Don’t Bank Too Much During the First 6 Miles
It’s a 13.1 mile race. The first 3-4 miles are somewhat rolling and have a lot of crowd support, followed by a lesser-supported (that I recall) 2 miles through Queensgate and into downtown. Banking too much here would have painful intrest payments through the rest of the race and could cause an energy bankrupcy in the next phase of the race.
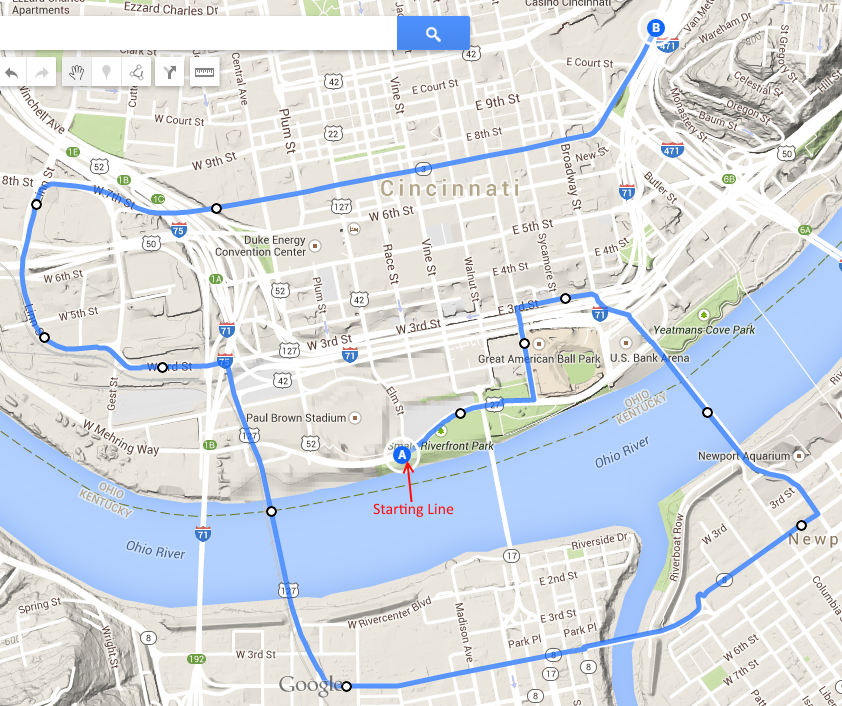
Part 1 of the course
2. Don’t Overrun the Hill
Miles 6 to 10.5 are hills. Be aware that people will claim stuff like “the bridge [at m7.7] is the top”. NO. IT IS NOT. It is the end of the worst, but there are still small hills from 7.7 to 10.5.
Note the location of the red ‘Energy” on the map. It’s around mile 9. For someone running a 1:30 half, that’s probably a good spot. For me (~2 hours), I’m taking a shot of Gu at 4.5-5 miles and 9 miles (I’m going by the Gu packet directions of “15 minutes before and every 45 minutes”. Note that the Flying Pig has PowerGel.

Part 2 of the course
3. Save Some For The Last 2.6 Miles
Around mile 10.5, you may feel like you’re falling off the side of the planet. This is where the race course sets you up for a negative split. I’ve had training runs where the uphill portion (miles 6-10.5) where 10:50-11:50 min/mile, and the downhill was 8:30 min/mile. If you follow key #1, you can hit this area hard for a strong finish. Miles 10.5 to just before 12 is downhill, things level out on Central Parkway (where the hairpin turn is), back downhill (a little) on Eggleston, and then right onto East Pete Rose Way. That last 0.2 (or so) of the course on Pete Rose Way is an uphill grade to the finish line – it’s not terrible, but after 13 miles, it can be a bit of a killer.

Part 3 of the course
Good luck to all those running!
Five Books Homebrewers Should Read
Thanks to Old Man Winter and Mother Nature (both of whom SUCK), I hurt my back shoveling snow and was resting a lot over the weekend and week. Since I couldn’t work on the electric kettle (and I had the incorrect solid-state relays), everything was held off for a week.
So I started reading another beer book and thought that I’d post something about them. This list is NOT EXCLUSIVE! There is a lot of great brewing literature out there – I’m just going to talk about the four I’ve liked the most so far. These are in no order, either.
1. How To Brew by John Palmer
I’ve read this probably three times, twice on his website and a third reading the Third Edition on Kindle. The thing I like about this book is that it is very step-by-step and practical, and when he goes into discussion about what is happening behind the scenes (particularly in the all-grain chapters), the author clearly indicates that he is going to explain things for a while and what chapter to go to if you just want to brew. In fact, the author does that in another place – the beginning. The book starts out with brewing your first extract brew (which I believe is a good place to start, even if you brew one extract brew like me).
2. The Complete Joy of Homebrewing by Charlie Papazian
After reading How To Brew, this is a little bit of a review, but I think this book clearly shows that brewing beer is not an uptight process. The book drives home the point of “Relax, don’t worry, have a homebrew”. It is somewhat of a review after reading How To Brew, but still a good read nonetheless. The book also talks about the historical context of beer and brewing.
3. The Brewer’s Apprentice by Greg Koch and Matt Allyn
First off, brewing books written by some of the most respected craft brewers should ALWAYS be read. Greg Koch is the CEO of Stone Brewing, brewers of such high-quality brews as Arrogant Bastard Ale, several excellent IPAs (Levitation*, Self-Righteous, Ruination 1.0 [and probably 2.0, too], and many others), as well as one of my favorite milk stouts. And while I’ve skipped out on the recent Green Tea and Golden Stout collaborations, the Xocoveza Mocha Stout collaboration was excellent. Anyway, the book is more of a thinking book than a howto book (unlike the two above). There is a lot of discussion about specific ingredients (like hops) and specific processes (like mashing). This is a book to read with a beer in your hand when your carboys are full and you want to think about brewing the next beer.
4. Tasting Beer: An Insider’s Guide to the World’s Greatest Drink by Randy Mosher
This book is not about brewing, it’s about tasting. Tasting is an important part of brewing beer, especially if you want to brew better beers (and who doesn’t?). Taste is a critical part of evaluating beer, whether it’s your own or someone else’s. It’s also an important part of recipe formulation. This book really hits its stride around chapter 4 when the discussion moves into the sensory evaluation of beer (judging), beer presentation (glassware, pouring, etc), and beer and food pairing.
5. Mastering Homebrew by Randy Mosher
This is a book that should be purchased as a printed book as opposed to an eBook version. While it is a little more expensive that way, the book is full of pictures and tables that explain a lot of the more complex brewing processes in a simpler, almost infographic-with-text-explanation style.
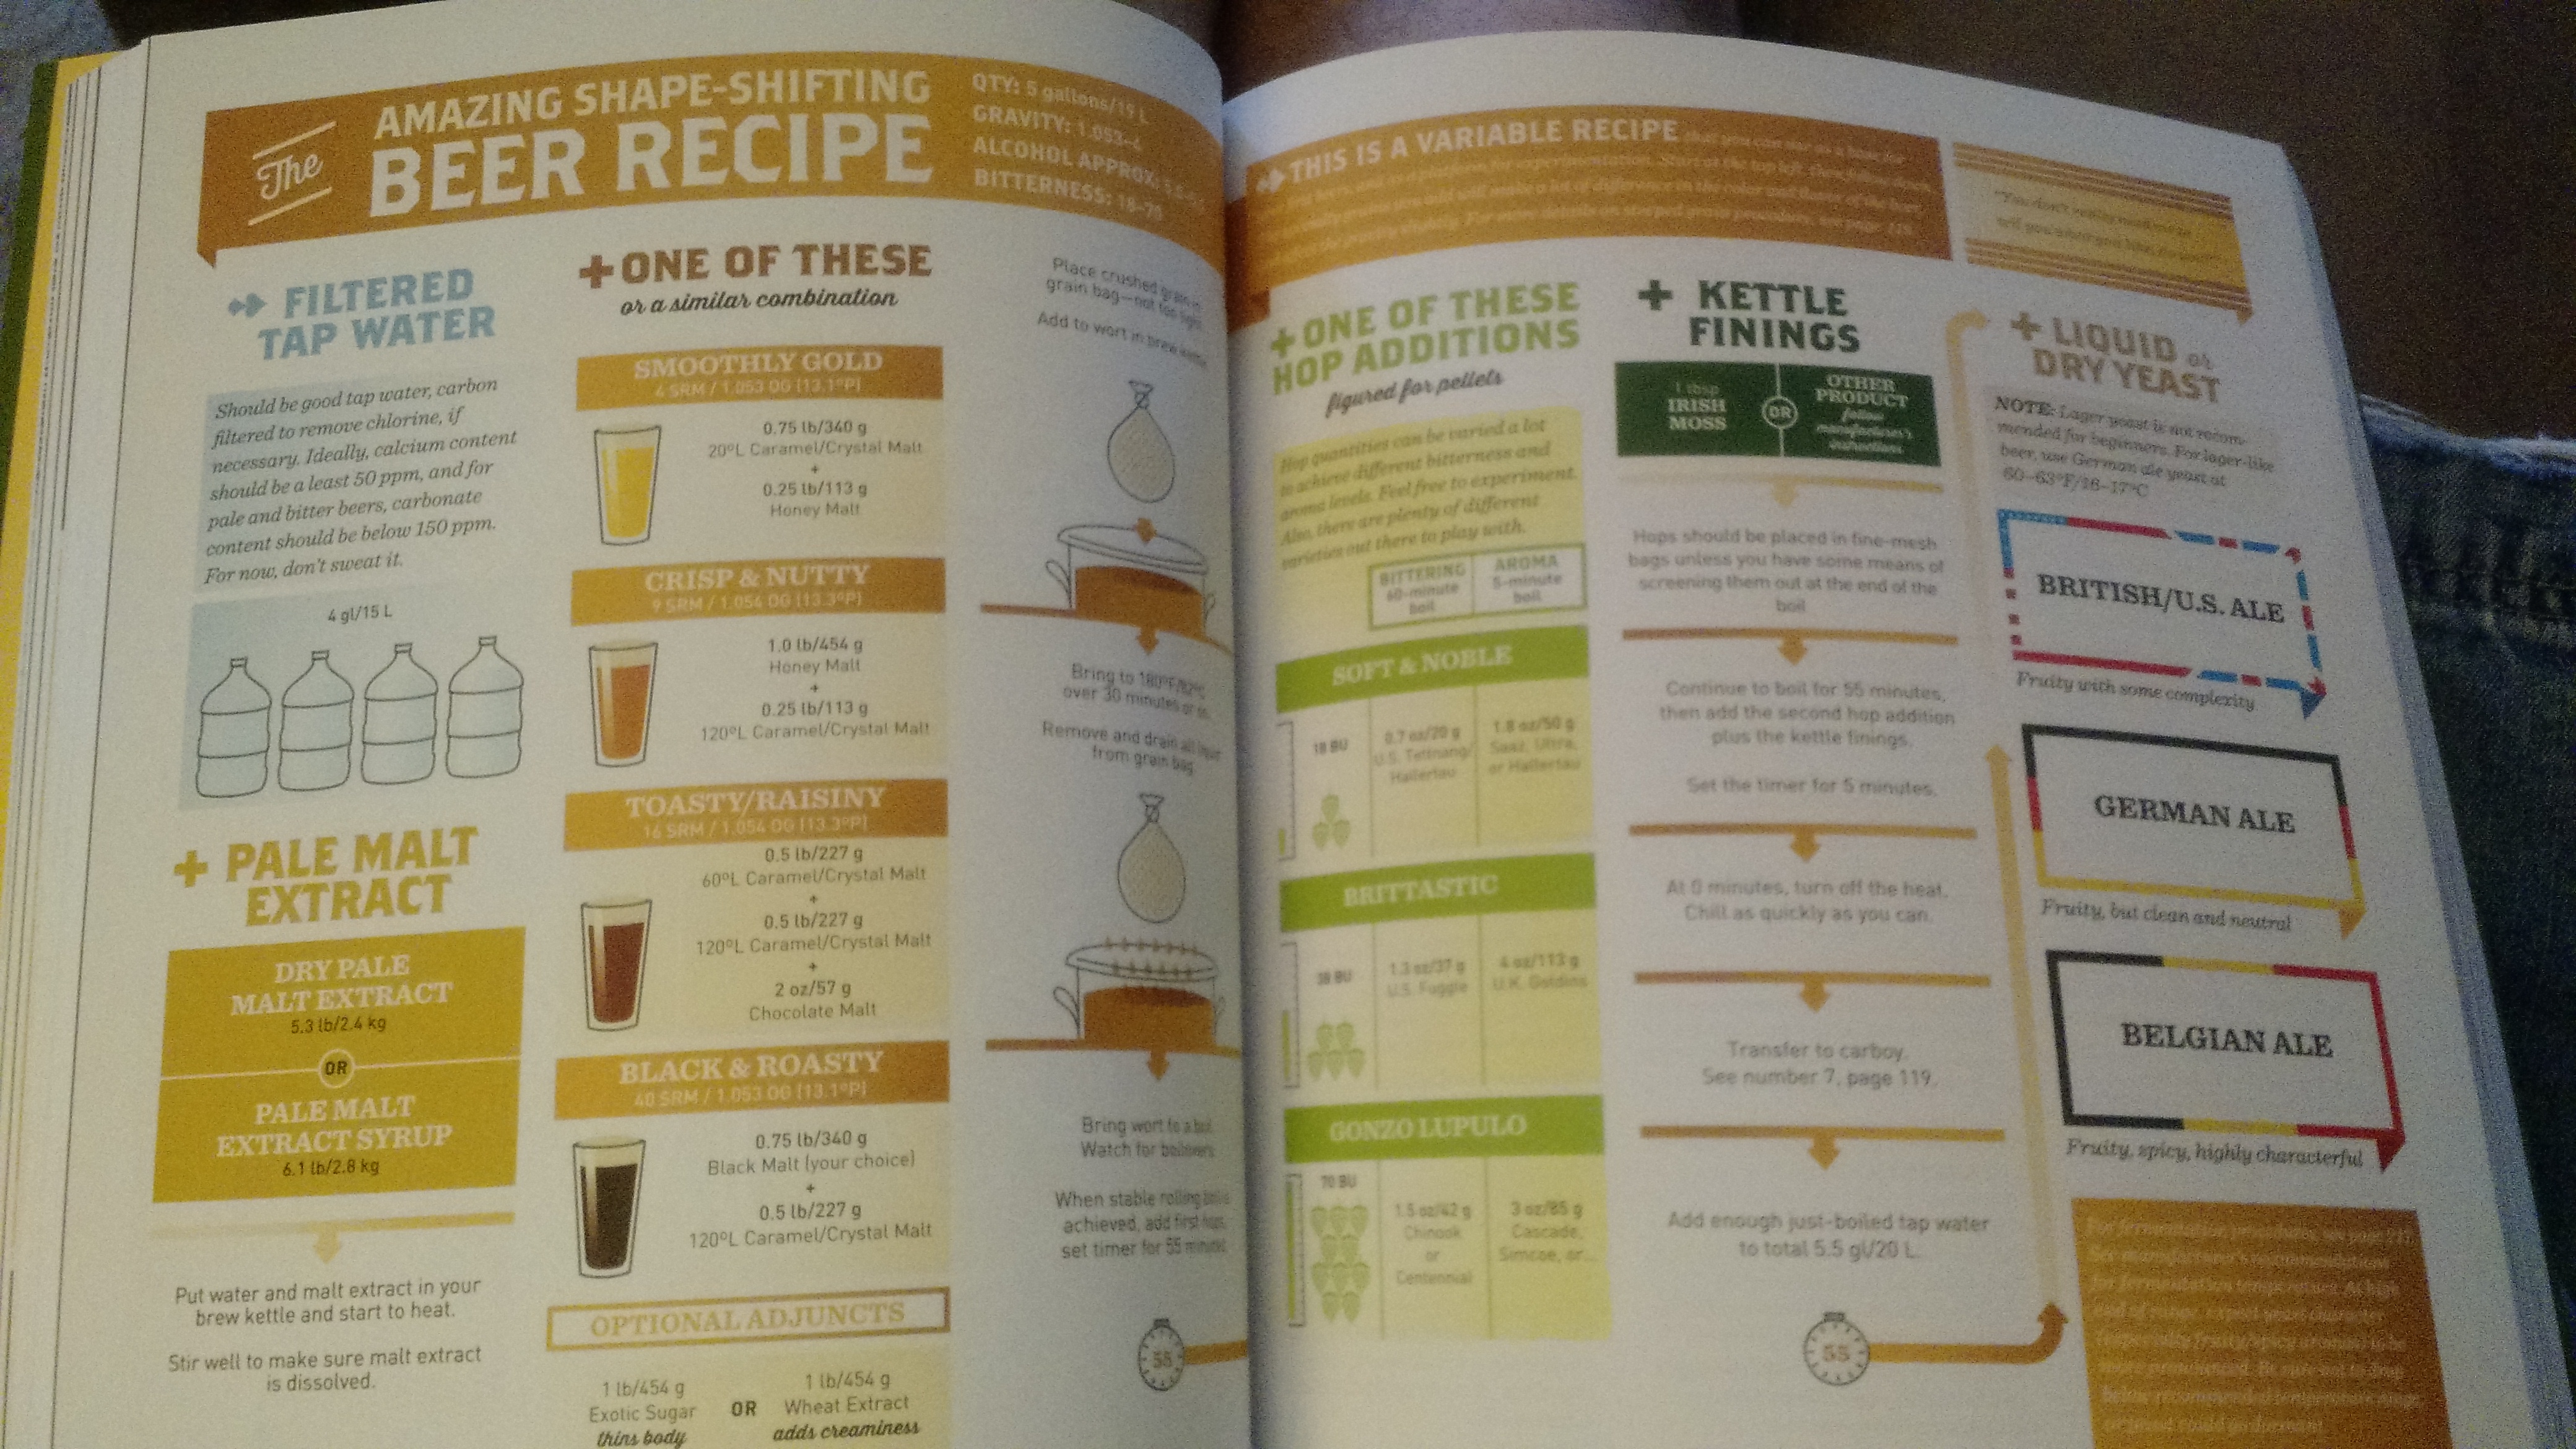
See this page? It looks awesome printed. It’d be nearly impossible to read on a Kindle!
I think I like reading this one at this point (6 or 7 brews, 4 or 5 all-grain brews) because of the intense discussion of grains and hops (so far), and I’m probably about 40% of the way through the book.
Cheers!
Saison + Brett from a 50W Brett Is My Copilot Bottle
I like the idea of experimenting.
First, I saw this on Twitter:

Some dude posted this on Twitter…
@CffmBeech is Country Fresh Farm Market on Beechmont Avenue. It’s about 1/4 mile away from my LHBS, Paradise Brewing. I needed to drop by Paradise for a hop rhizome. And I’m a beer explorer, so I couldn’t resist wanting this. So I dropped by CFFM and after finding the bottles.
I sought some help from a friend that is going to (or just graduated from) the Seibel Institute. He was asking if I used brett for the Saison, since that’s the traditional fermentation ‘method’.
The other person’s name has been removed since I didn’t ask him if I could post this.
So I thought about something…
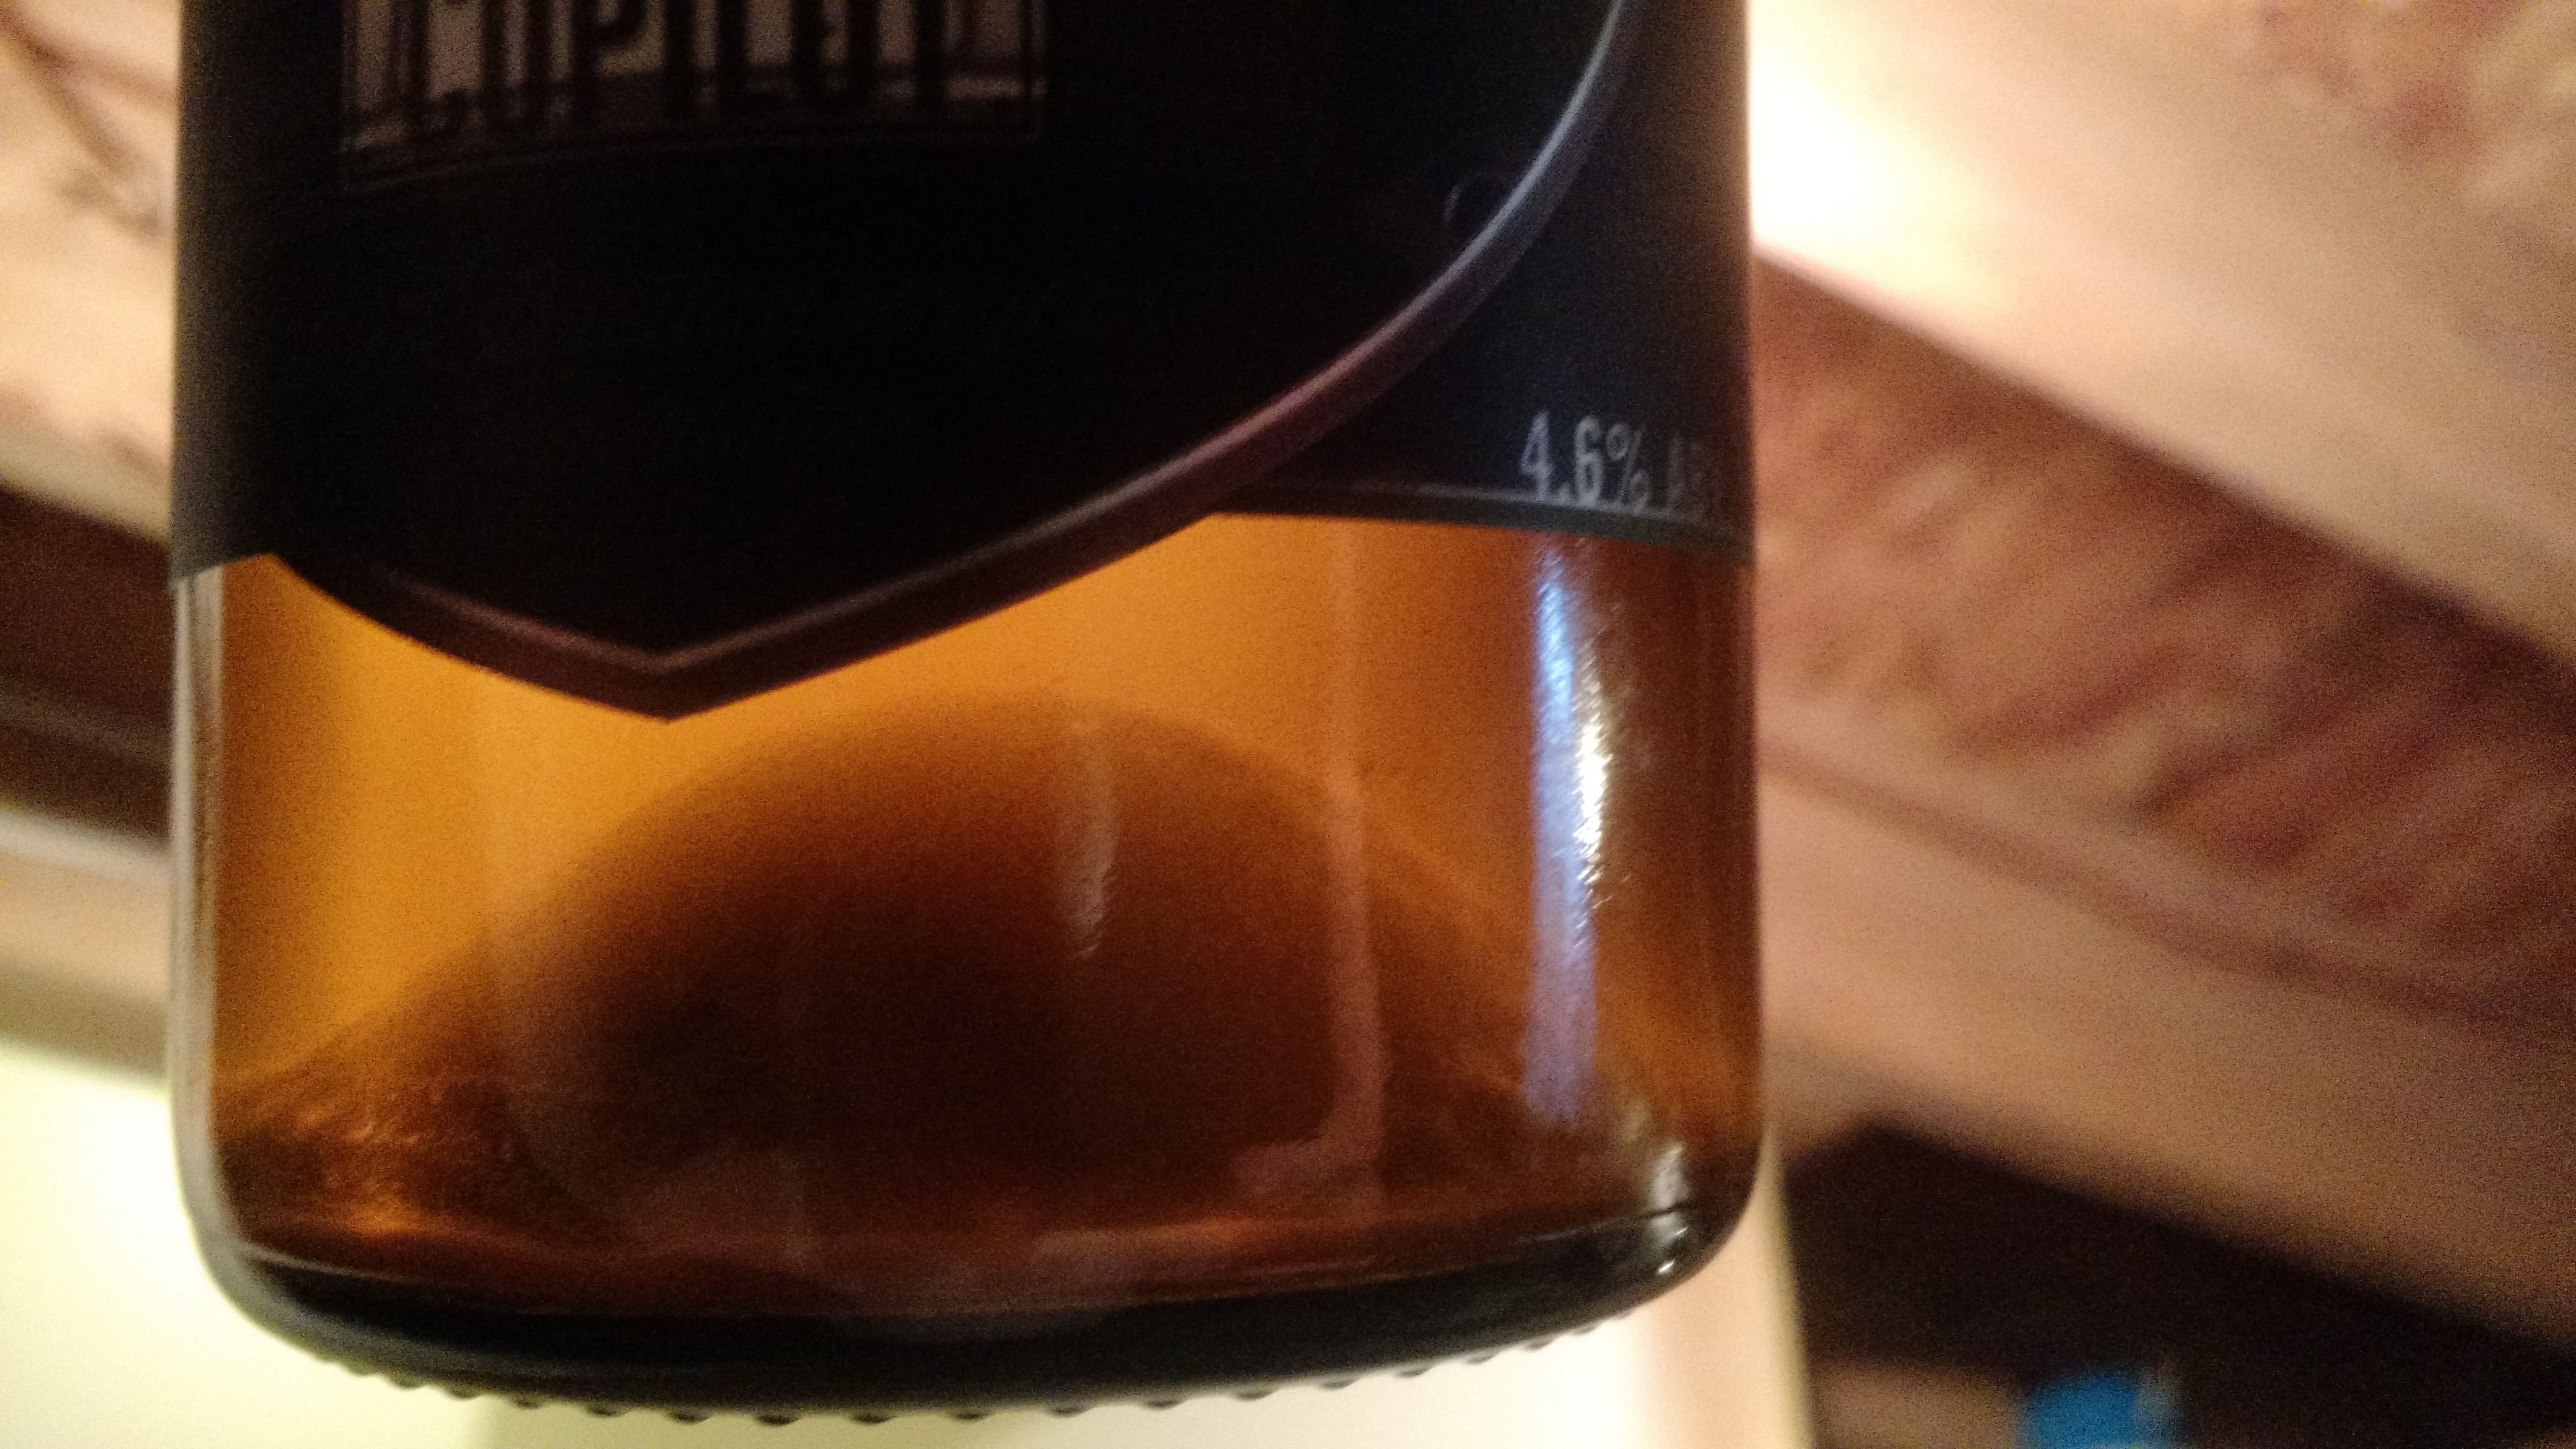
Oh look, what do we have here?
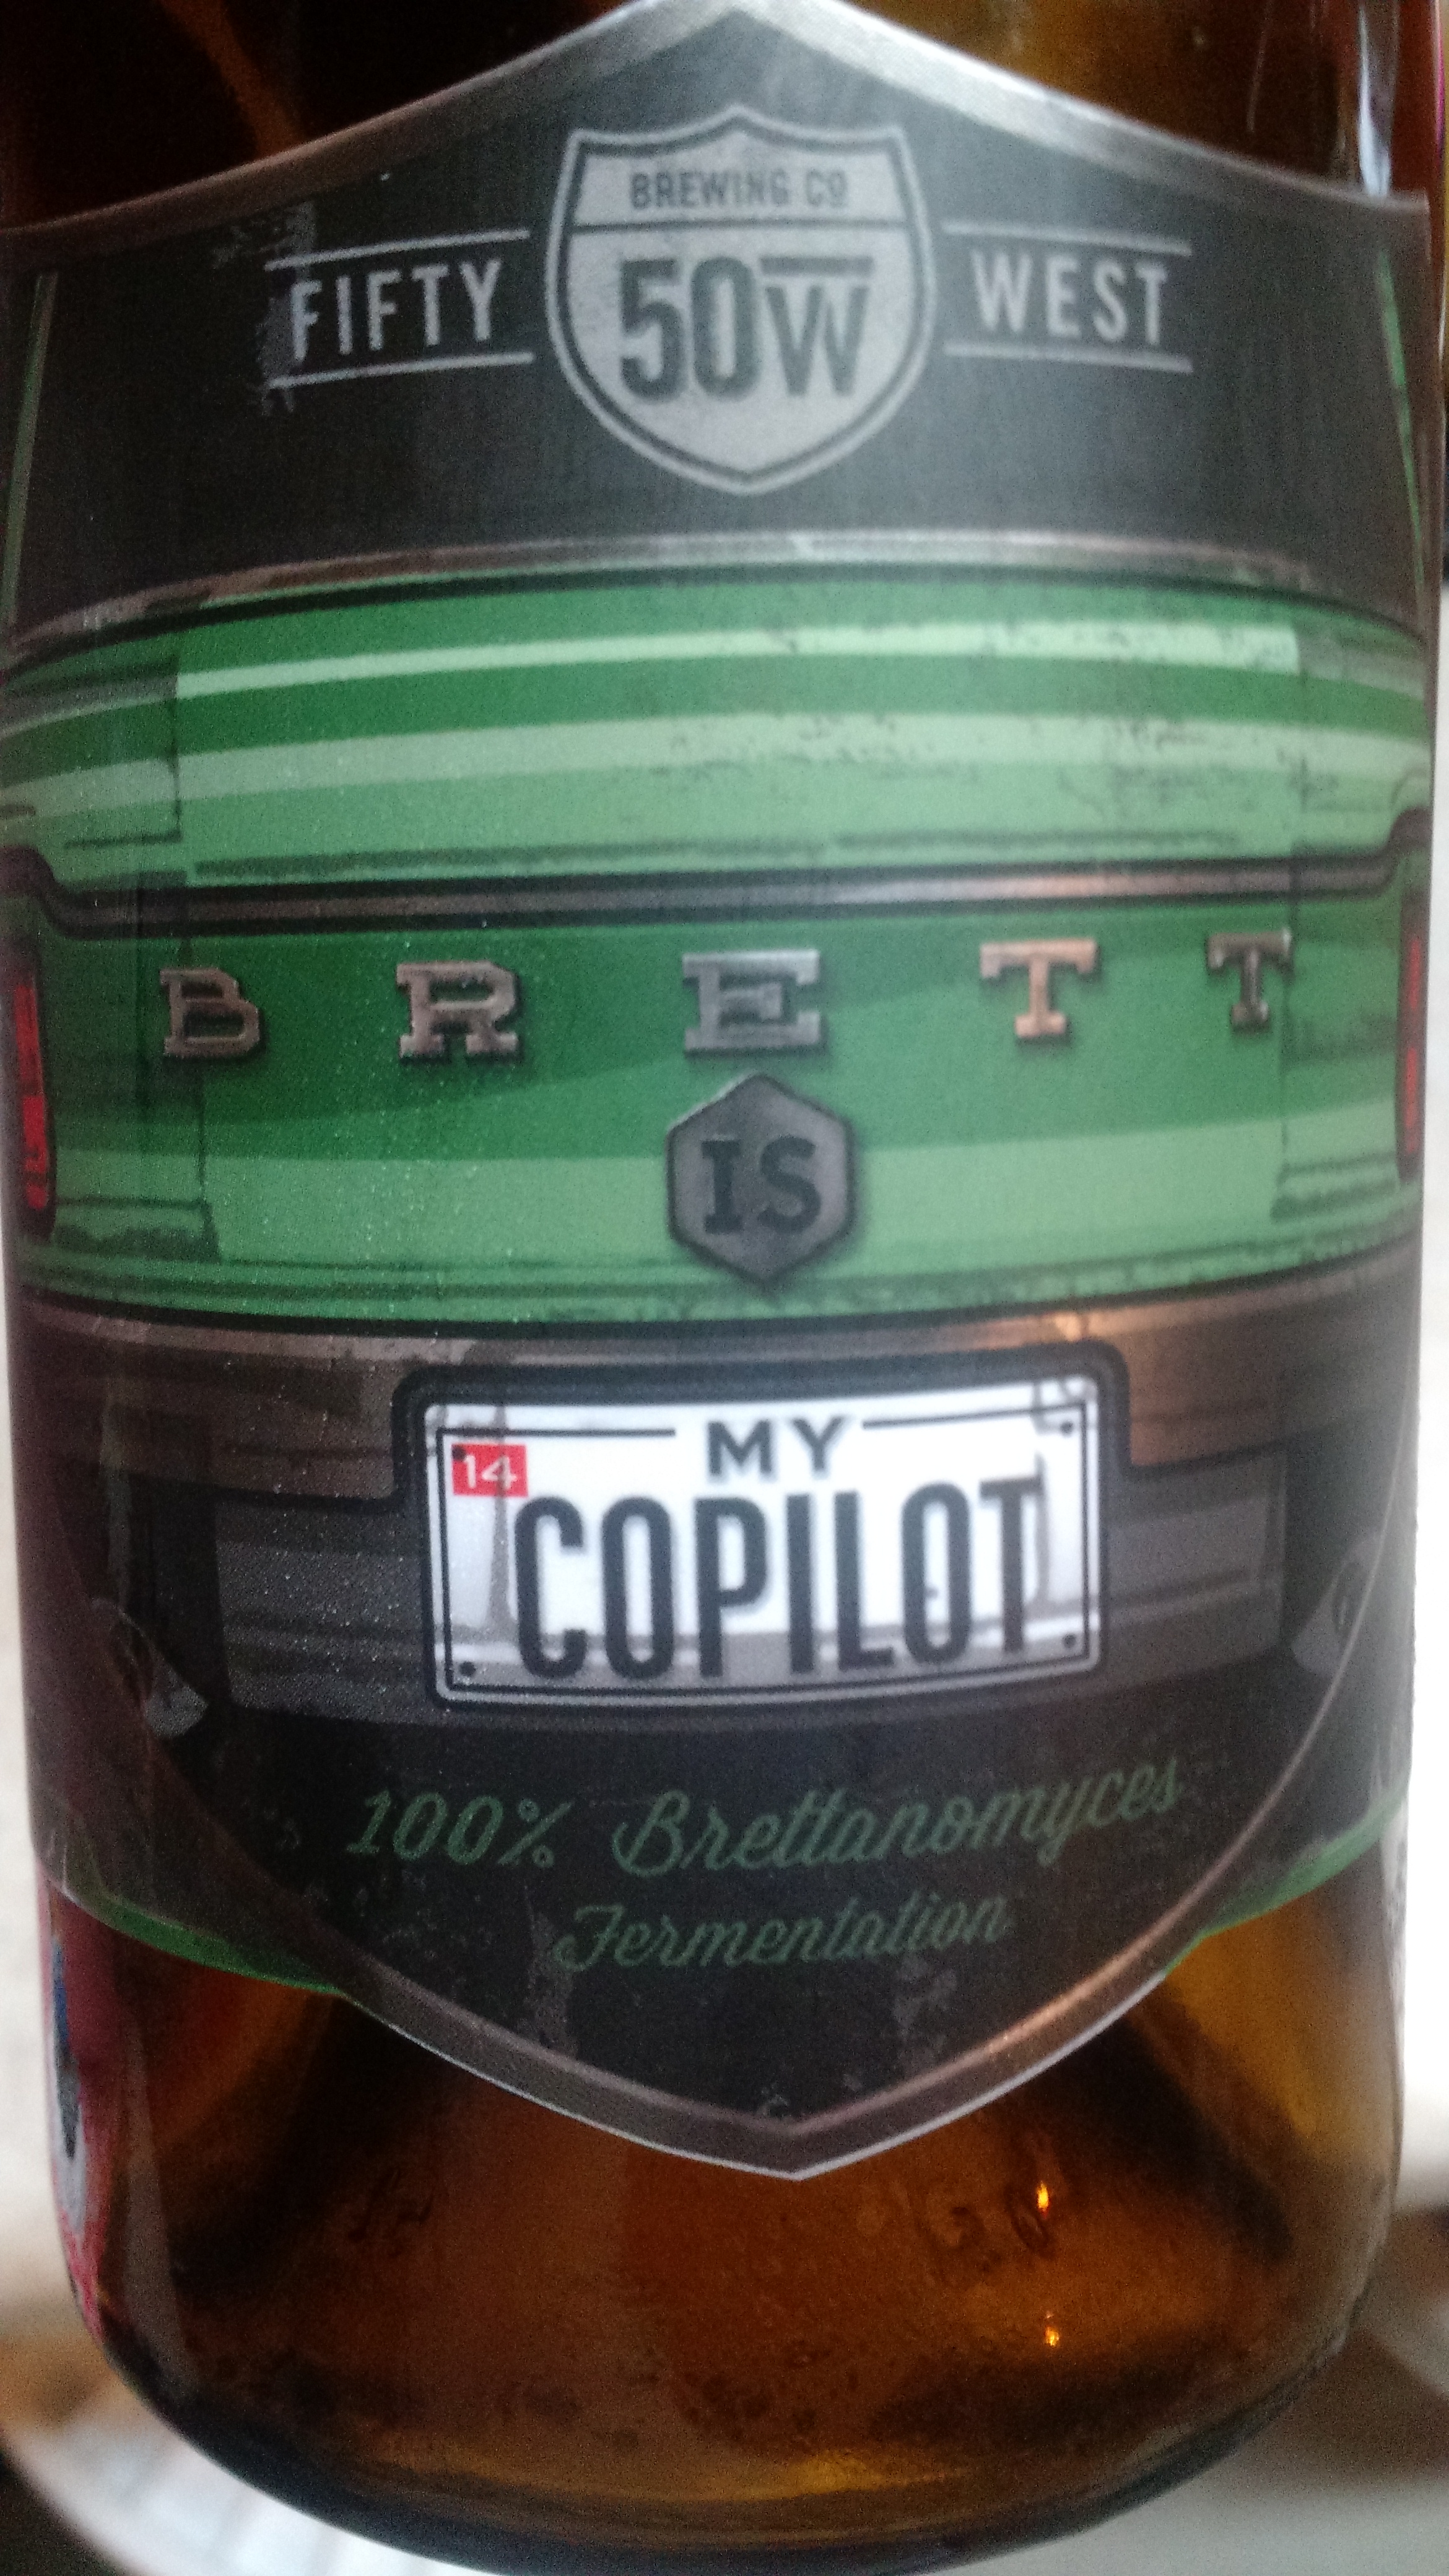
Note the 100% Brett fermented…
So while I was stopping by Paradise picking up that hop rhizome, I got a 1-gallon carboy to try this out. My Saison was nearly done fermenting, but I racked about a gallon into the second carboy (which was washed and sterilized, of course!), sprayed sanitizer around the cap of Brett is my Copilot, and poured all but about 3/4″ of it into a glass, and swirled the rest and pitched it into the second carboy.
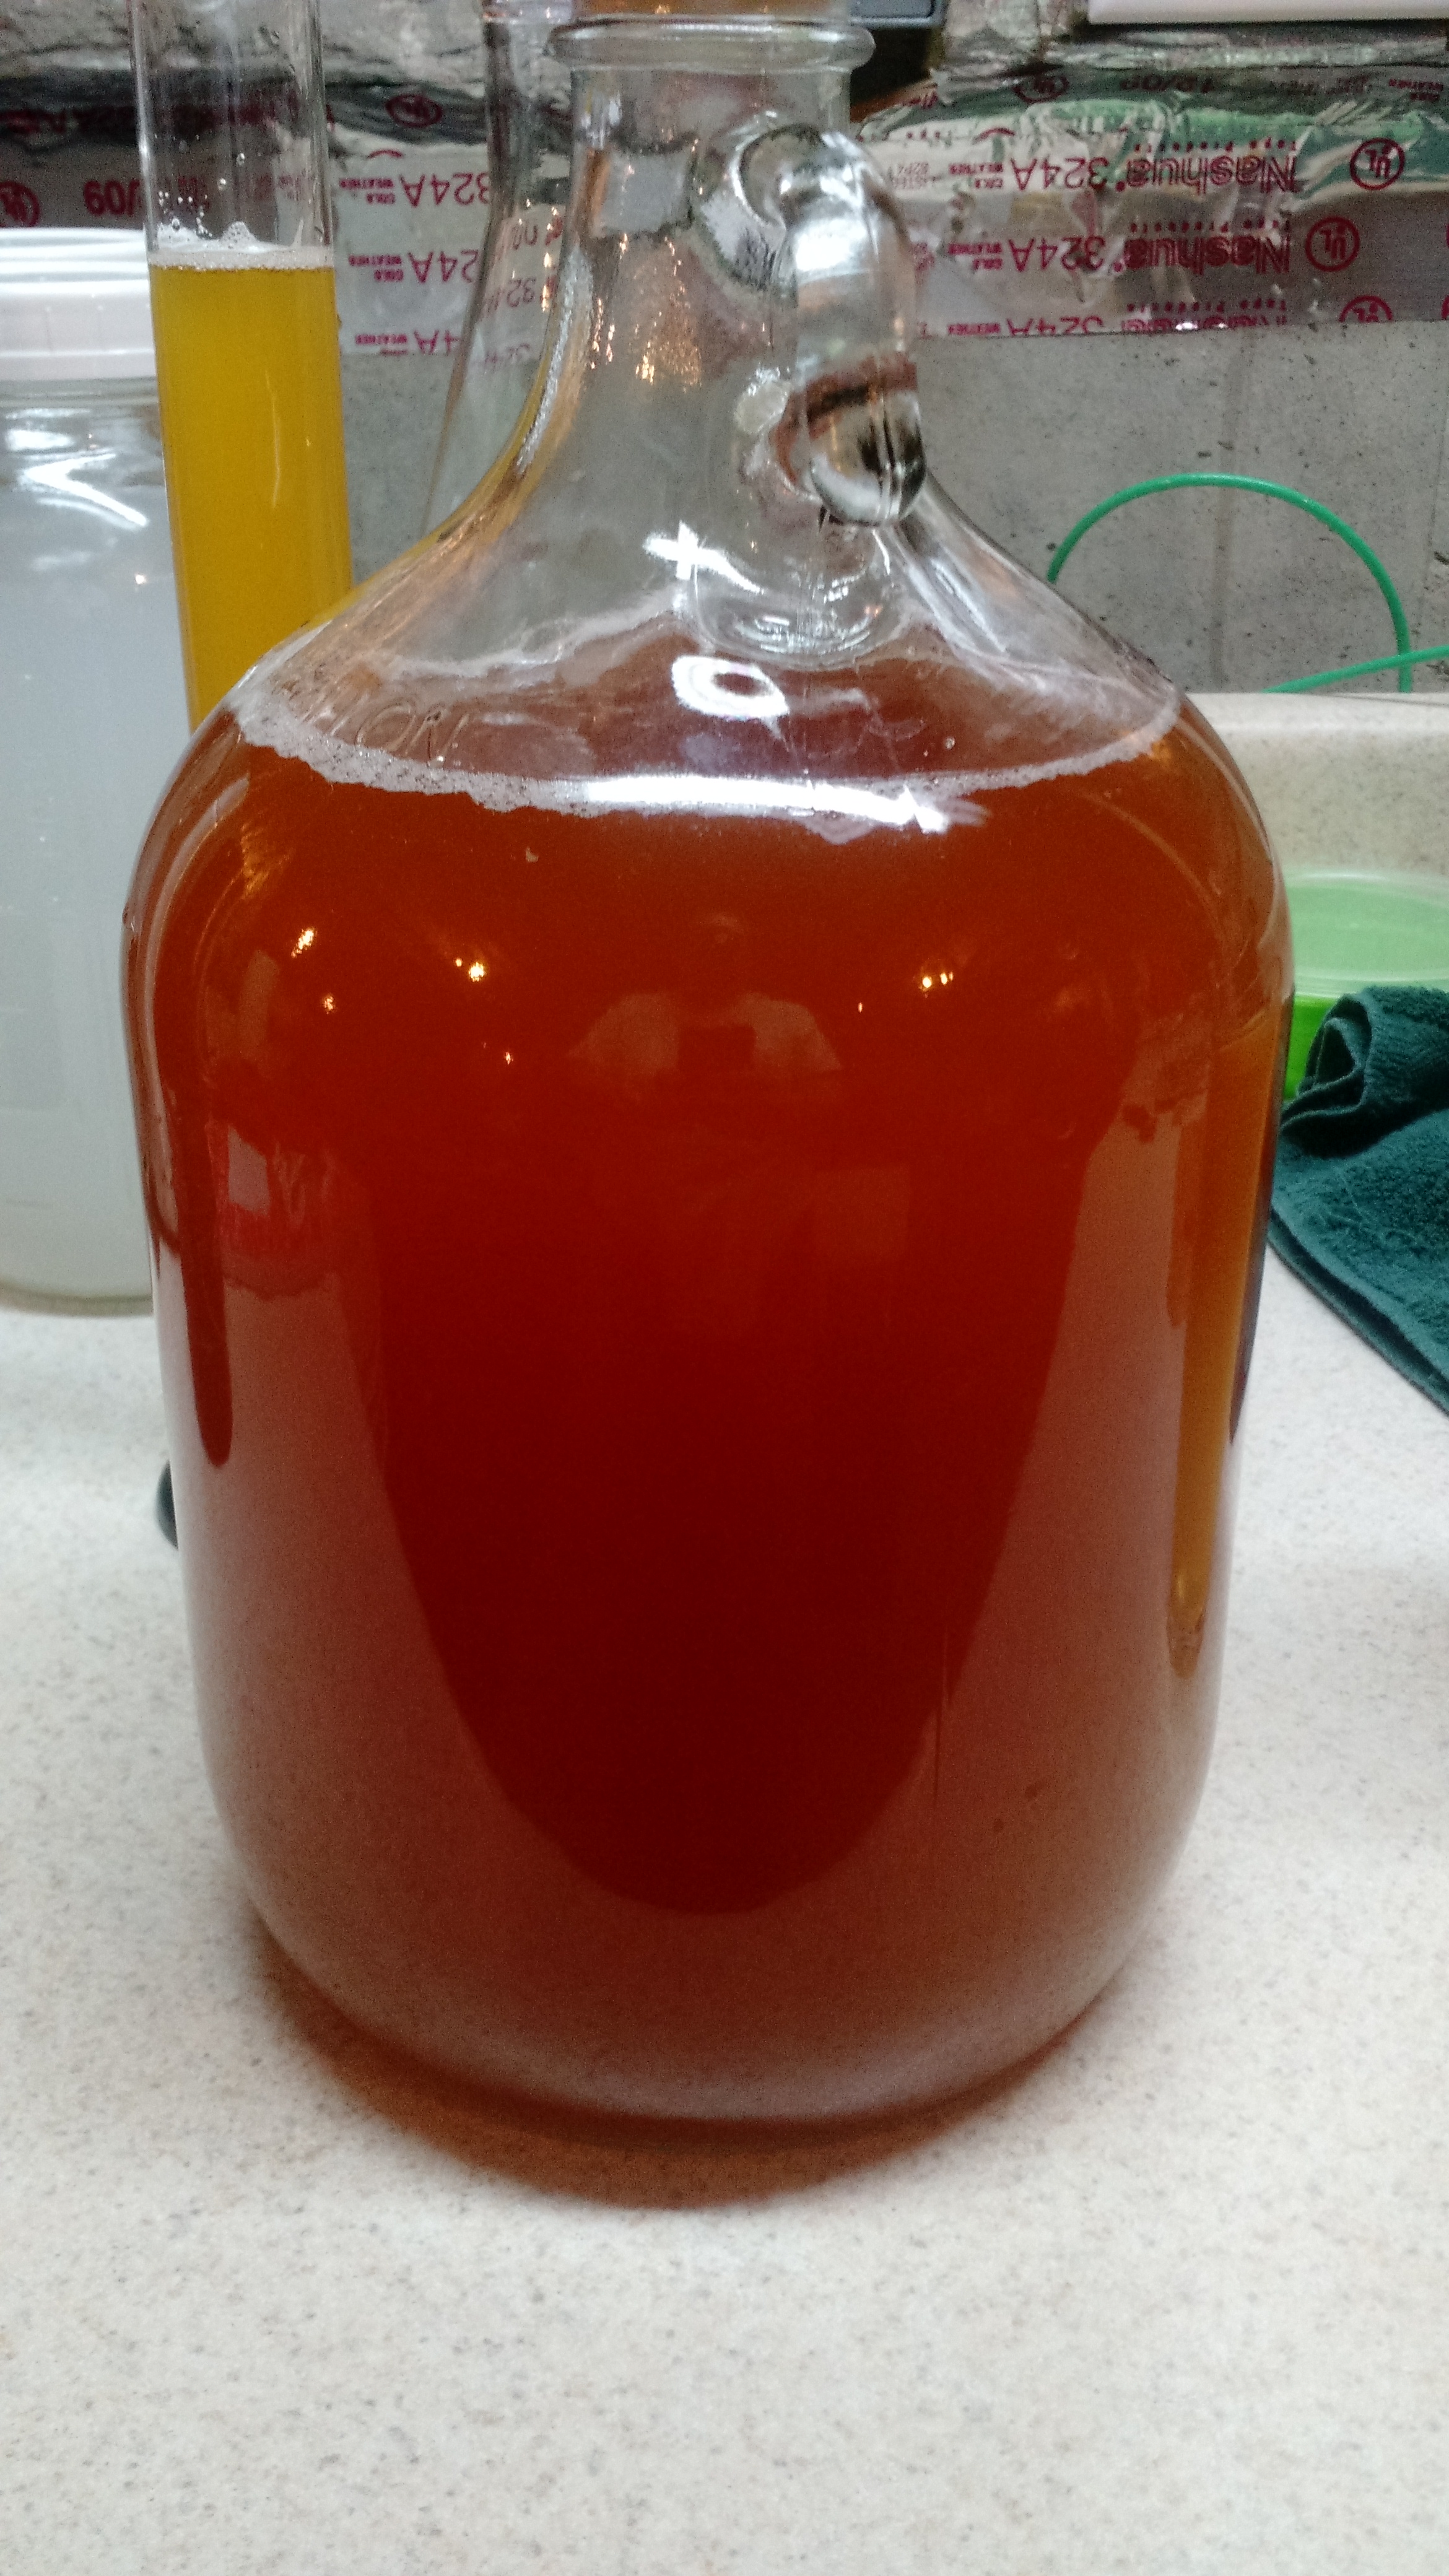
In secondary!
Within 5 minutes, the airlock was bubbling, but I don’t know if that was because of the Brett or if it was because of other reasons. There is no pellicle yet (a few days after pitching), but there’s still time. And I’m going to save the yeast/brett mix for my next Saison.
Oh, and this happened too:

🙂
Cheers!
PS: Brett Is My Copilot is a pretty good beer, too! It’s tart and citrusy. I can definitely see this as a beer to enjoy while sitting outside on a warm Cincinnati summer day.
The Wortsplosion and Lessons Learned
The title of this, coupled with last week’s post is chilling.
Brew day was not without hitches and major issues. It started with me not hitting my mash temp. The grain was cooler than I thought, so after making adjustments in BeerSmith, I set the temperature controller for the new temperature. I learned something…
Lesson 1: before believing that the temperature is correct, stir the HLT
I added water to bring the temperature up, but probably only partially successfully. My gravity was lower than I wanted by sparge, so I actually re-circulated the wort through the sparge again.
Boil went off mostly without a hitch, but I learned something else…
Lesson 2: it is possible to have too much of a boil
I didn’t get a mess (yet), but the wave caused by the over-active boil was a little scary. I found that 212.6F was a pretty good boil without causing a wave.
Lesson 3: Ventilation is important
The condensation caused minor issues, but allowed to go too long, this could become dangerous (mold?). Better work on a ventilation system. In the meantime, I’m running a dehumidifier.
Lesson 4: Barbed connectors shouldn’t be connected to pumps used for hot wort
Yeah, this is where the wortsplosion happened. I have a barbed connector going from my boil tun to and from the pump, to and from an immersion chiller in a bucket of ice water (I’m using it backwards, the heating element is in the way of using it normally, yes I cleaned it!).
Lesson 5: Wortsplosions are bad, especially where electricity is involved
Wort spraying everywhere means that it got on everything.
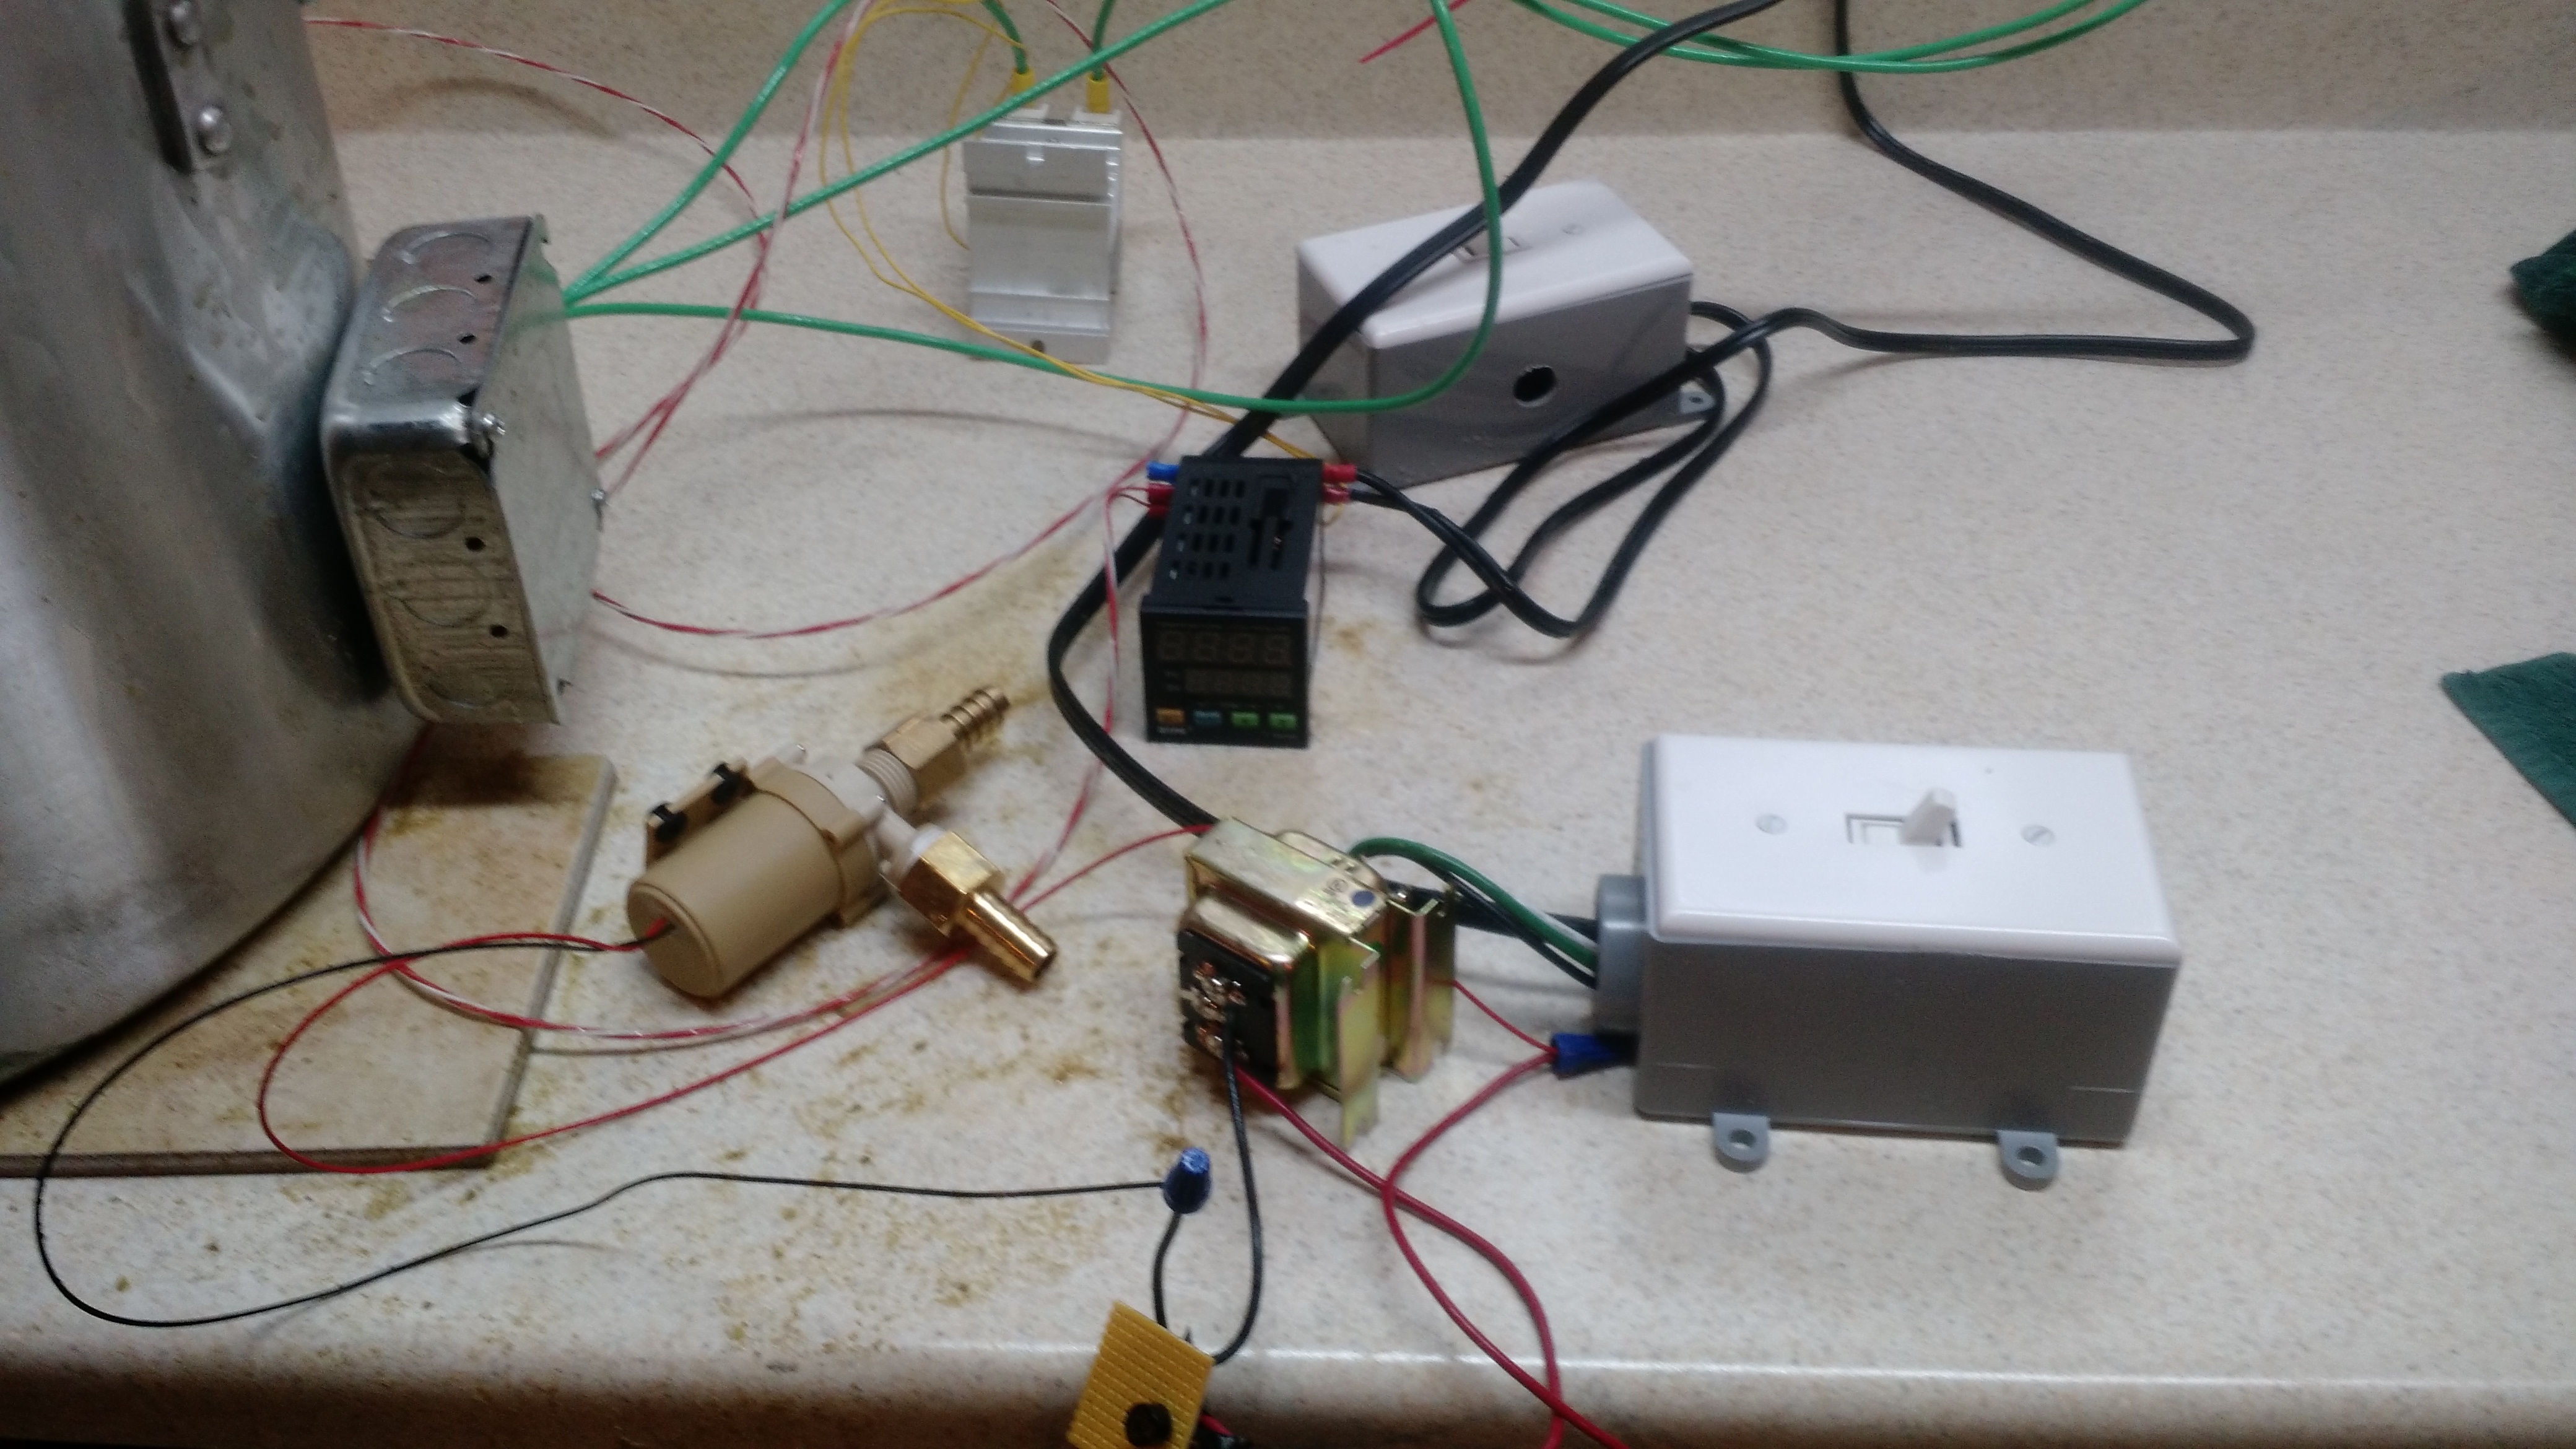
The pic doesn’t do it justice – there was wort on the side of the boil tun, the switches, the transformer, the PID controller, and me.
Somehow I managed to not get electrocuted in all this. The switches are not waterproof, and 24V AC and DC wiring is exposed. Everything had to be disassembled for cleaning.
One thing I did not own is a mop. I had to run out and get one, and I used some extra-strength purple Simple Green cleaner I had in my garage to remove the half-dried wort from the floor.
Total wort loss was about 3 quarts. 1 quart in my jeans, the rest to the floor. Not a total loss.
I did end up hitting about 70% efficiency, which I partly blame on adding the grain to the mash water in the cooler as opposed to the other way around. I also drained and sparged much slower.
Anyway, I’m going to consider buying a plate chiller. And new fittings (fuck the barbed hose fittings). Probably cam fittings.
The Saison that I brewed is fermenting.
Cheers!
One Month To Go Resolution Update
The problem with many resolutions is that nobody checks back partway through the year to see how they are doing. And partly because this is the kind of post for when you think you should post something to your blog and have nothing interesting or important to post.
I had five goals outlined in the original post, so here’s the updates:
1. Build a Better Brewing Area
If you’ve read this blog at all, it’s in progress. It’ll probably always be in progress, but it’s been much improved. However, I’ve got to a point that I’m thinking less about brewery improvements and more about other improvements.
2. Unlock All of the Style Badges on Untappd
This is kind of a hard goal because the uprights keep moving back.
Heffenista(Hefeweisens, done 2/28/15)Trappist Travesty(Trappist Style, done 3/26/15)Pucker Up(Sour styles, done 5/31/15)Trip to the Farm(Saison/Farmhouse, done 6/10/15)Fruits of Your Labor(Fruit Beers, done 5/16/15)- Down in Smoke (Rauchbier, 3/5)
I’ll be Bock*(Bock styles, done 2/27/15)Brewnettes Have More Fun*(Brown Ales, done 1/29/15)The Wine of Beers(Barleywines, done 6/11/15)Keep Your Wits About You(Witbier, done 6/18/15)- Hey Honey (Mead, 1/5)
Gourd to the Last Drop(Pumpkin, done 9/13/15)Imperial Czar(Russian Imperial Stout, done 7/11/15) (Added 2/6/15)- Dubbel, Tripel, and Quad, Oh My! (3/5) (Added 2/6/15)
- You’re Extra Special (ESB, 0/5) (Added 4/24/15)
- What Gose Round (Gose, 0/5) (Added 10/15/15)
- Wee Bit of Scotch (Scotch Ale, 1/5) (Added 10/15/15)
- Blondes Do It Better (Blonde Ale, 0/5) (Added 10/15/15)
So four additional badges, and four unlocked. This has been a fun goal that has also been enlightening – I’ve done a pretty good job of looking for things other than IPAs (and I do love IPAs!). I think trying to unlock these as well as reading other blogs and parts of the BJCP Styleguide fosters an appreciation for beer, which is an intensely complicated beverage that has been overly-simplified over several decades thanks to a few mega-breweries that have flooded the market with the same boring product.
3. Visit Many Breweries in the Cincinnati Region
I outlined the following:
MadTree
Rhinegeist
Great Crescent
Rock Bottom
Mt. Carmel
Blank Slate
Paradise
Ei8ht Ball
Braxton
+Rivertown (didn’t list that initially, but made it out there a few weeks ago)
Not as many as I wanted to. But soon!
4. Brew One Style that isn’t IPA, Pale Ale, Amber, Porter, or Stout
A brewed a Saison that I enjoyed, and a Kölsch, although not a great one. I will likely brew more IPAs, PAs, ambers, porters, and stouts, though. Those are among my favorite styles.
5. Make Headway into Kegging
I’ve thought a lot about this.
Things I Didn’t Plan
Like many things, plans change. I built a fermentation chamber and connected it to the Internet. Then I decided to make it into a keezer. I ended up with a cabinet and vent hood that made things better in the basement. I brewed a Kölsch that I didn’t expect. I brewed a cider, a watermelon wine (well, I tried, it didn’t turn out), and used brettanomyces (which turned out far better than I expected).
Things I’m Looking at Planning For Next Year
Sours! I initially thought about not worrying about sours for a while because of the additional equipment needed, but truthfully I really like a great kriek lambic or a Berlinerweisse. And I joined the Milk the Funk group on Facebook where I’ve seen A LOT of mouth-watering beers posted to it.
Cheers!
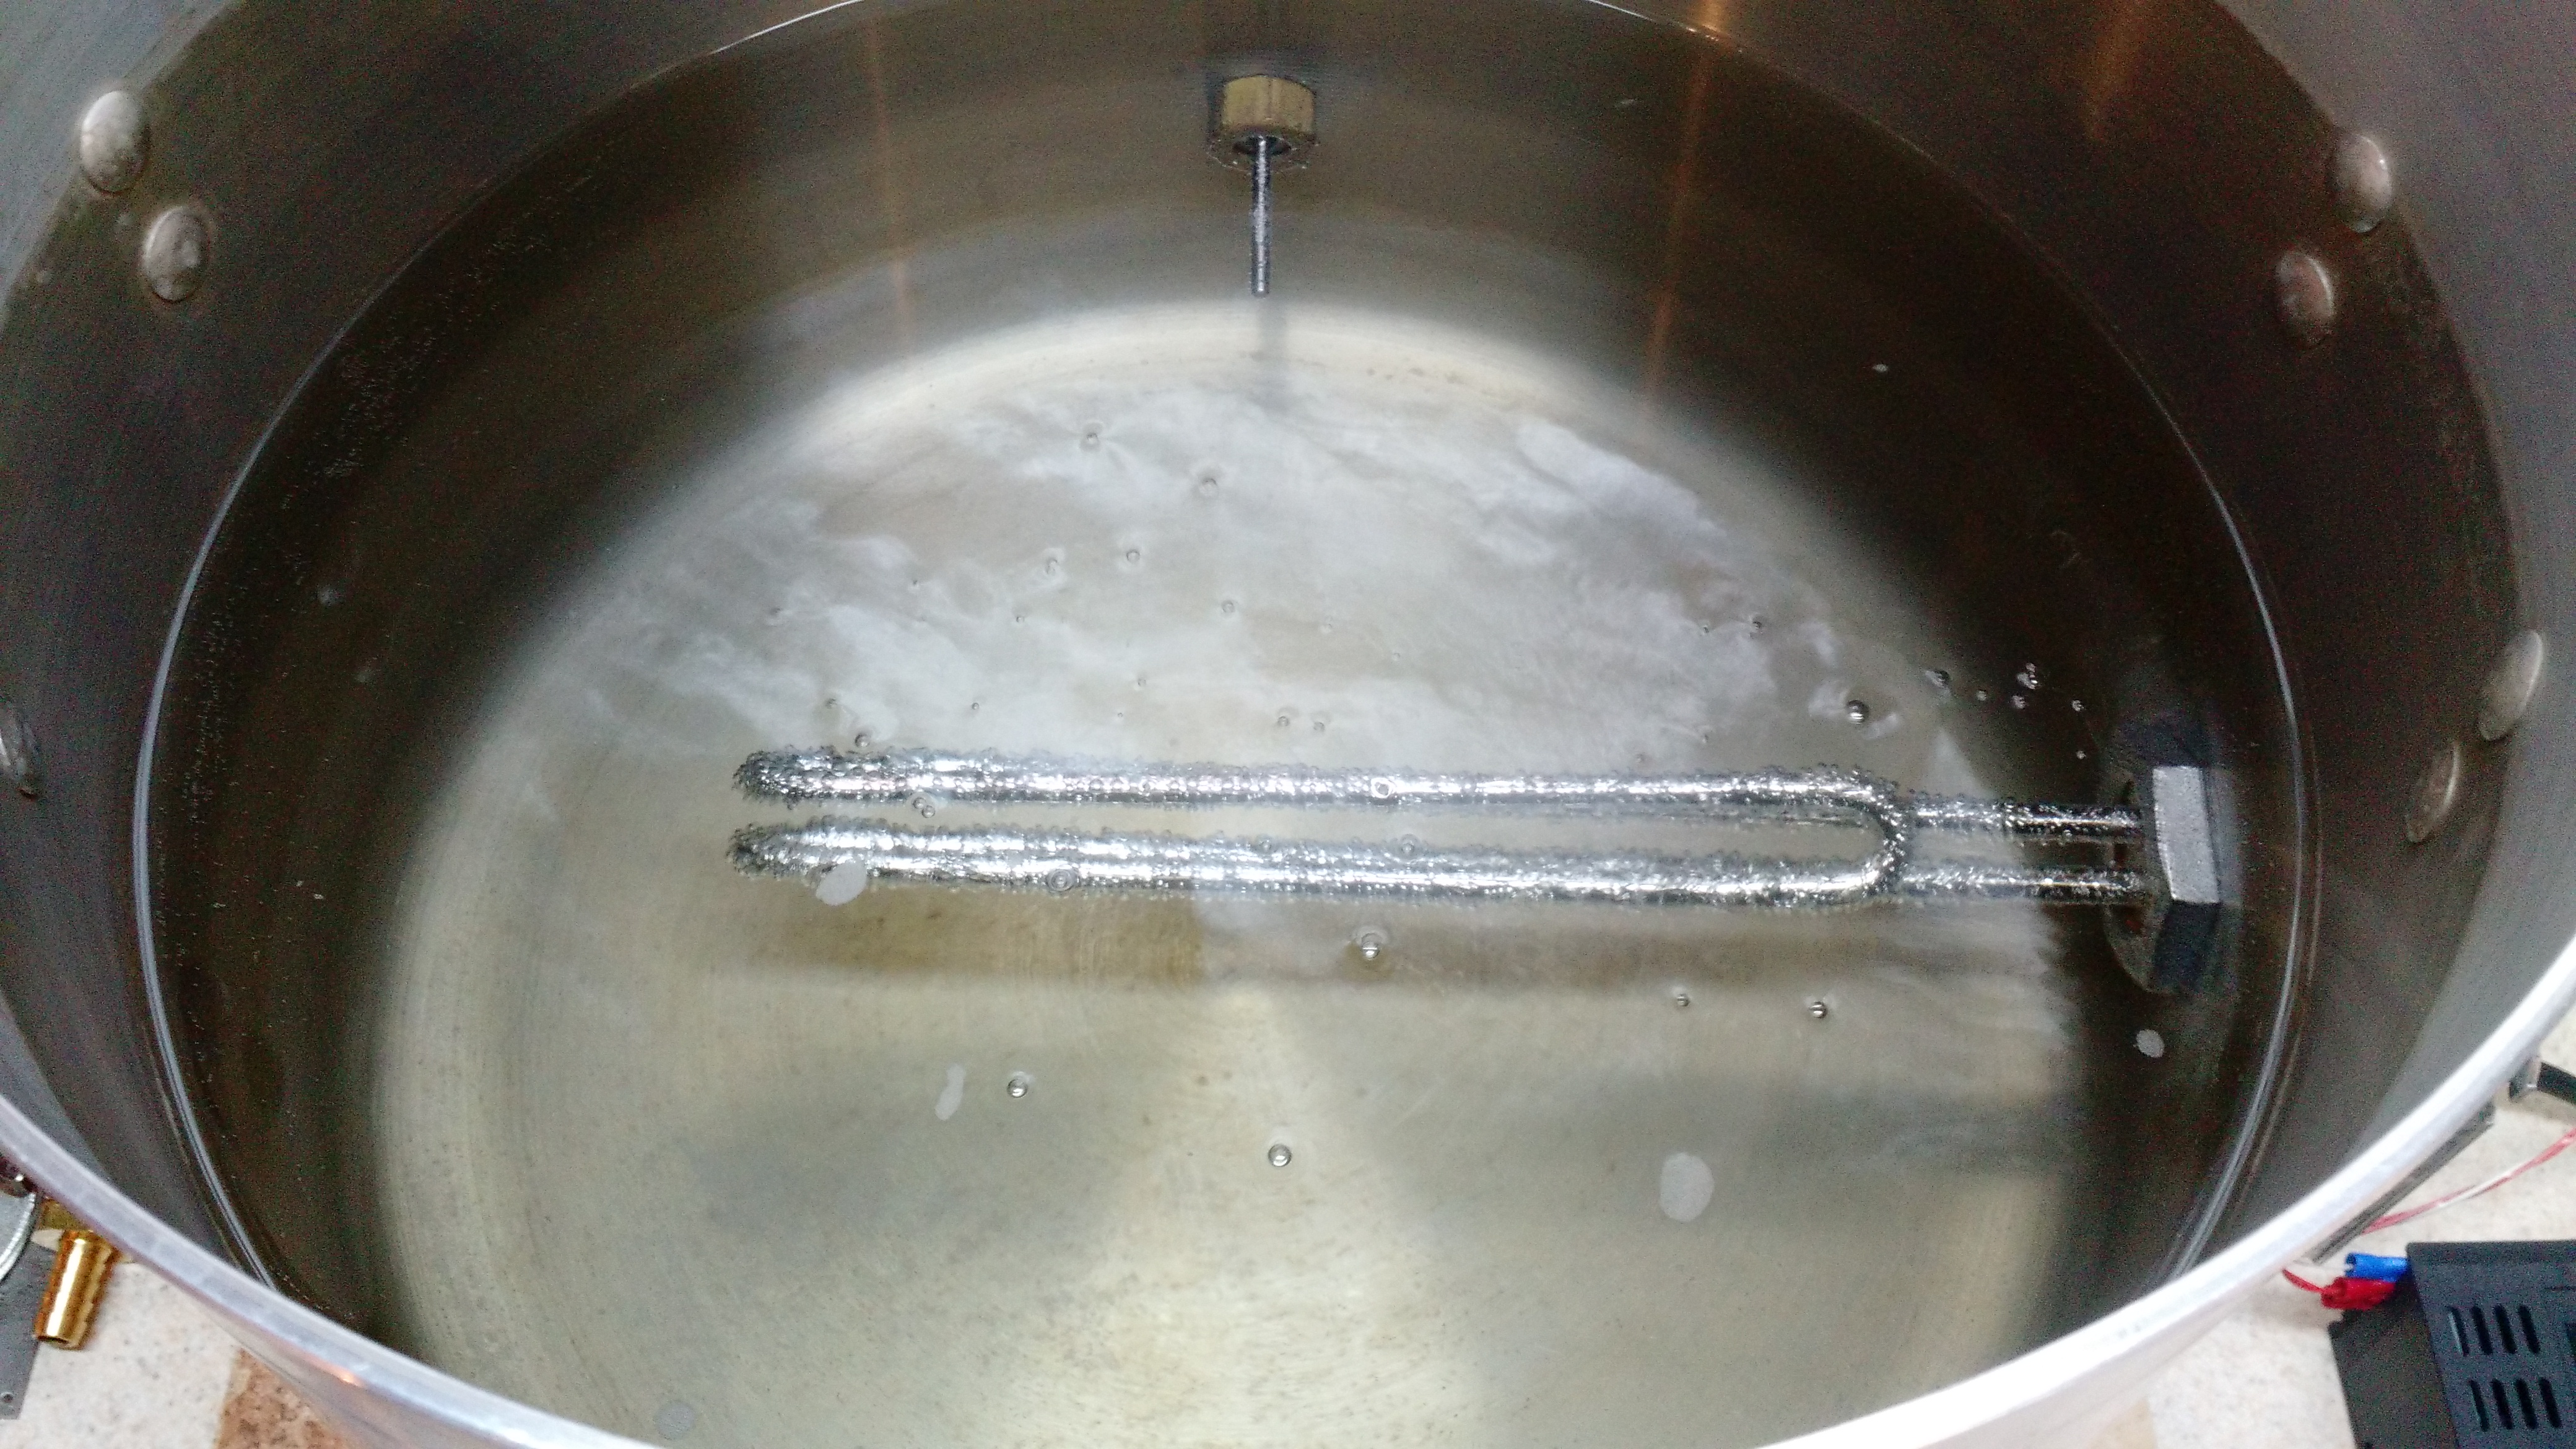
Dangerous Electric Boil Kettle DONE!
I had some free time over the weekend and was able to work on the brew kettle. As of Saturday afternoon, I was boiling water and if it wasn’t for having a few things to do I would have probably ran over to my LHBS and got a few pounds of malt and hops.
The things I did dangerously was that I used all green wire (the standard AC convention is red or black for hot, white for neutral, and green for ground). Also, I have no enclosure around all that power. I also do not have a way to disconnect this from power (other than a breaker, which is currently switched off since I’m not brewing anything).
While I was at it, I replaced my valve with a non-leaking valve (my previous valve was actually for a compression fitting, so it leaked). There is a remaining issue – I have to replace the fitting on the thermocouple because right now I have a compression nut (which leaves a place for bacteria to sit and harvest).
This is the setup. Not perfect, but it works. The switch is for the PID controller (the black box). The SSR is hiding behind the boiler.
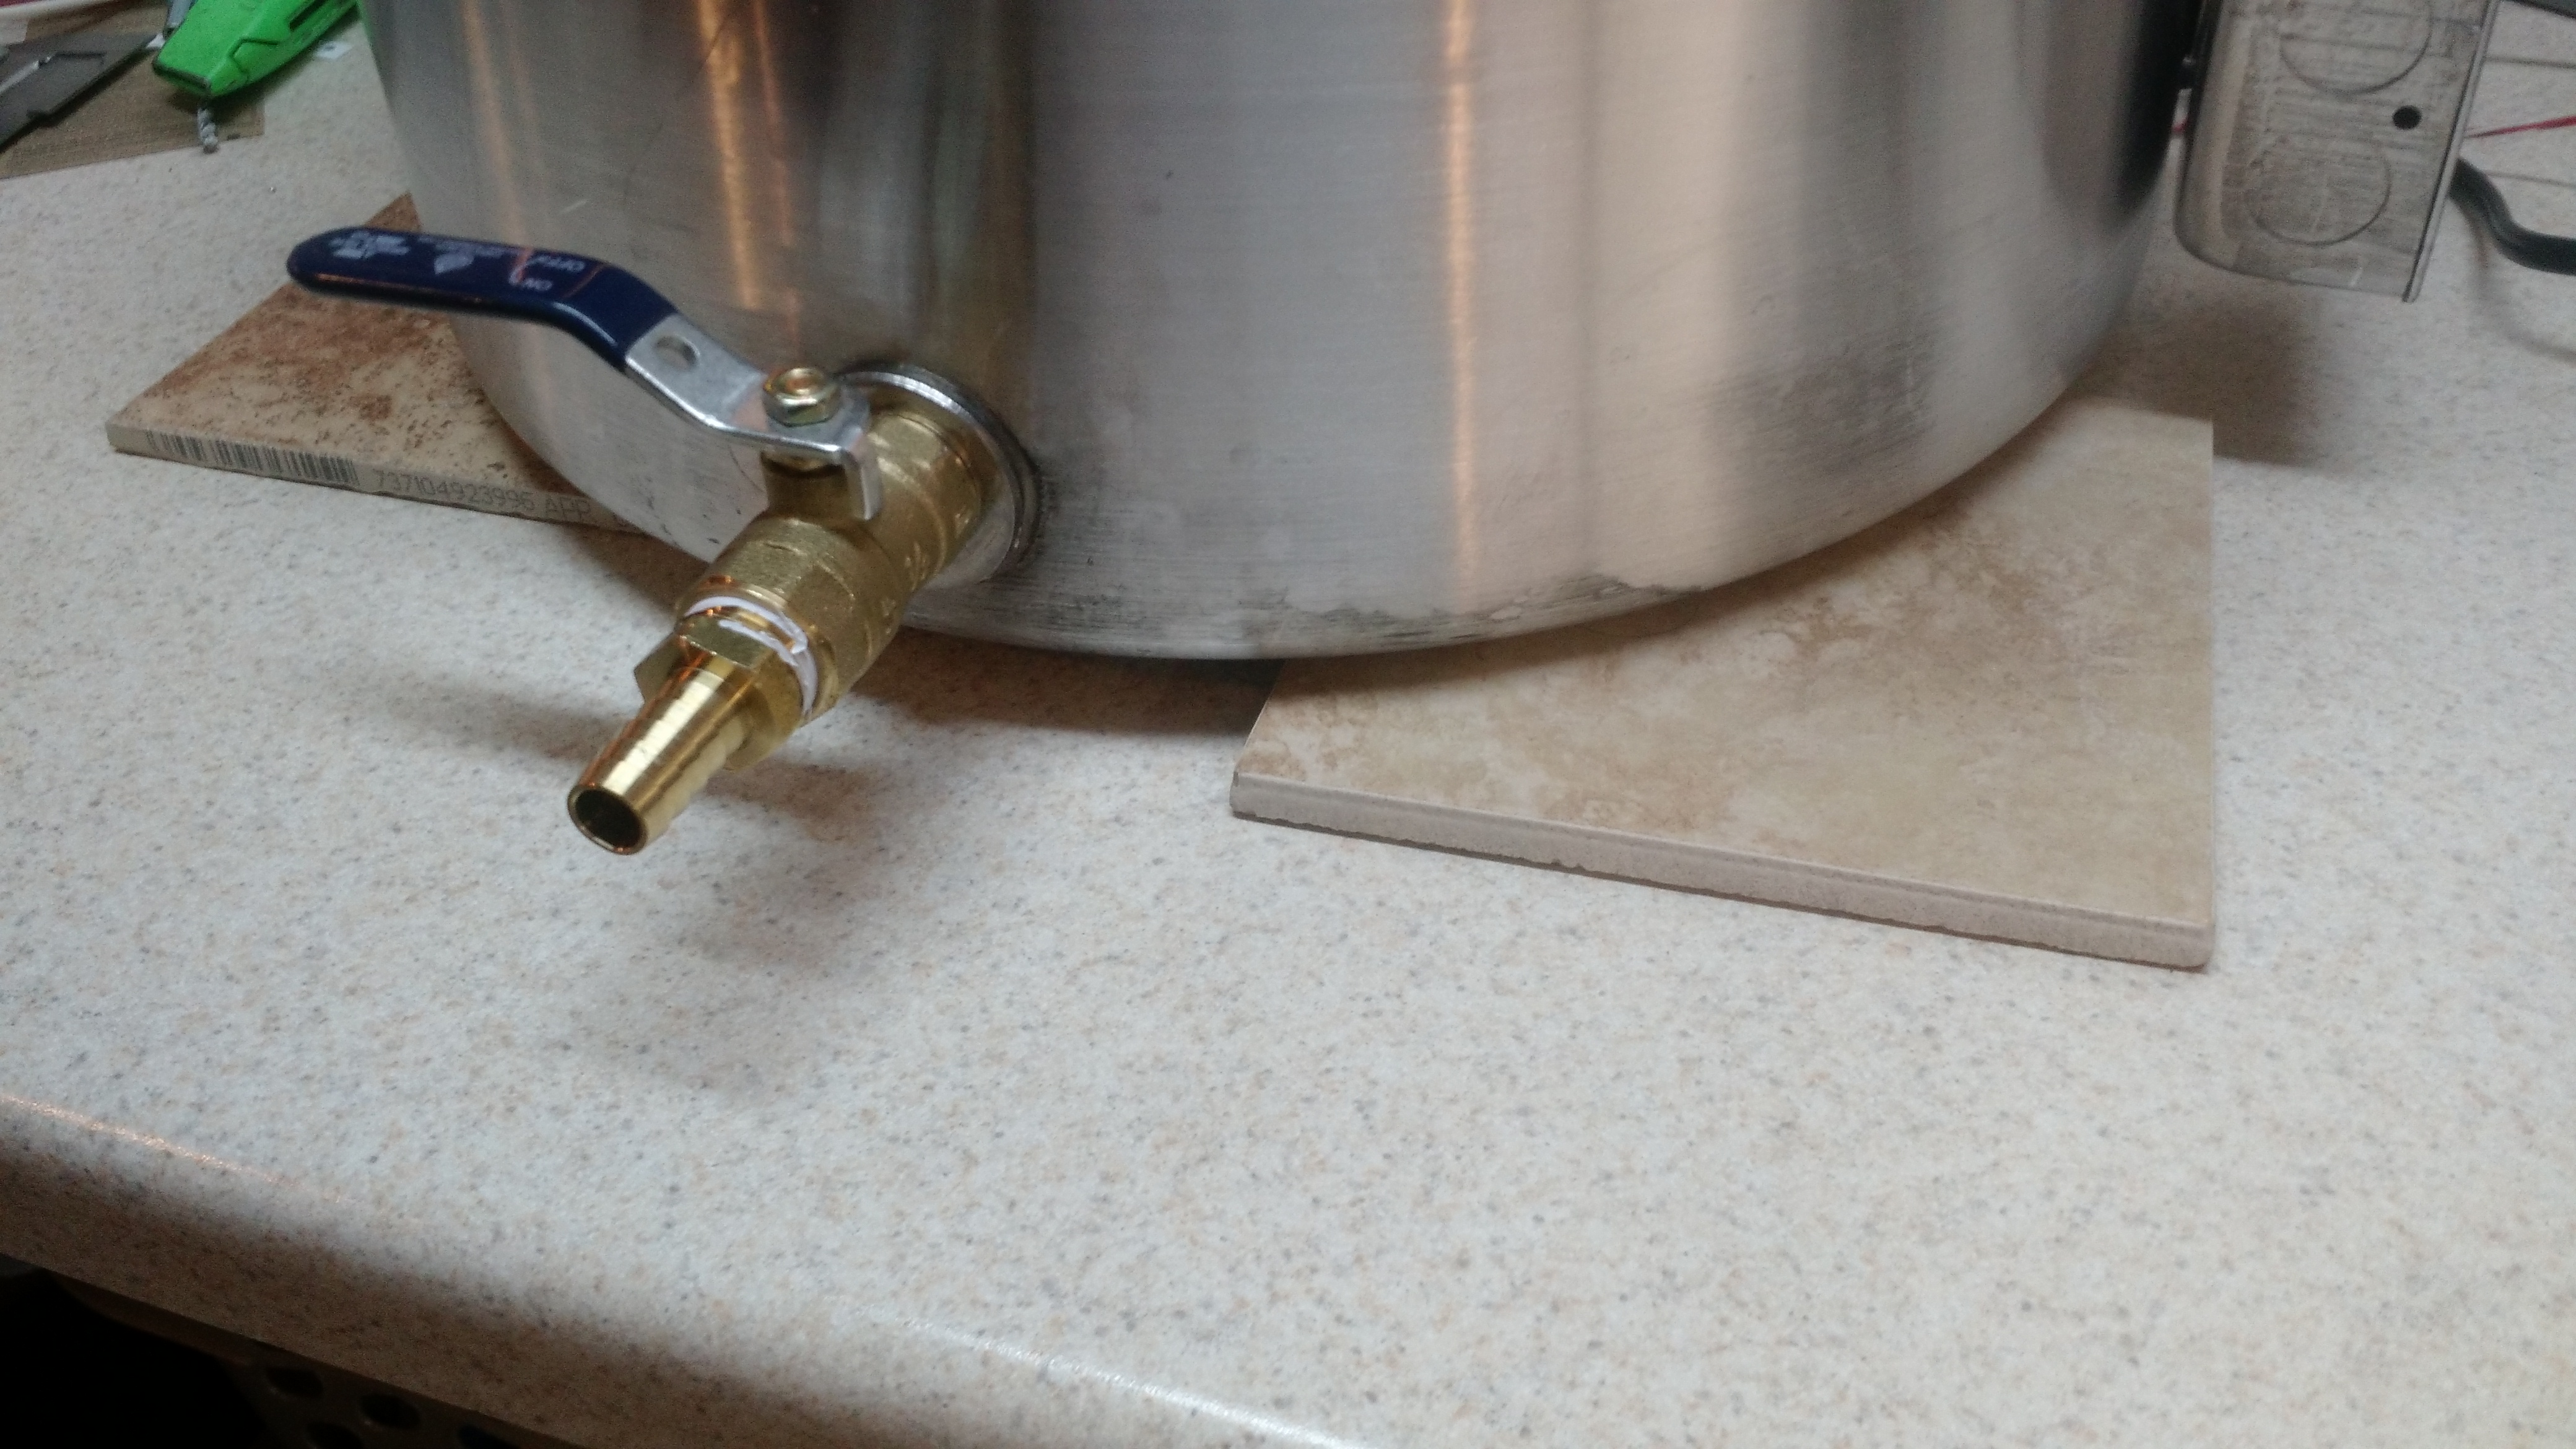
This is my counter protection – 3 6″x6″ ceramic tiles. I don’t think the kettle would damage my Formica countertop, but I don’t want to find out if I’m wrong.

This is the element running and boiling water.
Other Happenings
My cousin was selling a small freezer that would be perfect for us and would replace my current chest freezer with a small upright (and replace a non-energy-star freezer with one that is). Initially I was thinking KEGERATOR!, but after a night’s sleep I thought it might be better to do some fermentation temperature control. That means eventually I will make a schwarzbier, possibly a kolsch, and probably a bock beer early next year.
Cheers!
How I Make Canned Yeast Starter Wort
I like being prepared in advance as much as possible. So after reading BYO’s version of canning yeast starters, I made adjustments for me and actually thought out the process.
Gather Supplies
You will need:
- 1 Pound DME
- Some hops (possibly optional)
- Five 1-Quart Mason jars, bands, and lids
- Pot for boiling wort
- Large stockpot for sanitizing jars
- Pressure Canner (you can probably safely do this in a boiling-water bath canner, but wort isn’t really acidic enough to be safe for this)
- Something to stir the wort with
- Old dishtowels
- Clean washcloth
- Canning tools (see below)

Basic Canning Tools – jar tongs, lid magnet, headspace tool, funnel, and ladle
Light DME and some hops
Process
- Start bringing 5 quarts of water to a boil
- Fill large stockpot to 1″ above top of Mason Jars, set on heat and heat to 180F/82C
- Wash Mason jars, lids, and bands – put jars and lids in stockpot carefully
- When 5 quarts of water is boiling (or even near-boiling), shut heat off, add 1 lb DME (preferably light or very light) and hops, stir well, and turn heat back on
- Boil wort for 10 min
- With a few minutes remaining, prepare jars – remove them from the water, drain, and set on a towel near the wort pot
- Once the jars are out of the stock pot, remove it from the heat, and ladle some of the hot water into the pressure canner
- Once the wort boil completes, shut the heat off and fill the jars to 1/2″ headspace
- Wipe the rim of the jars, and cap (do not torque the rings down!) and add to pressure canner
- Once all 5 jars are in the canner, put the lid on and begin a boil
- Let steam vent from the canner for 10 minutes (see the pressure canner instruction manual)
- Add weight and process for 30 minutes at the correct PSI (for my area east of Cincy, the appropriate pressure is 11 PSI)
- At the end of the process, shut the heat off, but leave the weight in place (or otherwise leave the vent in place – you do not want the pressure to drop too rapidly or the jars can crack or burst
- Once the pressure has returned to 0 on the dial, remove the weight and wait 10 minutes
- After the 10 minutes, remove the lid and jars, place them on a towel (do not put them directly on a cold countertop)
- Once the jars cool, confirm that they are properly sealed (the lids should be “sucked in” and not click when pressed), and store in a cool dark place away from any source of UV light
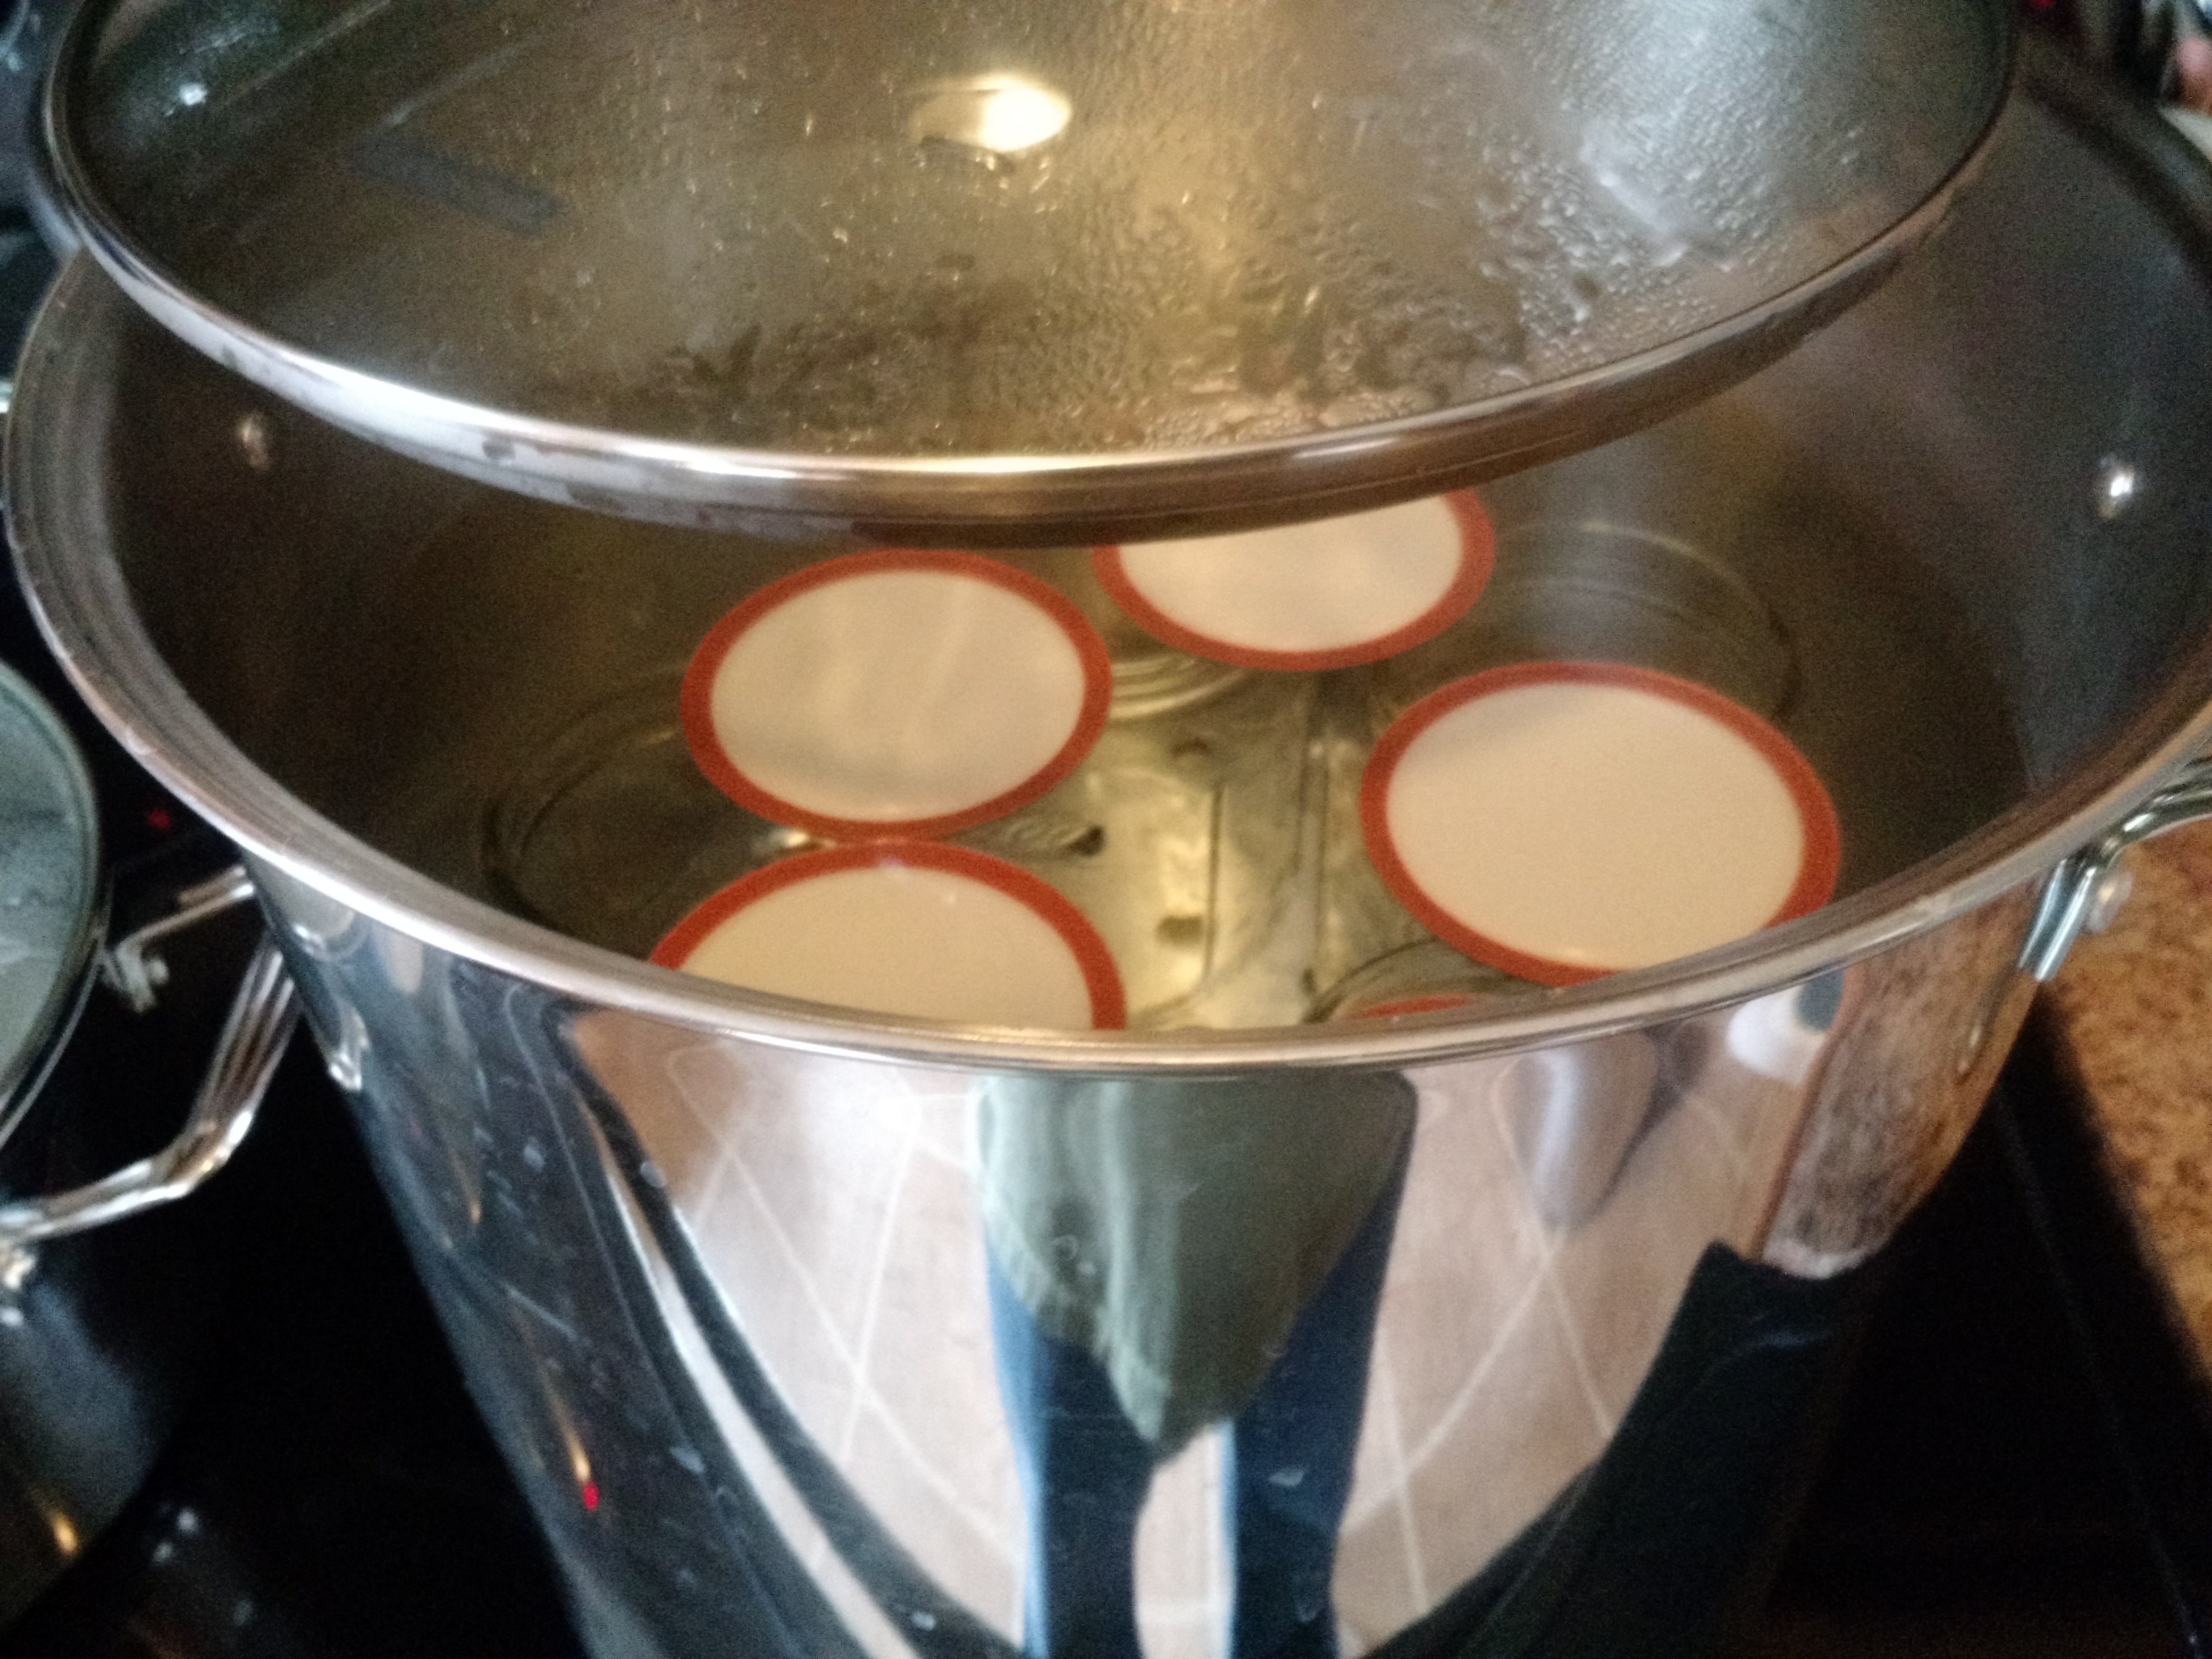
Mason jars and lids being sanitized in 180F water.
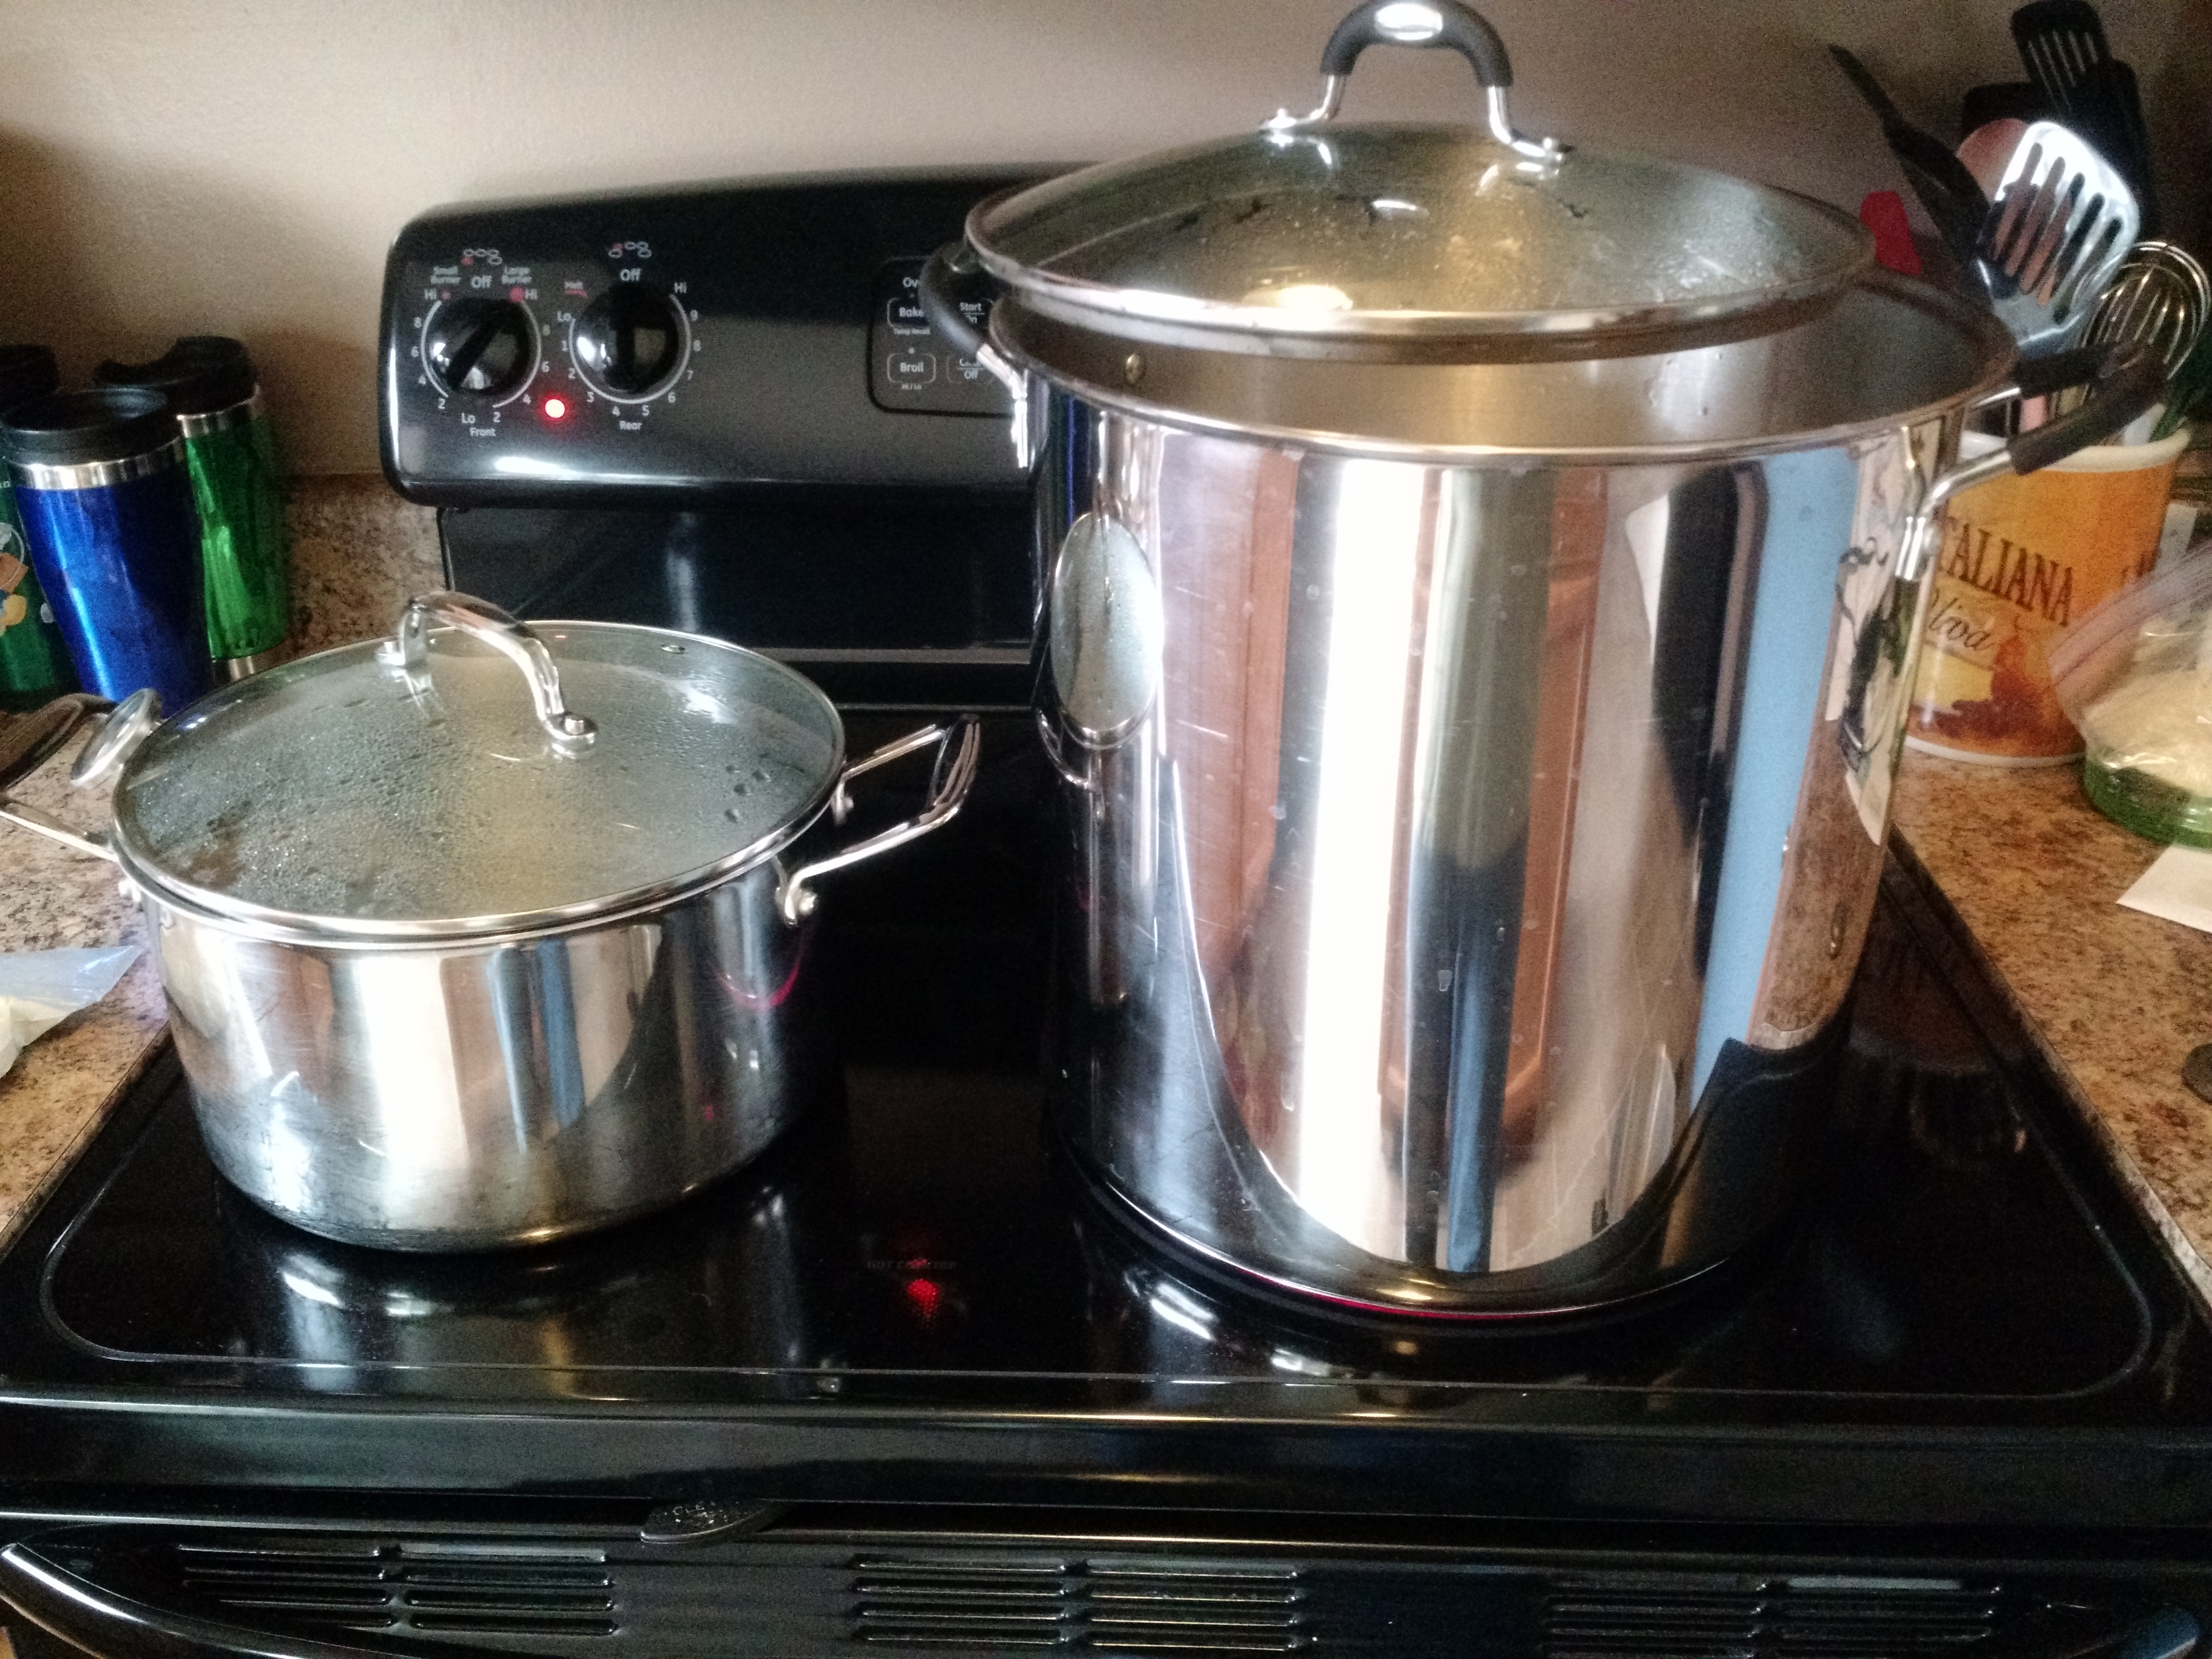
Hot liquor being brought to a boil on the left, jar sanitize water on the right.
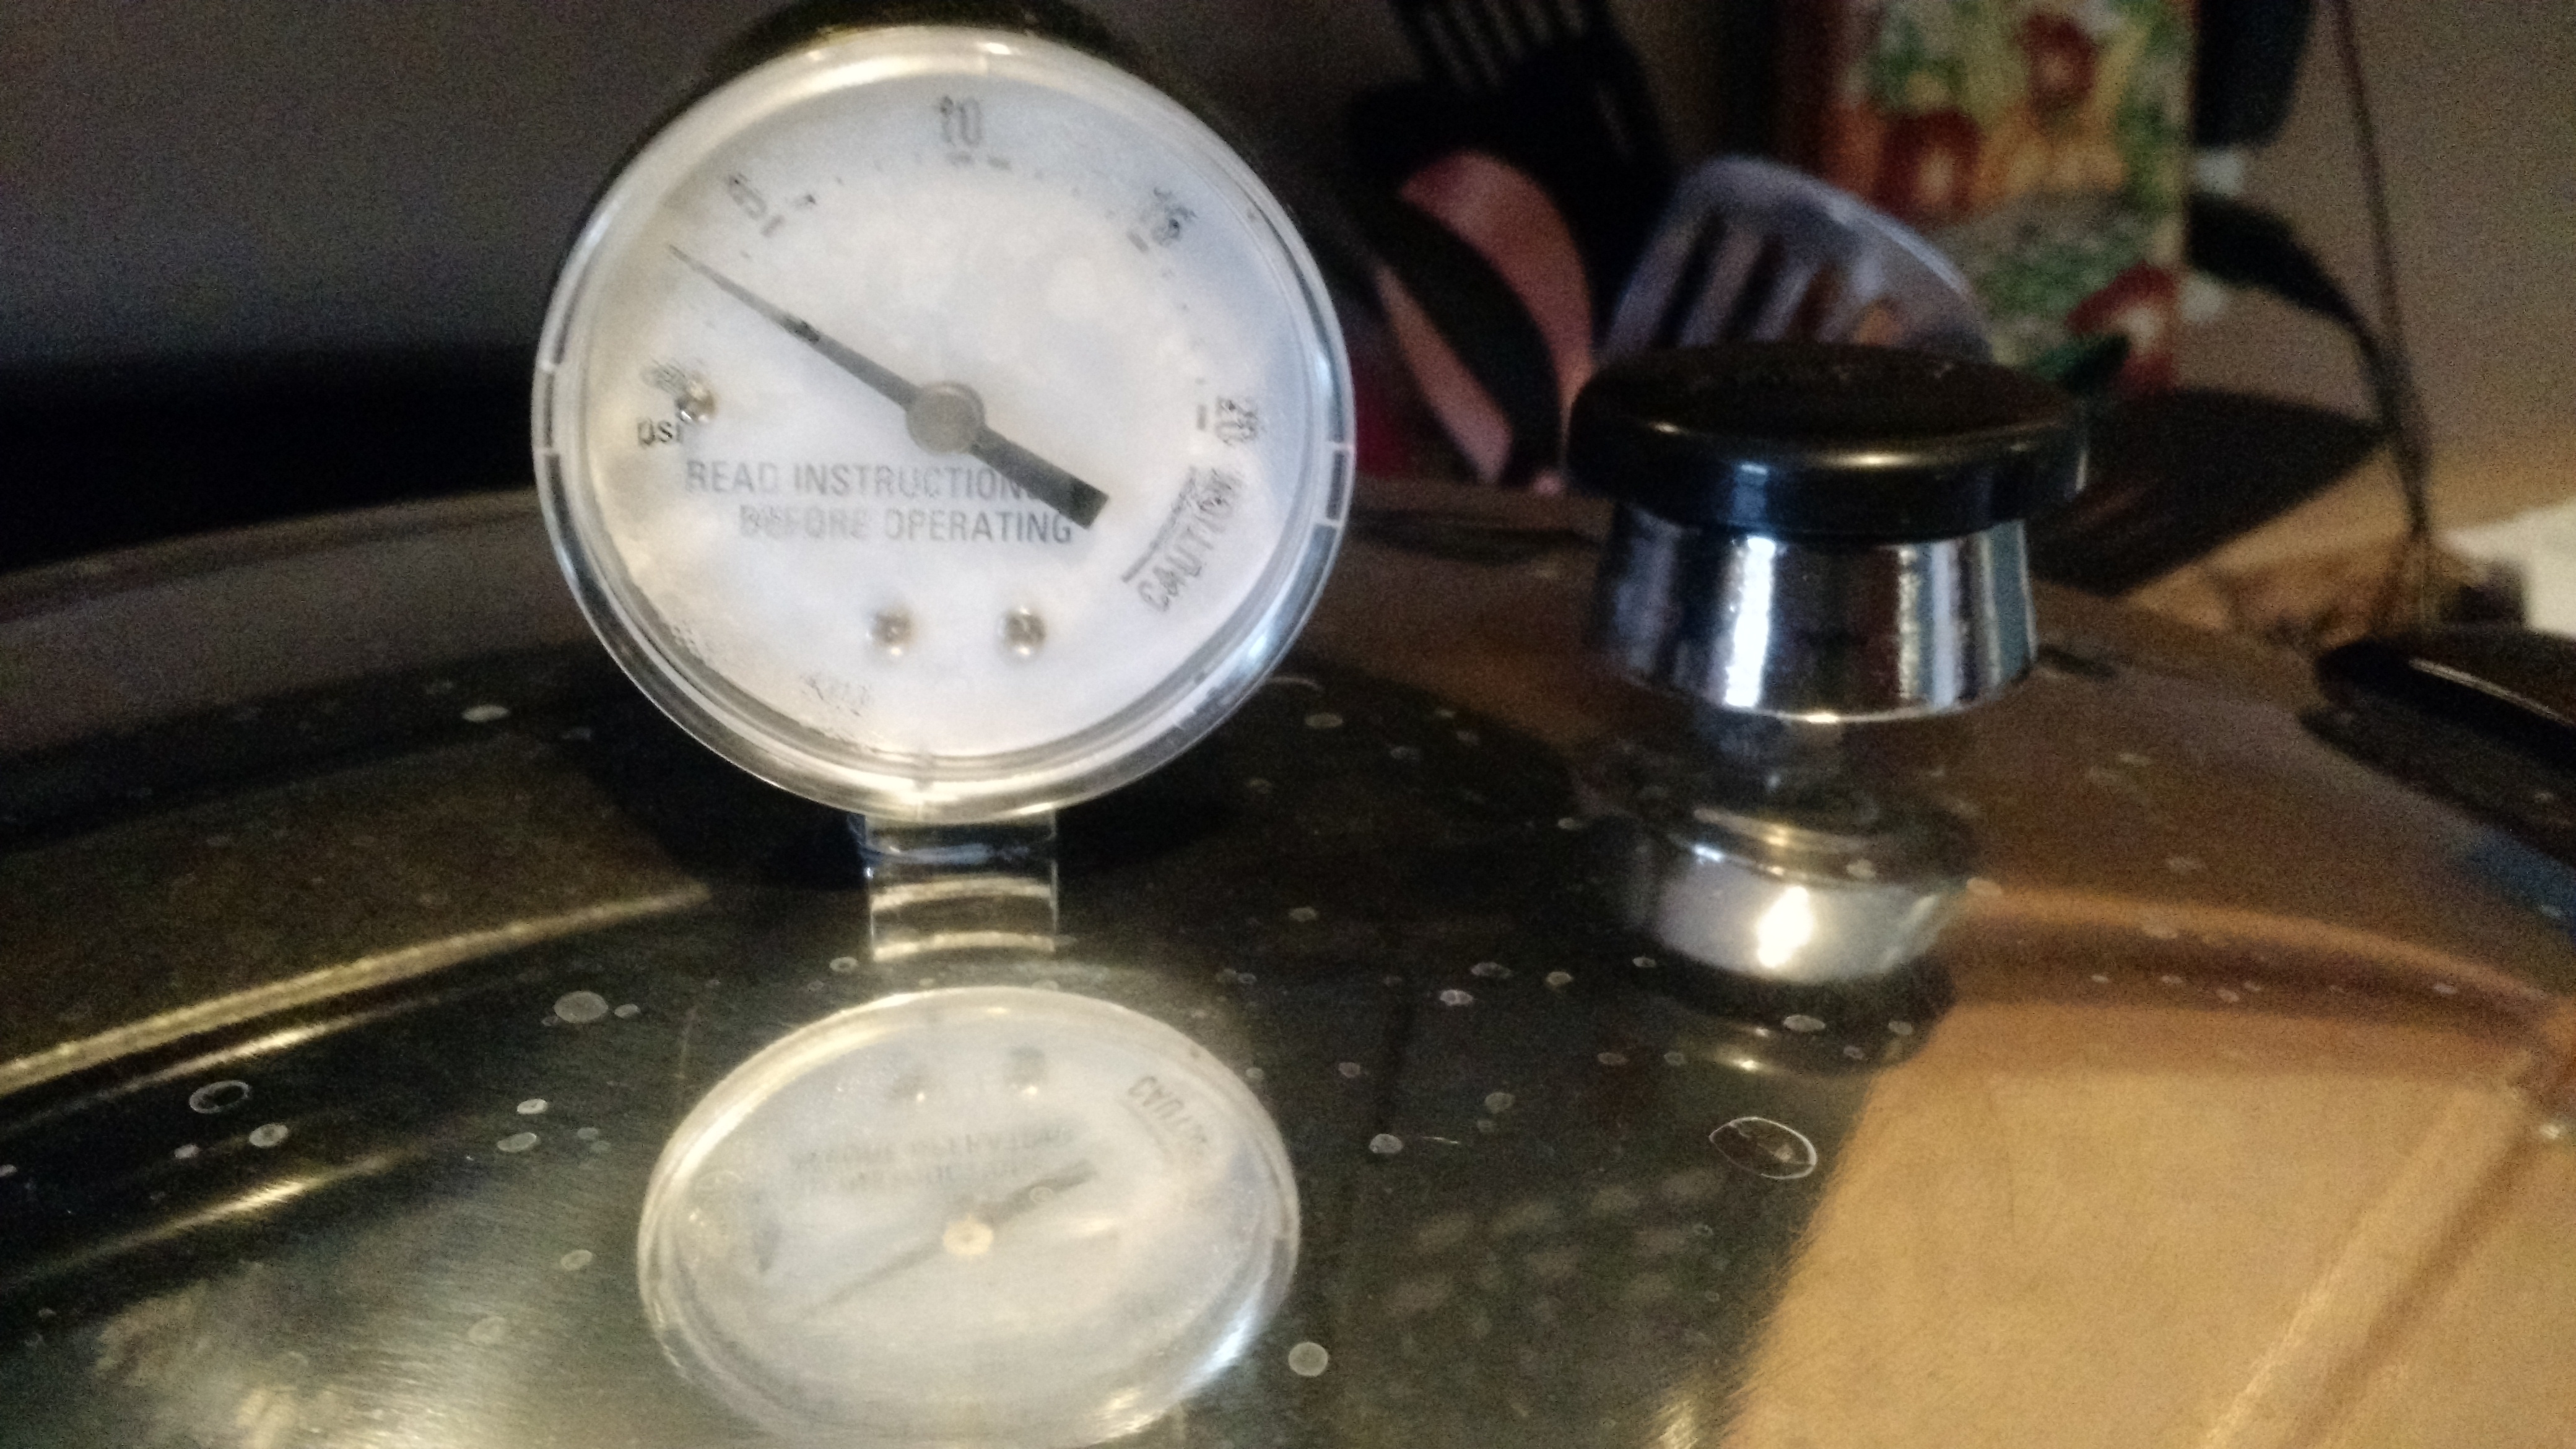
Pressure canner is coming to pressure. The weight is the black thing on the right.
Using the Starter
Using this is pretty easy. Remove the ring and spray the lid area with sanitizer, and then pour into a sanitized flask. Then, pitch yeast, add a stir bar, and put on a stirplate. The 1 Qt jars are roughly 1,000 mL of yeast starter. Depending on your yeast and situation, you may need to use multiple jars of starter.
Cheers!
More Looking at Beer Competitions
In the last few weeks since I first did some data-crunching on a few competitions (the Ohio State Fair, the AHA National Homebrewers Competition, and the Indiana State Fair), two things have happened – the results for the Cincinnati Malt Infusers 2015 All-American Home Brew Competition were released and I read an article about making heat maps, which is a better way to look at this.
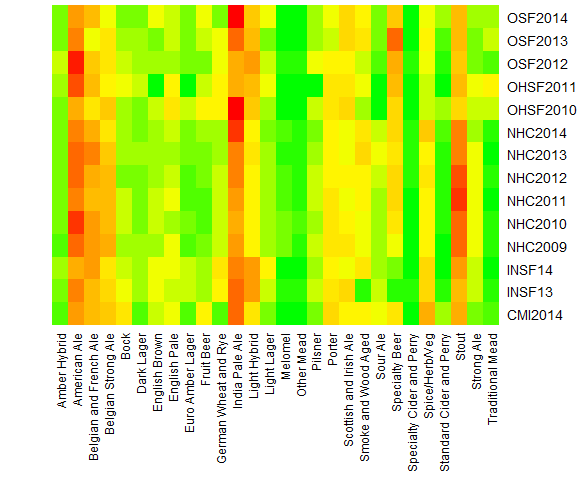
Note: green means few, red means many. Colors are proportion of the entries for that competition.
This really just shows the same conclusions I already came to previously:
- American Ale, IPA, and Stout are the most popular categories
- Light Hybrid is a little more popular at the state fairs than the NHC (which can probably be deemed to be somewhat of an average)
One thing the heat map shows is how some styles ebb and flow through time and location. Smoke, sour, and Belgian strong categories really show that.
The other conclusion I came to in the last writing on this subject still applies, too. This doesn’t matter if YOU like the beer you brew.
Cheers!