Brewing
Imperial Hoptrooper Brew Day and Tasting Notes
On November 20, I brewed my biggest (and most successful in terms of numbers) beer – a double IPA. Recipe inspiration came from MadTree’s High series, which is a series of IIPAs that are quite popular and very well rated (note: there are three “highs” that I know of, the Galaxy and Citra, which are linked in the text, and Azacca which is not… but it’s also f**king tasty! There may have also been a Mosaic High).
The recipes are similar. I did a fair bit of ‘back of the napkin’ analysis on the two beers, looking at the percentages of grain, the AAU at each addition, etc. I ended up with the recipe below.
Recipe Details
| Batch Size | Boil Time | IBU | SRM | Est. OG | Est. FG | ABV |
|---|---|---|---|---|---|---|
| 5.5 gal | 60 min | 123.7 IBUs | 5.9 SRM | 1.074 | 1.014 | 7.8 % |
Style Details
| Name | Cat. | OG Range | FG Range | IBU | SRM | Carb | ABV |
|---|---|---|---|---|---|---|---|
| Double IPA | 22 A | 1.065 - 1.085 | 1.008 - 1.018 | 60 - 120 | 6 - 14 | 2.4 - 2.9 | 7.5 - 10 % |
Fermentables
| Name | Amount | % |
|---|---|---|
| Pilsner (Hoepfner) | 10.5 lbs | 72.41 |
| Vienna Malt (Briess) | 2.25 lbs | 15.52 |
| Caramel/Crystal Malt - 40L | 8 oz | 3.45 |
| Carapils (Briess) | 4 oz | 1.72 |
| Corn Sugar (Dextrose) | 1 lbs | 6.9 |
Hops
| Name | Amount | Time | Use | Form | Alpha % |
|---|---|---|---|---|---|
| El Dorado | 1 oz | 60 min | Boil | Pellet | 15 |
| Galena | 1 oz | 60 min | Boil | Pellet | 12.5 |
| Centennial | 0.5 oz | 30 min | Boil | Pellet | 10 |
| Mosaic (HBC 369) | 0.5 oz | 30 min | Boil | Pellet | 12.3 |
| Centennial | 0.5 oz | 15 min | Boil | Pellet | 10 |
| Mosaic (HBC 369) | 0.5 oz | 15 min | Boil | Pellet | 12.3 |
| Centennial | 1 oz | 15 min | Aroma | Pellet | 10 |
| Mosaic (HBC 369) | 1 oz | 15 min | Aroma | Pellet | 12.3 |
| Centennial | 2 oz | 0 min | Dry Hop | Pellet | 10 |
| Mosaic (HBC 369) | 2 oz | 0 min | Dry Hop | Pellet | 12.3 |
| Chinook | 1.5 oz | 0 min | Dry Hop | Pellet | 13 |
| Citra | 1 oz | 0 min | Dry Hop | Pellet | 12 |
Mash
| Step | Temperature | Time |
|---|---|---|
| Mash In | 152°F | 60 min |
Download
| Download this recipe's BeerXML file |
I kept closer to the size of the Citra High recipe, mostly because I am still working through efficiency issues (it’s getting better, though). I still didn’t get MadTree’s efficiency, but to be fair, I’m targeting 75%, not 82%!
Brew Day
I’m happy to say that the only issues during brew day was how long it took and higher than expected grain absorption. I started later in the day (around 2:30 PM) and it didn’t end until maybe 6:30PM. There were no stuck sparges, clogged lines or chillers, boil boiled. I ended up with about 4.5 gallons into the fermenter, which is less than the 5.5 gallons I was targeting. However, the lower volume works better with my 7.5 – 8 gallon kettle.
Heating initial mash tun preheat water
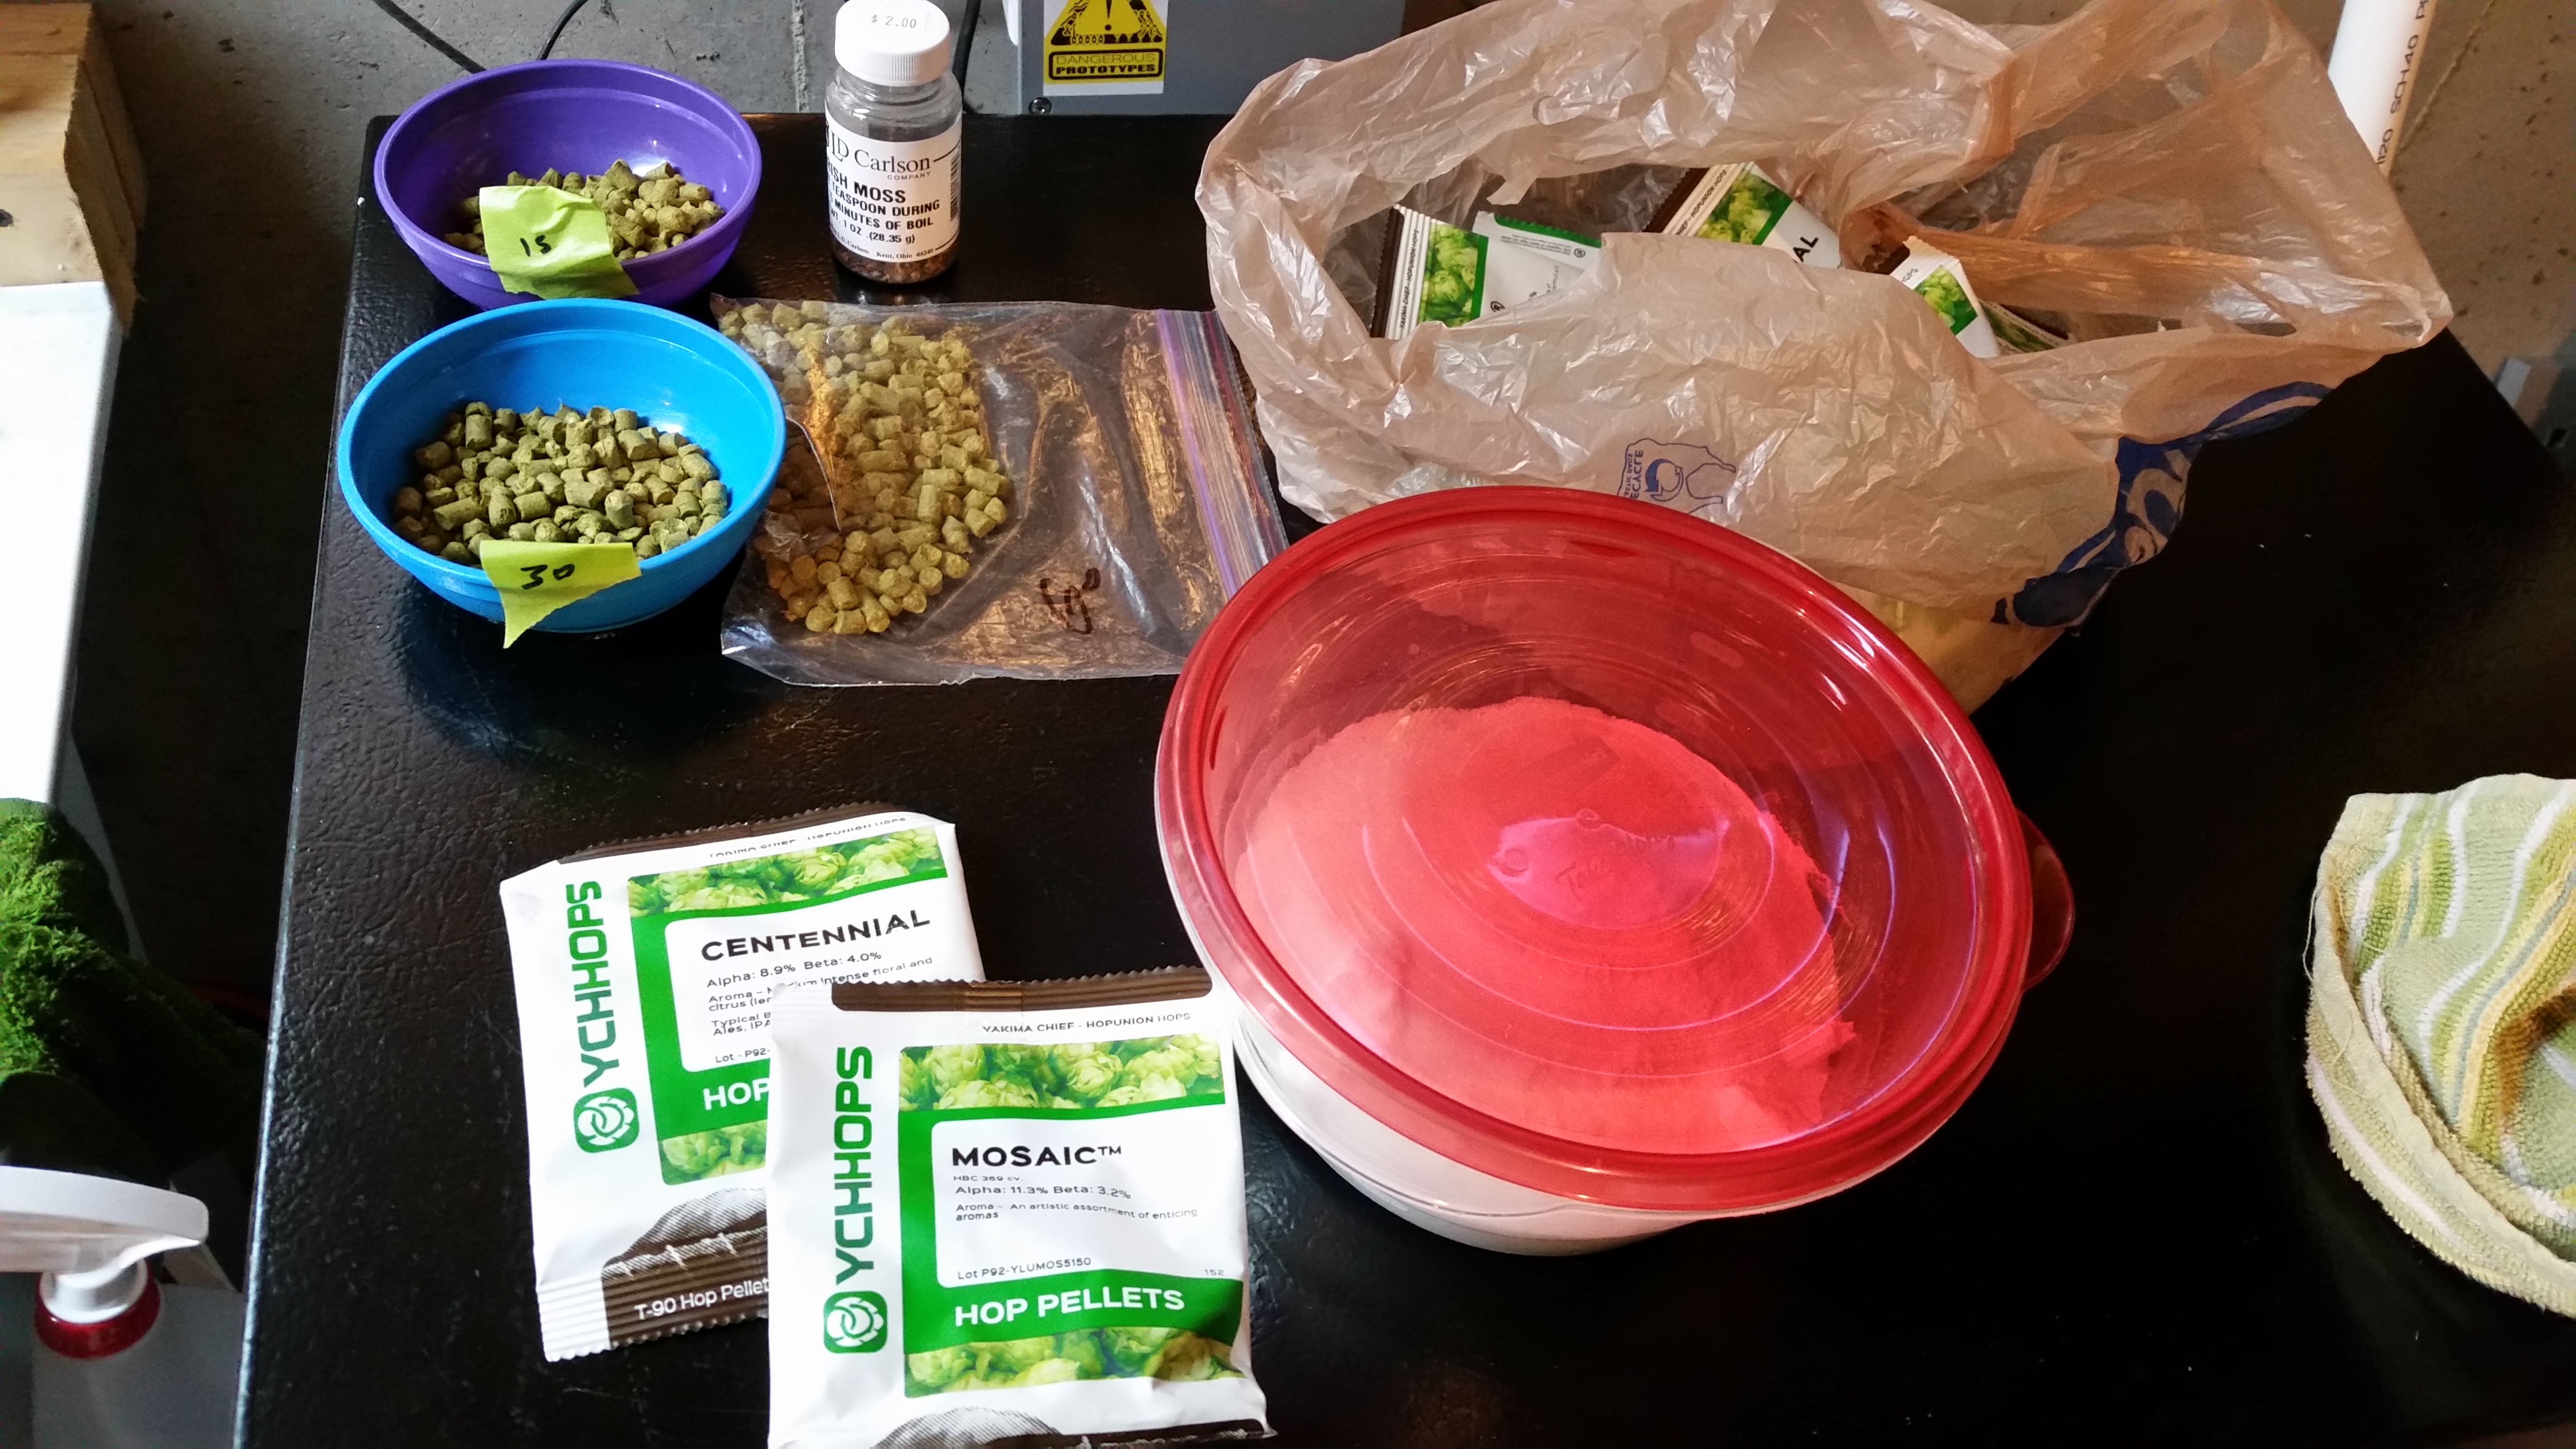
Lots of hops!
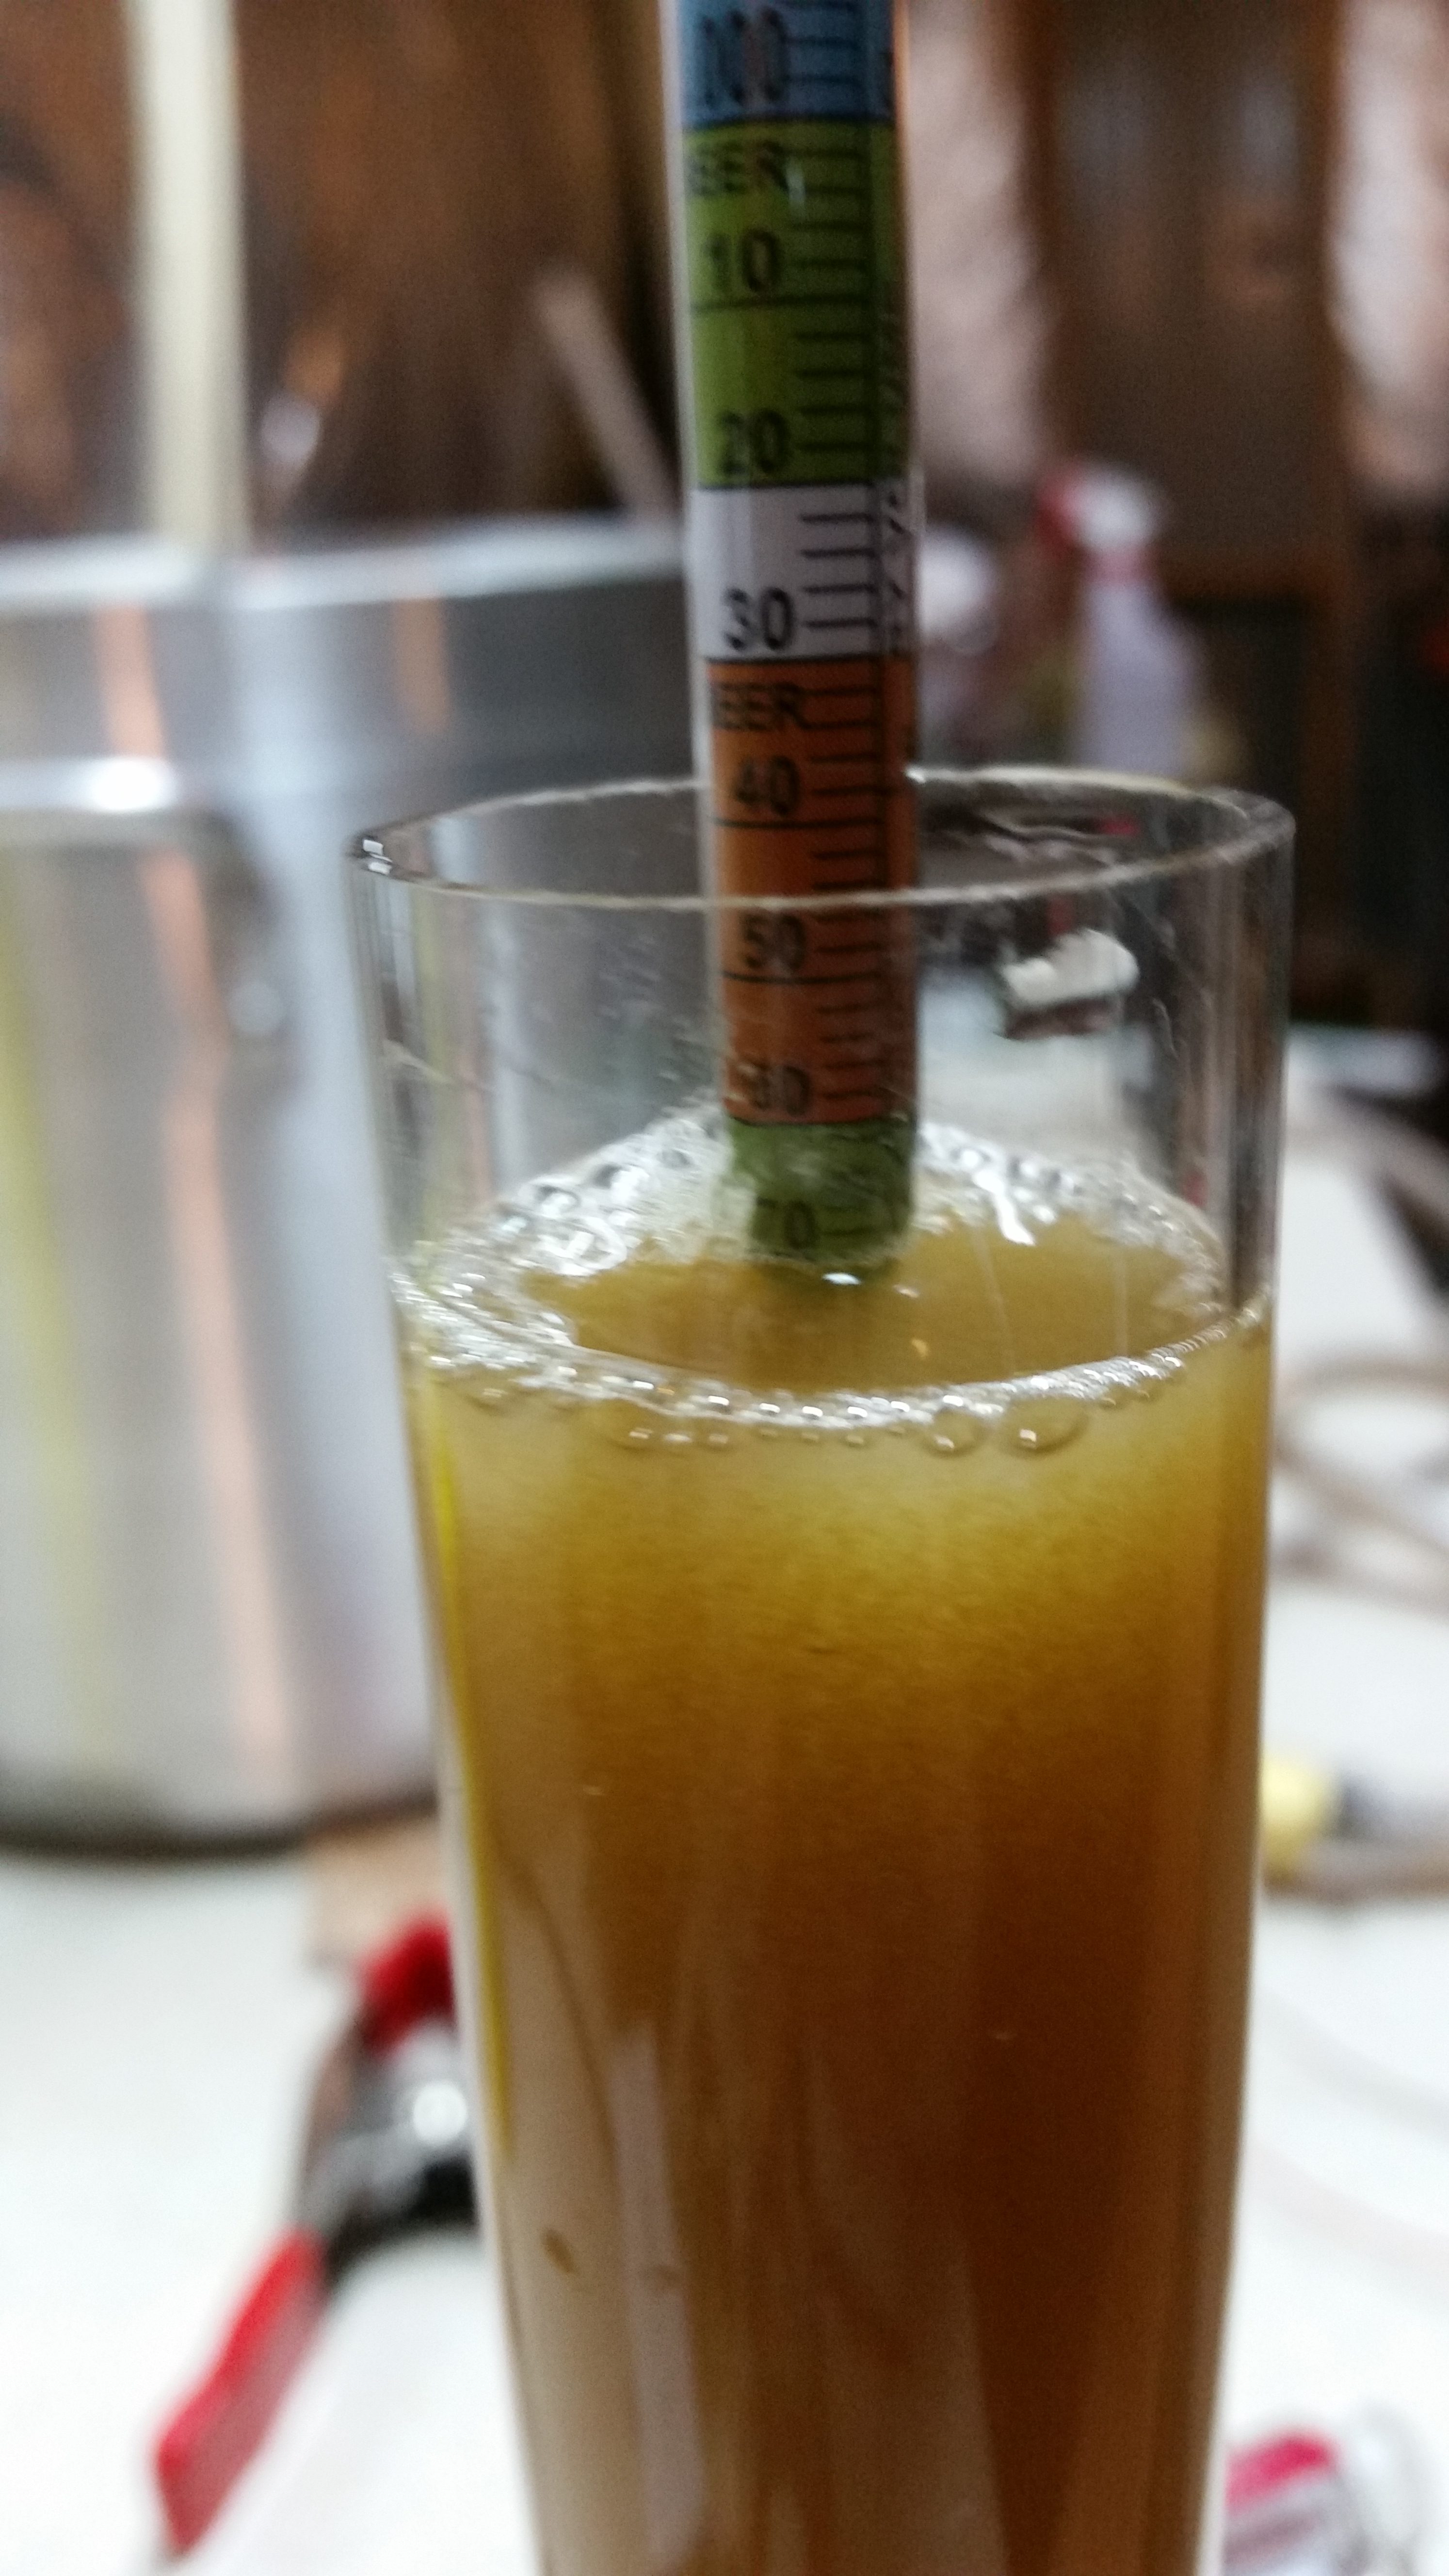
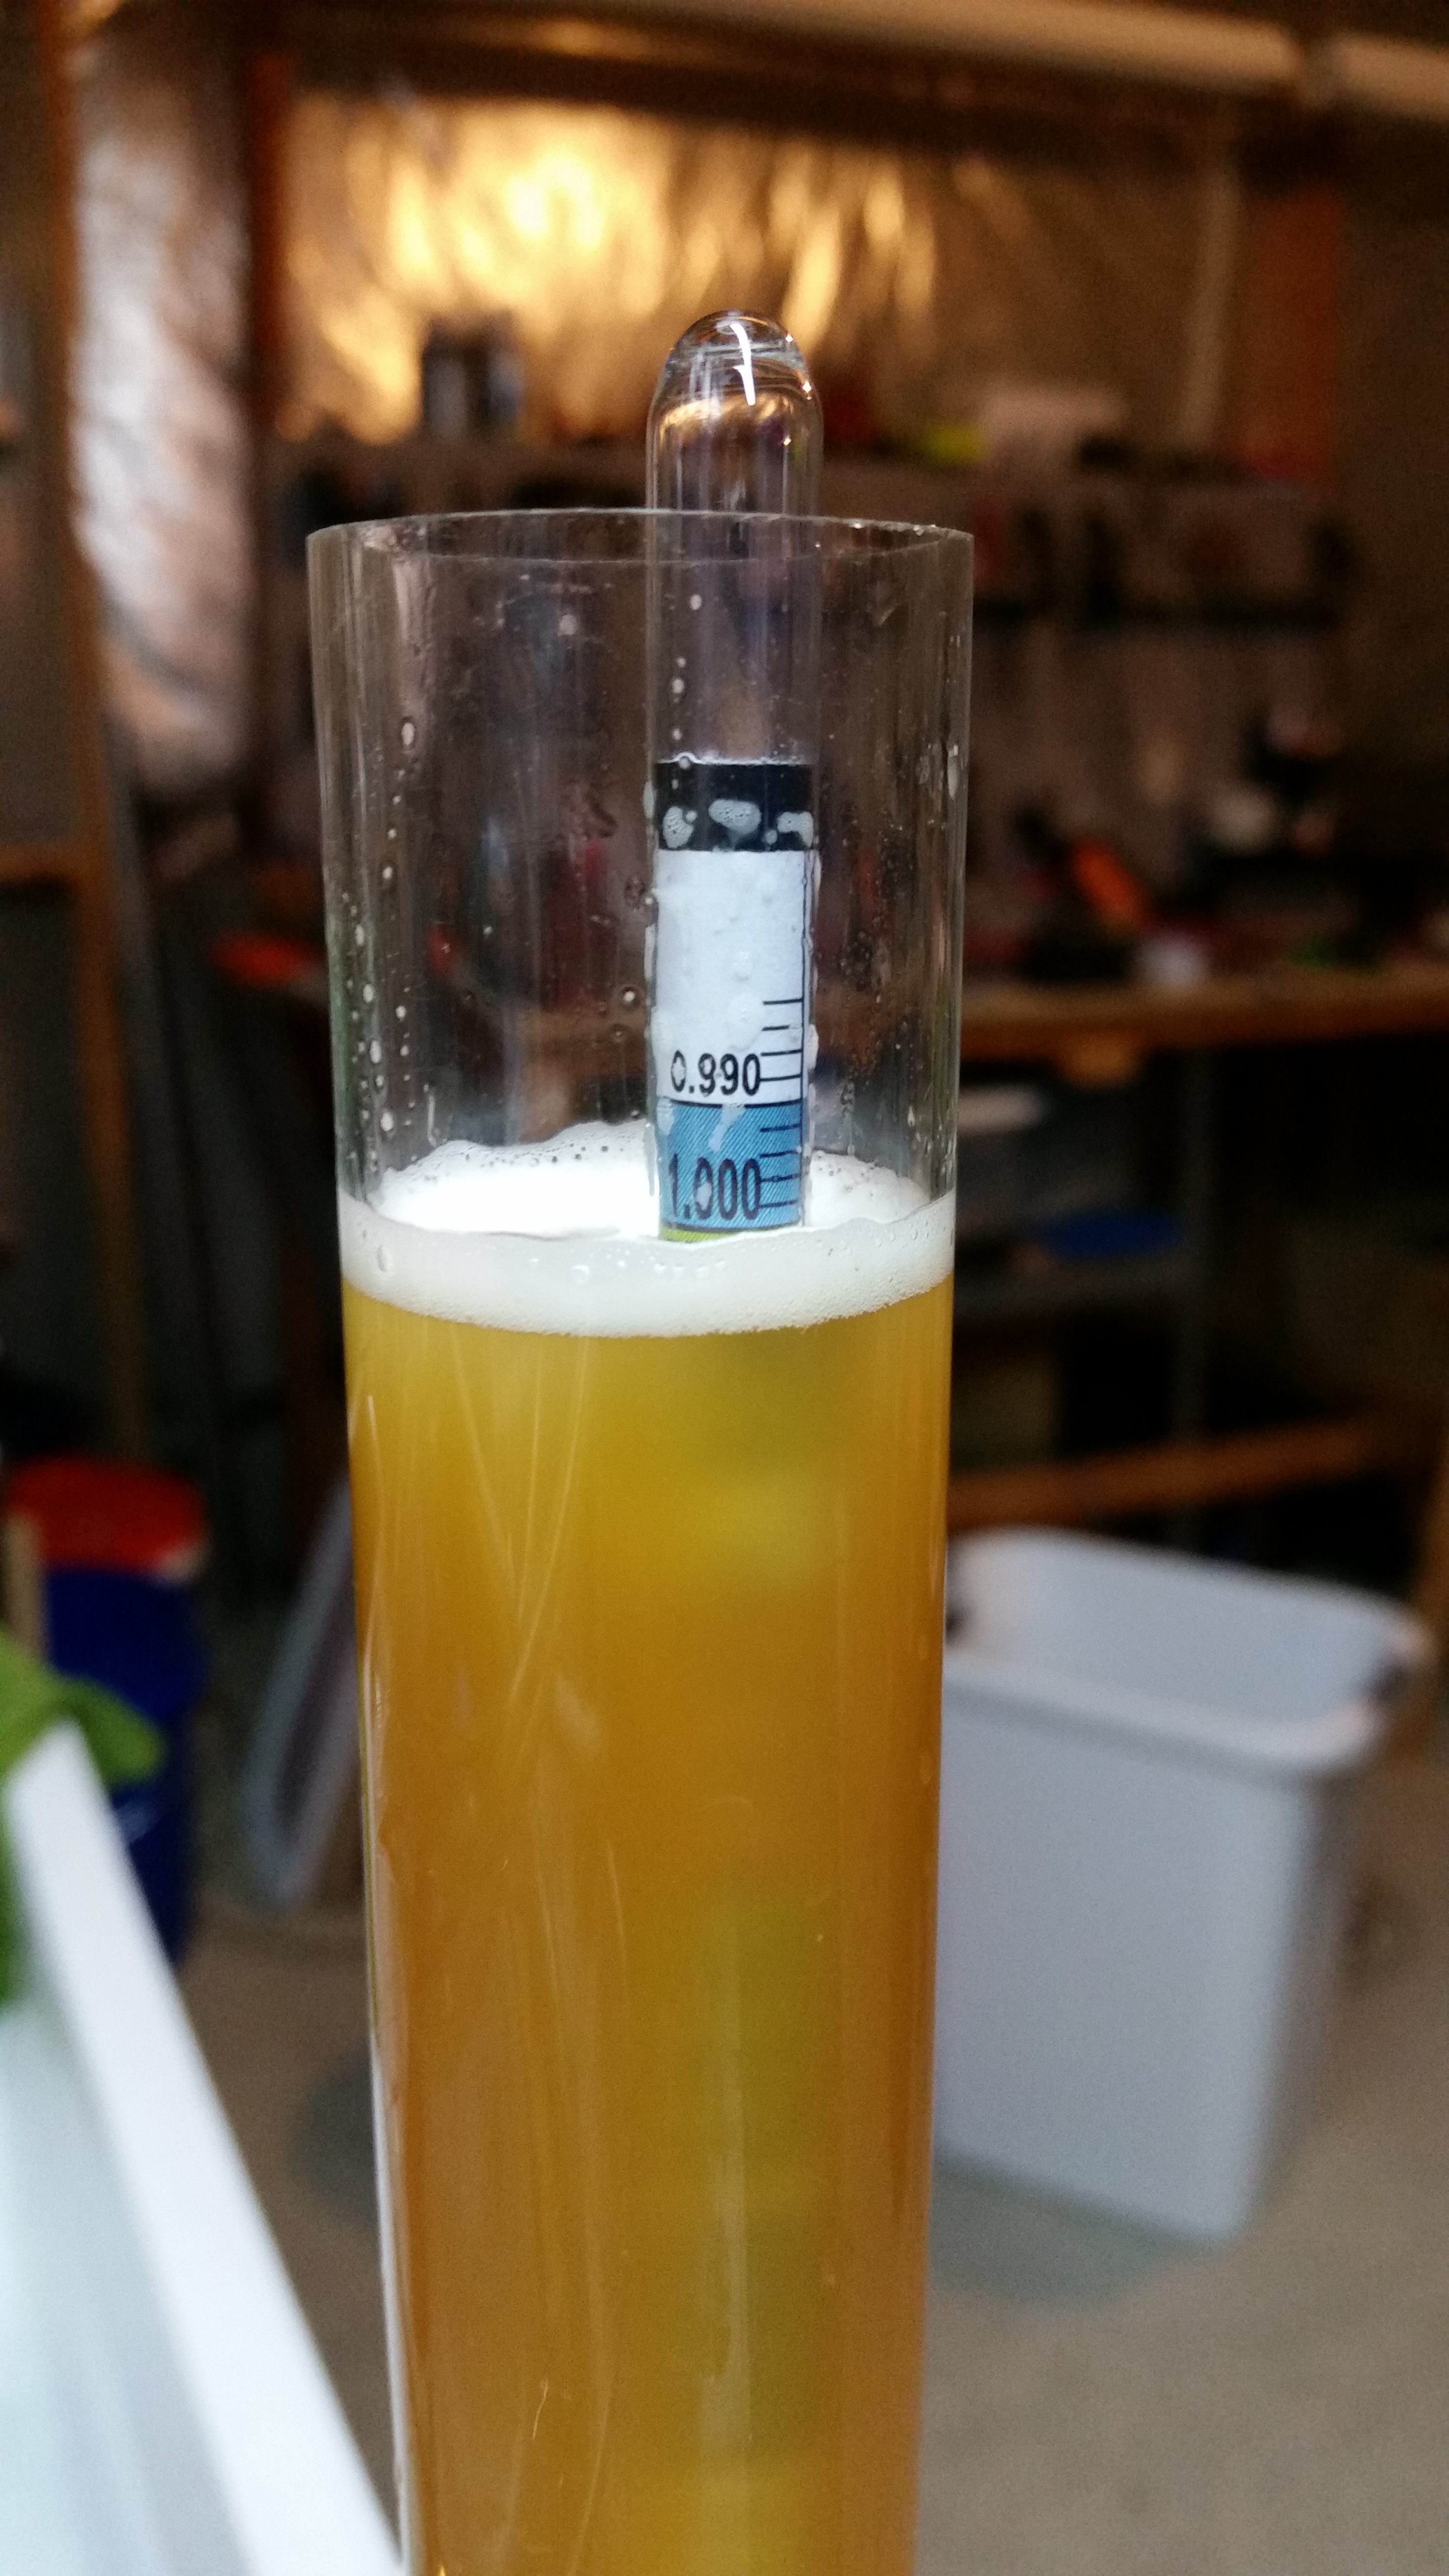
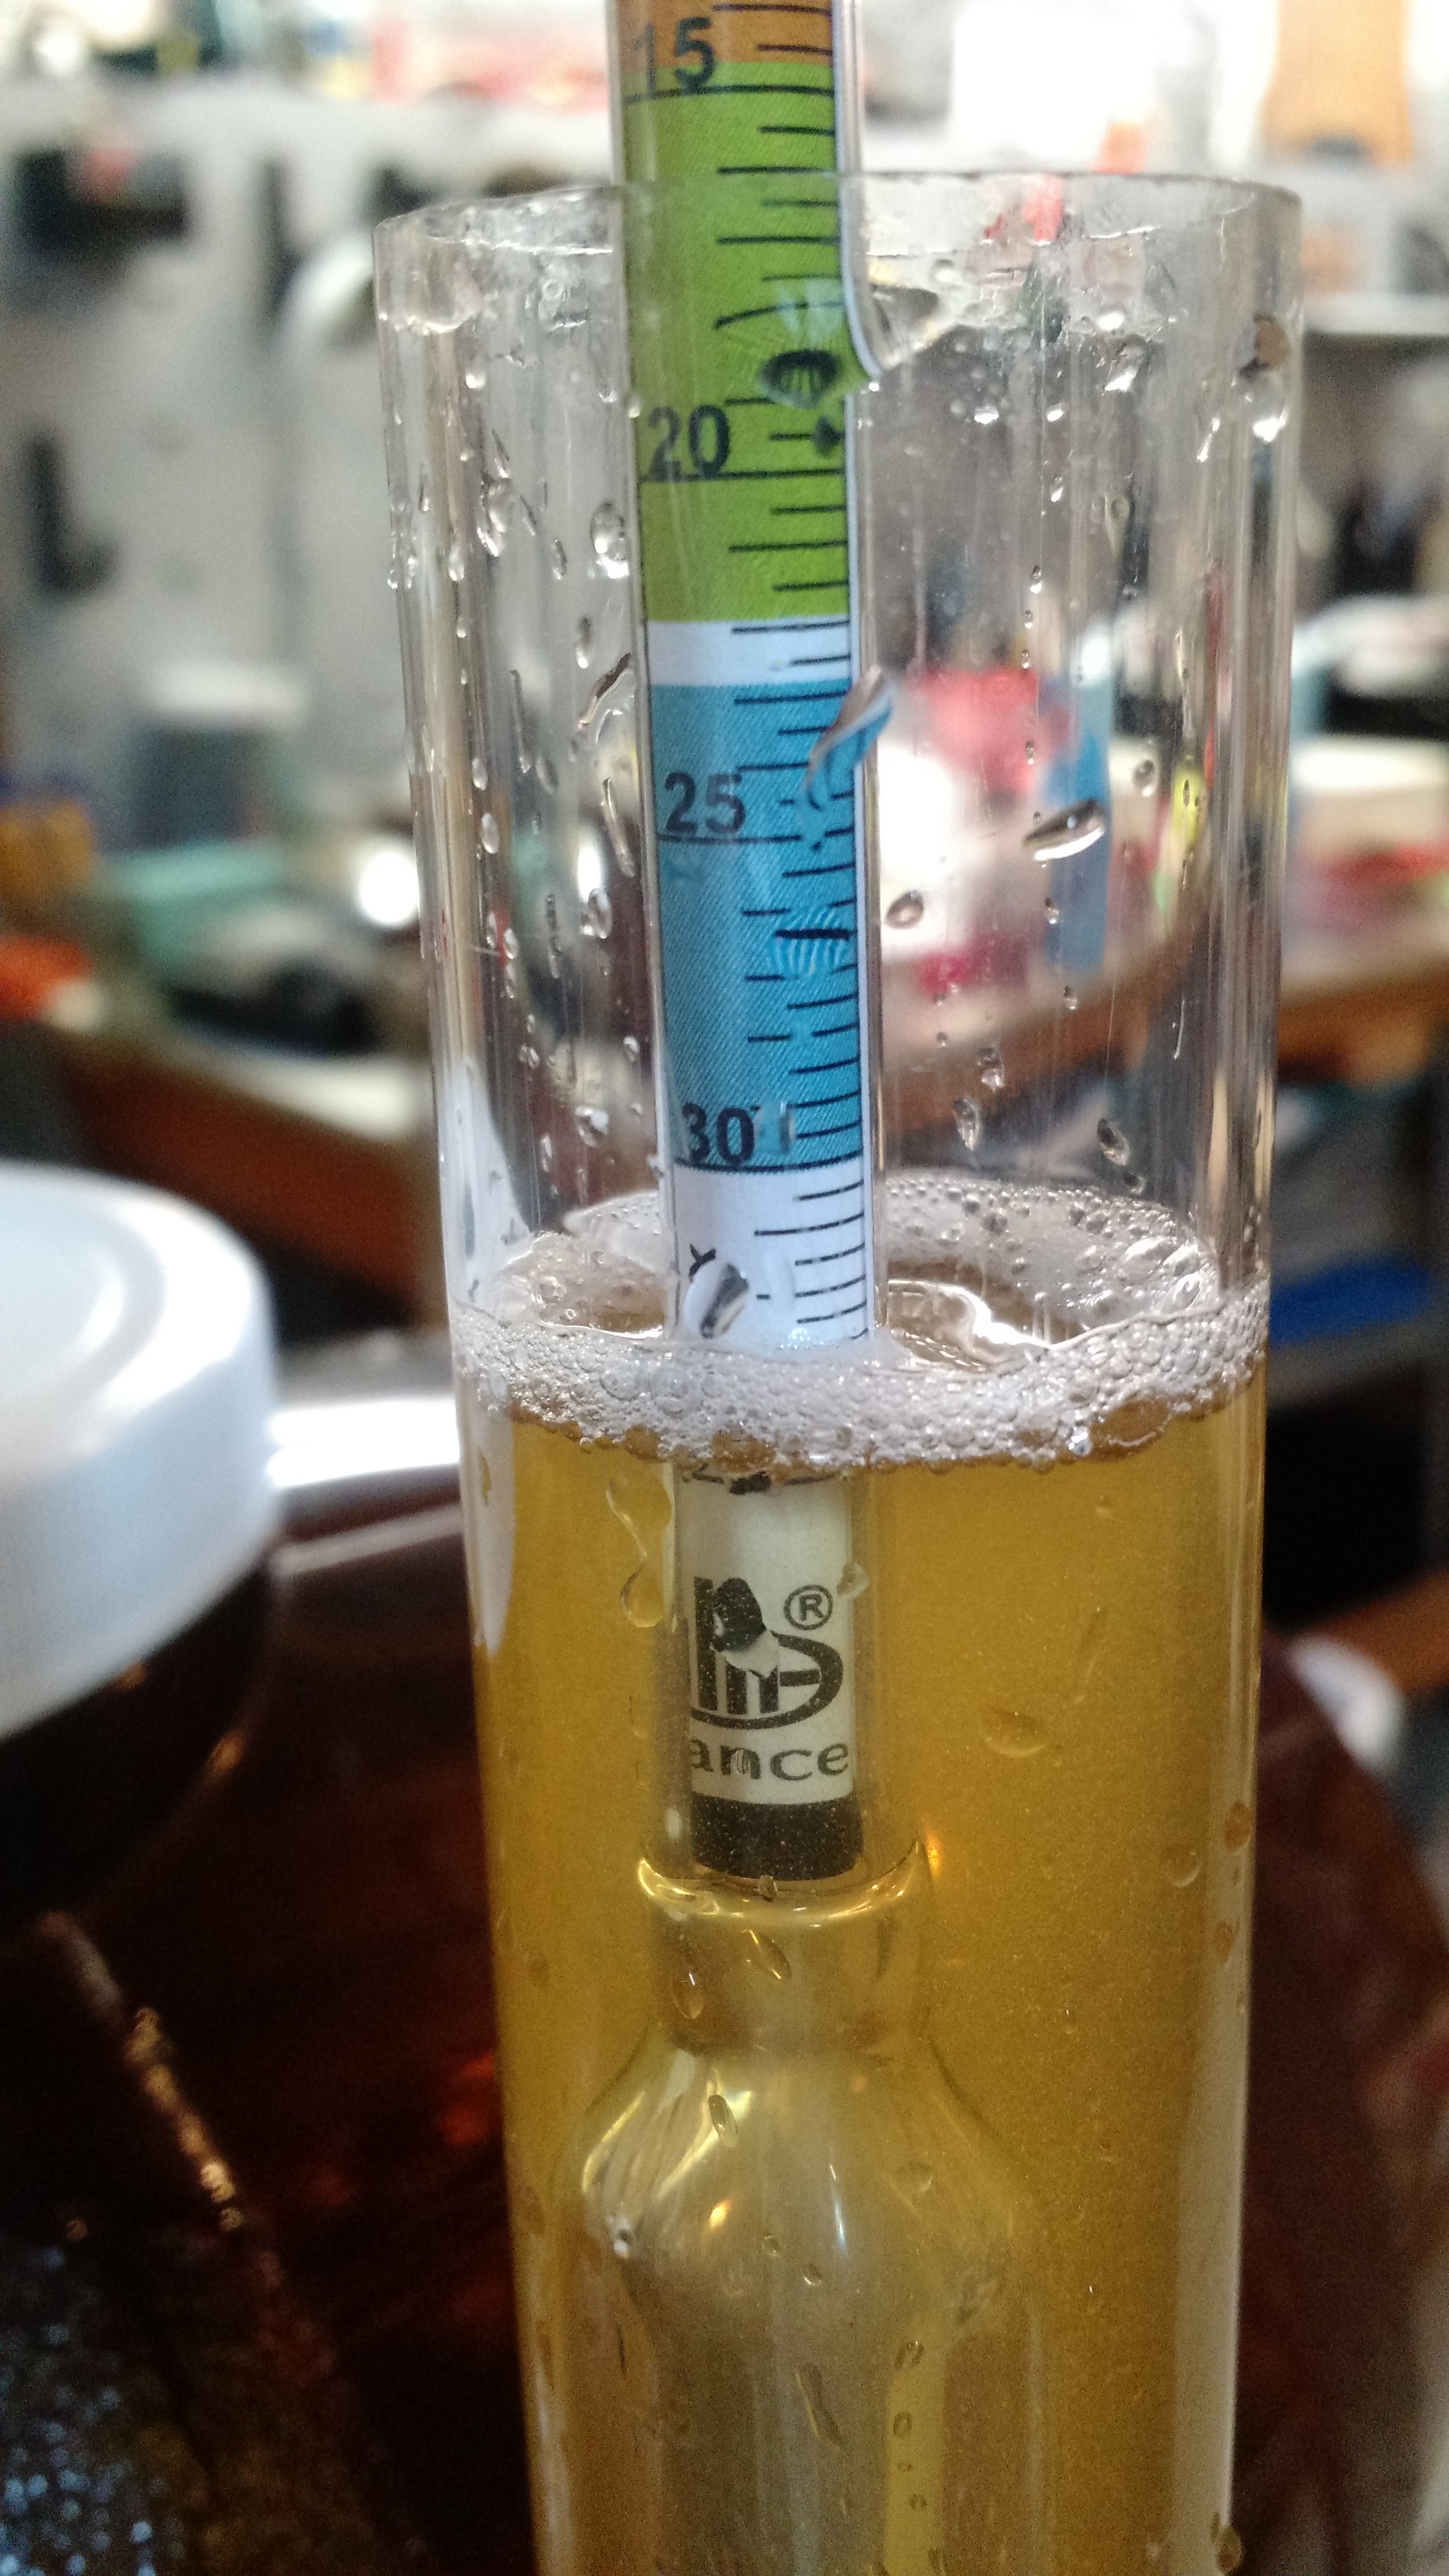
1.070! The most this hydrometer has ever floated!
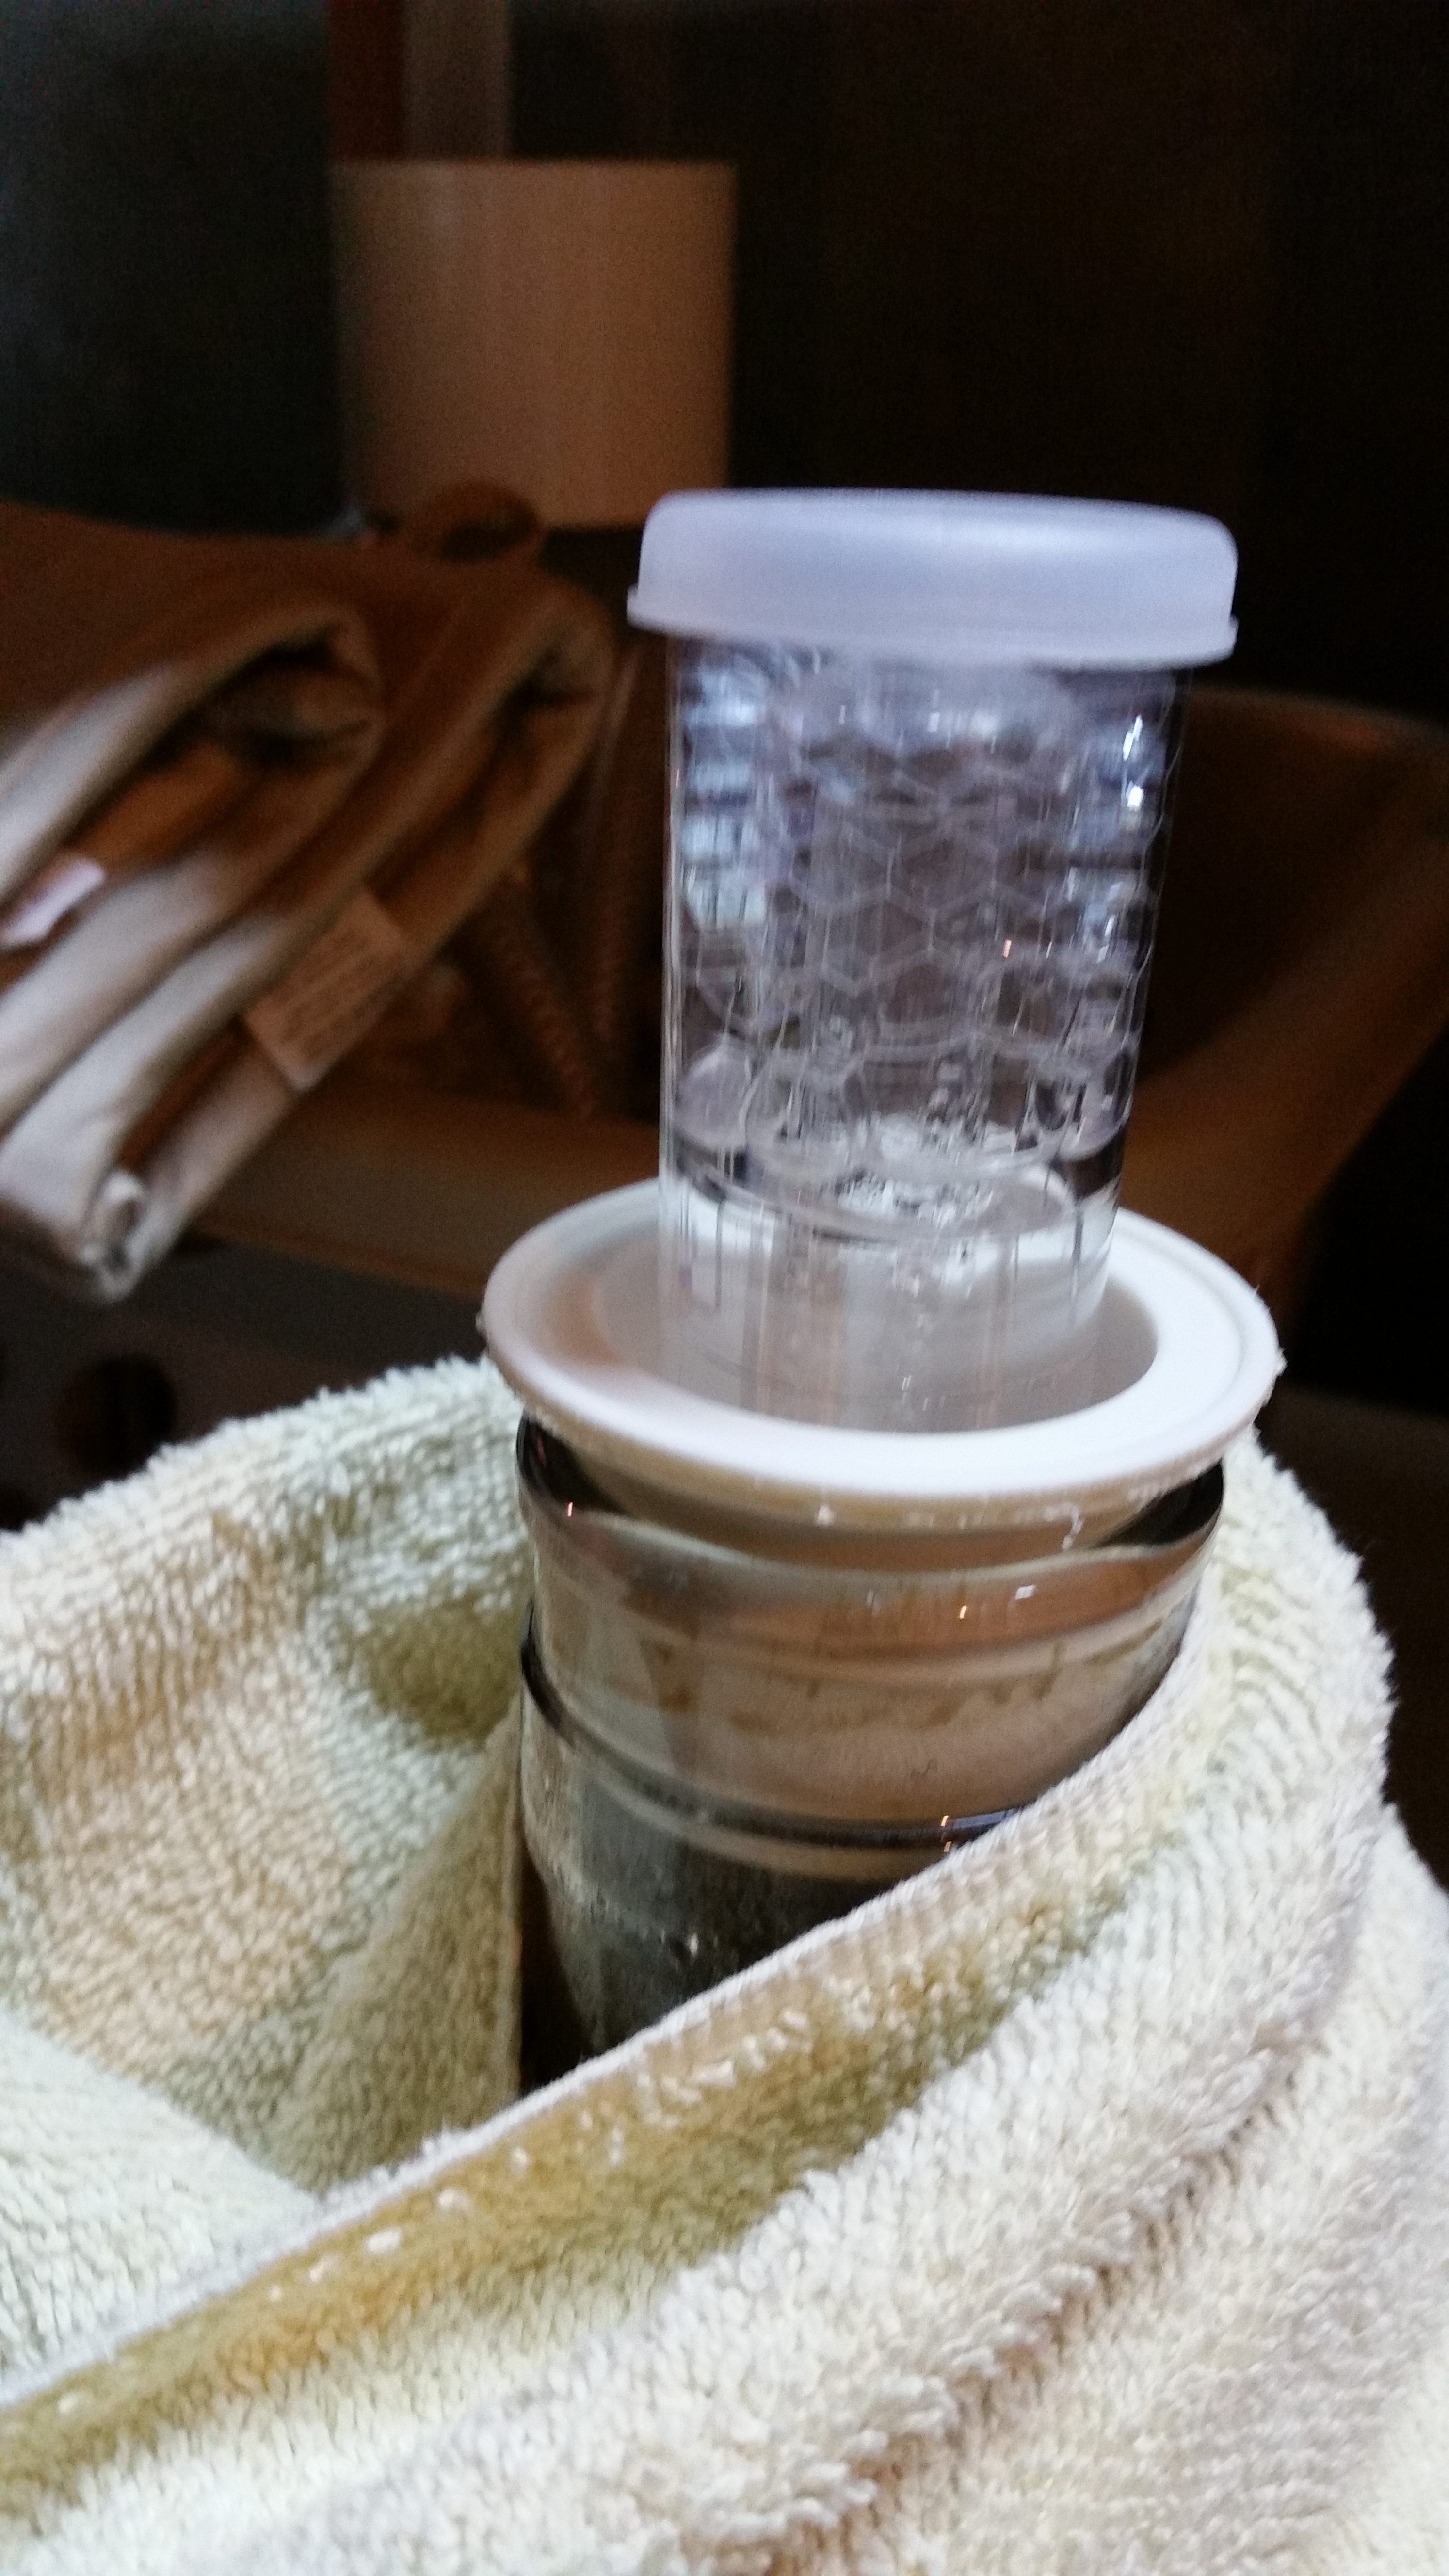
Airlock Action Shot!
1.004 (ultimately final gravity)
Throughout fermentation, the temperature (as measured on the side of the fermenter) stayed at 68, which is a nice perfect temperature.
Tasting Notes
The Beer
Aroma: Grapefruit mostly
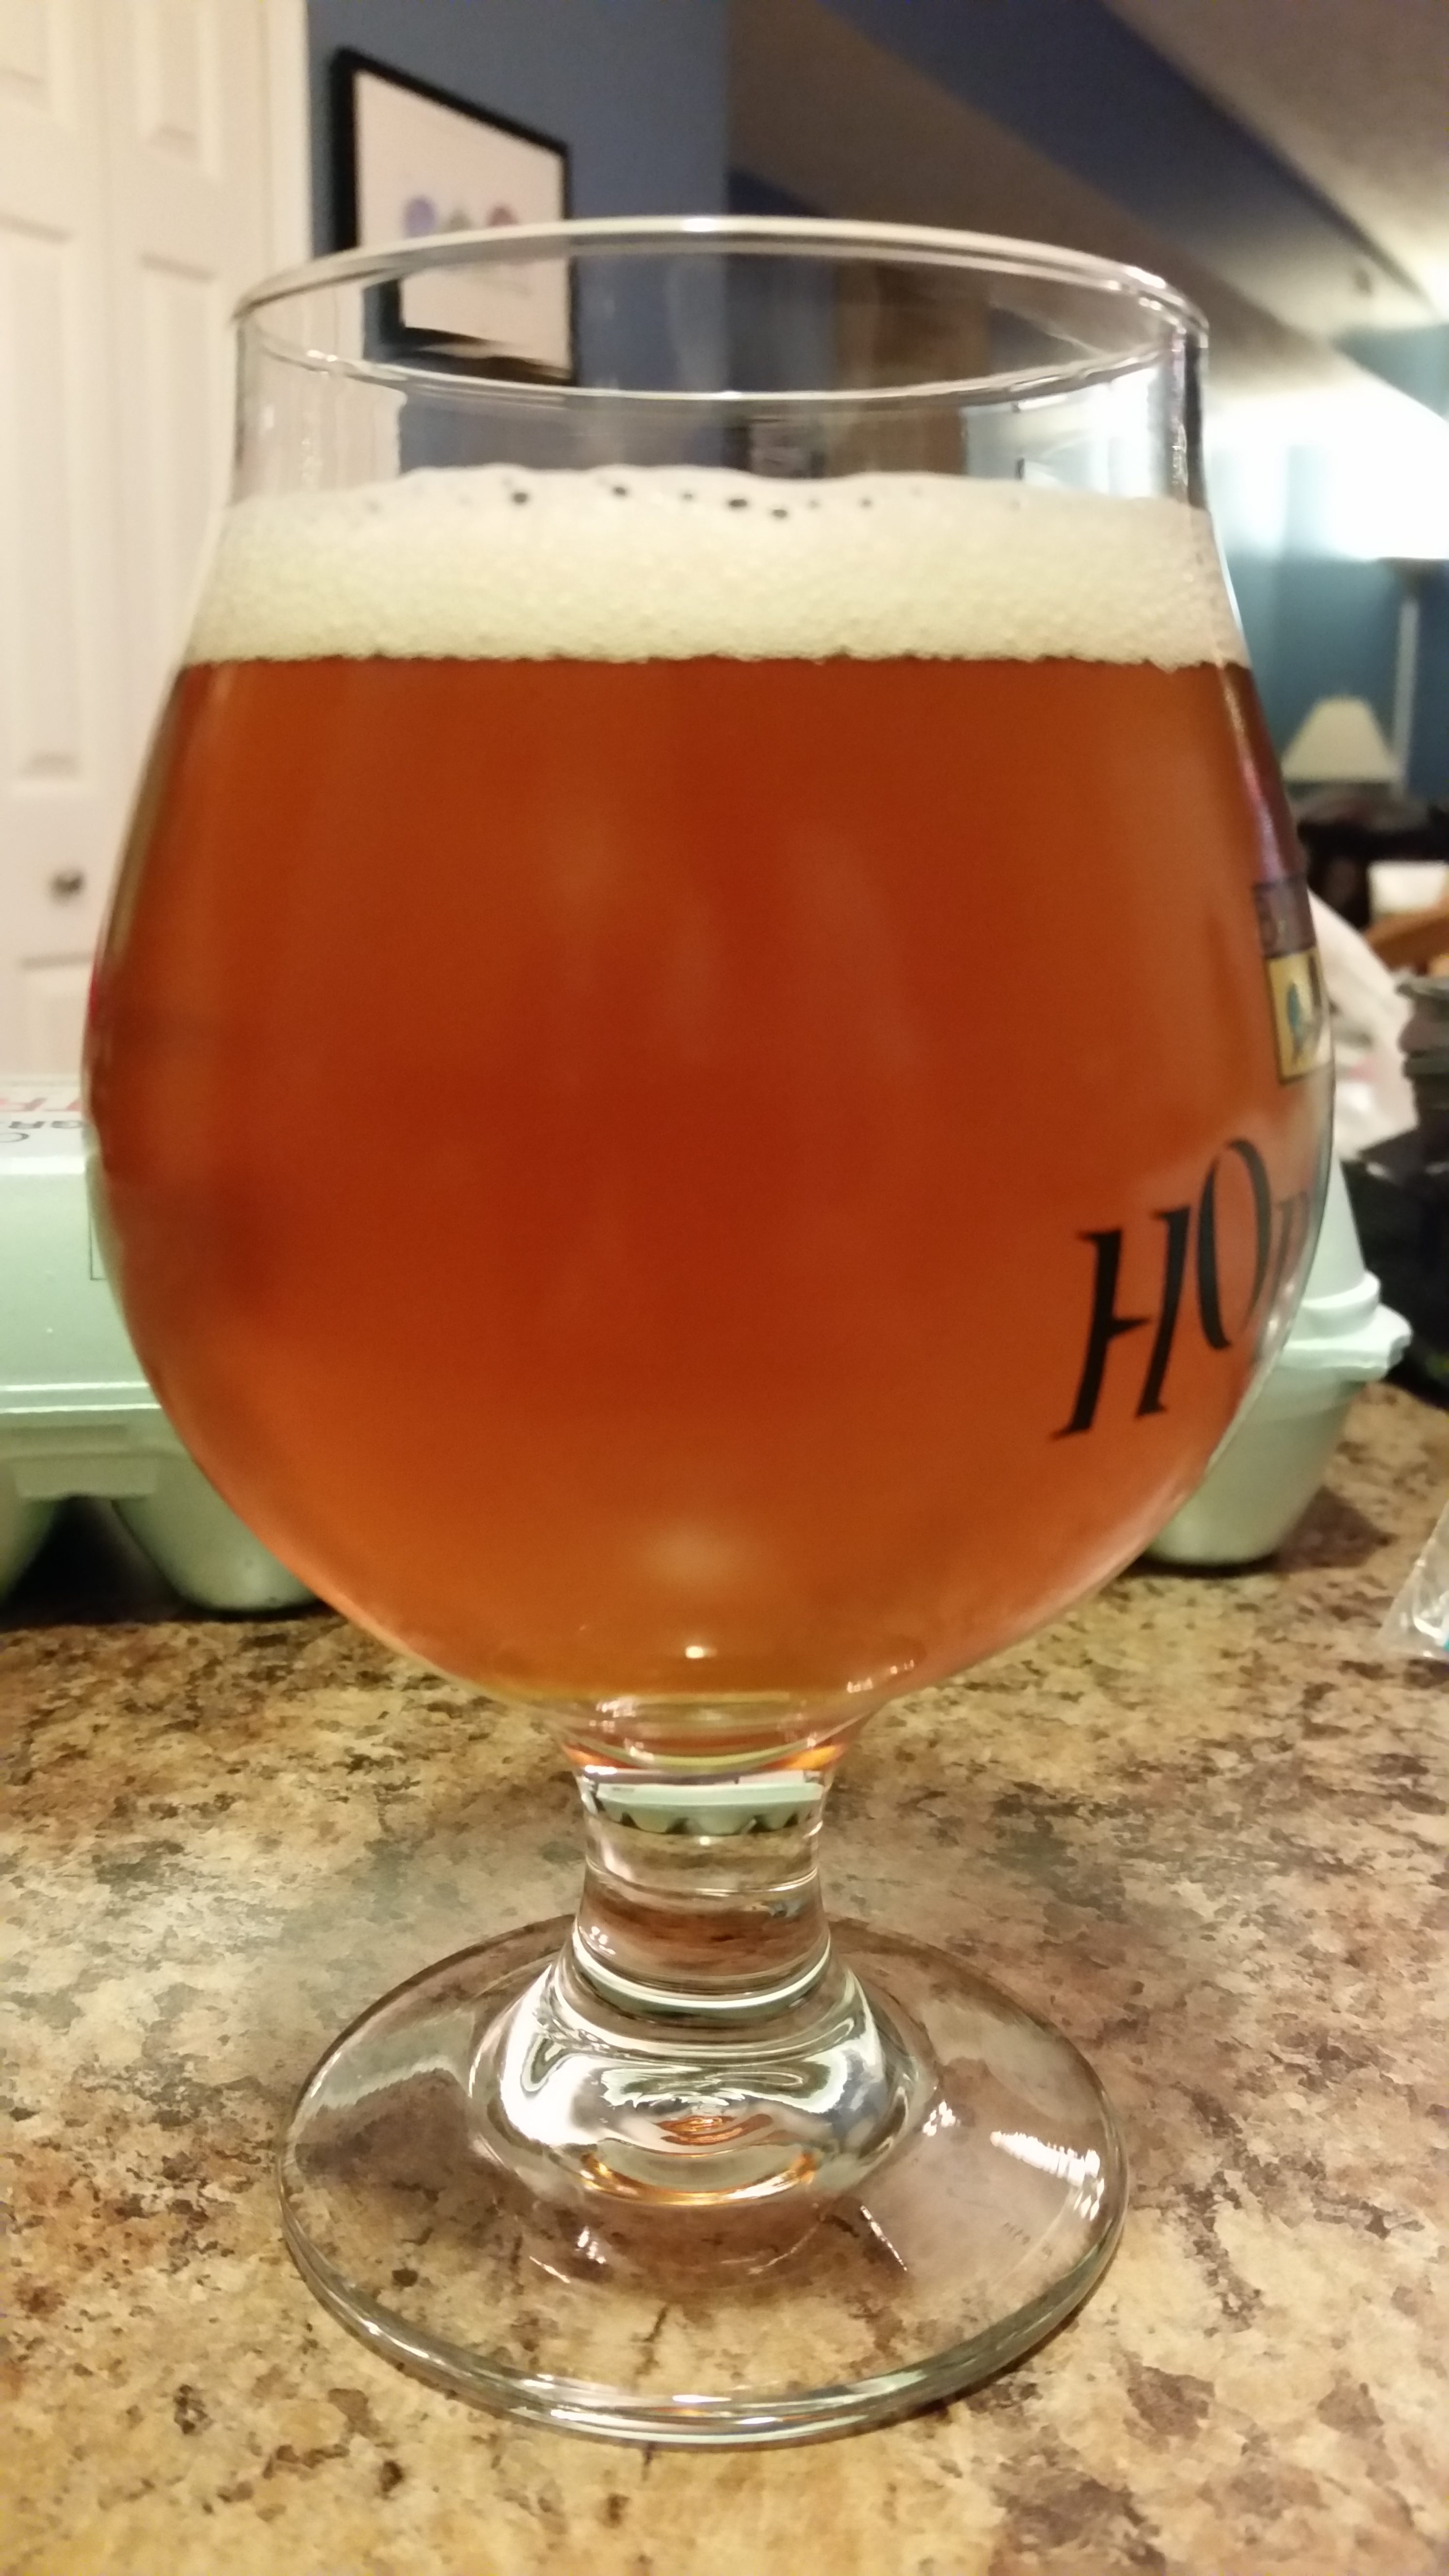
Appearance: Copper, opaque. White head that starts thick and persists as a thin head.
Taste: Tongue lashing bitterness with citrus tones. Some alcohol flavor.
Mouthfeel: Moderately carbonated, slight citrusy tartness lingers past the dry finish.
Overall Impression: I’m biased, but I love this beer. I’ve been drinking the heck out of this!
OG: 1.071
SG: 1.005
ABV: 8.7%
IBU: 124
SRM: 6
What’s Next With This Recipe?
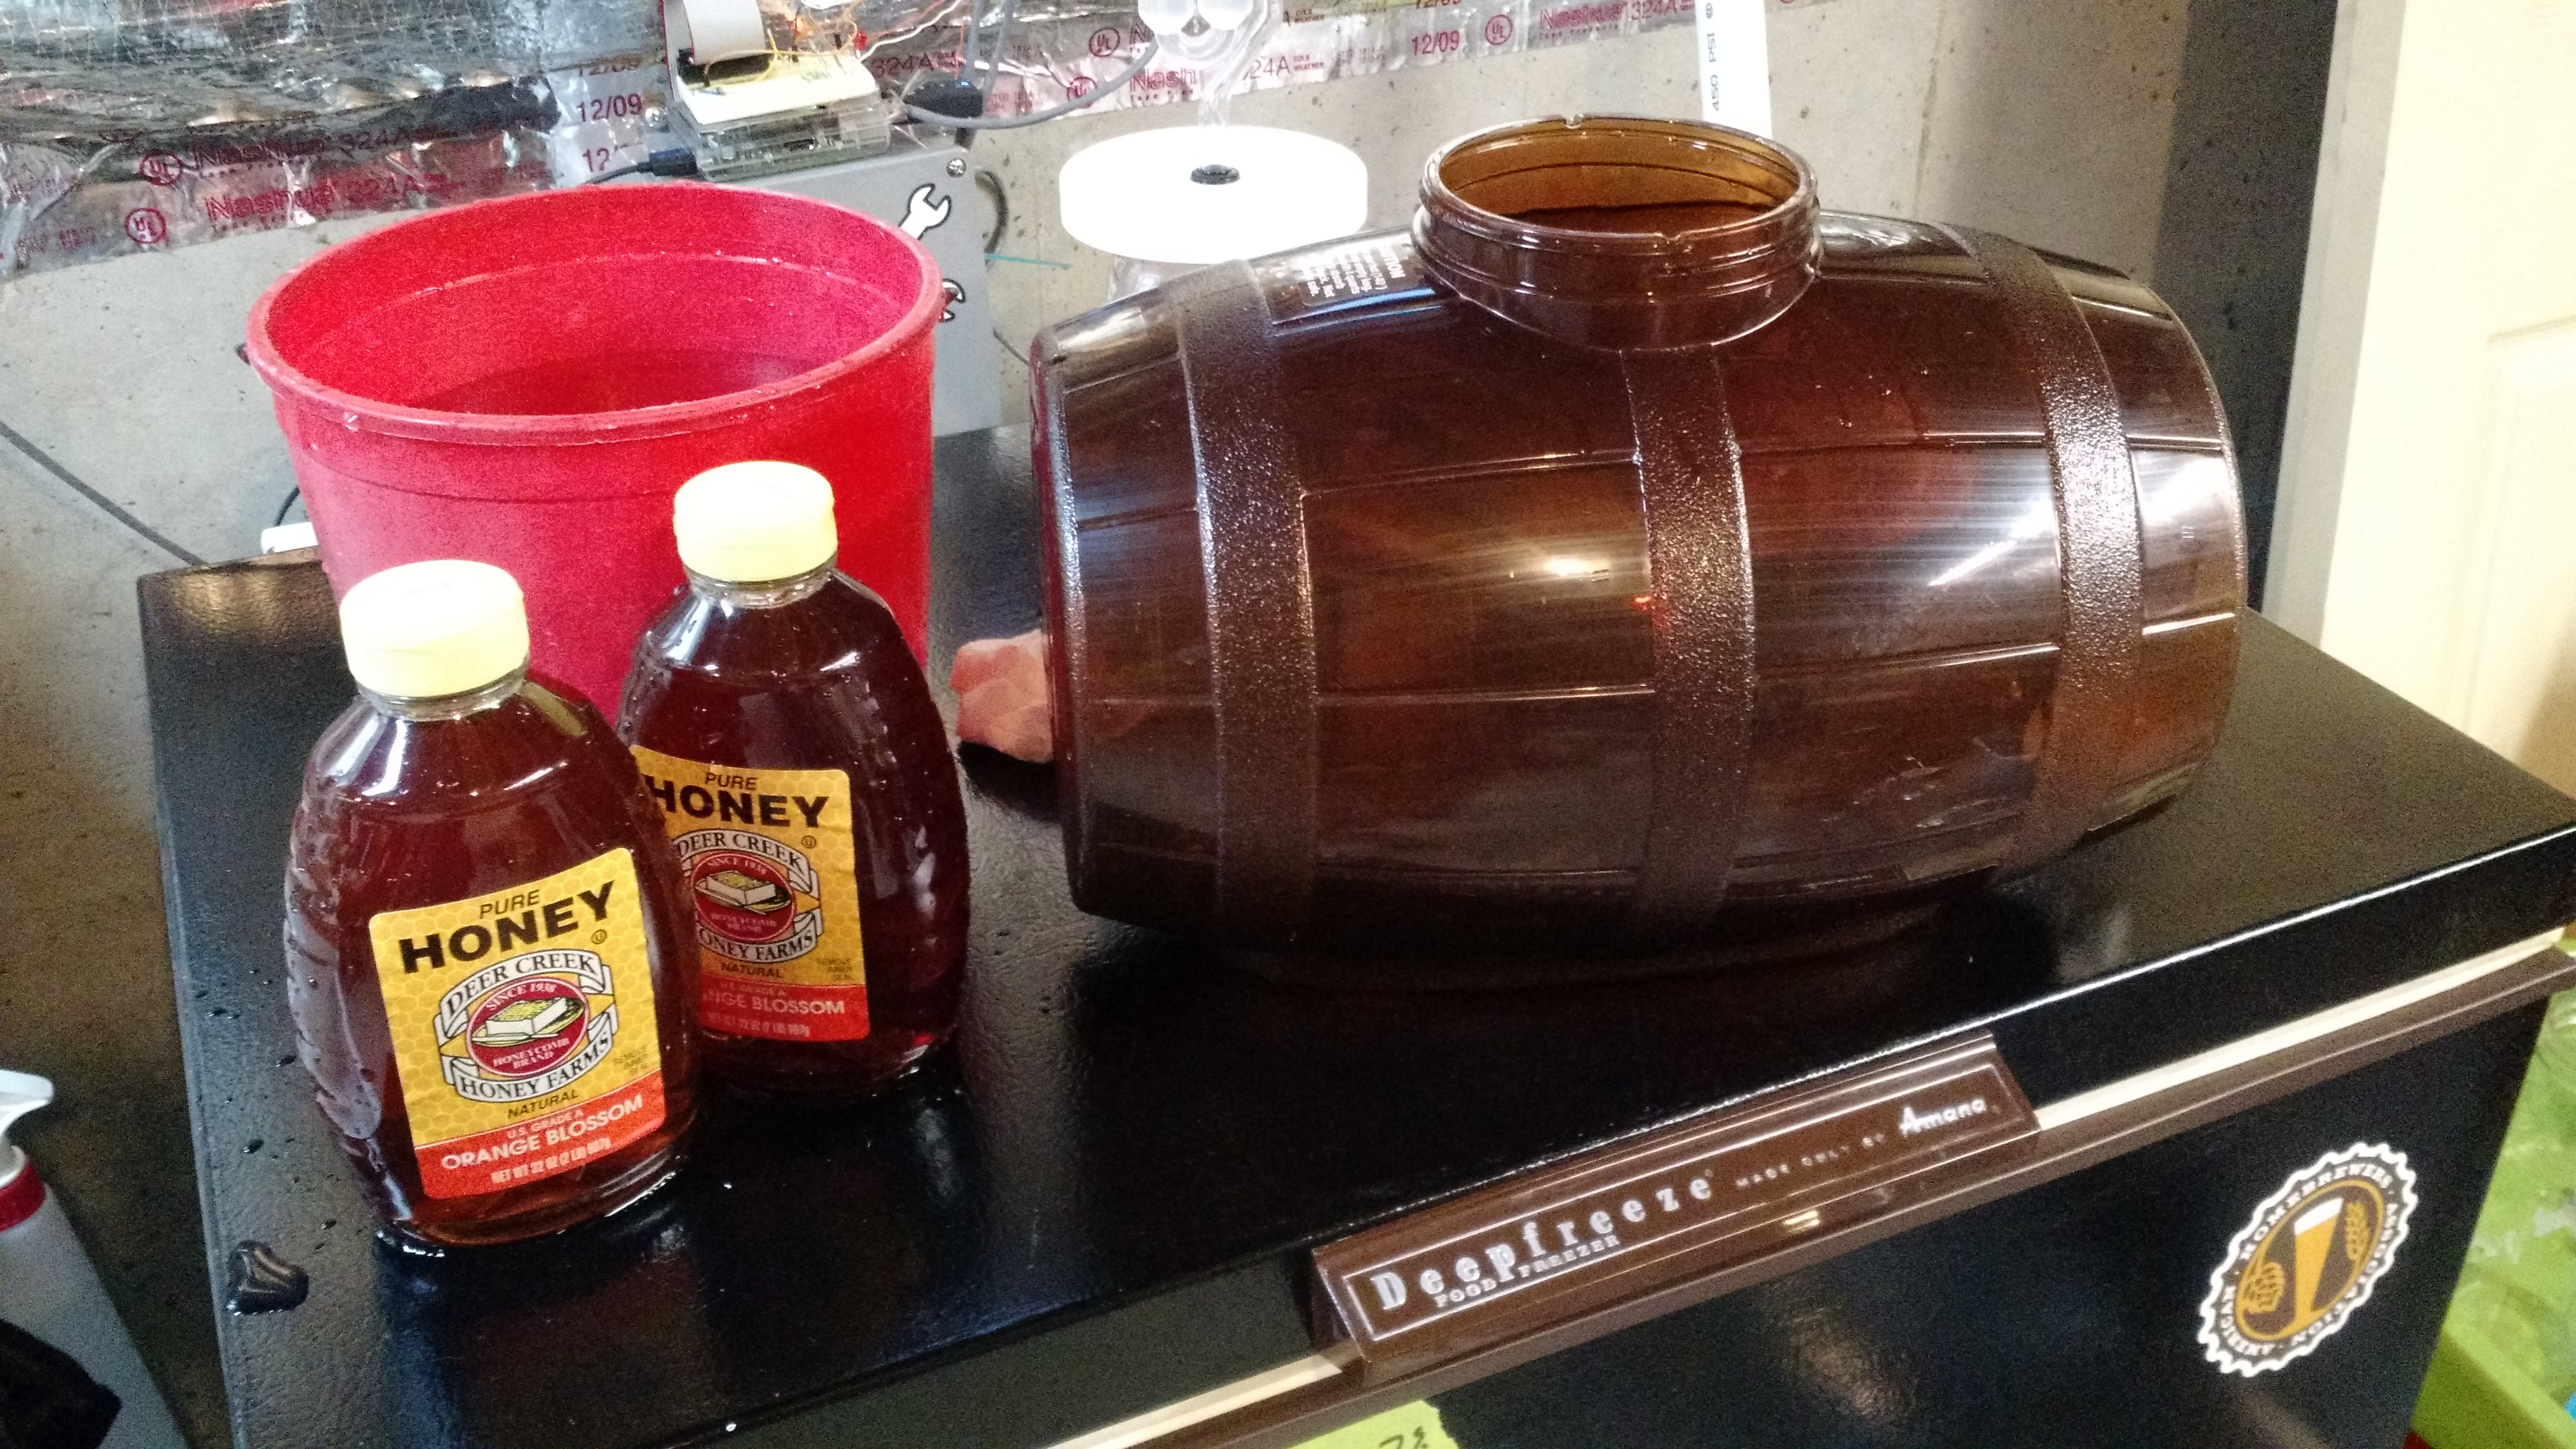
I want to try two things – one is maybe a little less bitterness. The other is honey instead of sugar. I’m wondering if some Orange Blossom honey would work well with the citrus based hops.
Cheers!
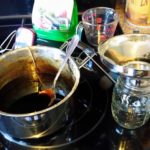
Made Dark Candi Syrup
I’ve been thinking about my next homebrew being a Belgian Strong Dark Beer. In the research process, I found two Chop & Brew Episodes, and both use dark candi syrup. Since I’m tight (a little) and since it’s basically sugar, I decided to make my own.
Off to the interwebs, I found a post by Mad Fermentationist that mentioned a Ryan Brews post in the comments. Looking at the Ryan Brews page, I used pickling lime and DAP (yeast nutrient, I used LD Carlson, which I had on hand).
I only scaled the recipe up, so I used:
1 pound sugar
1/2 cup water
1 tsp pickling lime
1 tsp yeast nutrient
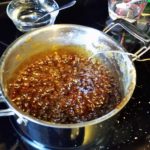
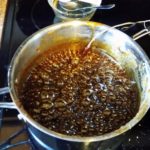
I brought it to a boil and held it to around 280º – 300ºF for 40 minutes. After that, I removed it from the heat, let it cool for a few, and added 1/3 cup of water and stirred it in to make it a syrup.
The two things I will do differently next time:
- Dissolve the lime and dap in the water before adding it to the sugar. I had a lot of large flakes that I think (operative word!) are from the lime.
- Use a better thermometer setup. My grill thermometer was reading 280º for a while including in boiling water, so I hope the thermocouple isn’t ruined. I’m letting it dry and will test it later. Edit a few days later: the thermocouple is saying 129º while sitting next to the food thermocouple reading 73º. I’ve ordered a replacement!
Cleanup of this stuff isn’t too difficult, the best way is to boil everything, even if you don’t make it to a boil, very hot water can dissolve the sugar/caramel.
-

- Starting…
-
- After 25 minutes of boil…
-
- After ~37 minutes of boil…
-
- End of boil, diluted, and ready to be packaged.
-

- In the jar, ready to be used.
-
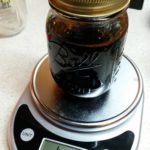
- Just over a pound of syrup.
Water Part Deux
So after the low mash efficiency last few beers AND my perception (note 1) of low mash efficiency in my last beer, I started looking at water more.
After looking at my options, I found a page on Braukaiser, and ended up purchasing an aquarium test kit that tests GH, KH, pH, NO2, and NO3. The NO2 and NO3 are unnecessary for brewing, and I had 0 ppm for both of those anyway. Using the spreadsheet and my 180ppm measurements for both GH and KH, I found Ca = 51 ppm and Mg = 13 ppm.
That’s not too different from my old measurements:
Ca: old 54, new 51
Mg: old 13, new 13
The two interesting differences are alkalinity and pH.
Alkalinity: old 123, new 180
pH: Old 8.1, new 7.5.
The total alkalinity is a concern – that’s the ability of the water to buffer changes in acidity. And my pH is lower than expected. So I may not have had the wort in the proper pH range. This could be why I’ve had efficiency problems.
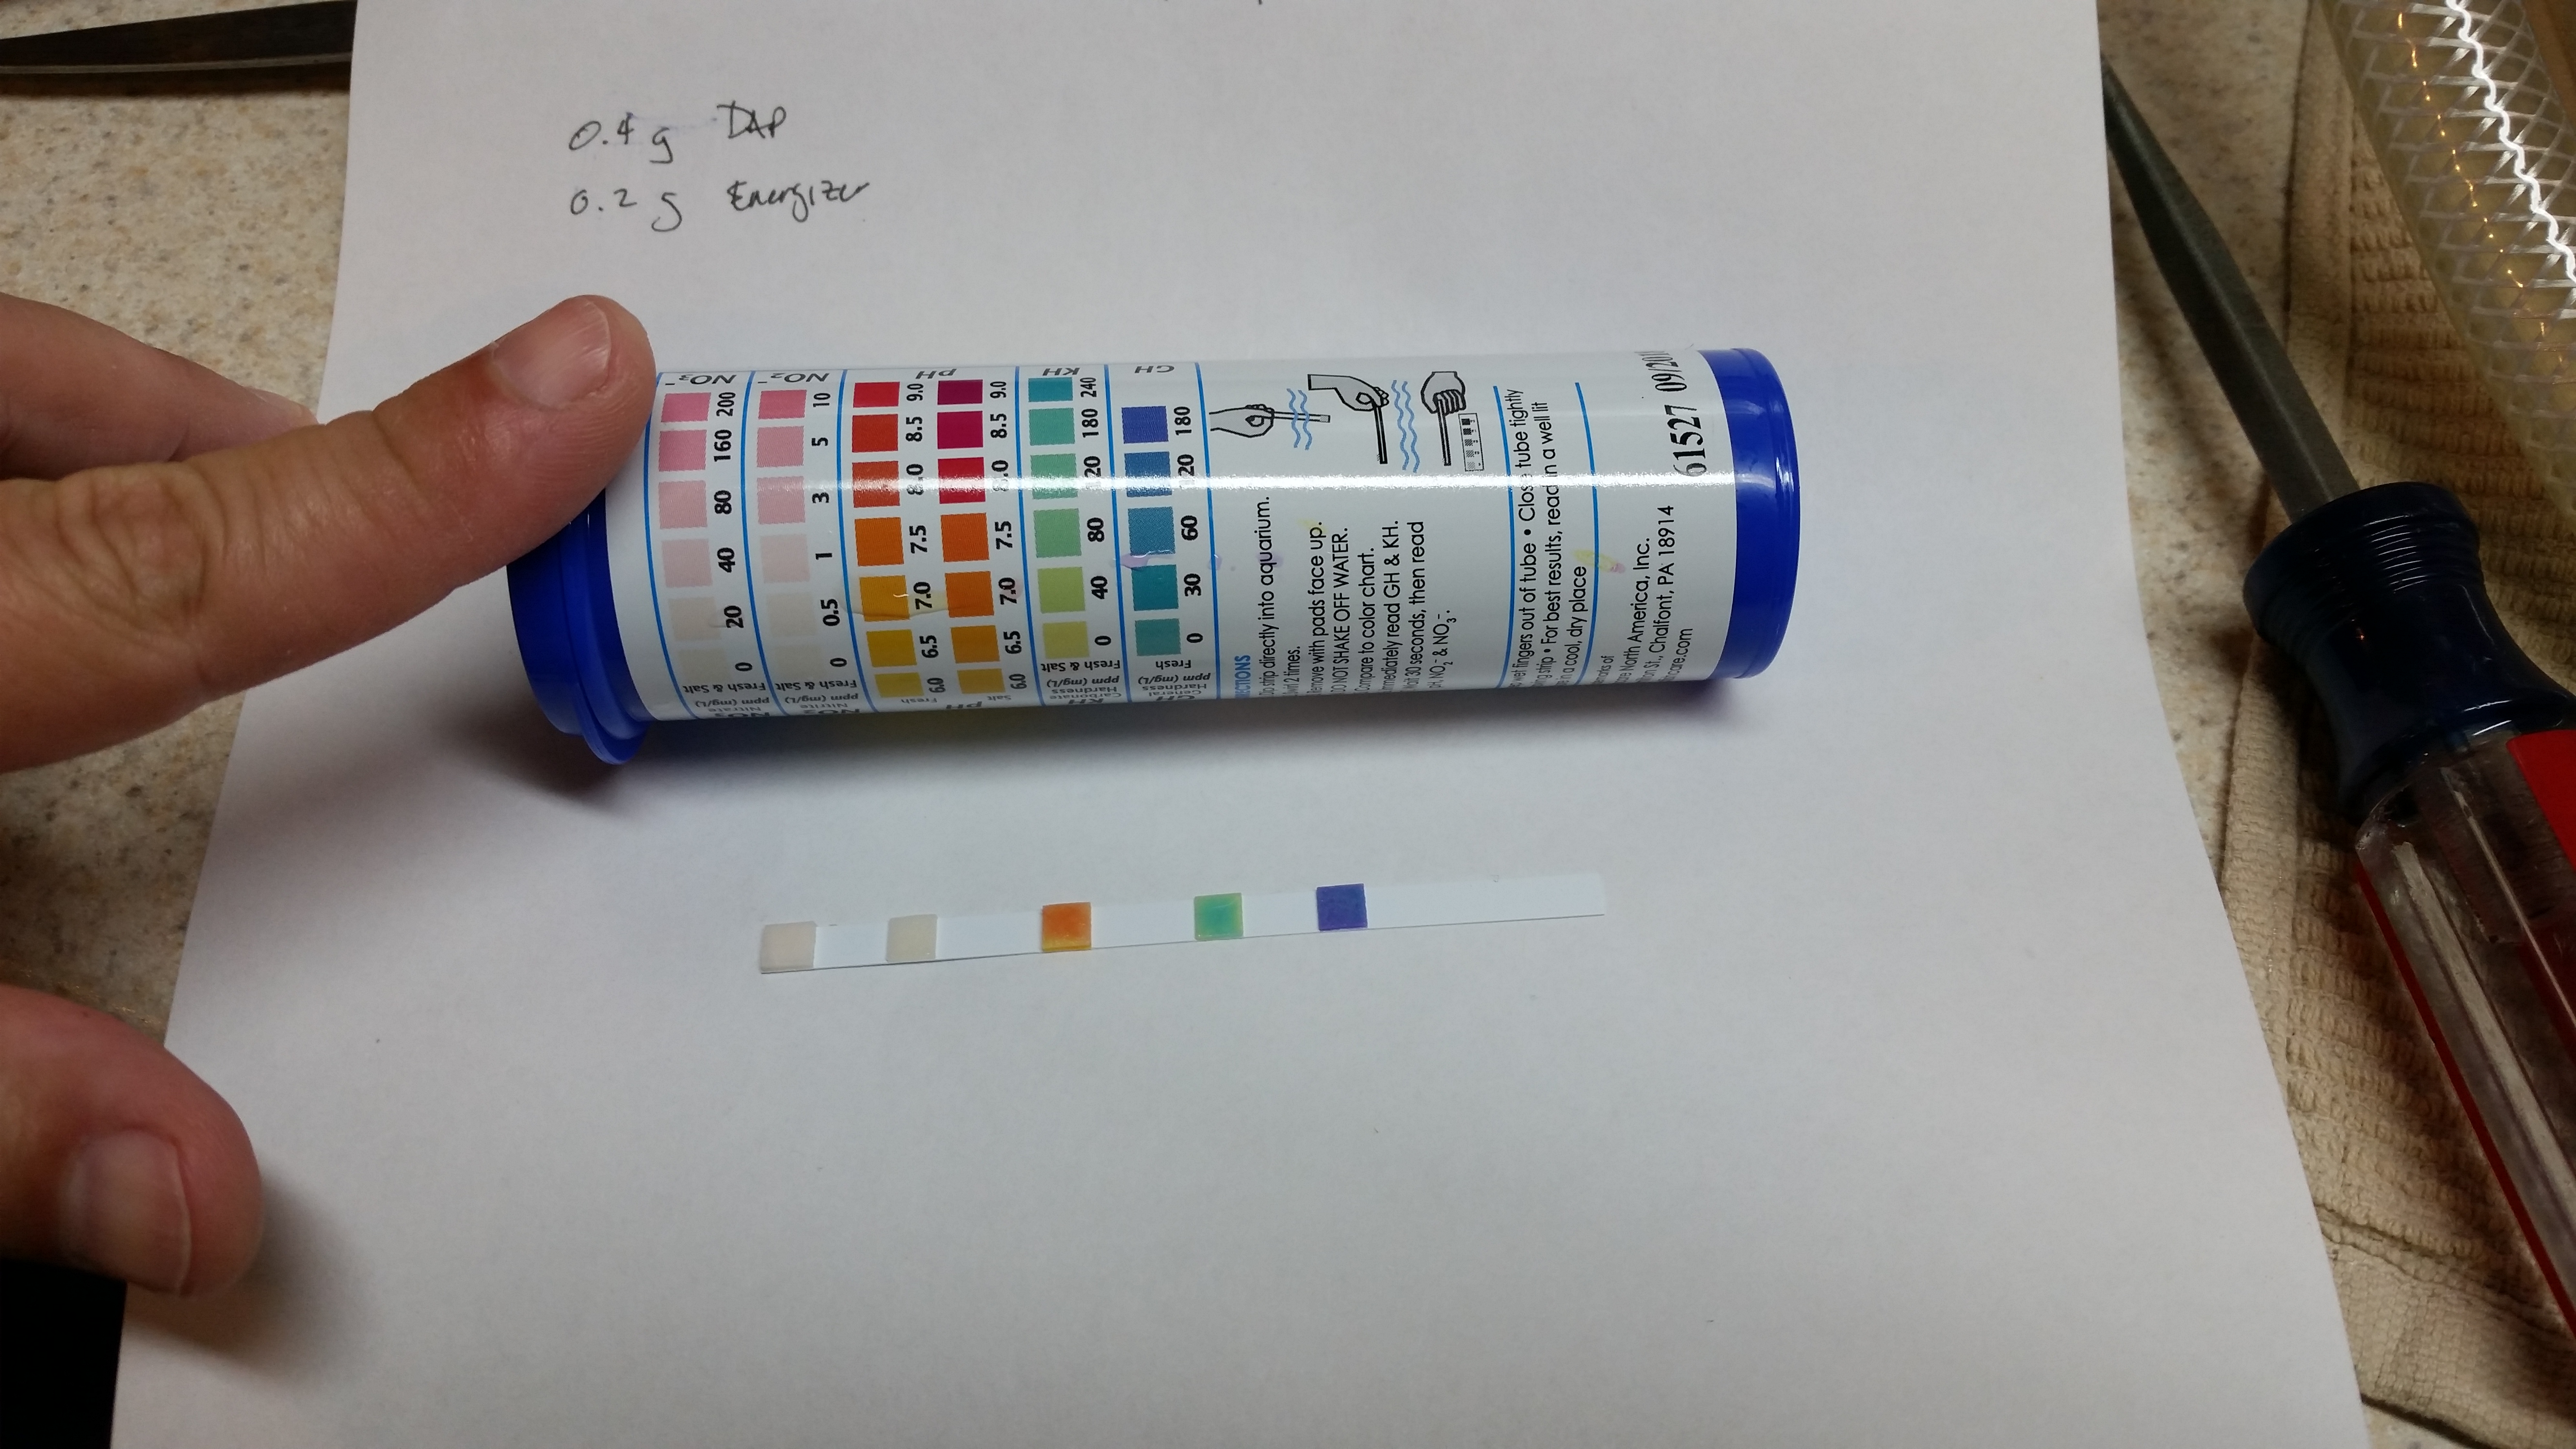
No nitrites or nitrates. 7.5 pH, 180 ppm of both Ca and Mg.
That being typed, I need a good pH meter. That’s really the only point that I came to after all this.
Note 1: I initially thought that I had really poor efficiency, and there is a problem somewhere in my measurements… particularly not taking a pre-boil gravity. I have the first running and the second running and the OG, and I determined a potential amount of sugar in the two runnings and it may be okay. The real problem was that I had far too much strike water and didn’t make any adjustments. I DID figure out that if I use Denny Conn’s method, I can safely assume his assumption that 10 pounds of grain absorbs 1 gallon of strike water, because mine is a hair over that.
On to the next beer!
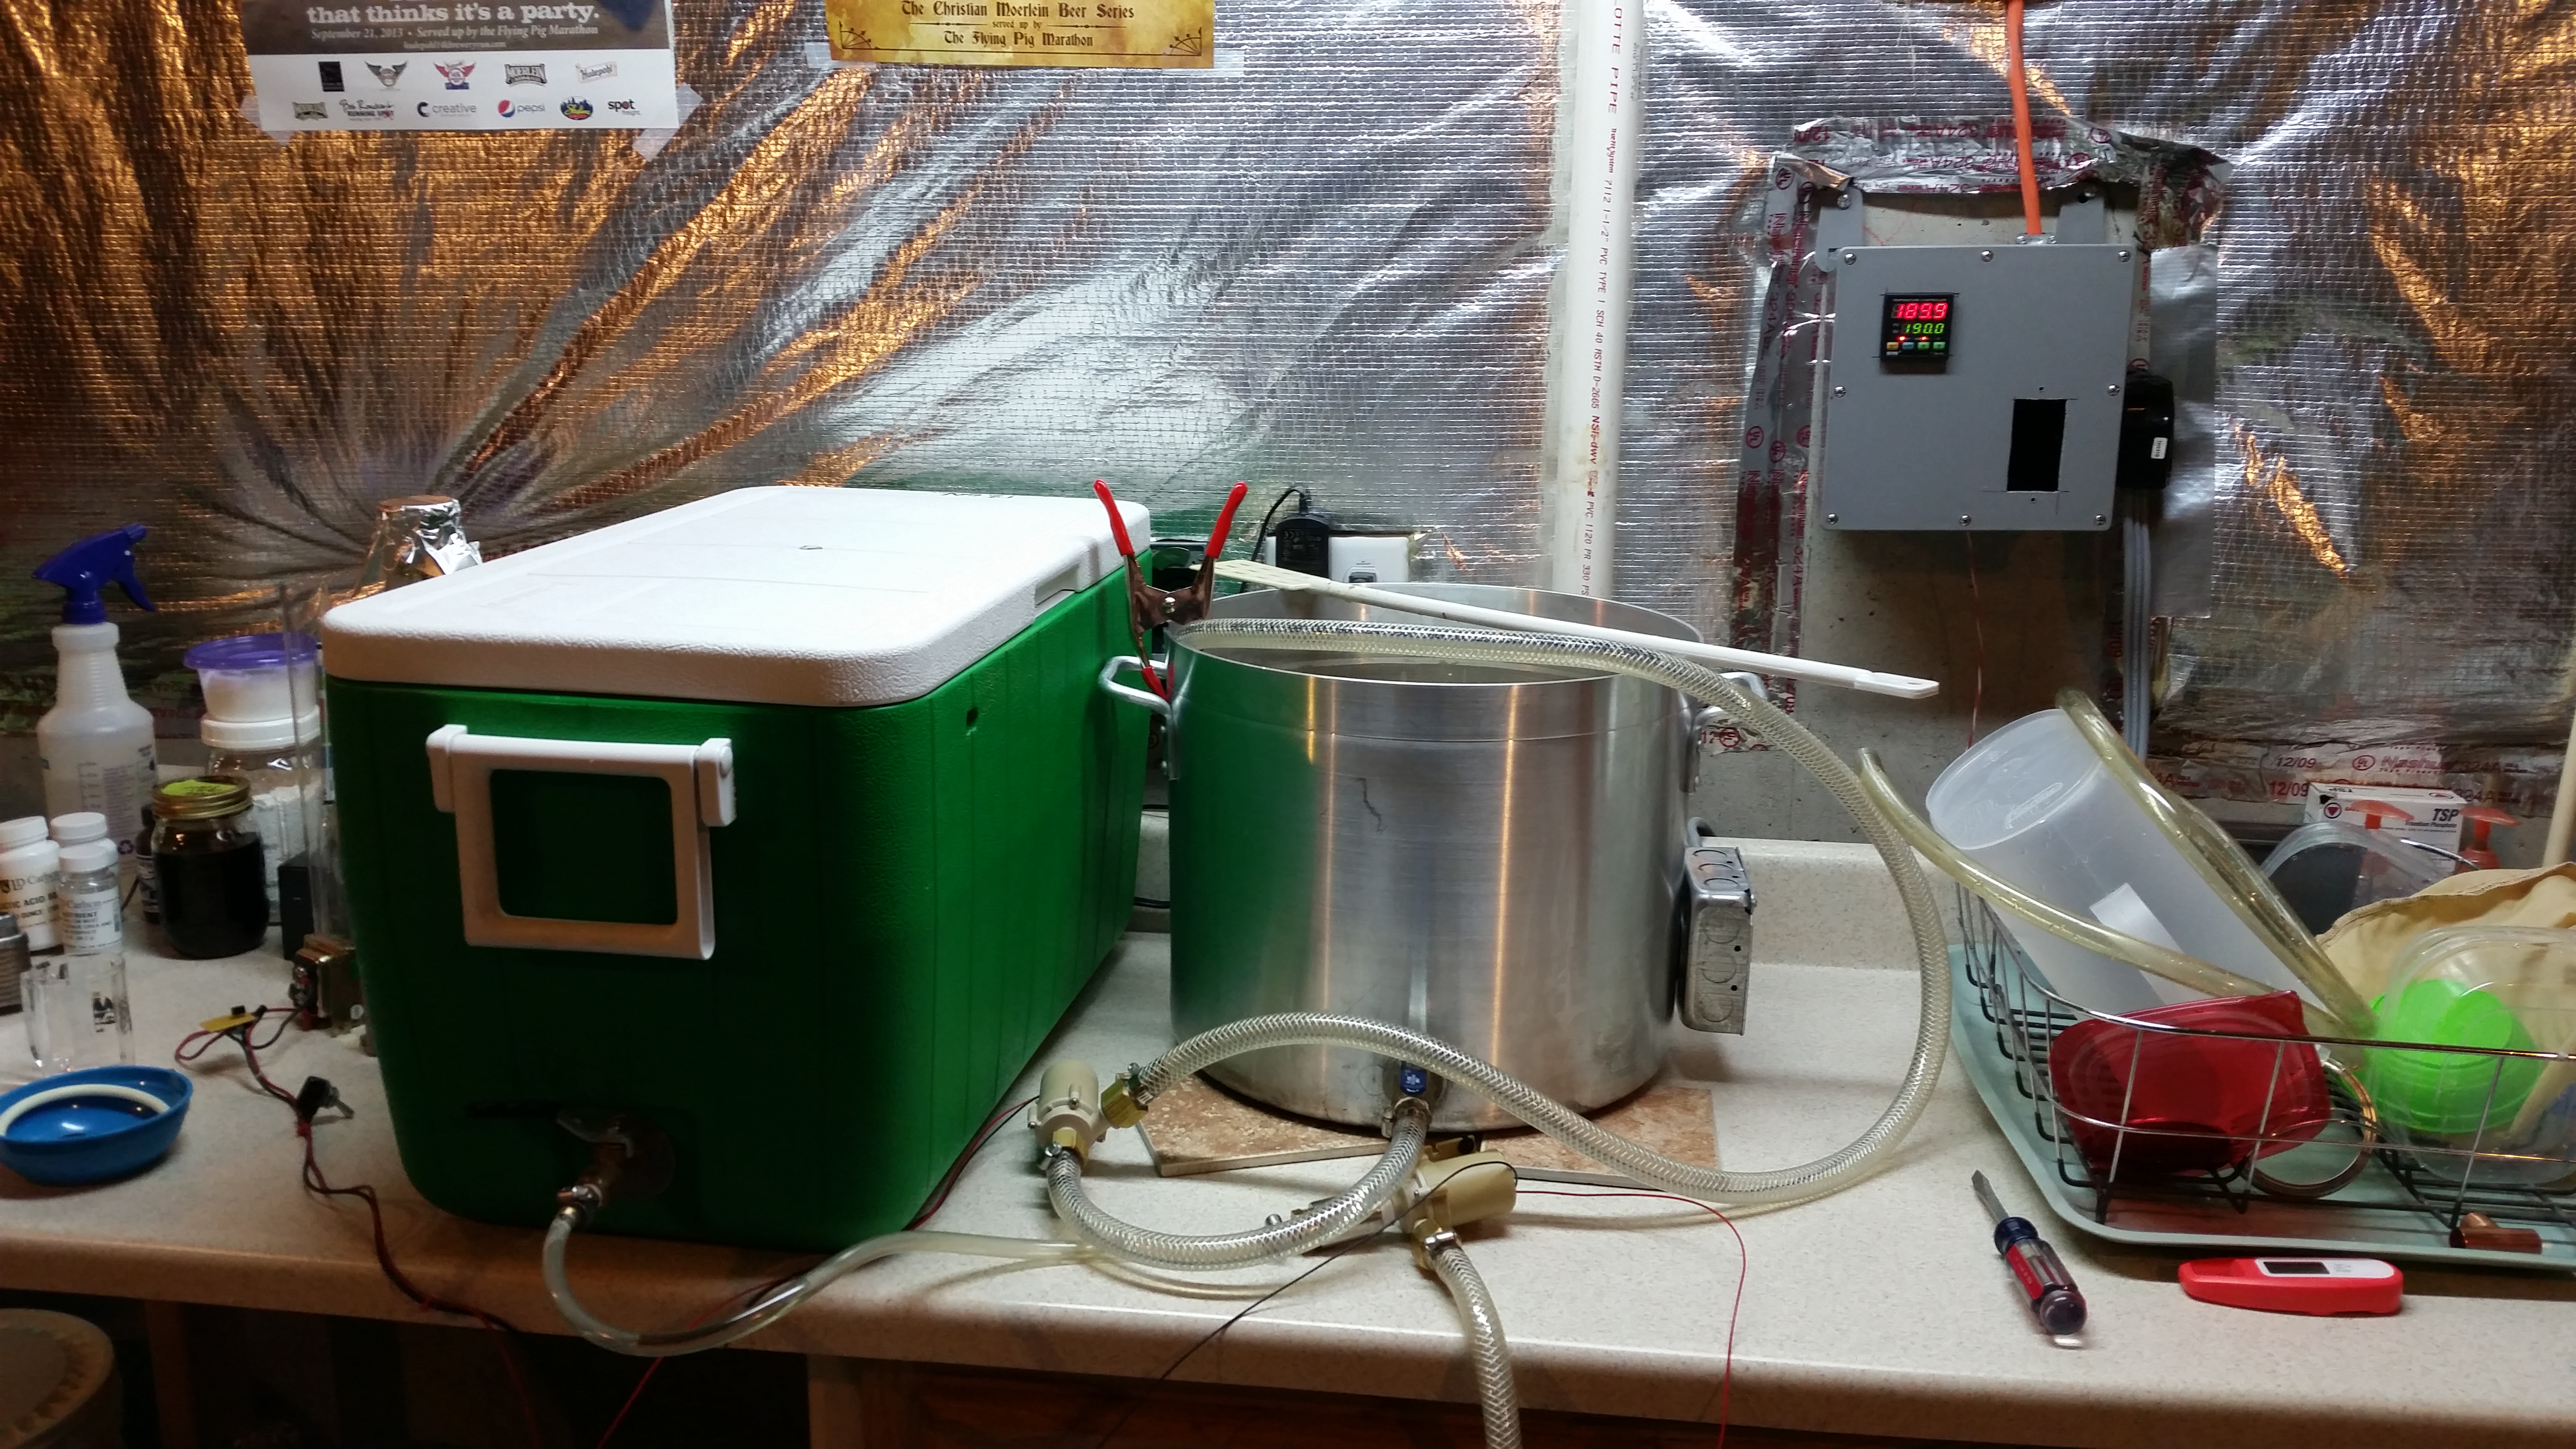
Brew Day: Vampire Dust Pale Ale and a Mead
Yesterday (at the time of writing) was Mead Day. Since I’m down to just a session wheat beer, I needed a pale ale, and I just wanted to make a mead.
Vampire Dust Pale Ale
Strike Water Additions
Crushed malt
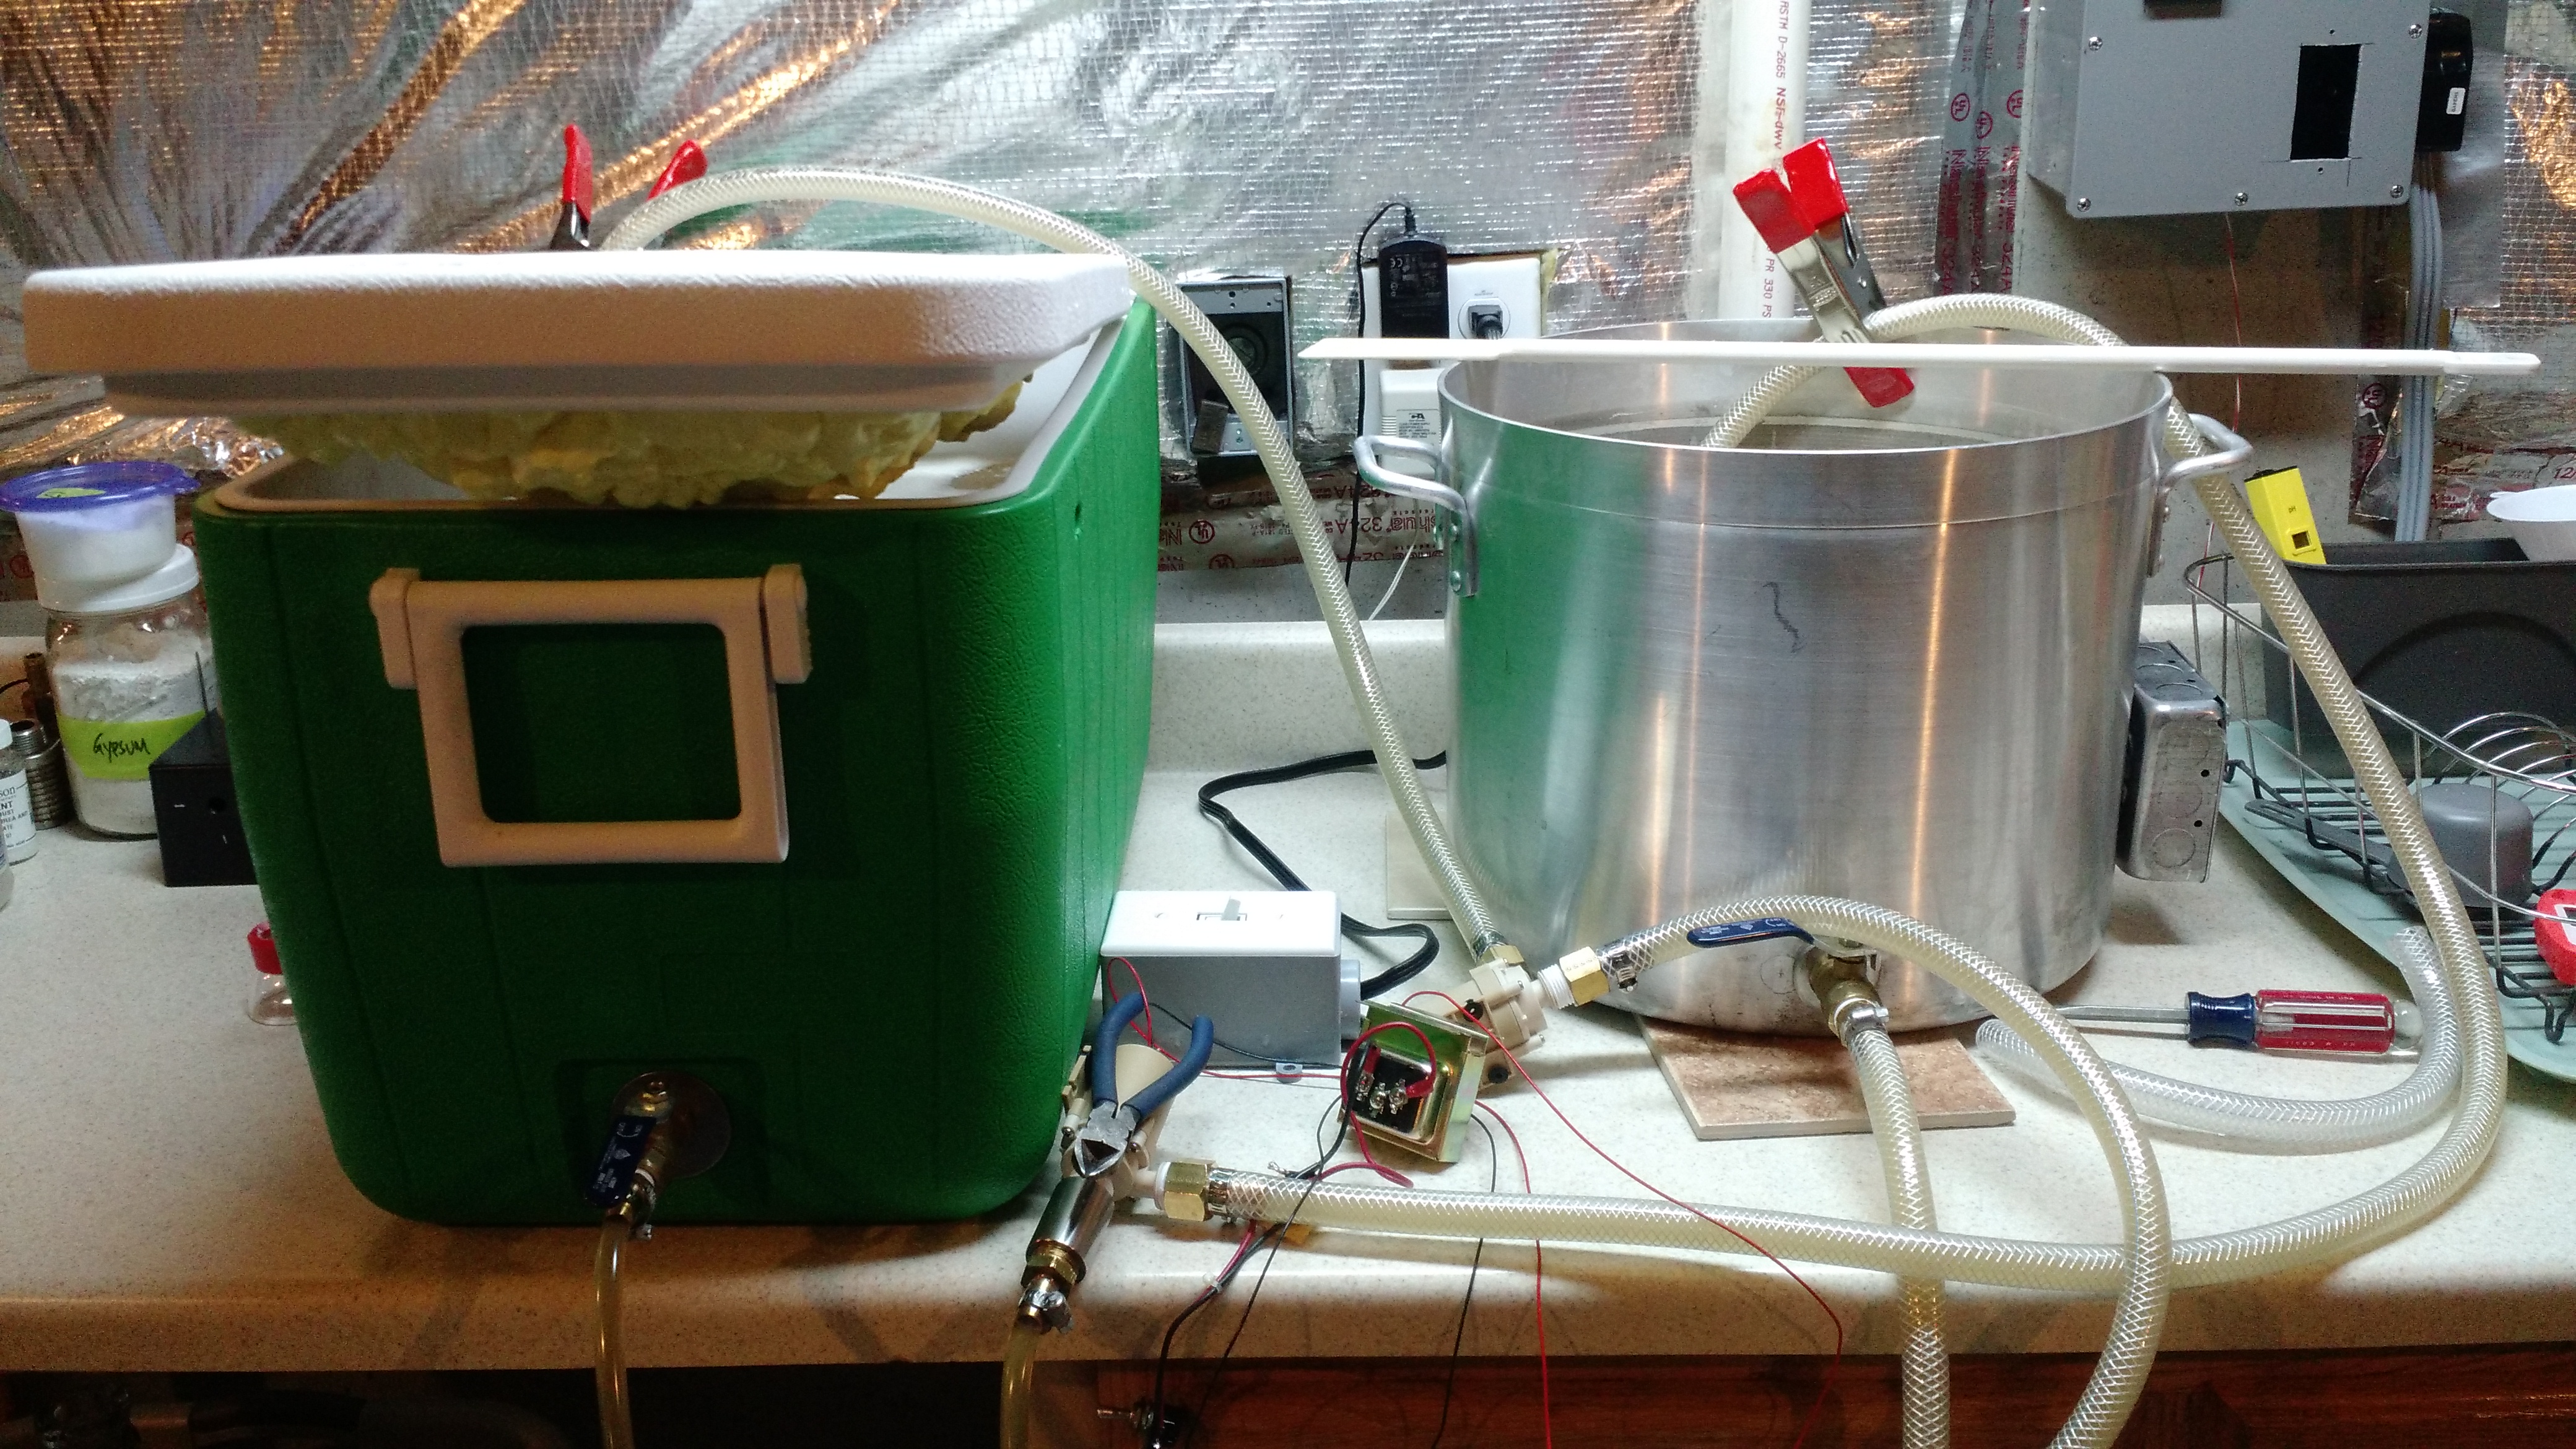
Redneck RIMS setup
Brewing went off with mostly few hitches except slowly hitting my strike temperature due to this redneck RIMS setup (to be documented further later).
Recipe Details
| Batch Size | Boil Time | IBU | SRM | Est. OG | Est. FG | ABV |
|---|---|---|---|---|---|---|
| 5.5 gal | 60 min | 44.9 IBUs | 5.2 SRM | 1.059 | 1.011 | 6.3 % |
| Actuals | 1.054 | 1.01 | 5.8 % | |||
Style Details
| Name | Cat. | OG Range | FG Range | IBU | SRM | Carb | ABV |
|---|---|---|---|---|---|---|---|
| American Pale Ale | 18 B | 1.045 - 1.06 | 1.01 - 1.015 | 30 - 50 | 5 - 10 | 2.3 - 3 | 4.5 - 6.2 % |
Fermentables
| Name | Amount | % |
|---|---|---|
| Brewer's Malt, 2-Row, Premium (Great Western) | 11 lbs | 90.72 |
| Carapils (Briess) | 12 oz | 6.19 |
| Caramel/Crystal Malt - 40L | 6 oz | 3.09 |
Hops
| Name | Amount | Time | Use | Form | Alpha % |
|---|---|---|---|---|---|
| Green Bullet | 0.5 oz | 60 min | Boil | Pellet | 13.5 |
| Citra | 1 oz | 15 min | Boil | Pellet | 12 |
| Citra | 1 oz | 5 min | Boil | Pellet | 12 |
| Citra | 3 oz | 7 days | Dry Hop | Pellet | 12 |
Miscs
| Name | Amount | Time | Use | Type |
|---|---|---|---|---|
| Irish Moss | 1.00 tsp | 15 min | Boil | Fining |
Yeast
| Name | Lab | Attenuation | Temperature |
|---|---|---|---|
| London Ale Yeast (1028) | Wyeast Labs | 75% | 60°F - 72°F |
Mash
| Step | Temperature | Time |
|---|---|---|
| Mash In | 148°F | 60 min |
Download
| Download this recipe's BeerXML file |
My First Mead
This is the fist time I’ve attempted mead, and I tried to keep it as simple as I can:
Ingredients: 4 lb Orange Blossom Honey, water to make 1g, yeast, LD Carlson Yeast Nutrient and LD Carlson Yeast Energizer
Yeast: Lavlin 71b, 5g
Process:
Rehydrate yeast with 125 ml water and 6.25g LD Carlson Yeast Nutrient
Add all honey to fermenter, water to 1 gallon, mix well. Pitch yeast. Forget to add first SNA (oops).
34 Brix!
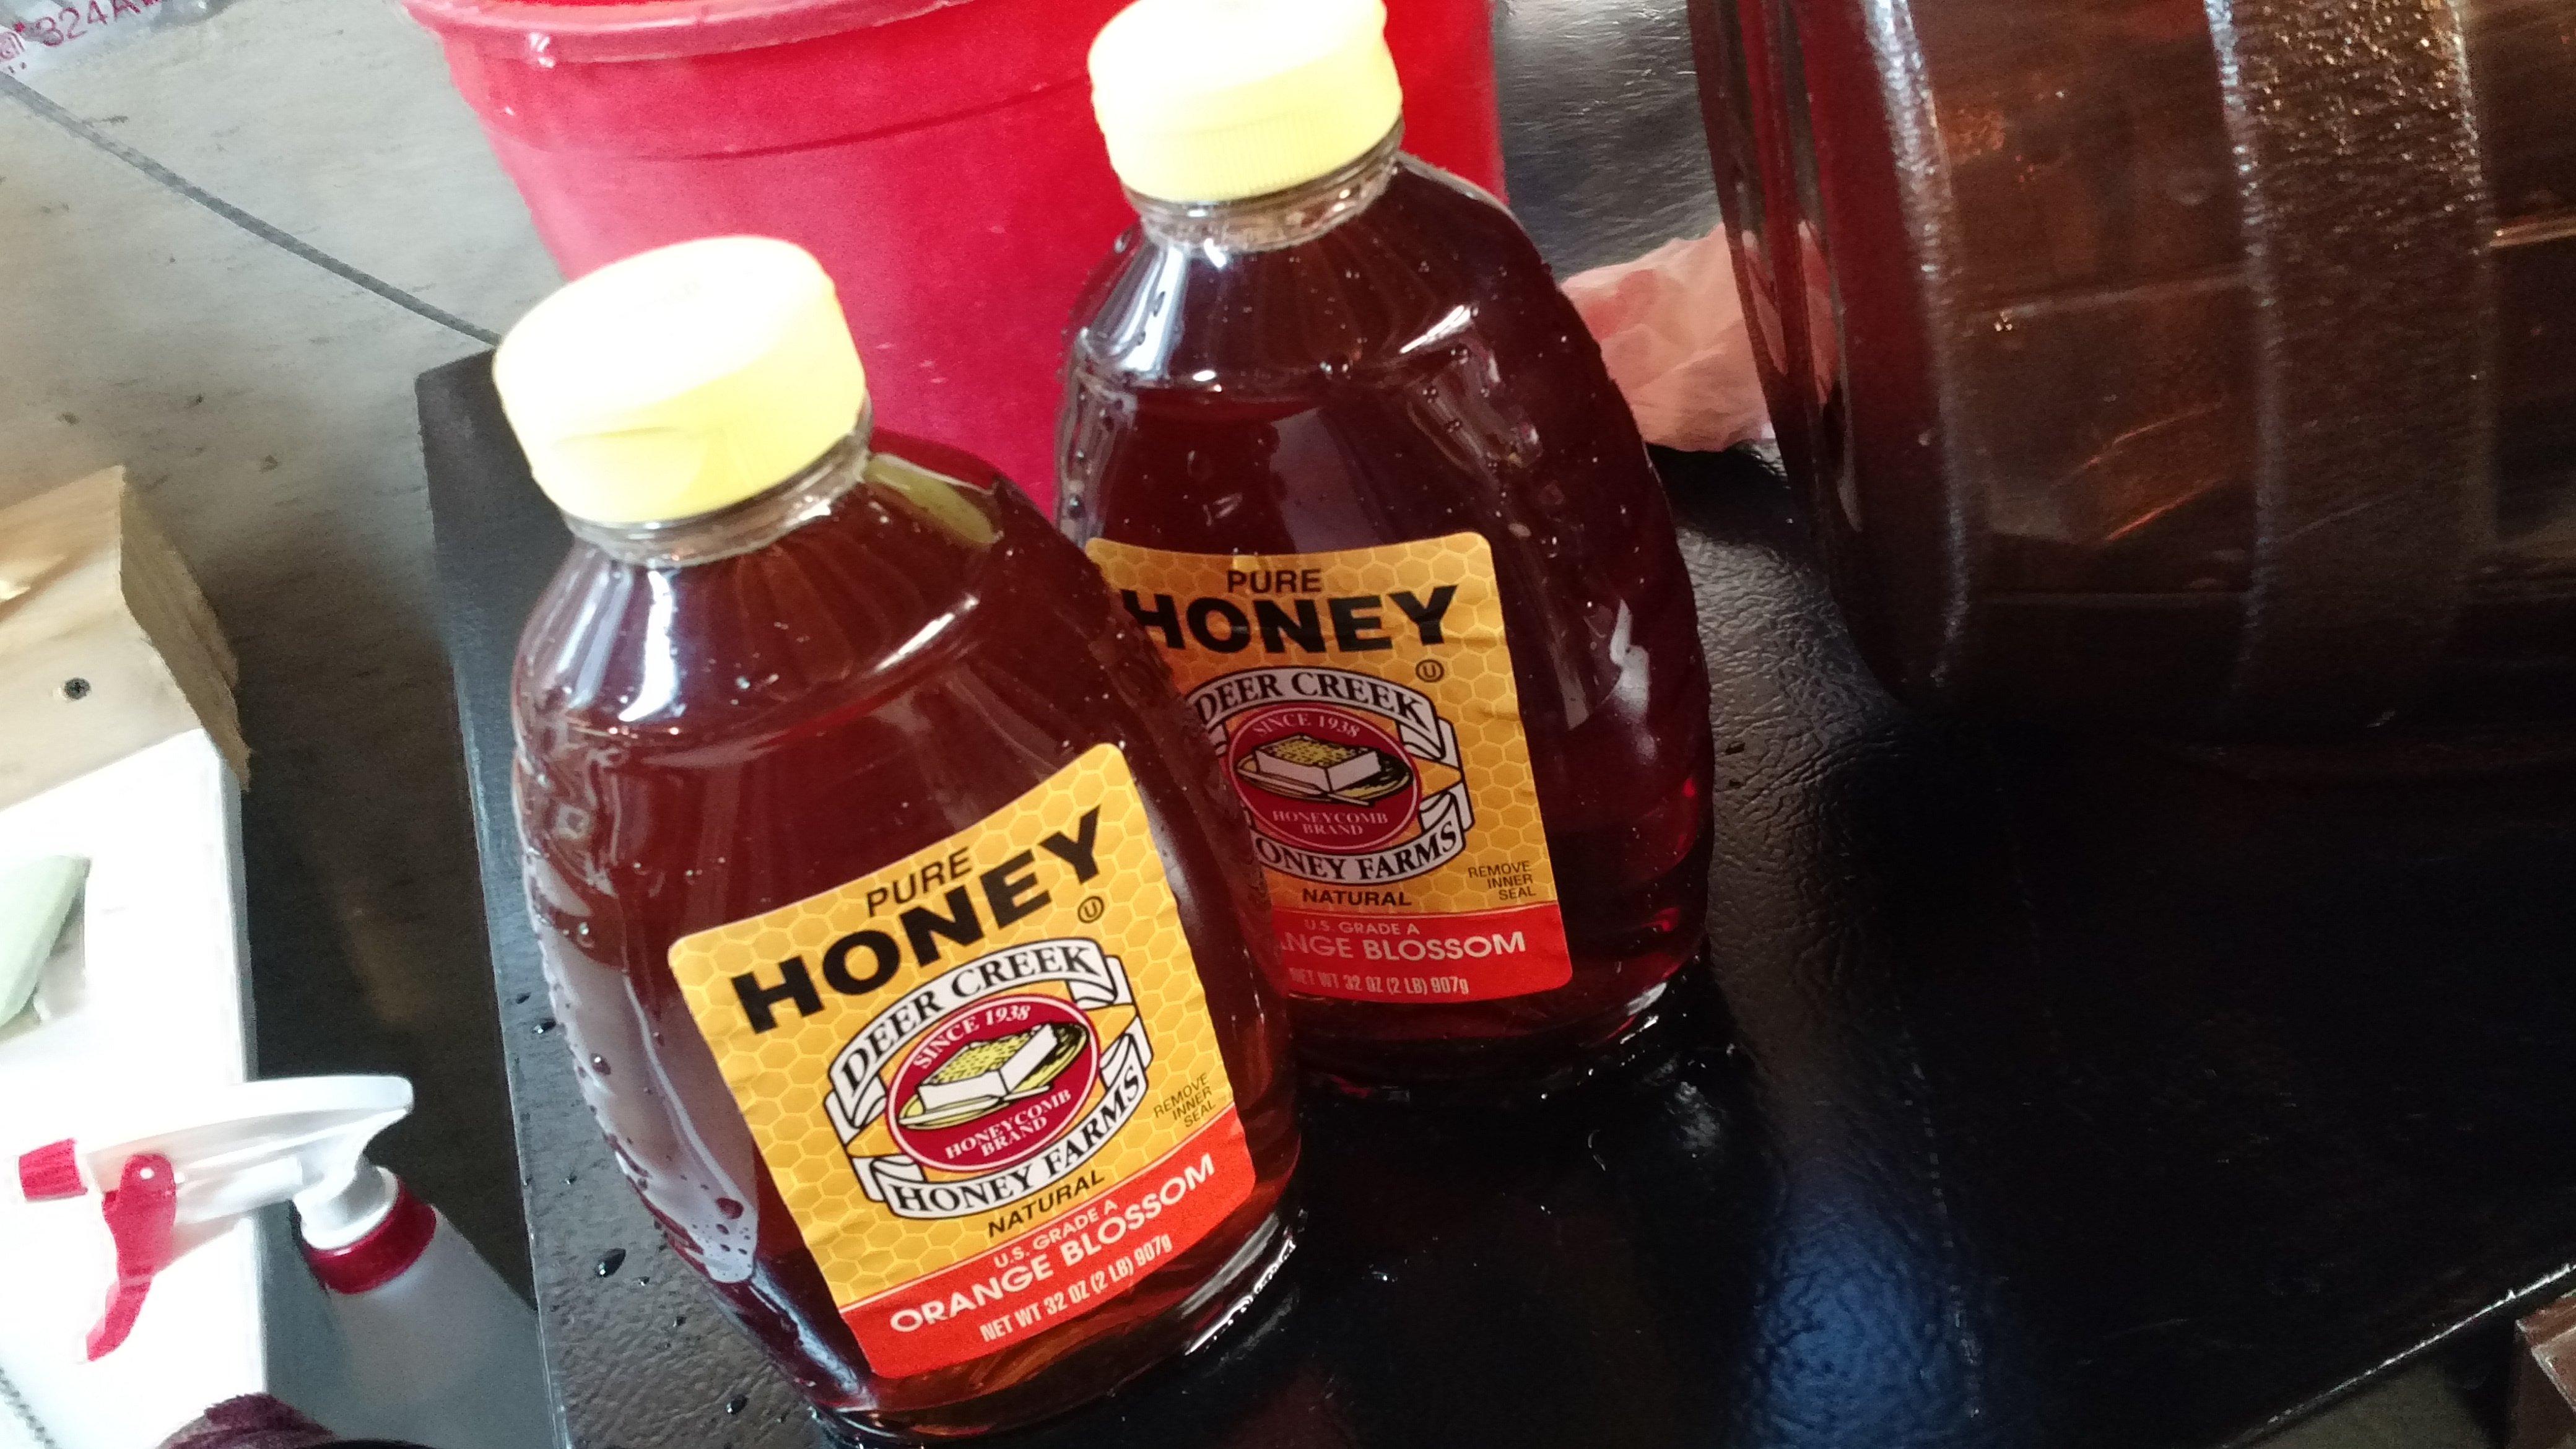
2 * 2lb Orange Blossom Honey… from Ohio?
Supplies. Putting the Mr. Beer into use.
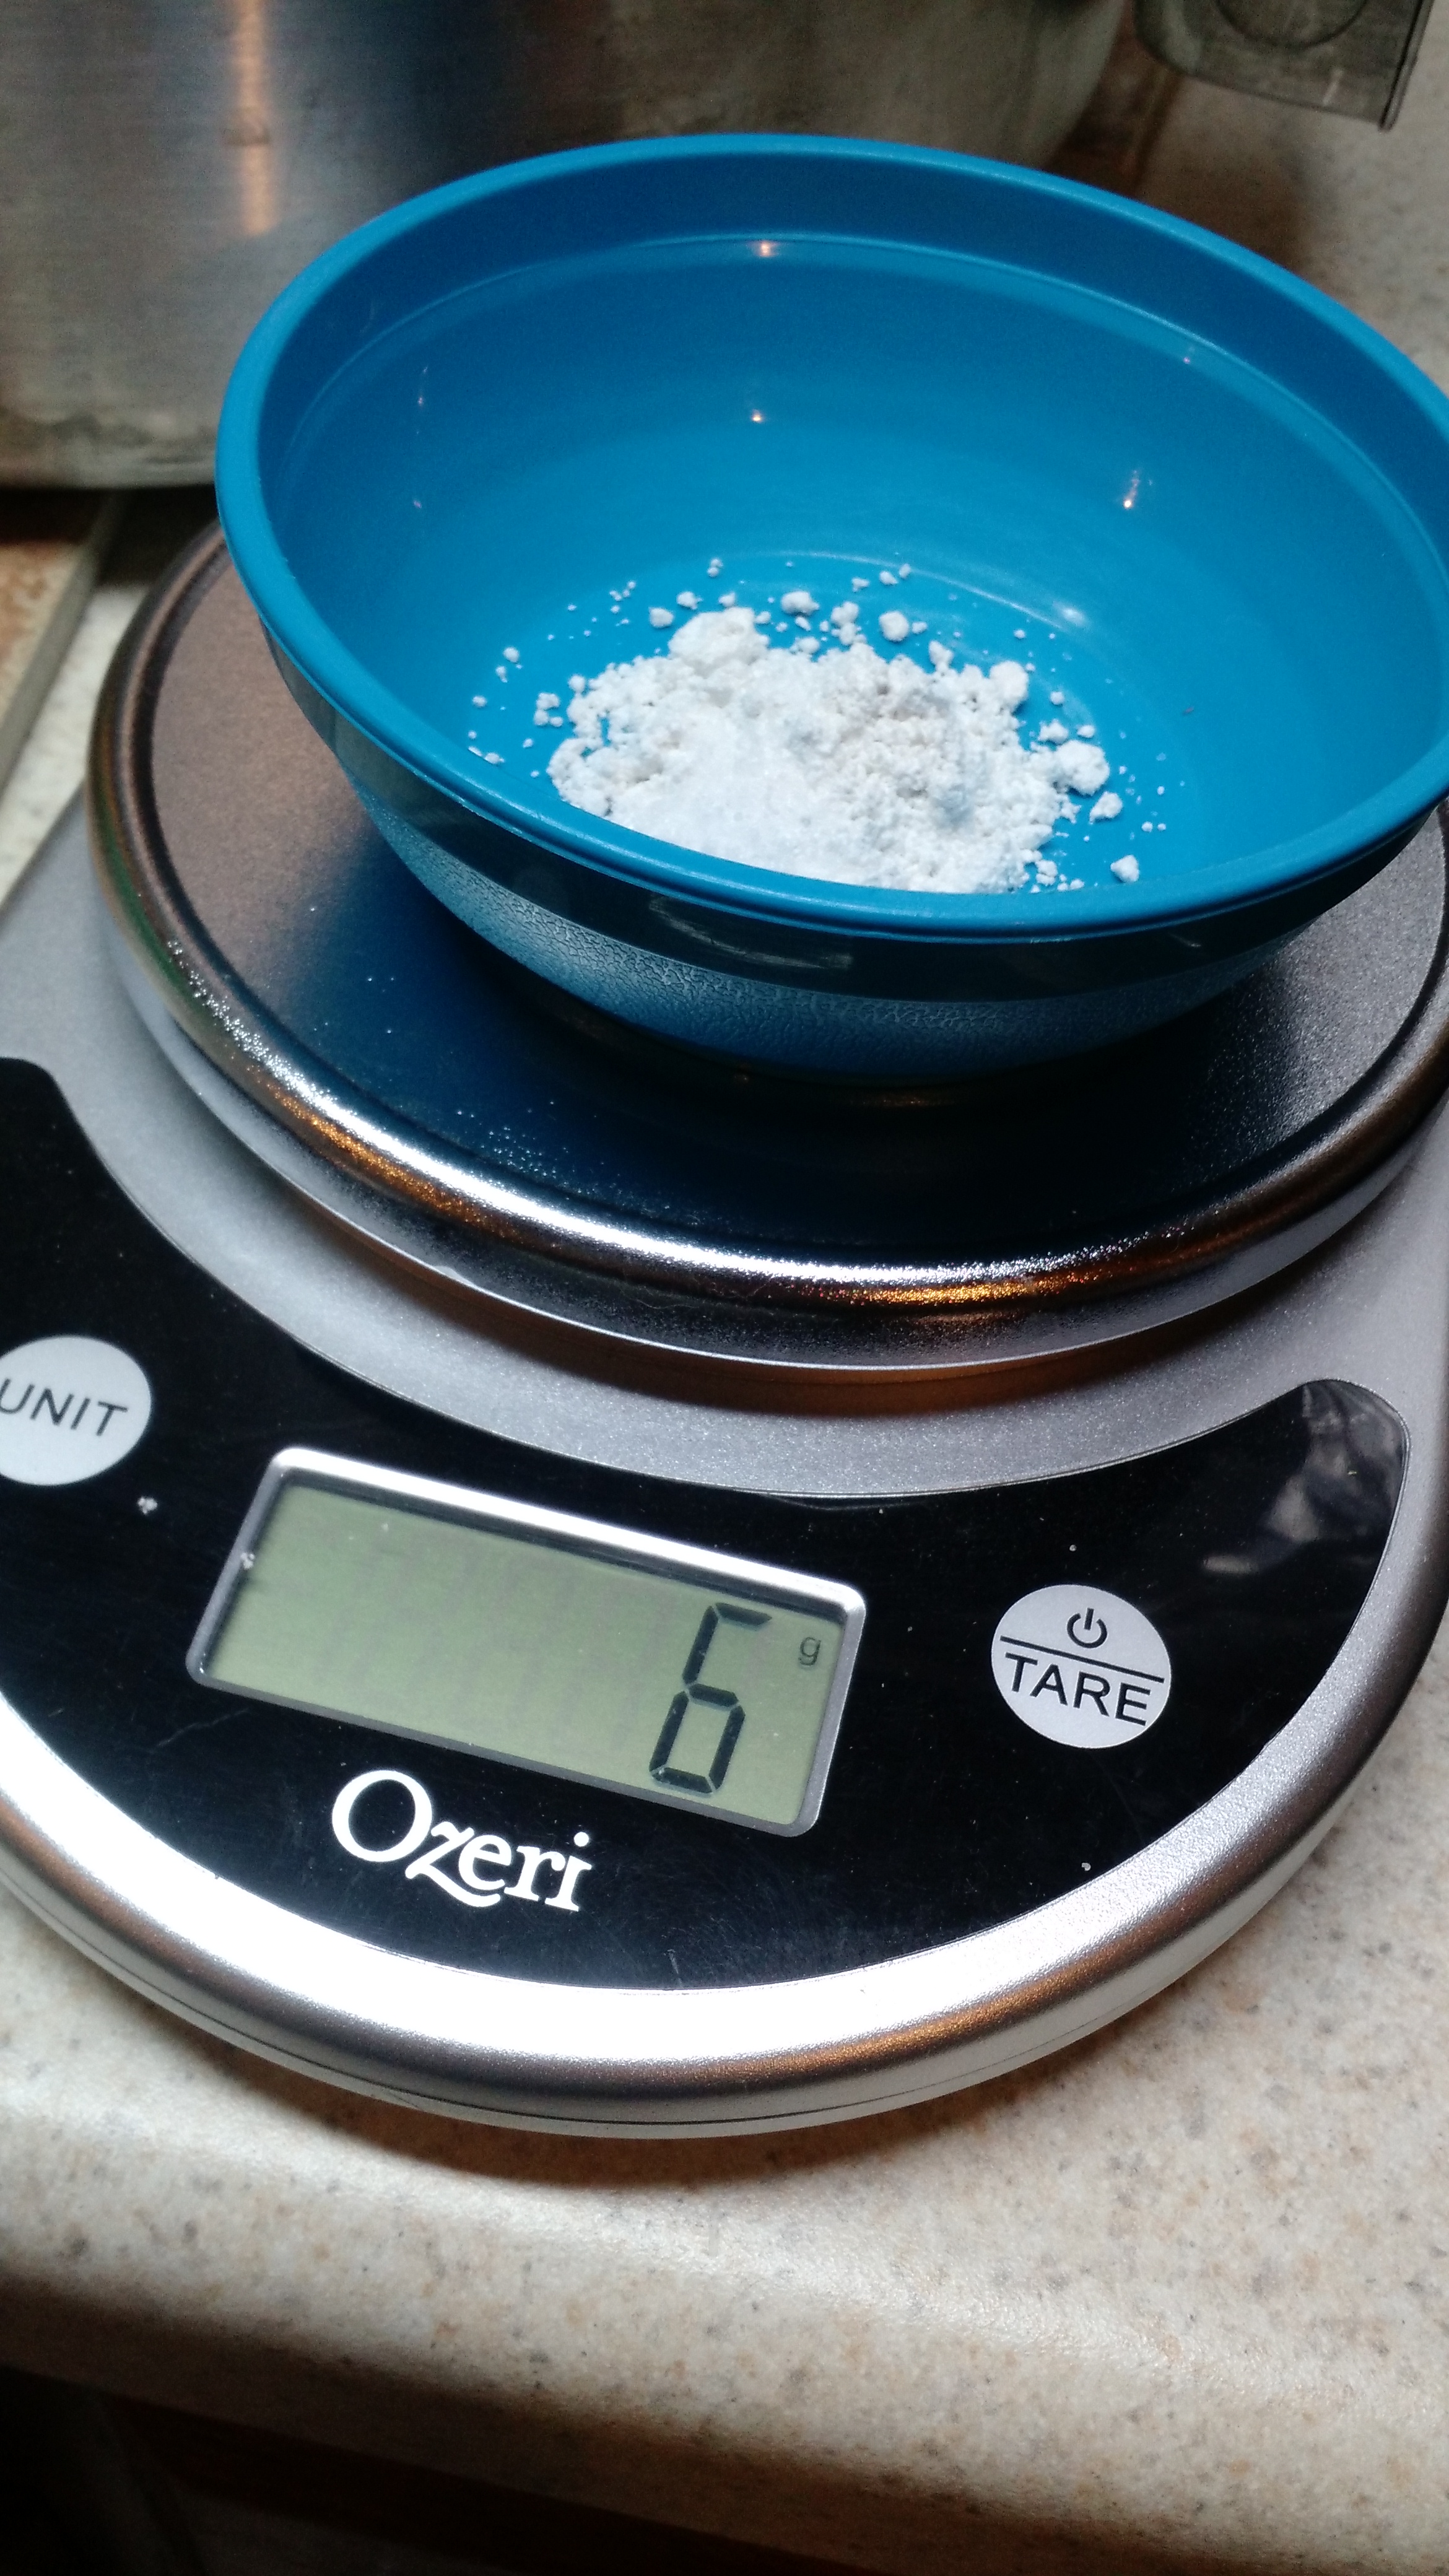
Following morning: add first two SNA’s, mostly because I don’t have a way to measure to tenths of grams.
The SNAs should be 0.4g Nutrient and 0.2g Energizer each addition, at pitch and at each of 24, 48, and 72 hours post-pitch.
Vampire Dust Pale should be ready in 10 days or so, the mead will be a while.
Cheers!
My First Sour: a Flanders Red?
I’ve been wanting to do a few sours for a while, and recently purchased two Better Bottles for the purpose of one being a sour-only fermenter. I’m merging two recipes, one is the on the Milk The Funk Wiki, which is the malt bill for The Rare Barrel beers. Since it is only part of a recipe, I took the other part from the Flanders Red Solera recipe from the Bloatarian Brewing League (a Cincinnati homebrew club) – specifically the hopping, mashing schedule, and yeast.
Water
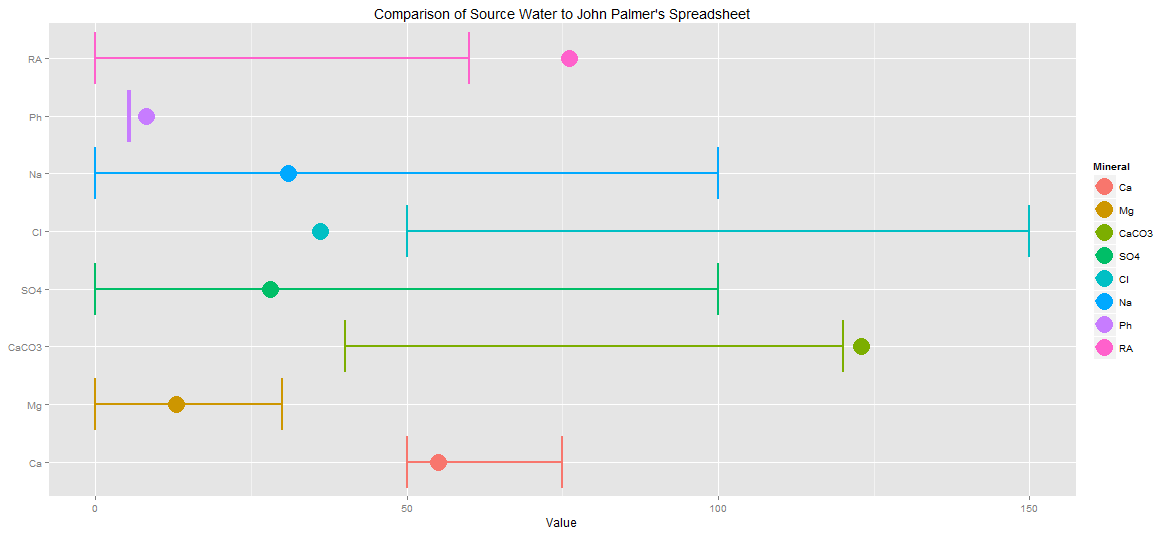
My base water is pretty close for a Flanders Red, just a tad alkaline.
Base Ranges for a Flanders Red
The only adjustments are basically pH, so once I add a milliliter of Lactic Acid, it puts the water right in line with where it needs to be.
Adjusted Water
Recipe
Recipe Details
| Batch Size | Boil Time | IBU | SRM | Est. OG | Est. FG | ABV |
|---|---|---|---|---|---|---|
| 5.5 gal | 60 min | 17.1 IBUs | 13.4 SRM | 1.053 | 1.012 | 5.4 % |
| Actuals | 1.046 | 1.01 | 4.7 % | |||
Style Details
| Name | Cat. | OG Range | FG Range | IBU | SRM | Carb | ABV |
|---|---|---|---|---|---|---|---|
| Flanders Red Ale | 23 B | 1.048 - 1.057 | 1.002 - 1.012 | 10 - 25 | 10 - 16 | 2 - 2.7 | 4.6 - 6.5 % |
Fermentables
| Name | Amount | % |
|---|---|---|
| Pilsner (2 Row) Bel | 8 lbs | 71.11 |
| Wheat Malt (Barrett Burston) | 1.5 lbs | 13.33 |
| Caramel/Crystal Malt - 60L | 8 oz | 4.44 |
| Oats, Flaked | 8 oz | 4.44 |
| Vienna Malt (Briess) | 8 oz | 4.44 |
| Carafa II | 4 oz | 2.22 |
Hops
| Name | Amount | Time | Use | Form | Alpha % |
|---|---|---|---|---|---|
| Mt. Hood | 1 oz | 45 min | Boil | Pellet | 6 |
Miscs
| Name | Amount | Time | Use | Type |
|---|---|---|---|---|
| Lactic Acid | 1.00 ml | 60 min | Mash | Water Agent |
| Oak Chips | 4.40 oz | 7 days | Secondary | Flavor |
Yeast
| Name | Lab | Attenuation | Temperature |
|---|---|---|---|
| Roselare Belgian Blend (3763) | Wyeast Labs | 80% | 55°F - 80°F |
Mash
| Step | Temperature | Time |
|---|---|---|
| Mash In | 156°F | 90 min |
Download
| Download this recipe's BeerXML file |
This is still in progress, and the oak is questionable at this point.
Down The Rabbit Hole of Water Adjustments
Where I got started on this subject
This all started when I saw a blog post on Practical and Low Cost Water Adjustments. The author there is pretty convincing on the importance of this. Following links from that site, I found this. “Rerun” claims to live “just inside of Clermont County, about a mile east of Beechmont Ford”. I happen to live 5 miles east of Beechmont Ford. Our water in Clermont County comes from three sources and goes into a common distribution system (in other words, they’re all connected).
Coming Brew Day
I eat a lot of Mexican food (well, perhaps “Mexican inspired and styled American food”), and I know that two styles seem to work best: Amber Ale and Vienna Lager. I decided to go with a lager since my fermentation chamber is going to become a keezer. I happen to also see a traditional Vienna Lager on Five Blades Brewing’s website.
Due to availability, I had to substitute Carafa II for the Blackprinz,and carapils for carafoam (there is a lengthy discussion on the difference here). I also added and extra half of a pound of Vienna to compensate for the slightly lower efficiency of my system.
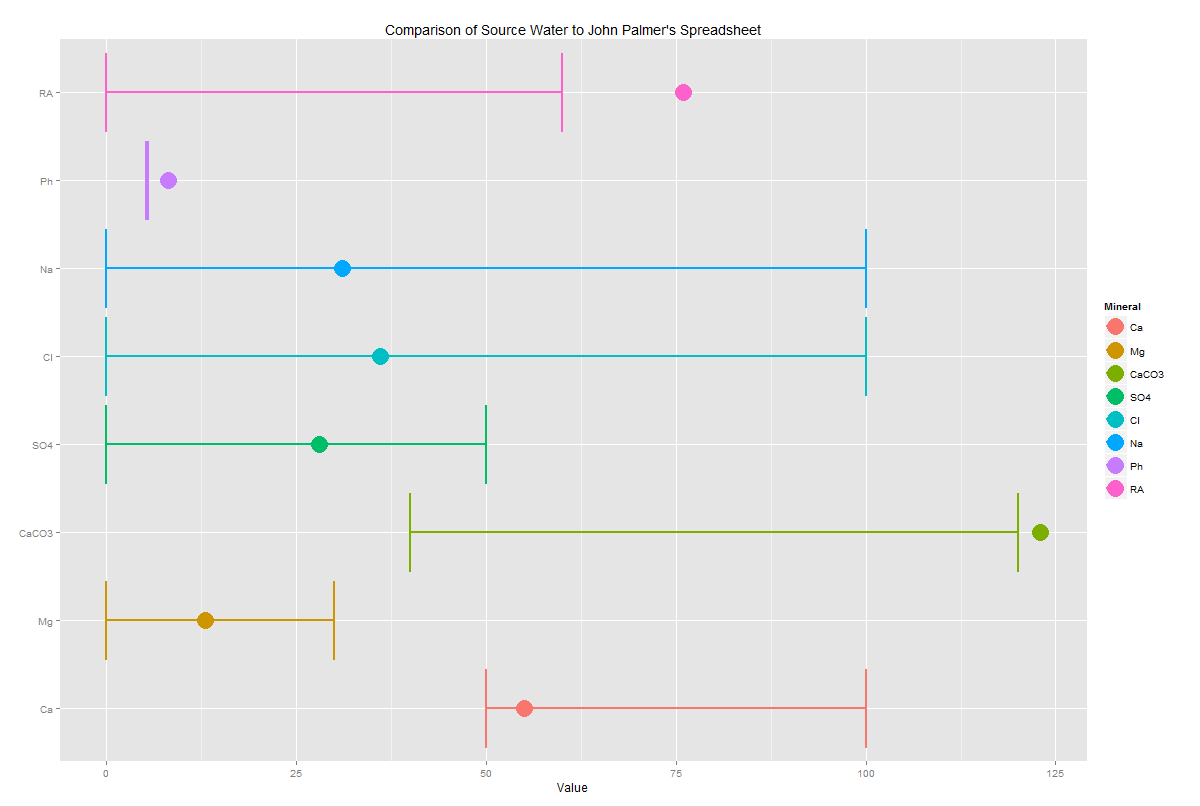
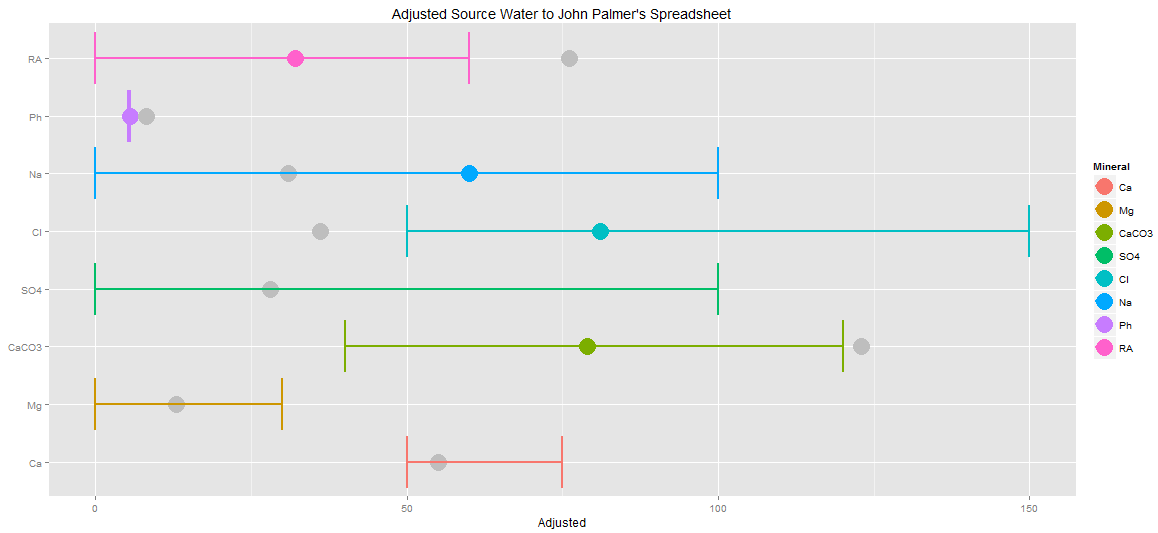
Looking at my source water compared to what John Palmer’s spreadsheet says to use, I’m in range for most of the minerals except for being low on chloride and high on hardness (both calcium carbonate and residual alkalinity).
Source water from report with Vienna Lager ranges.
Water Adjustments
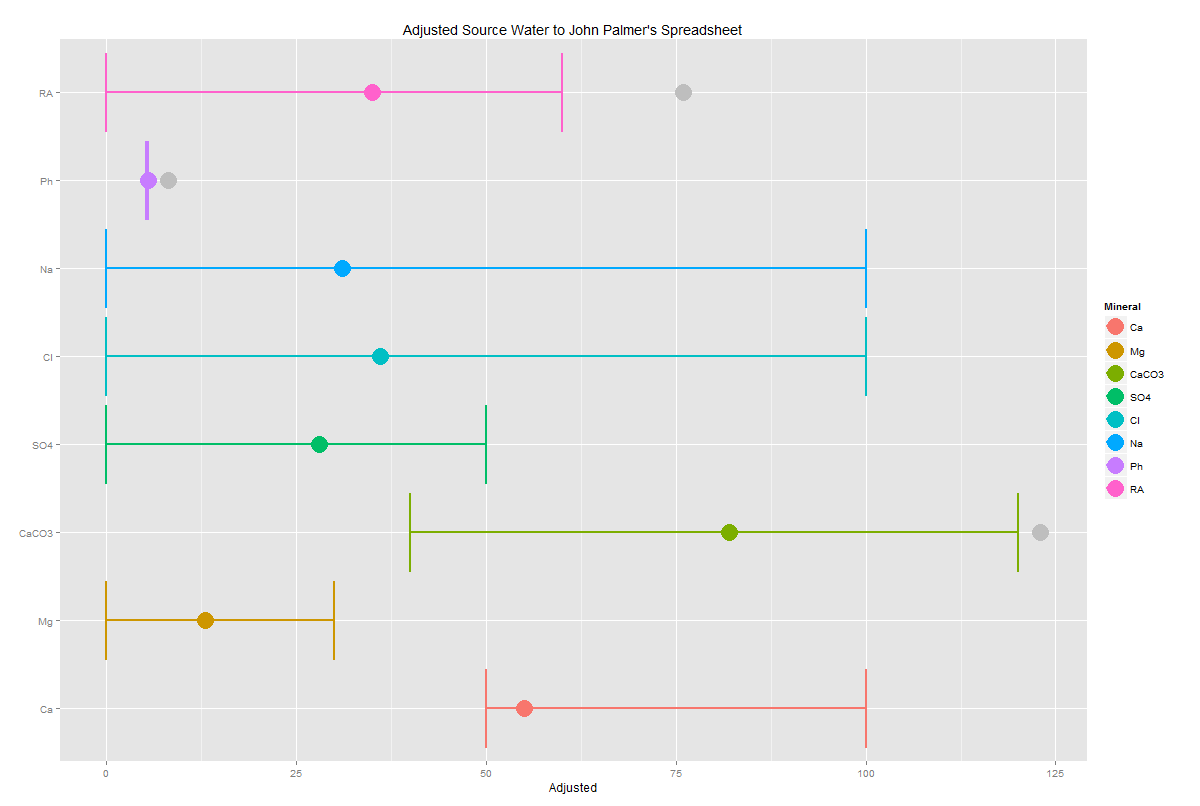
I got John Palmer’s water spreadsheet from the BrewLab kit website. It’s an older version, an updated one is on the How To Brew website. The spreadsheet is fairly easy to use – select a style (from the 2008 styles, not a big deal, really), input my source water info (the boxes are YELLOW), input my RA (I used 0) and my strike water (3.53 gallons). I skipped dilution (left the rate at 0%). The next parts – mineral additions, acid, and results all work together – I looked at where I wasn’t in the range – which was only chloride, and added a gram of a mineral that provides chloride. That mineral is canning salt (NaCl, sodium chloride), so after adding a gram I noticed I was near the middle of the chloride range without exceeding the sodium range (up to 100 ppm). I also saw that total alkalinity was too high (by a measly 3 ppm), but that kept the residual alkalinity up high (76 compared to 0-60) which appears to cause the beer to be darker than expected (and this is expected, as I think all my beers have been darker than I planned). I added a milliliter of 88% lactic acid which reduced the total alkalinity to the middle of the range and the color to 7 – 14 SRM (the target is 10-16, the beer as planned is 10.4 SRM).
Finally, I went down to step 8, which is sparge water treatment. I’m sparging with 6 gallons, so I input the recommended 4 ml of lactic acid for my sparge water.
In the end, 1 gram of canning salt (pure sodium chloride) and 1 ml of lactic acid to the strike water, and 4 ml of lactic acid to the sparge water.
Adjusted water minerals
I’m typing this on Saturday night and I brew on Sunday. We’ll see how this works out.
Cheers!
Bottling N’ Stuff – Cream Stout
As much as I was hoping to make this my first kegged beer, I haven’t actually purchased any kegs and my keezer is currently in use as a freezer. Since I was given a $25 Amazon gift card, I decided to make my life a little easier in bottling with one of those bottle trees.
New Equipment in the Batavia Basement Brewing Company.
It looks lighter than it is, courtesy of the foil-backed insulation in the basement.
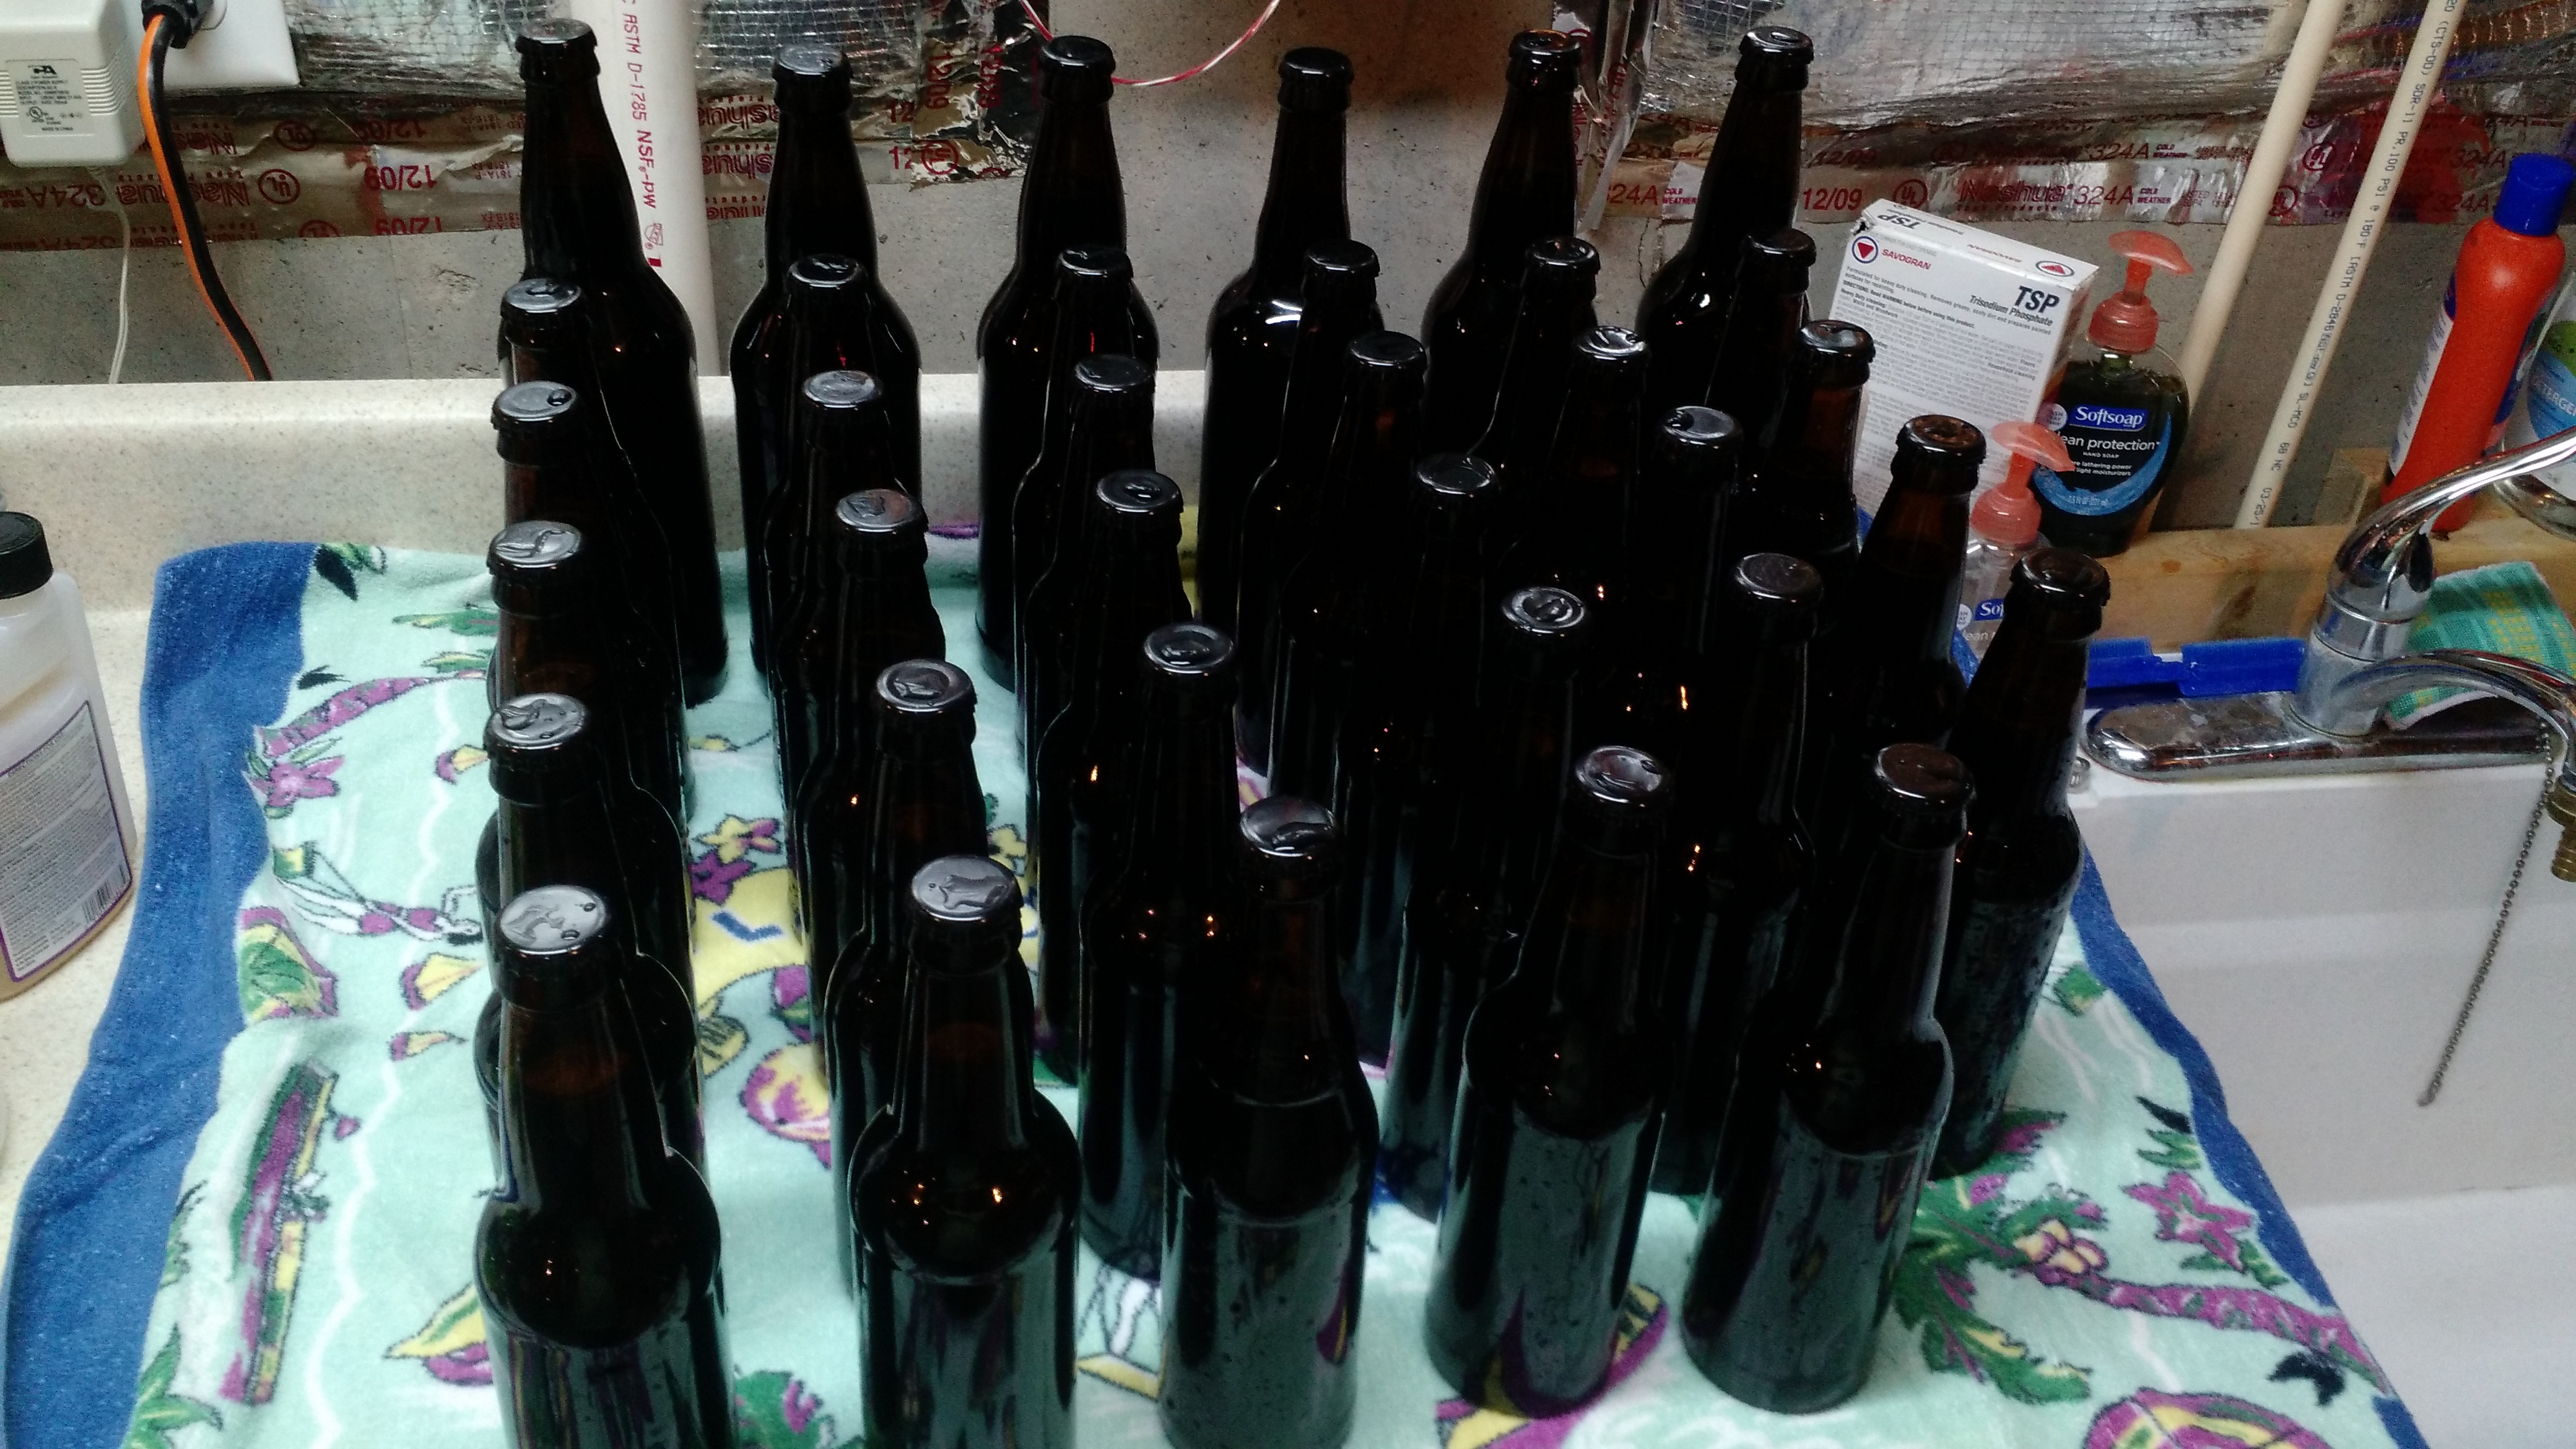
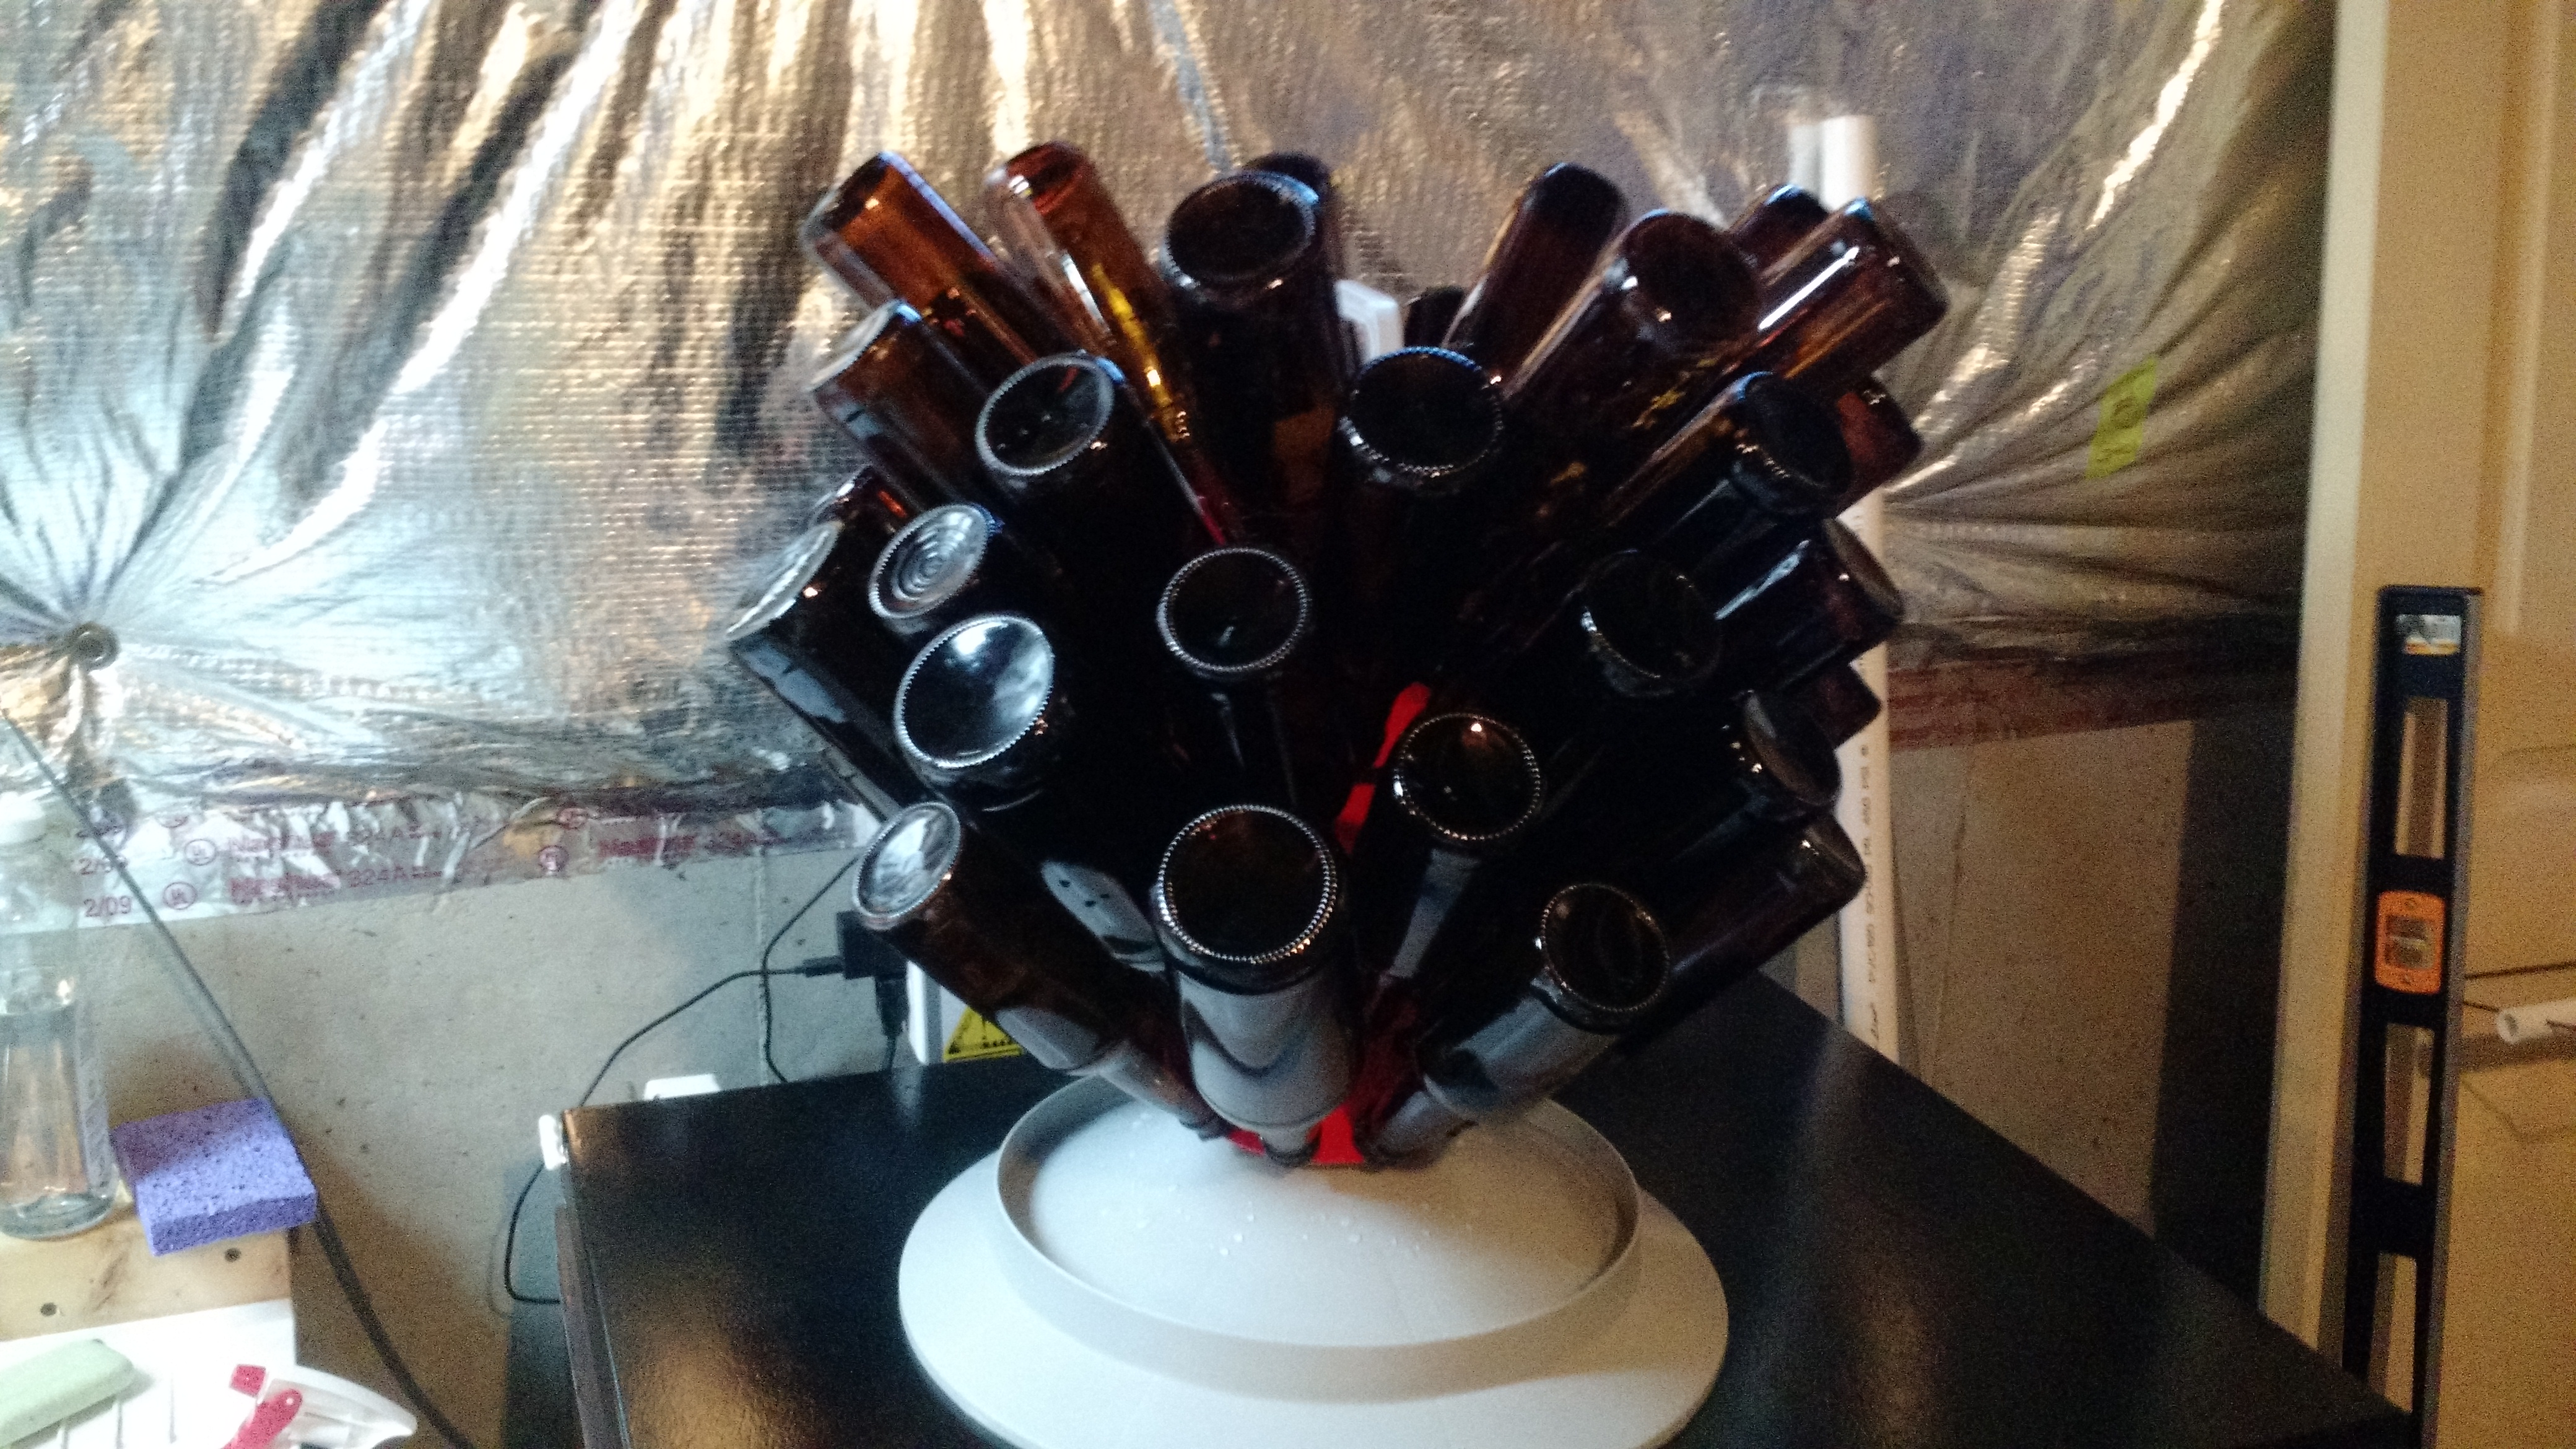
Pretty little bottles all in a row. 29 12-oz and 6 22-oz.
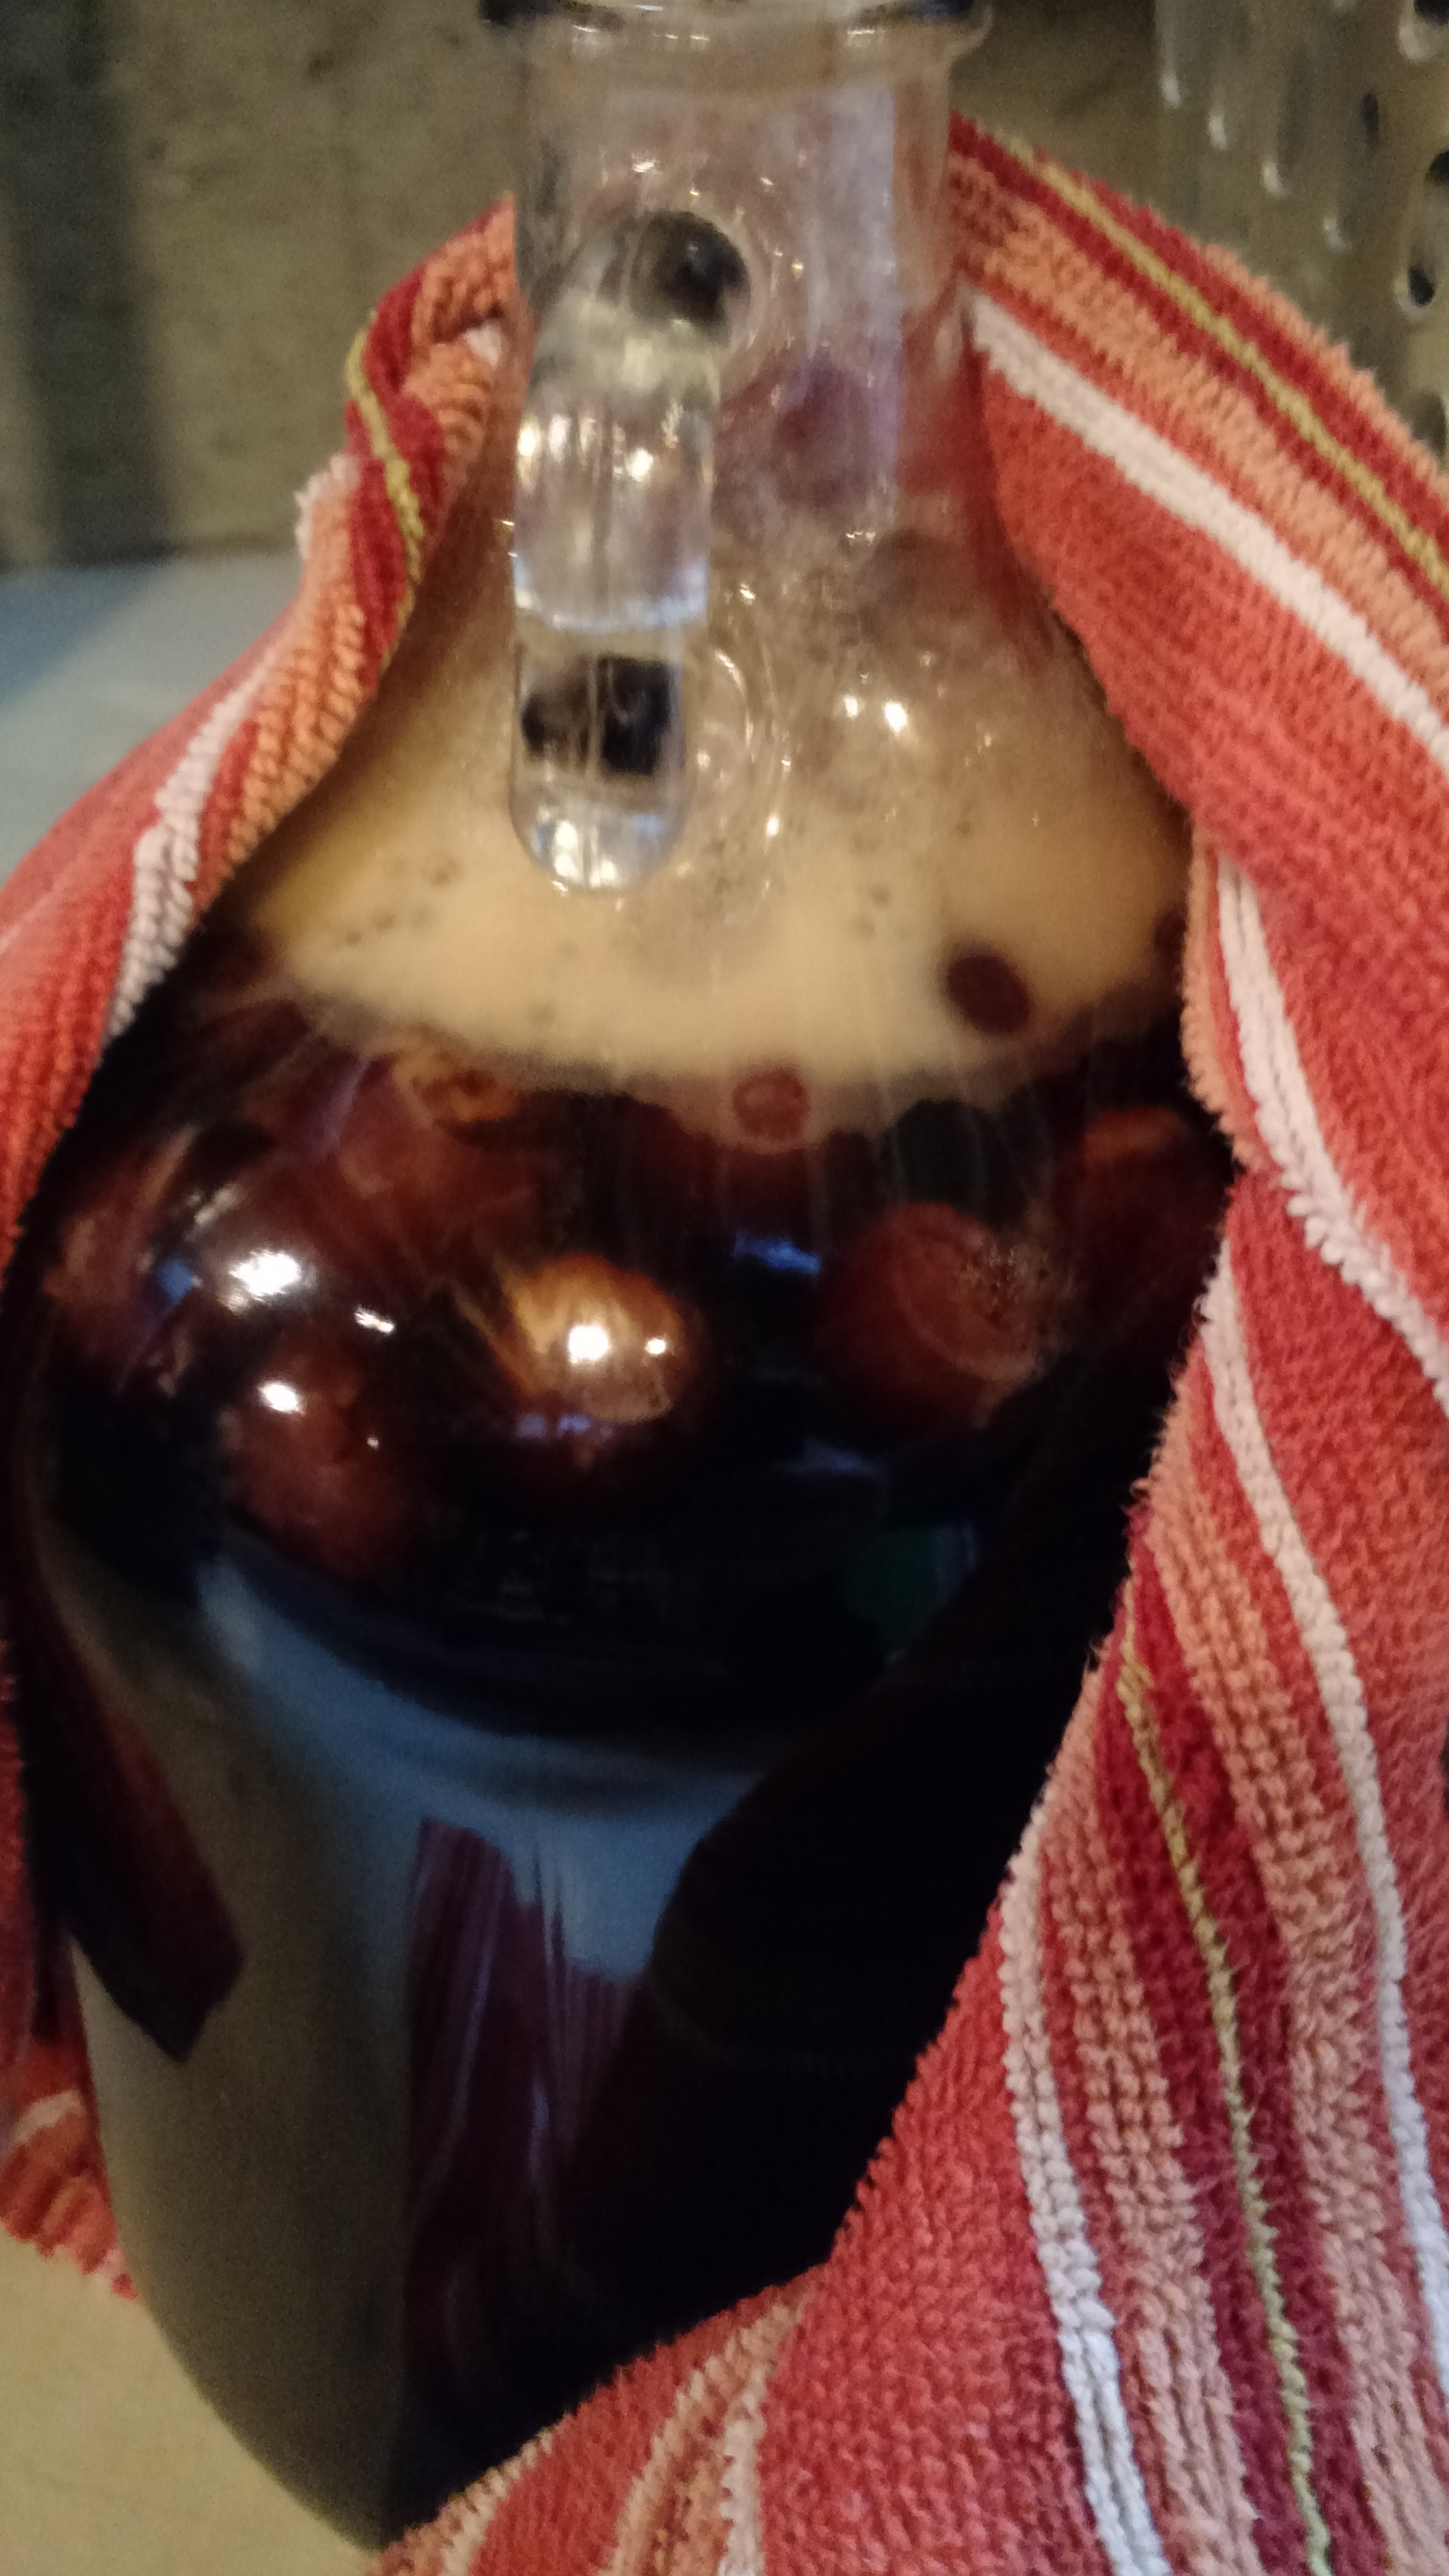
Racked one gallon off and put it on cherries.
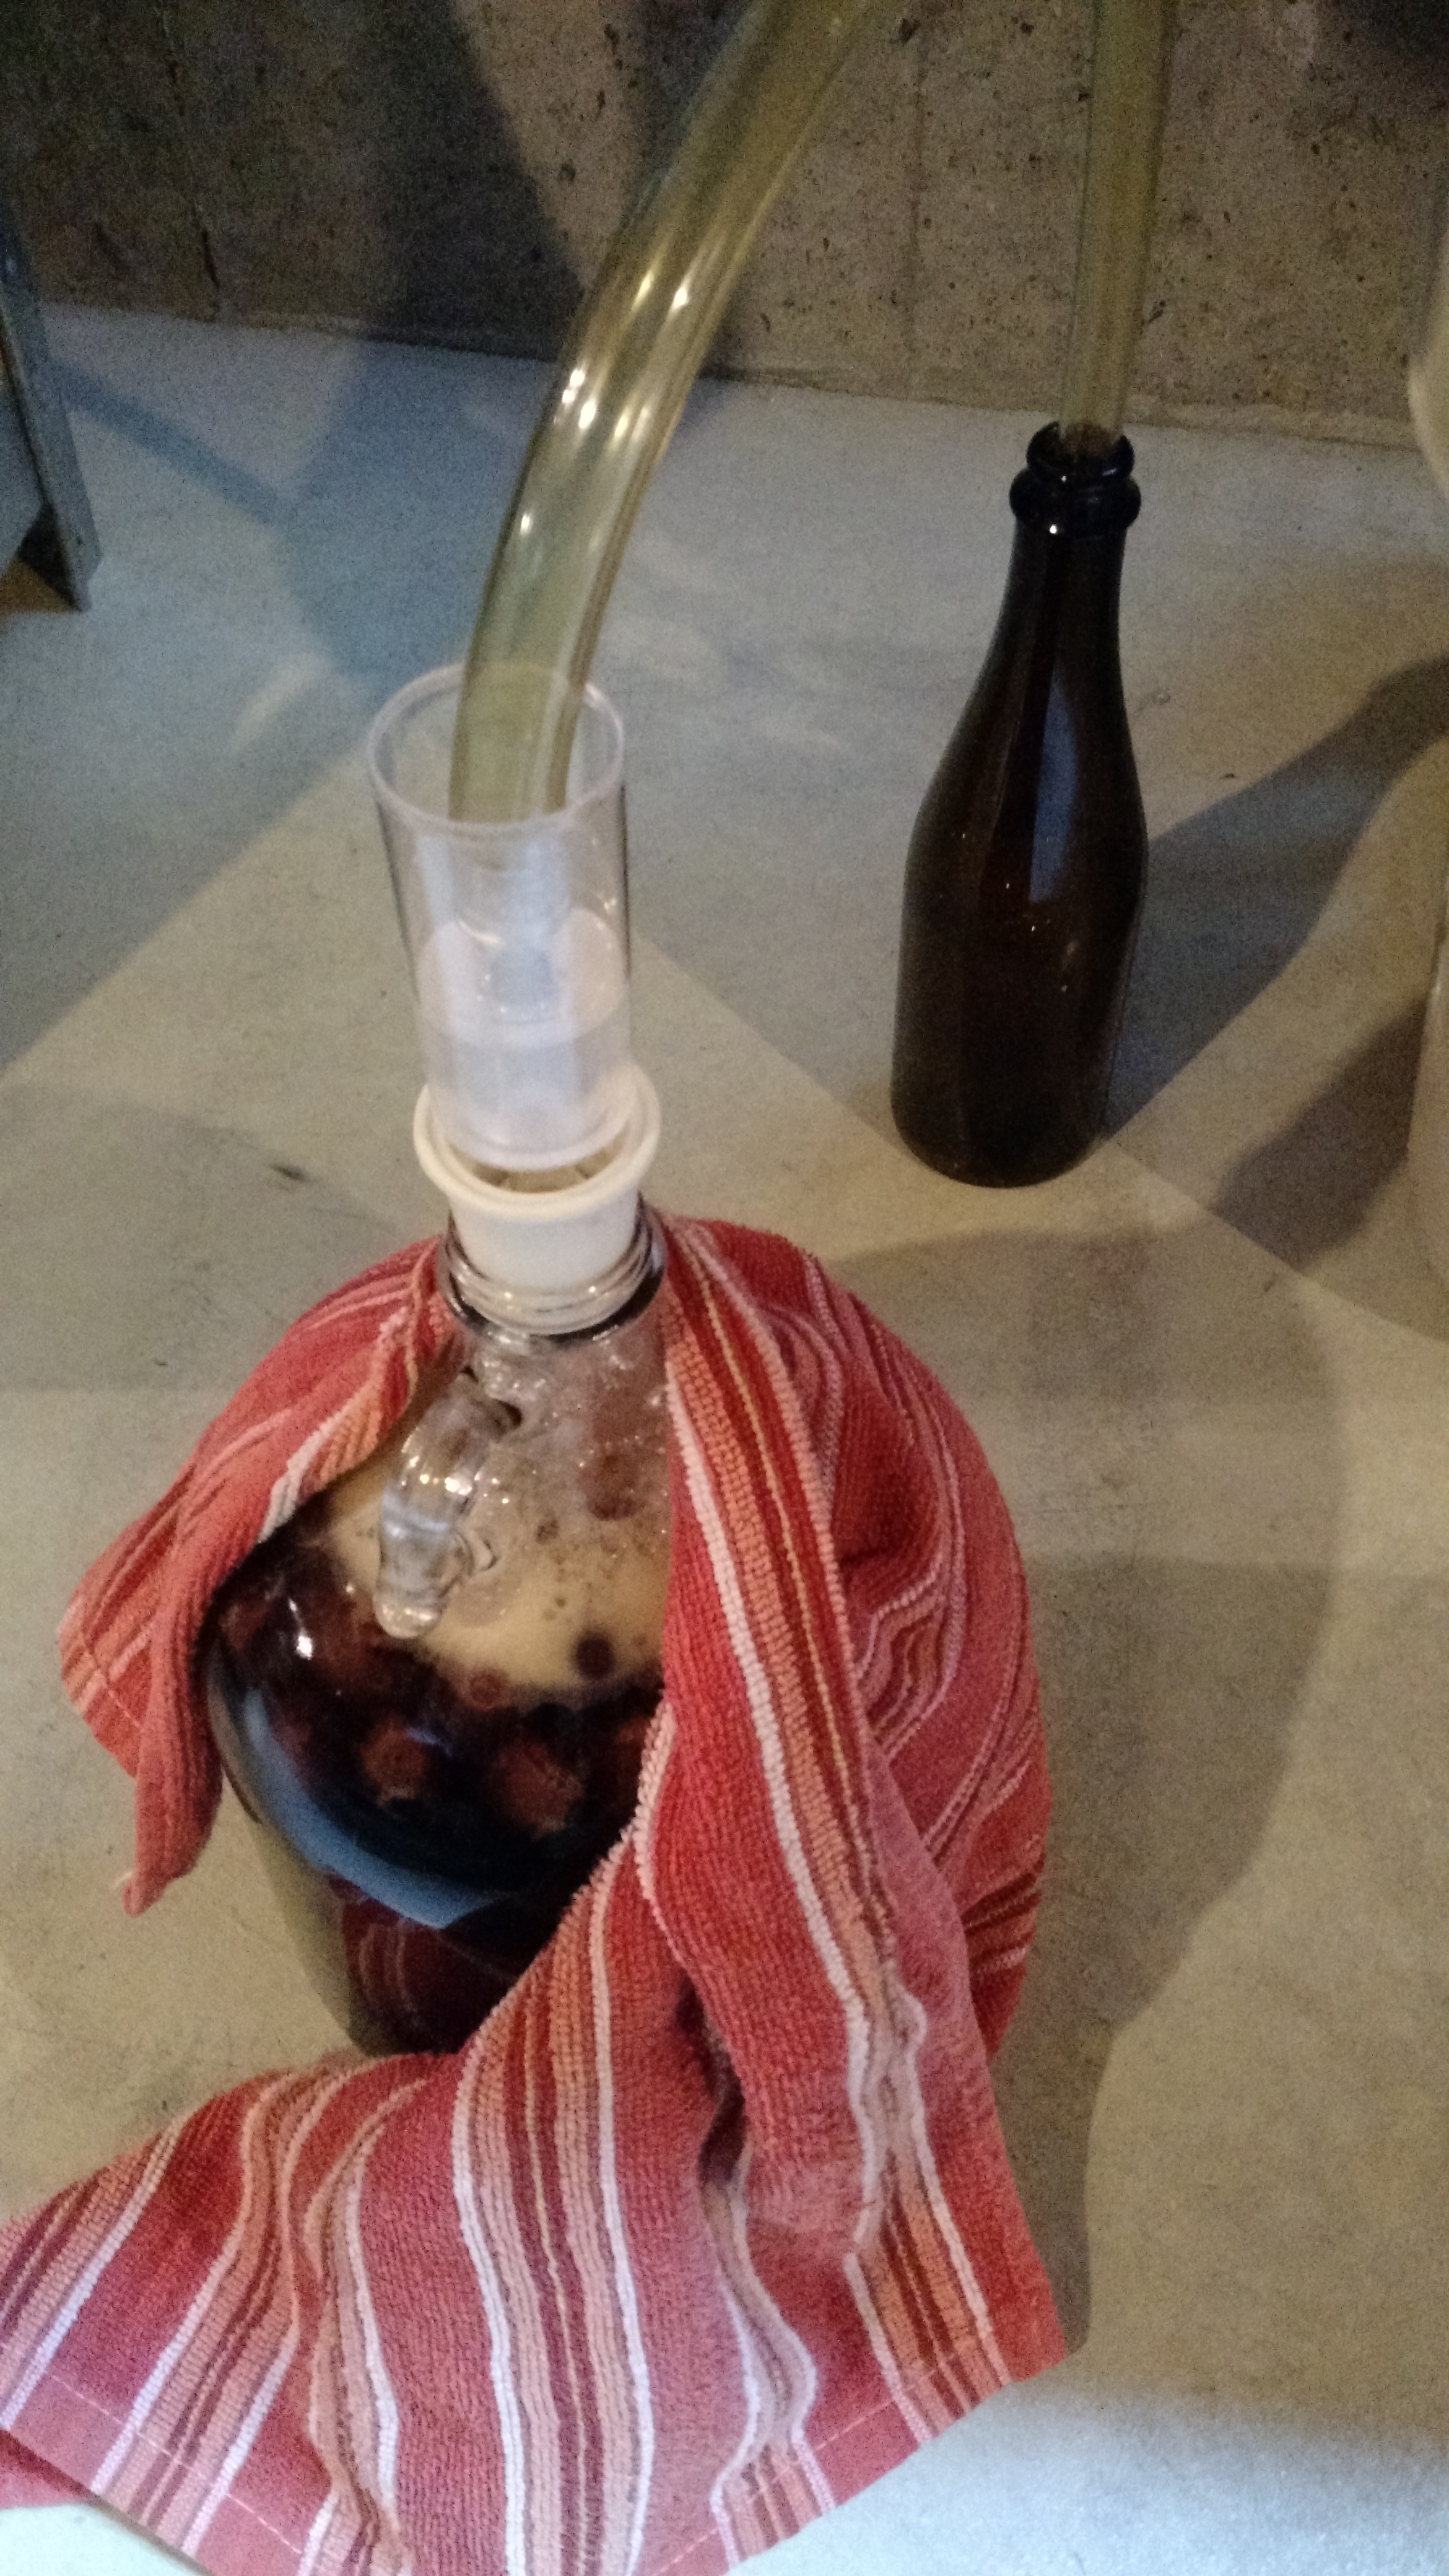
Definitely used a blow-off tube for this! The towel is to protect from UV light.
I have some pictures of the brew day and was intending to write that blog post before this one, but there is a lot more that is going to go into that, so things will just have to be out of order. Regardless of that, first taste of this will likely be on 11/21. And I’m really looking forward to it.
Cheers!
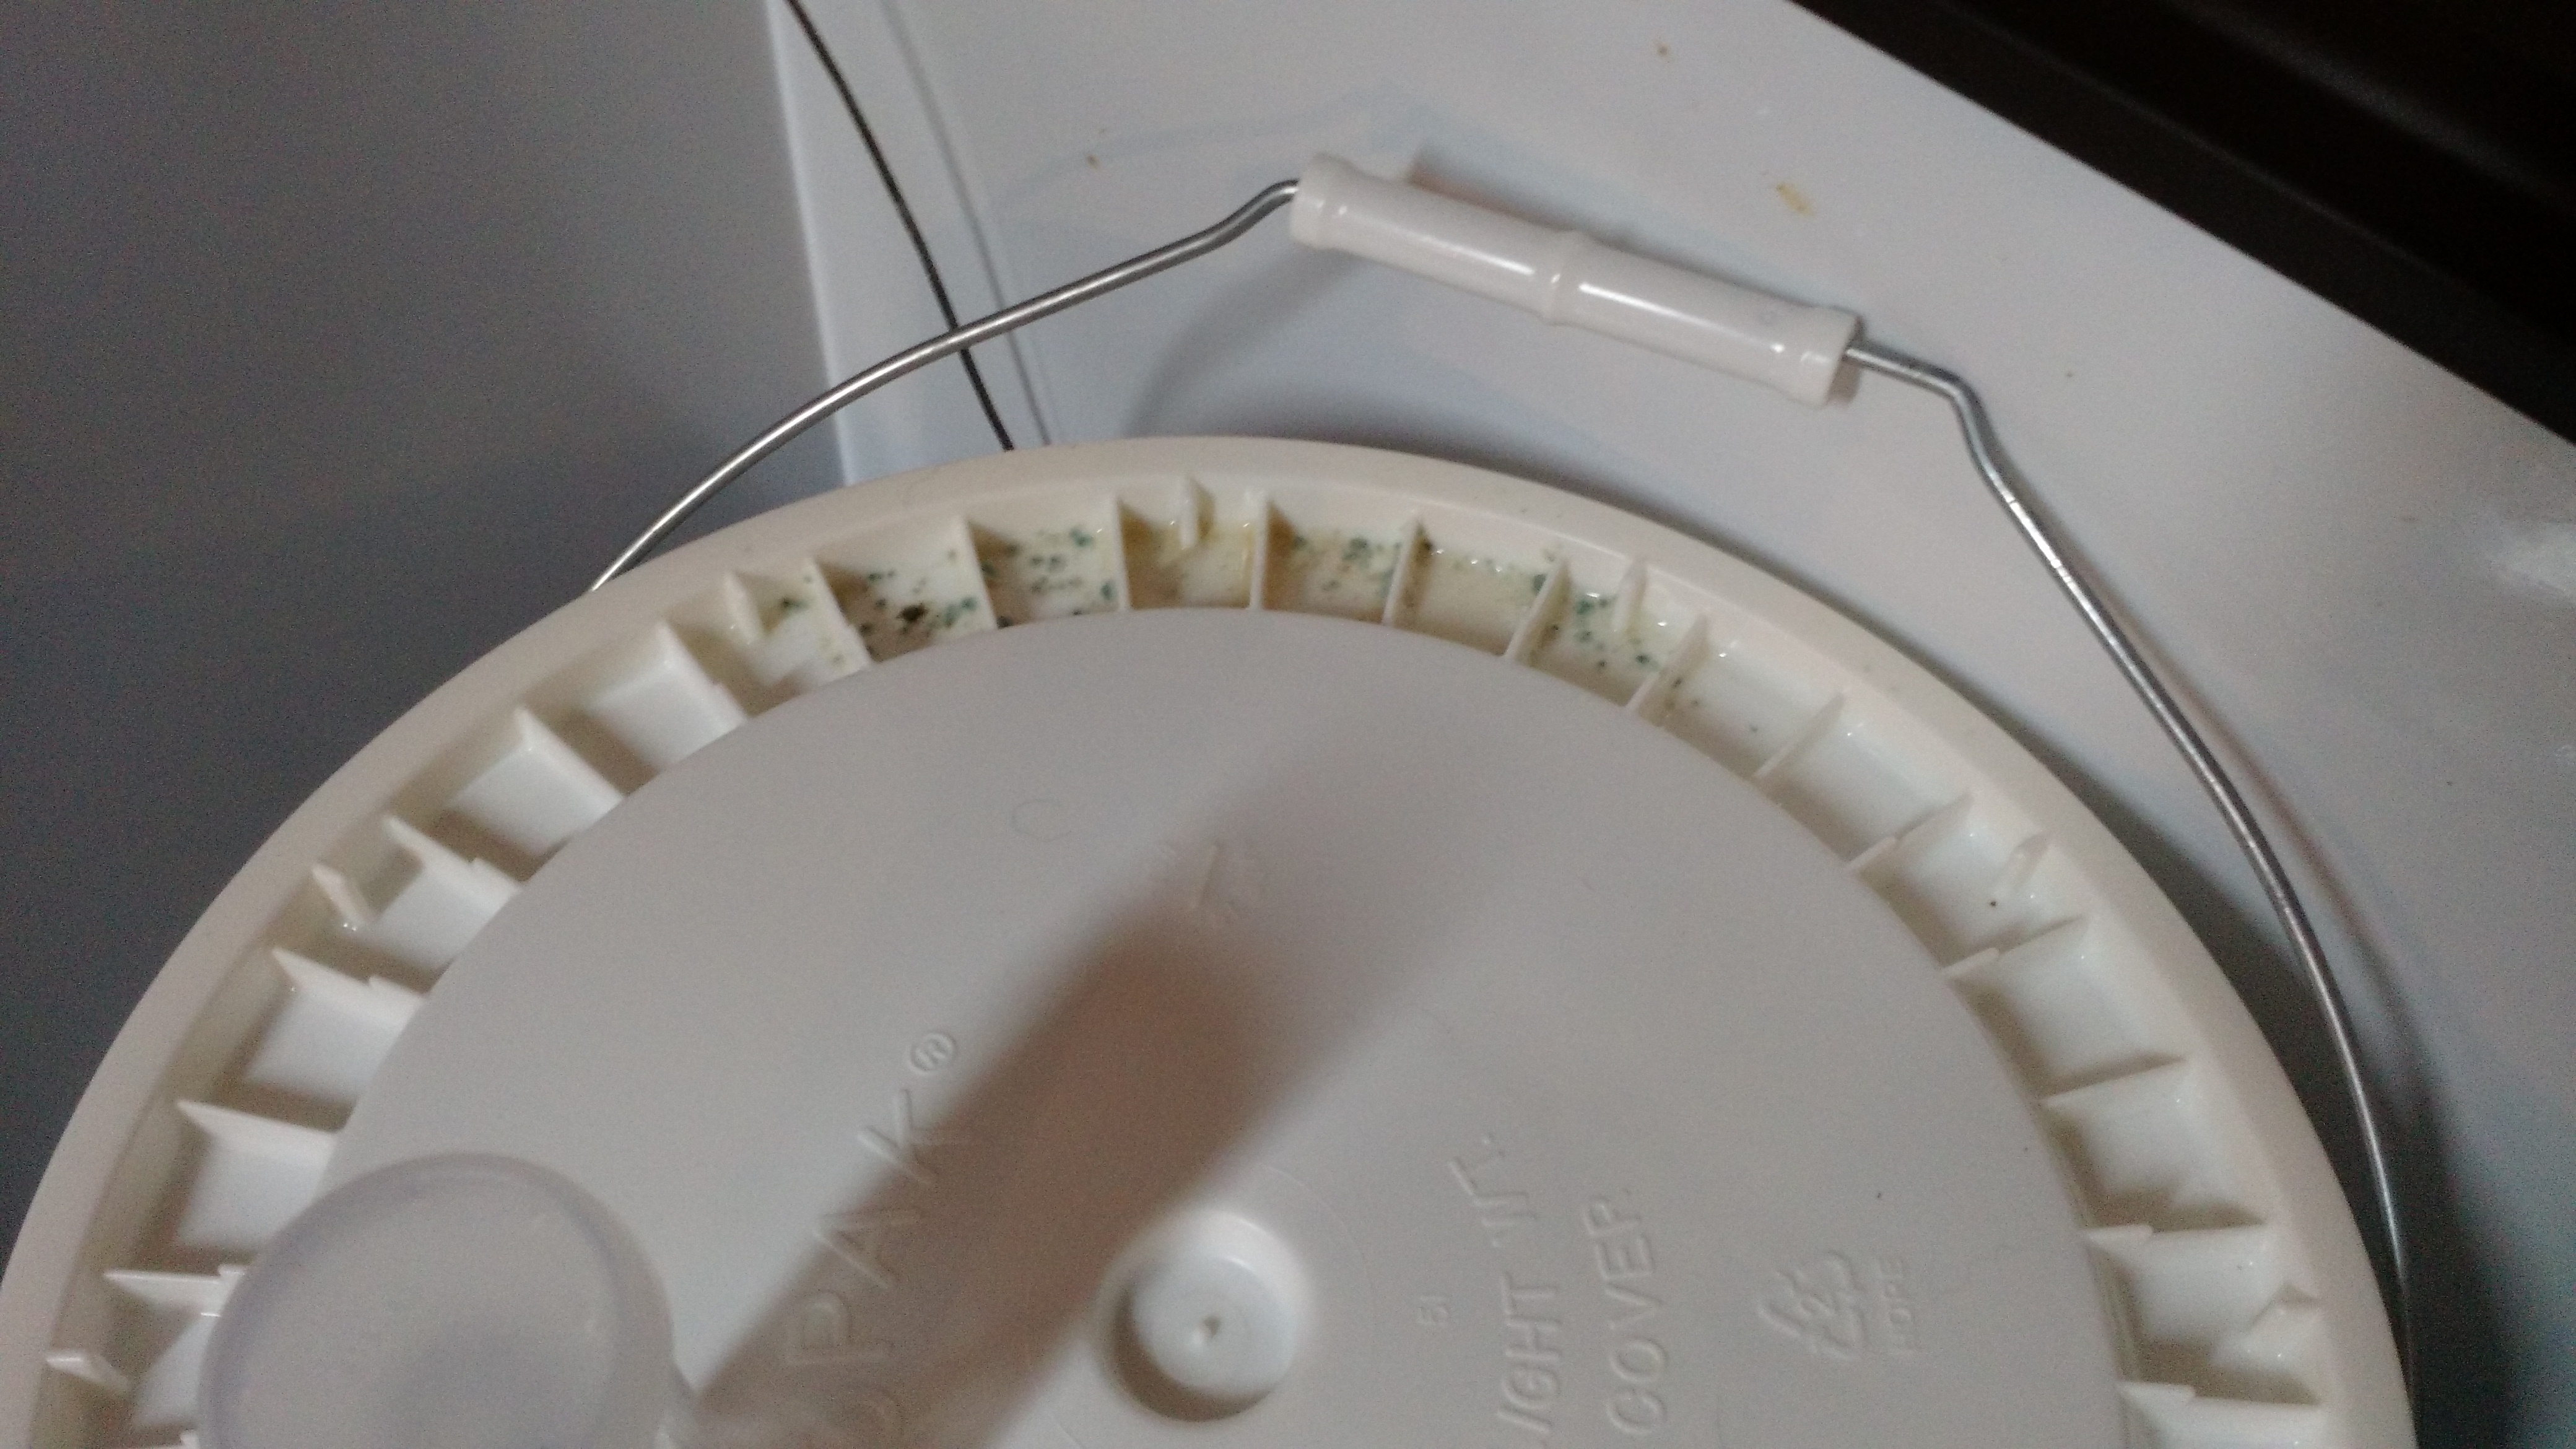
IPA Bottled… God, I Hate Bottling. And Mold.
I had this IPA sitting in the fermenter a week longer than I anticipated. It had to be bottled this week, though – next week is likely going to be busy (I’m volunteering with the Cincinnati Queen Bee Half Marathon for part of Saturday, and Sunday will likely be busy with family). This is a somewhat fitting end to a great weekend… well, the lovely citrus hop aromas was a fitting end, the rest, not so much.
Friday kicked off with Pint Night courtesy of my wife asking for Woodchuck Harvest Cider. The featured brewery was 5 Rabbit Cerveceria, and in attendance was Randy Mosher (partner and creative director at 5 Rabbit). I got to talk to Randy for a few minutes, which was awesome since I’ve read two of his books. I found out he went to the University of Cincinnati College of Design, Architecture, Art, and Planning (DAAP) “when it was just DAA, before the P”. I told him I went there for urban planning, in DAAP, after they added the P. It was a true beer geek moment, and I was savoring it with their Yodo con Leche, which is among the best beers I’ve tasted!
Saturday, my wife arranged for her parents to babysit the kids and we went to Rivertown Brewery and Barrelhouse. We arrived just behind a bus full of beer geeks. Initially I was concerned that getting a flight and a seat would be an issue, but fortunately neither was an issue, and we ended up having a nice conversation with a couple that were on the bus.
Sunday began with a little bit of NFL from London and me beginning bottling.
Insert an F-bomb here.
Things were a little more difficult this time because of mold. Part of me wants to blame HBF or AHA or something because one of them tweeted out something about it, but it’s really not their fault. And all this was on the outside. To add to the mold problem, I didn’t have enough corn sugar, so I decided to use math and use a partial batch of corn sugar and sucrose.
Yup, I are engineer.
Once I boiled the sugar solution (upstairs in the kitchen) and moved it downstairs (to the brewery), I decided to wash all the bottles I was going to use. Normally I don’t because I wash all bottles before taking them into the basement, I decided a change was in order because one of my cats has taken up residence in the basement. I really don’t want cathair in my IPA. Then I had to sanitize the bottles. I don’t own a bottle tree, so dealing with bottles is a painful process of draining bottles on a dish drainer and then setting them on a towel.
Cascade cones from my garden out back!
I believe I was able to open the fermenter without getting any mold into the beer. This was an AWESOME smelling beer! As soon as I opened the fermenter I was greeted with citrus aromas from the citra, galaxy, and cascade hops I used. Bottling was without incident, and I now have 39 bottles of green capped goodness conditioning in my basement.
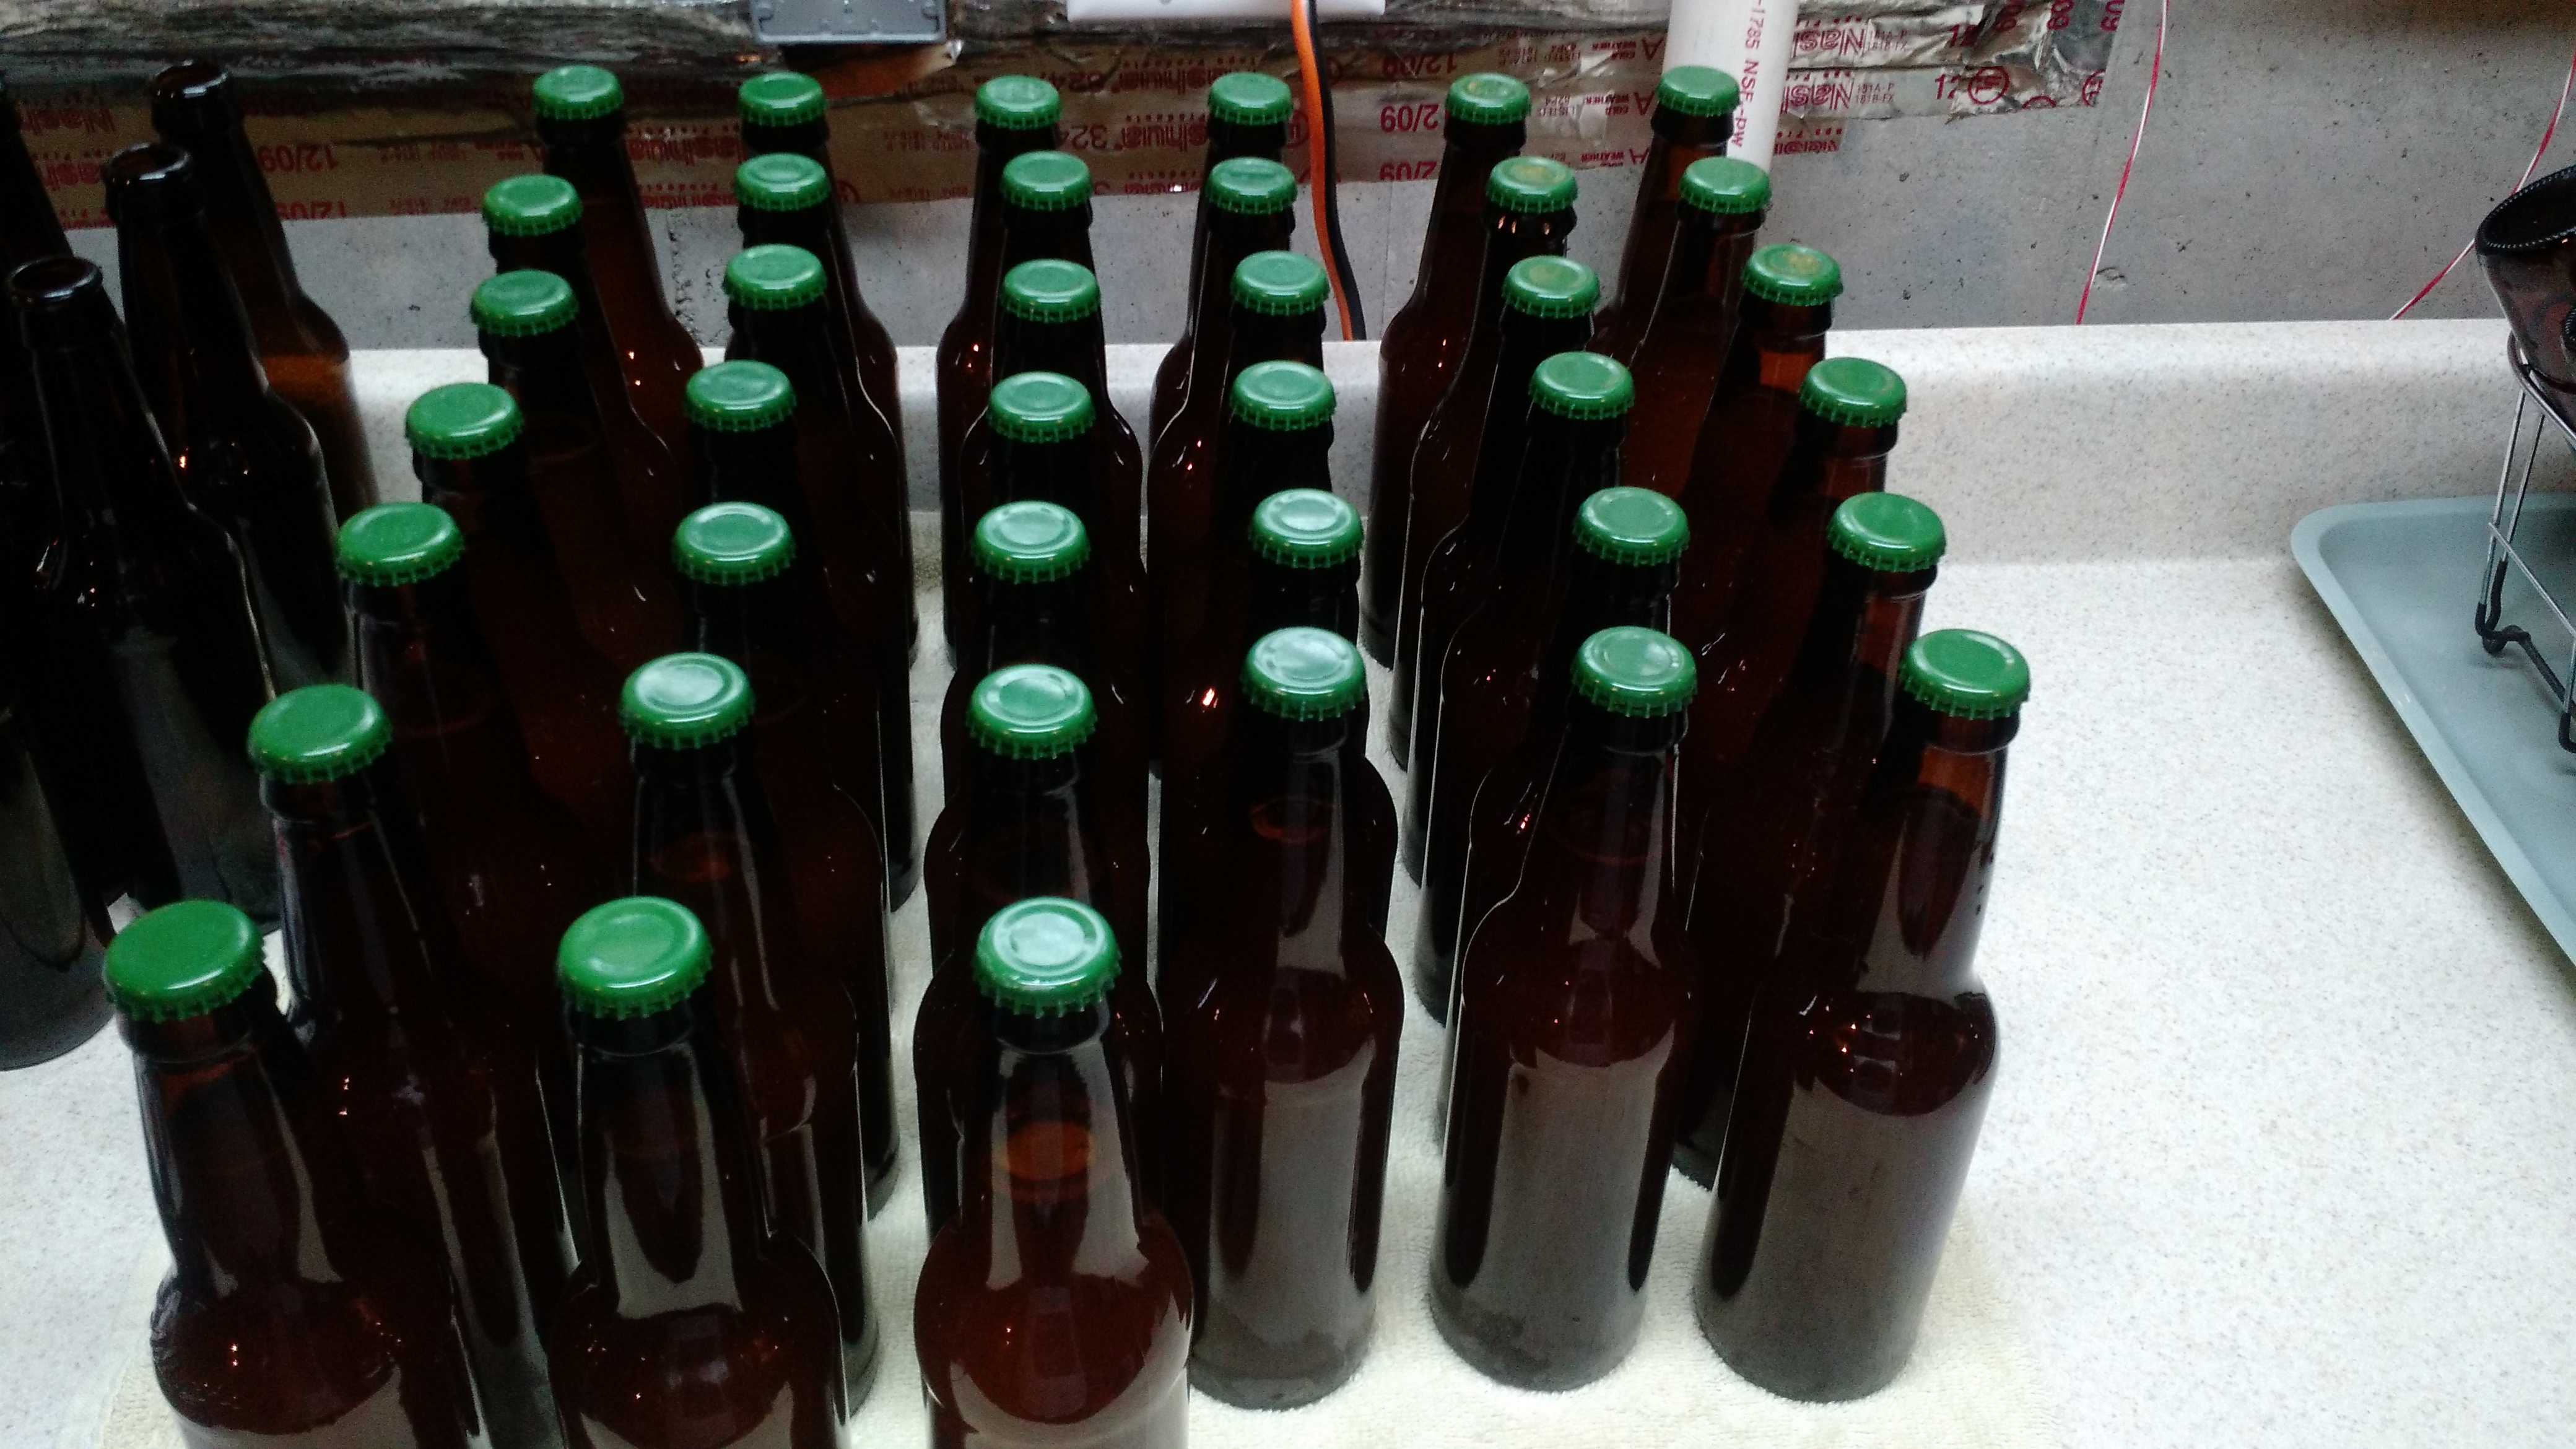
Green Capped Goodness!
The stats:
78 IBU, 6.3%ABV, OG 1.056, FG 1.008.
Of course, this was not the end of bottling day. The mold was not only on my fermenter lid, but also in the freezer. I had to spend some time cleaning it out with antibacterial cleaner. I decided to remove the thermocouple and go with another solution. I also decided that making lagers wasn’t as important to me as not bottling anymore, and I decided I’m going to move towards kegging. I spent a large part of the afternoon on Facebook messenger pelleting a friend of mine with questions.
Cheers until next week!
Another IPA Brew Day
So I decided later than usual on a Saturday to brew. This is a brew that I wanted to do the prior weekend, but my home AC was on the fritz and adding a bunch of humidity to it would not have been a very smart move.
This was an interesting brew day for two reasons. A large portion of the brew day was spent thinking that I would be preparing to brew the following day. I built an electric panel to fix the dangerous setup I had previously.
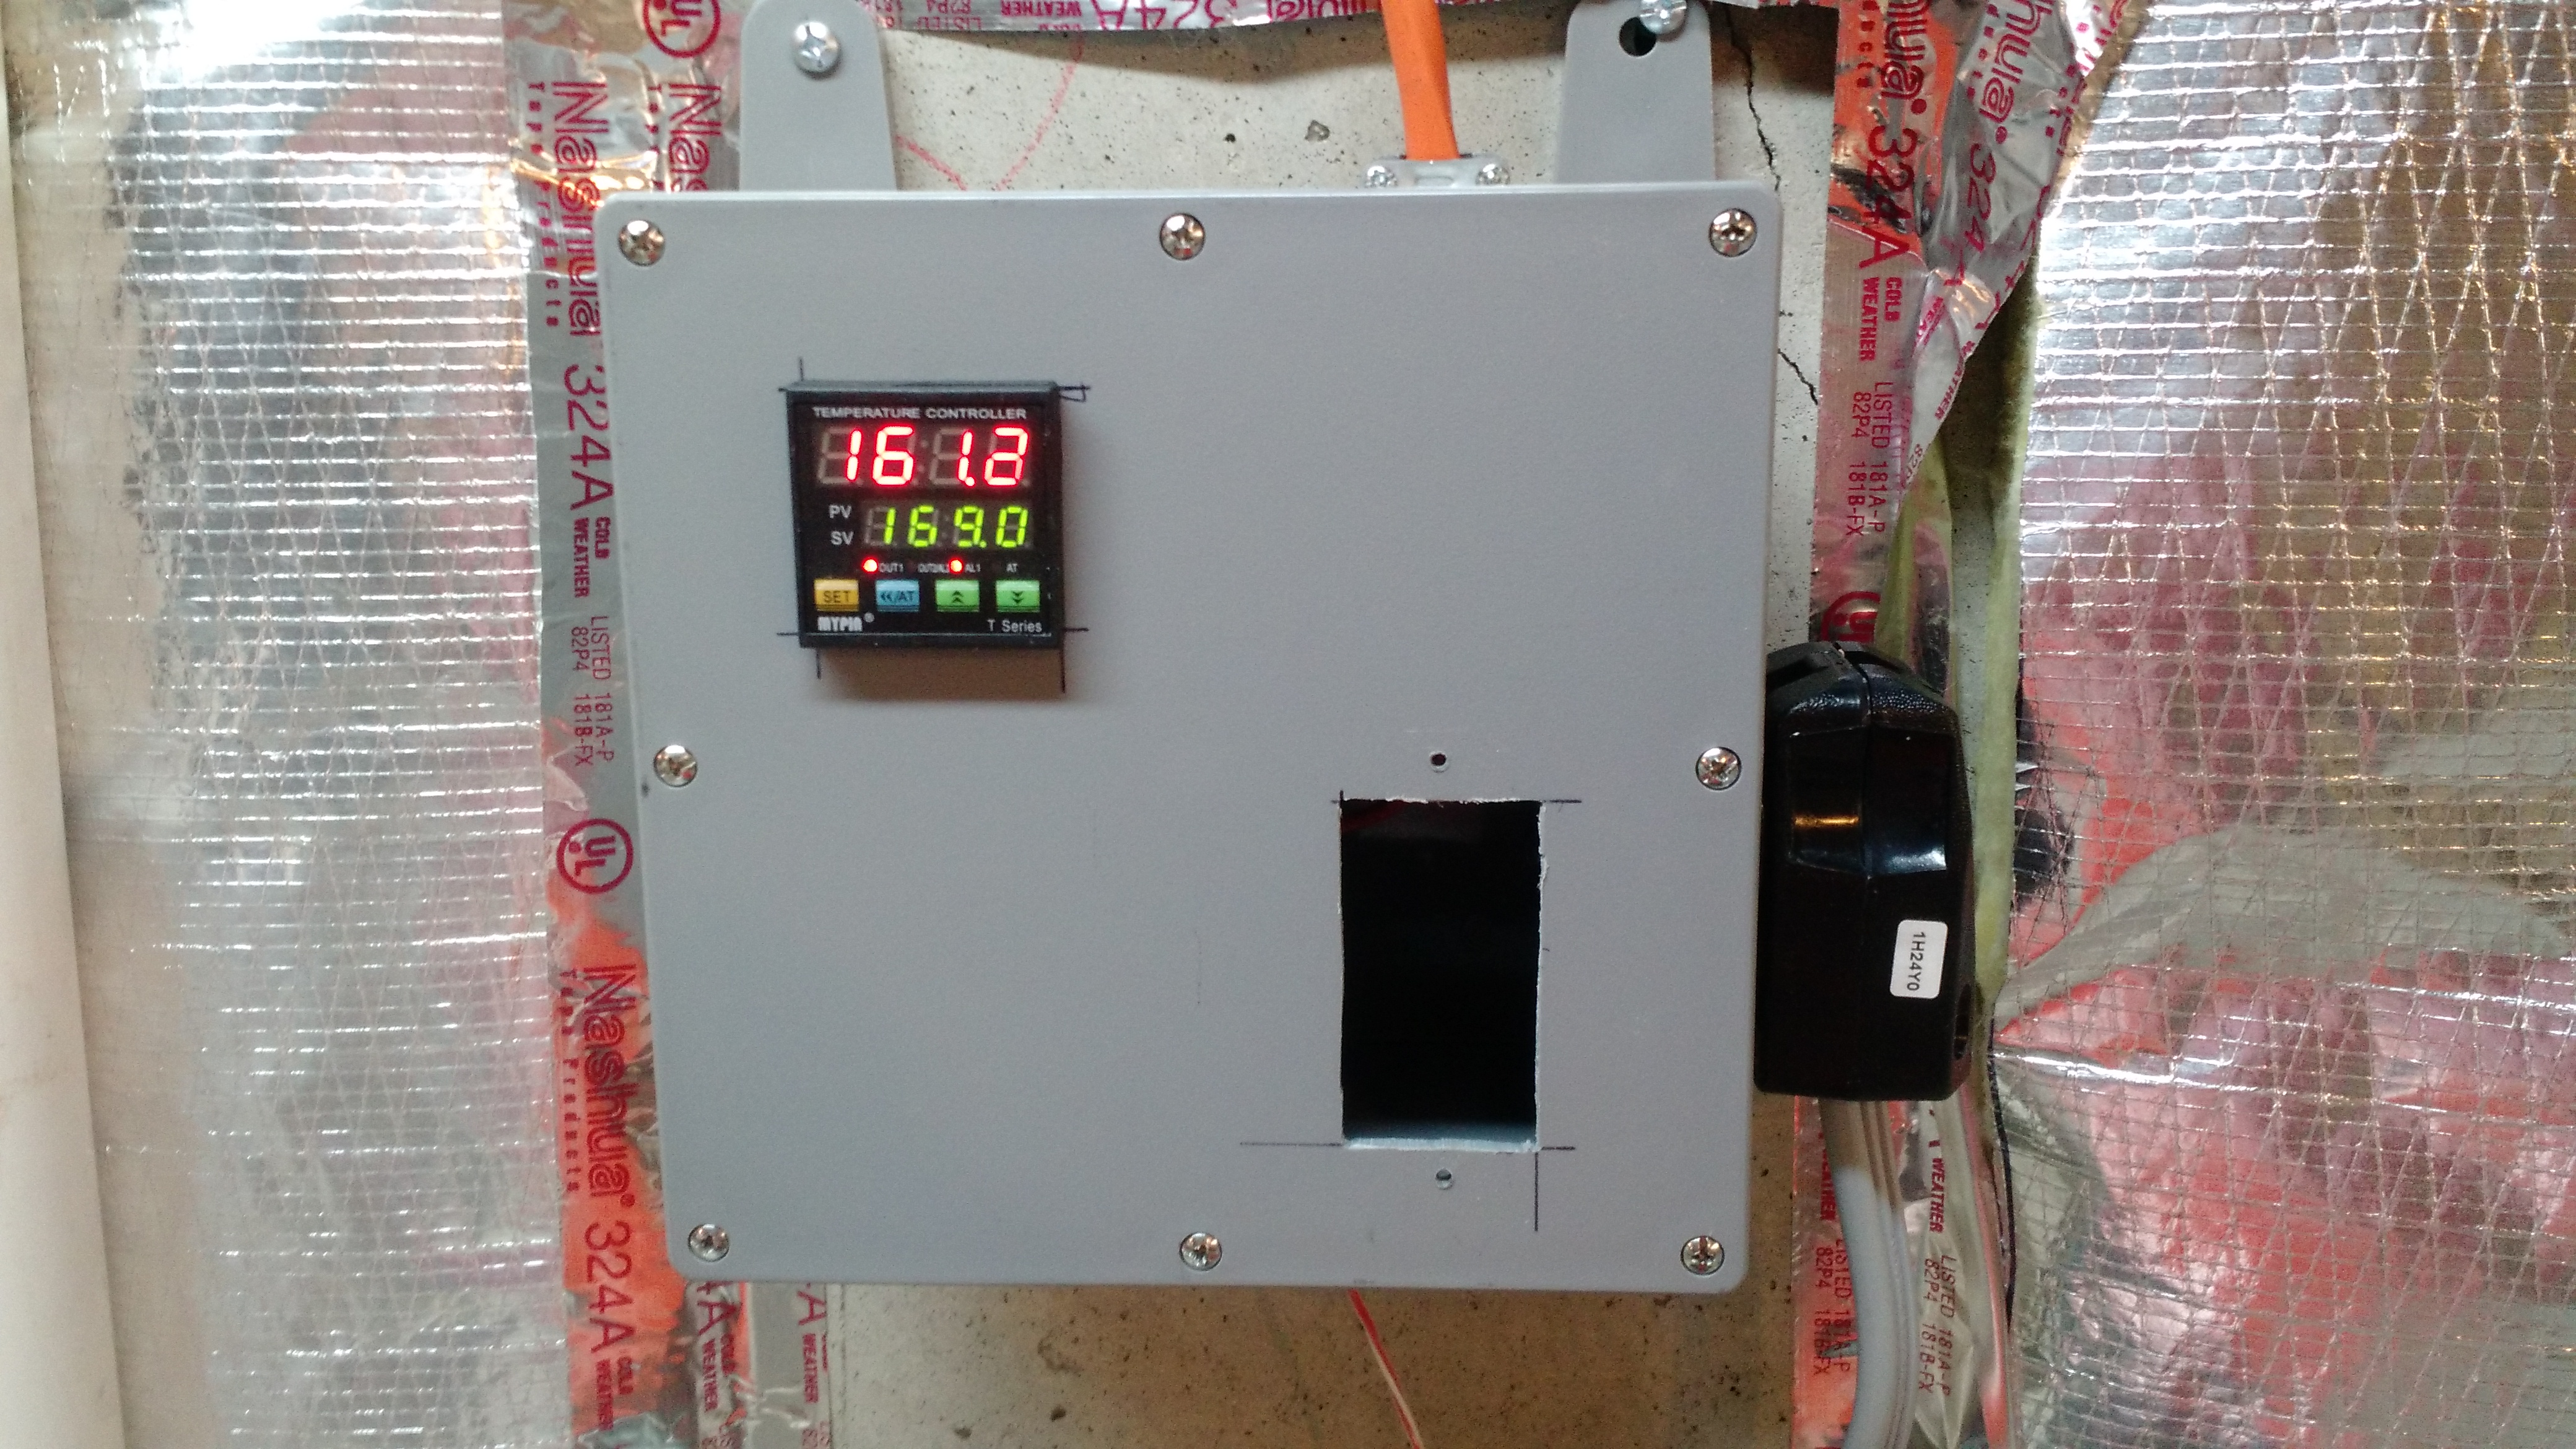
It’s almost done. The blank spot is for a switch.
The thing is, I didn’t have the plug on the cord from the boiler ready. Once I did that, I added water and started things up. Then I went to work on preparing the mash tun. In my last post, I had the stuck sparge from Hell. I did NOT want that happening again. I added some plumbing solder in some strategic places and scrubbed down the copper. At that point (and after messing up and fixing solder joints twice, and since leaks don’t really matter here the mess ups were pretty important to fix), I decided to go ‘all in’ and start mashing.
I love problems that fix themselves!
This brew day had one minor mess up – for my IPA, I have hops at first wort (in the kettle), 15, 5, knockout, and dry. I did first wort, 15, 10, and knockout. Oops. It also had one issue that I thought would be a huge problem – my sparge water kept heating even after the PID said things were off. I didn’t notice until the water hit 205º F, and the heat was still on despite the output light on the PID controller not being on. So I unplugged the boiler to keep the water from boiling and let it cool. Later, when it was time to heat the water back up to sparge temperatures, I plugged the boiler back in and let it heat back up. And it worked correctly. And it worked correctly through the entire boil, too. I love problems that fix themselves!
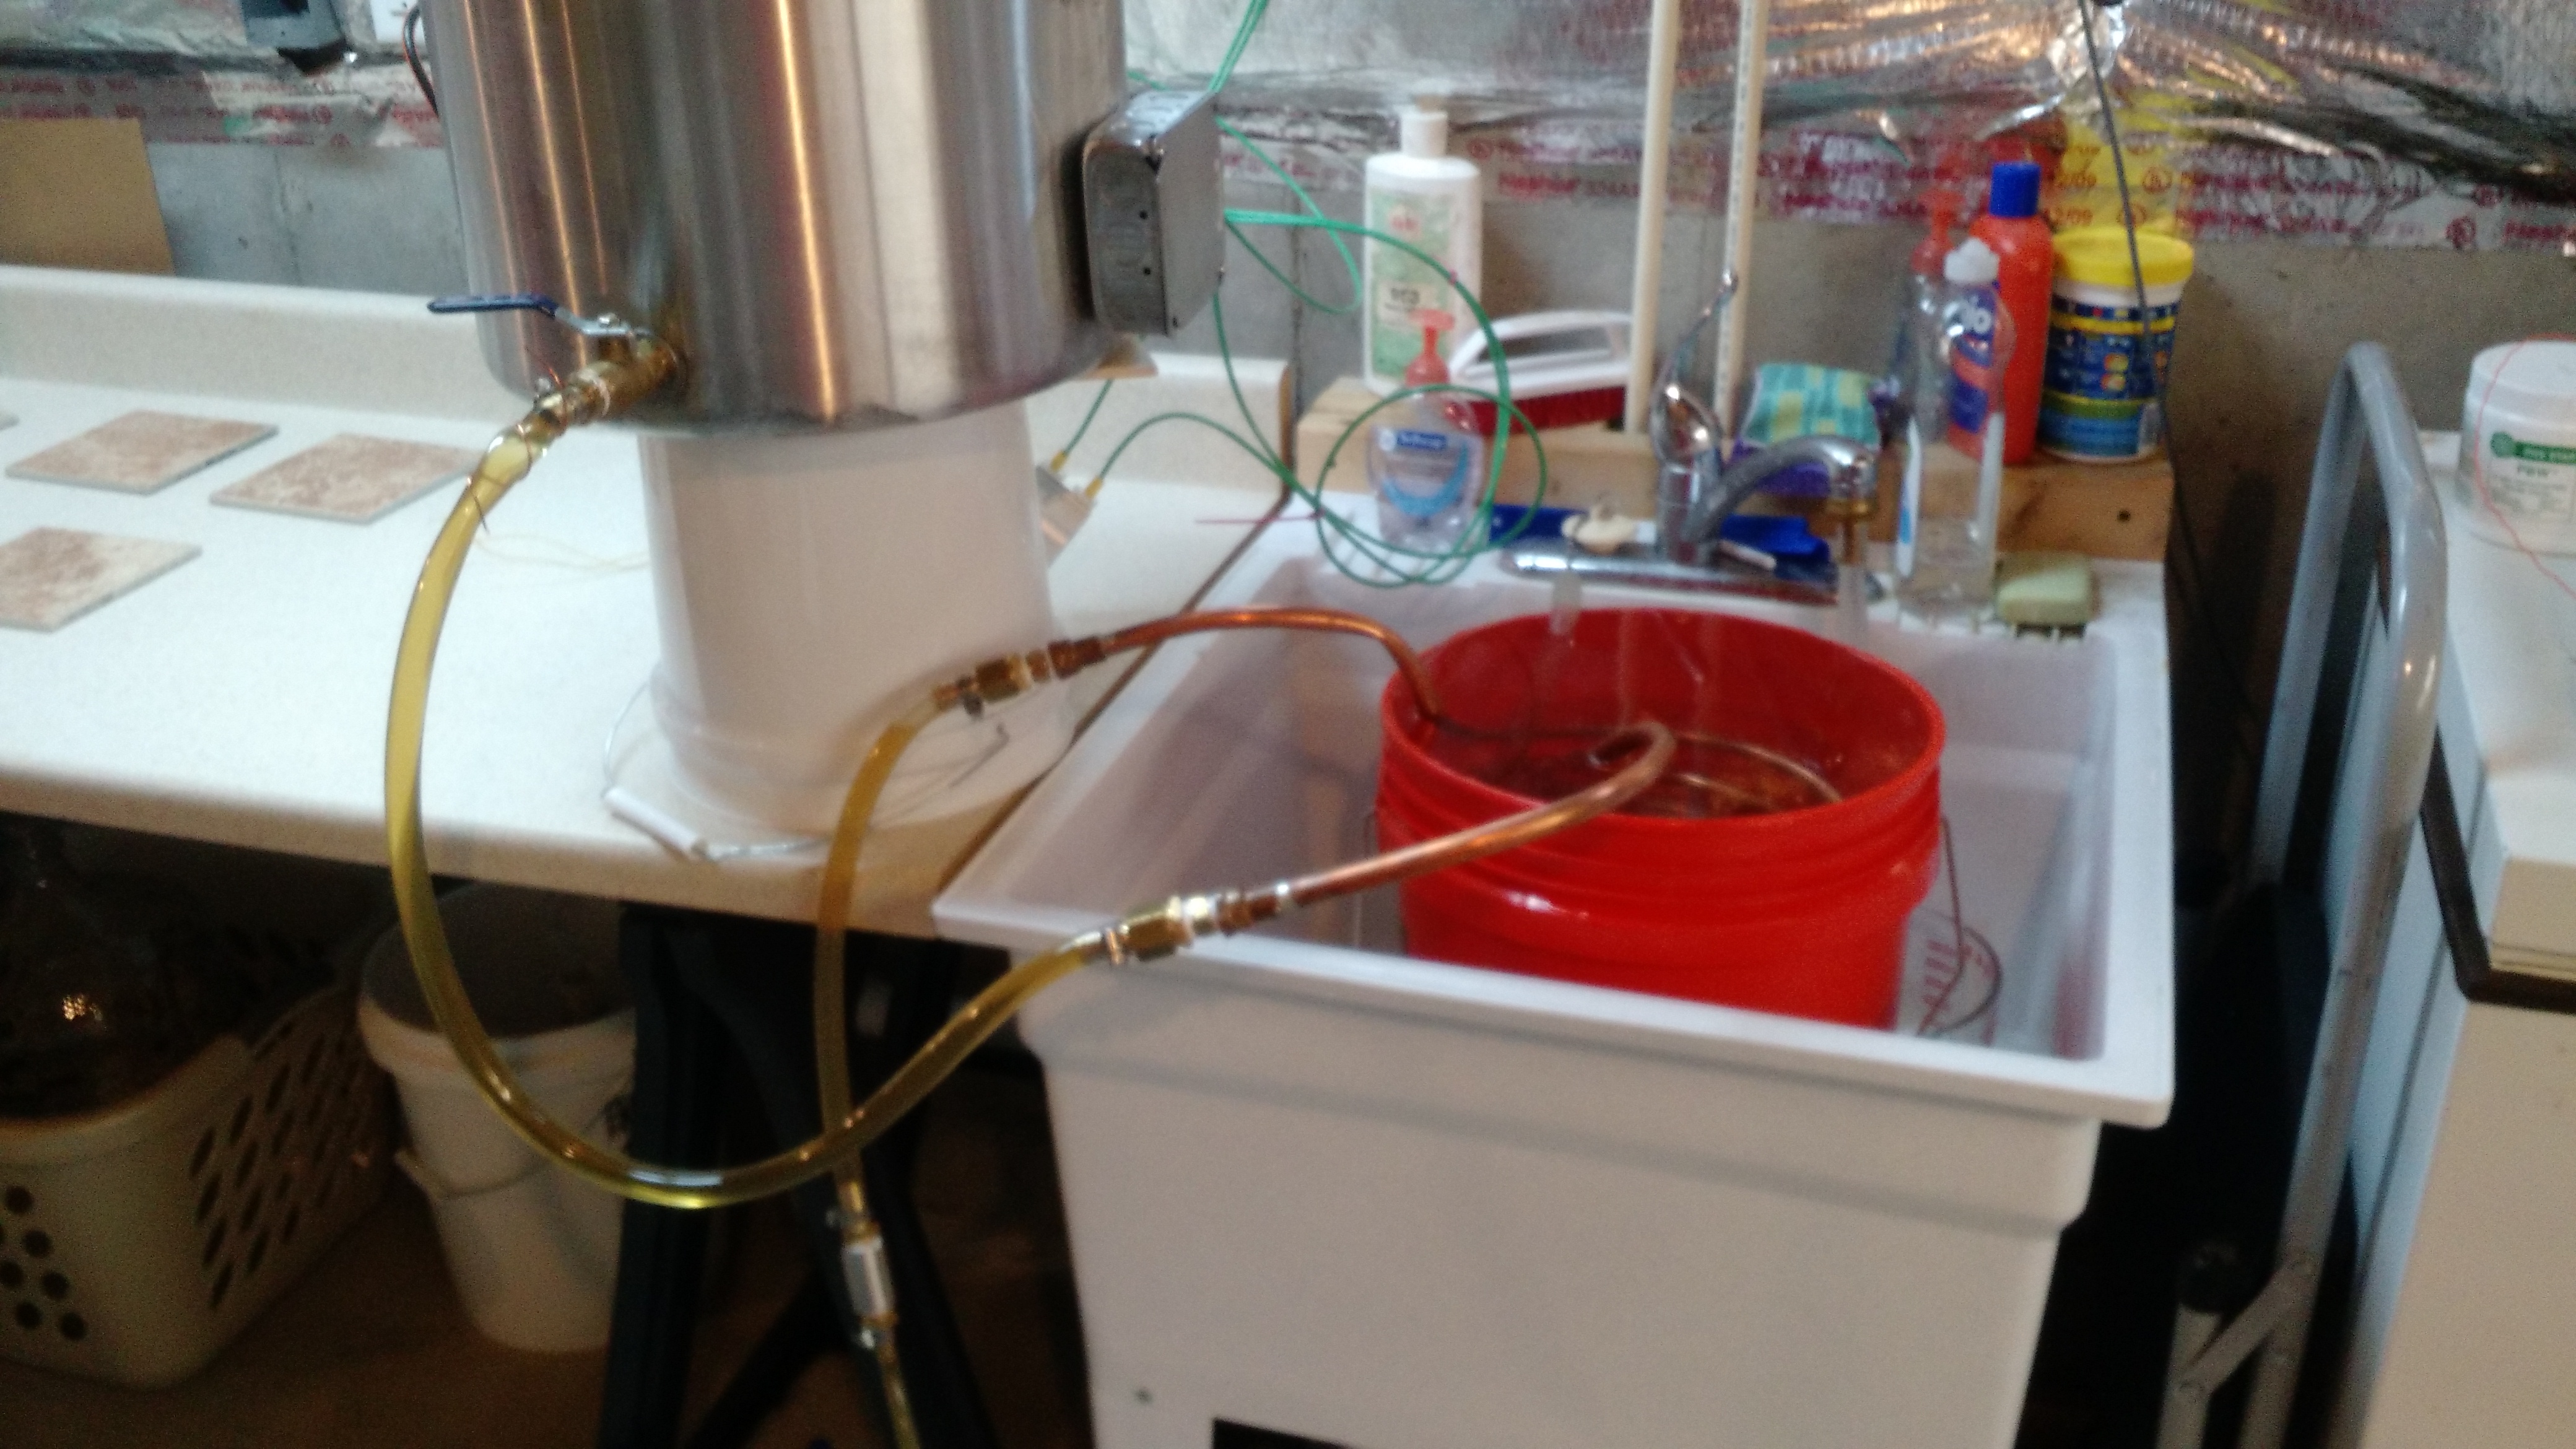
They leak
Chilling had been an issue in the past, and I still reign supreme at having the most fucked up chilling schemes. This one isn’t much different. I bought a plate chiller on Amazon a few weeks ago. The water inlets and outlets were standard hose fittings. My house is six years old, and the cheap washing machine lines were something that was on the list of things to replace. I decided to purchase new stainless steel lines for the washing machine and use the old lines for the plate chiller.
They leak. Somehow in the process of unhooking them from the back of the washing machine and the wall and putting them on the plate chiller, they decided to leak. And these weren’t leaks that could be fixed by torquing down the connectors or using pipe tape (which is unnecessary on these connectors). And I made sure the O-rings were in the hose connectors.
So I did what any sane person would do. Since I didn’t have enough hose to set the plate chiller in the sink (that would have been optimal), I put the chiller in a bucket. Which started to fill. So to avoid flooding part of my basement, I used a small hose to siphon the leaking water out of the main bucket into another so I could dump water without moving the plate chiller around.

This is nuts. But it worked.
So on the shopping list is two new hoses. Because had I had not-leaking hoses, the plate chiller would have worked very well. And even allowing a lot of the trub go through was okay (I use pellet hops). I’m not sure what temperature I got things down to. Put the ale pail into the fermentation chamber and set it to chill at about 6:30. I ended up pitching the yeast at midnight or so.
The Recipe
The recipe has changed a little. I wanted it a little less malty and a little more crisp.
Recipe Details
| Batch Size | Boil Time | IBU | SRM | Est. OG | Est. FG | ABV |
|---|---|---|---|---|---|---|
| 5 gal | 60 min | 71.4 IBUs | 5.4 SRM | 1.070 | 1.013 | 7.6 % |
| Actuals | 1.051 | 1.01 | 5.4 % | |||
Style Details
| Name | Cat. | OG Range | FG Range | IBU | SRM | Carb | ABV |
|---|---|---|---|---|---|---|---|
| American IPA | 14 B | 1.056 - 1.075 | 1.01 - 1.018 | 40 - 70 | 6 - 15 | 2.2 - 2.7 | 5.5 - 7.5 % |
Fermentables
| Name | Amount | % |
|---|---|---|
| Pale Malt (2 Row) US | 7 lbs | 50 |
| Vienna Malt | 6 lbs | 42.86 |
| Cara-Pils/Dextrine | 1 lbs | 7.14 |
Hops
| Name | Amount | Time | Use | Form | Alpha % |
|---|---|---|---|---|---|
| Cascade | 2 oz | 15 min | First Wort | Pellet | 6.6 |
| Cascade | 0.5 oz | 15 min | Boil | Pellet | 6.6 |
| Citra | 0.5 oz | 15 min | Boil | Pellet | 12 |
| Galaxy | 0.5 oz | 15 min | Boil | Pellet | 11 |
| Cascade | 0.5 oz | 5 min | Boil | Pellet | 6.6 |
| Citra | 0.5 oz | 5 min | Boil | Pellet | 12 |
| Galaxy | 0.5 oz | 5 min | Boil | Pellet | 11 |
| Cascade | 1 oz | 15 min | Aroma | Pellet | 6.6 |
| Citra | 1 oz | 15 min | Aroma | Pellet | 12 |
| Galaxy | 1 oz | 15 min | Aroma | Pellet | 11 |
| Cascade | 1 oz | 7 days | Dry Hop | Pellet | 6.6 |
| Citra | 1 oz | 7 days | Dry Hop | Pellet | 11 |
| Galaxy | 1 oz | 7 days | Dry Hop | Pellet | 11 |
Miscs
| Name | Amount | Time | Use | Type |
|---|---|---|---|---|
| Irish Moss | 0.25 tsp | 15 min | Boil | Fining |
Yeast
| Name | Lab | Attenuation | Temperature |
|---|---|---|---|
| American Ale (1056) | Wyeast Labs | 75% | 60°F - 72°F |
Mash
| Step | Temperature | Time |
|---|---|---|
| Mash In | 148°F | 60 min |
Now the wait. One week (as of time of writing) to add dry hops, and one week to absorb. Then bottling and another week to two weeks to wait. I WISH IT WAS DONE ALREADY.
Cheers!
Brew United Competition Soapbox
In amateur radio contests, there is something called a soapbox. It is text about the contest, things like how it went, equipment used, things tried, etc. It’s optional and I’ve only used it once when I blew up a radio halfway through a contact and decided to put something like “I killed my radio in this contest. I left it all on the air”. I thought I was being funny, but I’m not sure anyone else noticed.
Anyway, this is not something I’d do often. Unlike amateur radio contests (which are planned and frequently prepared for, like a race or other sporting event), up until now all of my competition entries have been afterthoughts – I brew a good beer and then decide to enter it into a competition. This is because I’m like many other homebrewers (well, the smart ones, anyway) and I brew what I like. I don’t need a medal or ribbon to tell me I’m pretty good at this or when I screw up (which is rare! knock knock… FUCK [read on]). However, after my other competition entries (only two), I like reading the judge’s comments. This is particularly because the judge’s comments are generally really nice (or maybe I do make some damn good beer). Reading many of the comments puts far less emphasis on the number and allows for a realistic view of what they thought. And my first contest made me realize that commercial examples aren’t always great representations of the style, no matter how much you like them!
However, the Brew United contest was different. For starters, you have four grains that all must be used – pilsner, flaked wheat, crystal 60, and Munich 10. You also have to use exactly two from a list of six hops. You also have a slightly abbreviated list of styles. You also have prizes (I really want one of those SS Tech steel fermenters)!
My Beer
I decided to brew a Kölsch. This was partly because I wanted to use that new fermentation chamber I’ve been talking about. If I was just brewing any Kölsch, I’d probably be 90-95% pilsner and something like 5% honey malt and possibly 5% of something else.
This is different. I’m required to use at least 1% of crystal 60. And wheat.
So I got to thinking, Moerlein did a beer called “Altered Pale Ale”, which was a pale ale with a large contingent of wheat. It had some smoothness that I liked. So I decided to use a few pounds of wheat in addition to mostly pilsner malt so I could keep it light and within style but possibly add some smoothness without adding turbidity (haziness… I’m an engineer). I used even less of the Munich 10. I would have preferred crisp over malty for this, but I do want some sweetness that the Munich 10 might be able to bring. And that damn crystal 60. I used 2 ounces, which makes it 1.3% of the grain bill. I was even joking with the people at my LHBS that this is the first time I’ve ever bought just 2 ounces of a malt!
This arrangement of malts means no toasting or cold steeping, which are two things I did not want to get into.
My hops were Northern Brewer and Perle. German hops for a German beer. I was initially thinking Saaz instead of Northern Brewer, but that’s really more of a Czechoslovakian hop.
The Recipe
Recipe Details
| Batch Size | Boil Time | IBU | SRM | Est. OG | Est. FG | ABV |
|---|---|---|---|---|---|---|
| 5.5 gal | 60 min | 27.1 IBUs | 4.2 SRM | 1.046 | 1.008 | 4.9 % |
| Actuals | 1.04 | 1.008 | 4.2 % | |||
Style Details
| Name | Cat. | OG Range | FG Range | IBU | SRM | Carb | ABV |
|---|---|---|---|---|---|---|---|
| kolsch | 5 B | 1.044 - 1.05 | 1.007 - 1.011 | 18 - 30 | 3.5 - 5 | 2.4 - 3.1 | 4.4 - 5.2 % |
Fermentables
| Name | Amount | % |
|---|---|---|
| Pilsen Malt 2-Row (Briess) | 5.5 lbs | 57.14 |
| Wheat, Flaked | 3 lbs | 31.17 |
| Munich 10L (Briess) | 1 lbs | 10.39 |
| Caramel/Crystal Malt - 60L | 2 oz | 1.3 |
Hops
| Name | Amount | Time | Use | Form | Alpha % |
|---|---|---|---|---|---|
| Northern Brewer | 0.5 oz | 60 min | Boil | Pellet | 8.5 |
| Perle | 1 oz | 15 min | Boil | Pellet | 8 |
Miscs
| Name | Amount | Time | Use | Type |
|---|---|---|---|---|
| Irish Moss | 1.00 tsp | 15 min | Boil | Fining |
Yeast
| Name | Lab | Attenuation | Temperature |
|---|---|---|---|
| German Ale/Kolsch (WLP029) | White Labs | 75% | 65°F - 69°F |
Mash
| Step | Temperature | Time |
|---|---|---|
| Mash In | 148°F | 60 min |
Brew Day
Before actually getting to brew day, I started checking things. Last time I brewed, I found that I may have missed my mash temp. So I decided to check to be sure. Sure enough, I stuck my thermometer in ice water and it read about 40ºF! It should have been at 32ºF, so I adjusted it and made sure it was correct by leaving it in the icewater for a while. I also checked my hygrometer. I haven’t been hitting my gravities too well, and part of that may be because my hygrometer was reading 0.004-0.006 low (unless I somehow got distilled water that is lighter than water). I filed away some of the bottom and checked again, and after three or four filings, it was taken care of. I also bought a Ph meter so I could fill in all the little text boxes in BeerSmith.
A stuck sparge. But not just any stuck sparge. This was the stuck sparge from Hell.
Brew day itself started great. I heated my water 10ºF higher than BeerSmith indicated because it appears my PID controller reads low through part of the range. I drained and began mashing out and sparging and then it happened… a stuck sparge. But not just any stuck sparge. This was the stuck sparge from Hell because it wasn’t stuck because of “normal” reasons, it was stuck because the sparge manifold came off.
This is what Hell looks like. Needless to say, this is getting fixed VERY soon!
After manually sparging with a sieve, I was finally able to start the boil. Fortunately, boil went without a hitch. No boilovers or anything, and one minor splash.
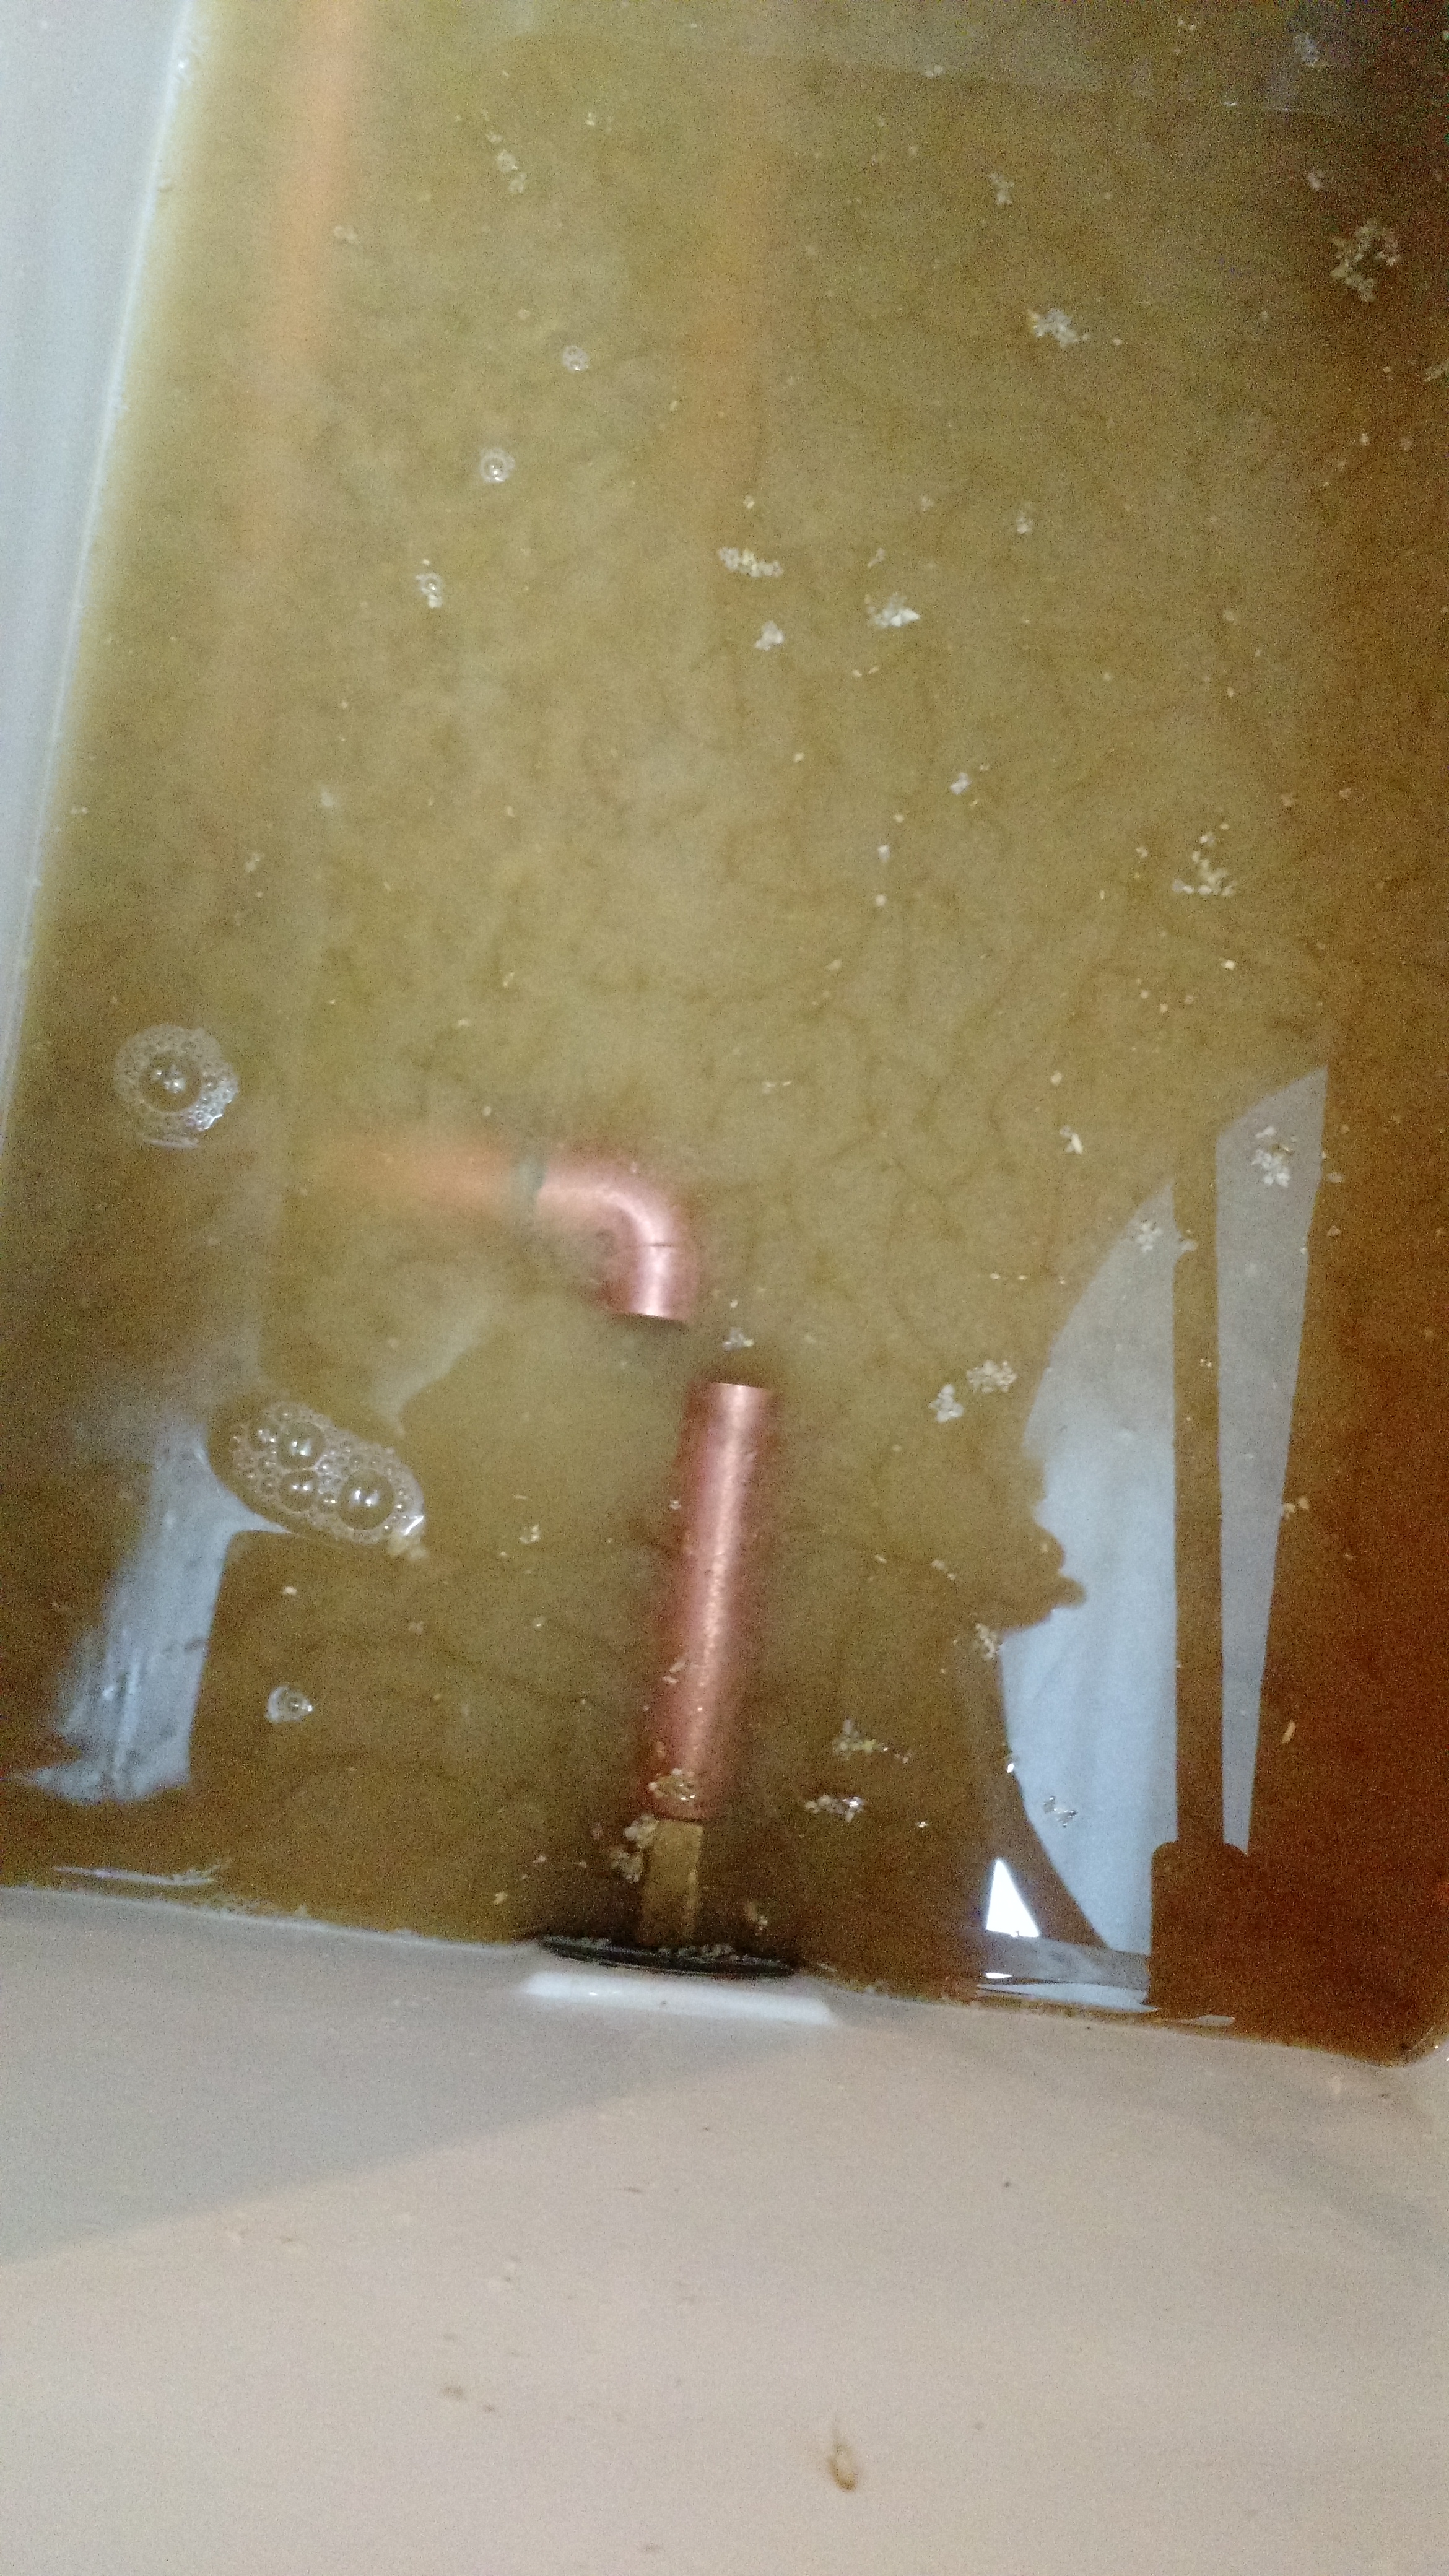
Cooling the wort was a bit of a pain. Since I have an electric system (“system” used liberally), I use what is essentially an immersion chiller backwards. It doesn’t work too well, but I thought since I have a new cabinet below my counter (raising the counter up about 6″ compared to the image below), I thought it might work better. It didn’t.
This still needs work.
I’m definitely going to put a pump on it for next time, and probably also a way for the wort to go back into the kettle and create a whirlpool. I bought a plate chiller. Anyway, this got the wort down to about 90ºF. Too hot to pitch and I was 30 minutes from guests arriving, so I decided to put the hot wort in the fermentation chamber and let it ride out for a while. I fitted a hose to use as a blow-off tube from the fermenter since I had more than 5.5 gallons in the fermenter.
“I’m wondering if I need to include “one partially sanitized dial thermometer” on my recipe when I send this in.”
After a few hours, I ran downstairs for something and went to check the temperature (and I can’t see the side of the bucket too well) and I sanitized the stem and bottom of my dial thermometer. Unfortunately, it slipped out of my hand. I’m wondering if I need to include “one partially sanitized dial thermometer” on my recipe when I send this in, because that thermometer is staying in the fermenter until bottling!
Brew day ended at about 2:40 PM. It started around 10:00 AM. Timewise, not so bad.
At nearly 9:00 that evening, the wort hit somewhere close to 70ºF and I decided to aerate and pitch the yeast. I sanitized a whisk and stirred vigorously for a minute to aerate, and I managed to NOT drop the whisk in the wort (but just in case, I sanitized the handle, too!). I pitched a good bit of yeast, sealed the top, and shut the chamber.
The following morning, I couldn’t see the temperature (this was because of light, not because it froze or anything) and I decided that for now, I need to ensure things are cooling so I removed the temperature probe from the water jug and let it sit out of it (this should make it more “volatile”).
After the issues I experienced during the mash, I wasn’t even remotely interested in checking my efficiency. But I did want to check progress and taste after a week, so I opened up the laptop and BeerSmith and input the brewing session data I recorded on my tablet. 75% mash efficiency and about 65% brewhouse efficiency. Compared to my last brew, that’s a 14% improvement in mash efficiency and a 5% improvement in brewhouse efficiency and a slight improvement over the brew before that (where I had mash problems and ended up recirculating some mash). So I’m happy despite the difficulties that I’ve since repaired.
After a week of fermenting and some interesting smells in the fermentation chamber and relaxing, trying not to worry, and drinking some homebrew, I opened the fermenter to check gravity and taste. It tasted somewhat phenolic, but I could EASILY tell it needed another week. Color was around where I expected it to be, and gravity was 1.010. Slightly low compared to what BeerSmith thinks it should be, but given the turbidity of the sample it’ll go down.
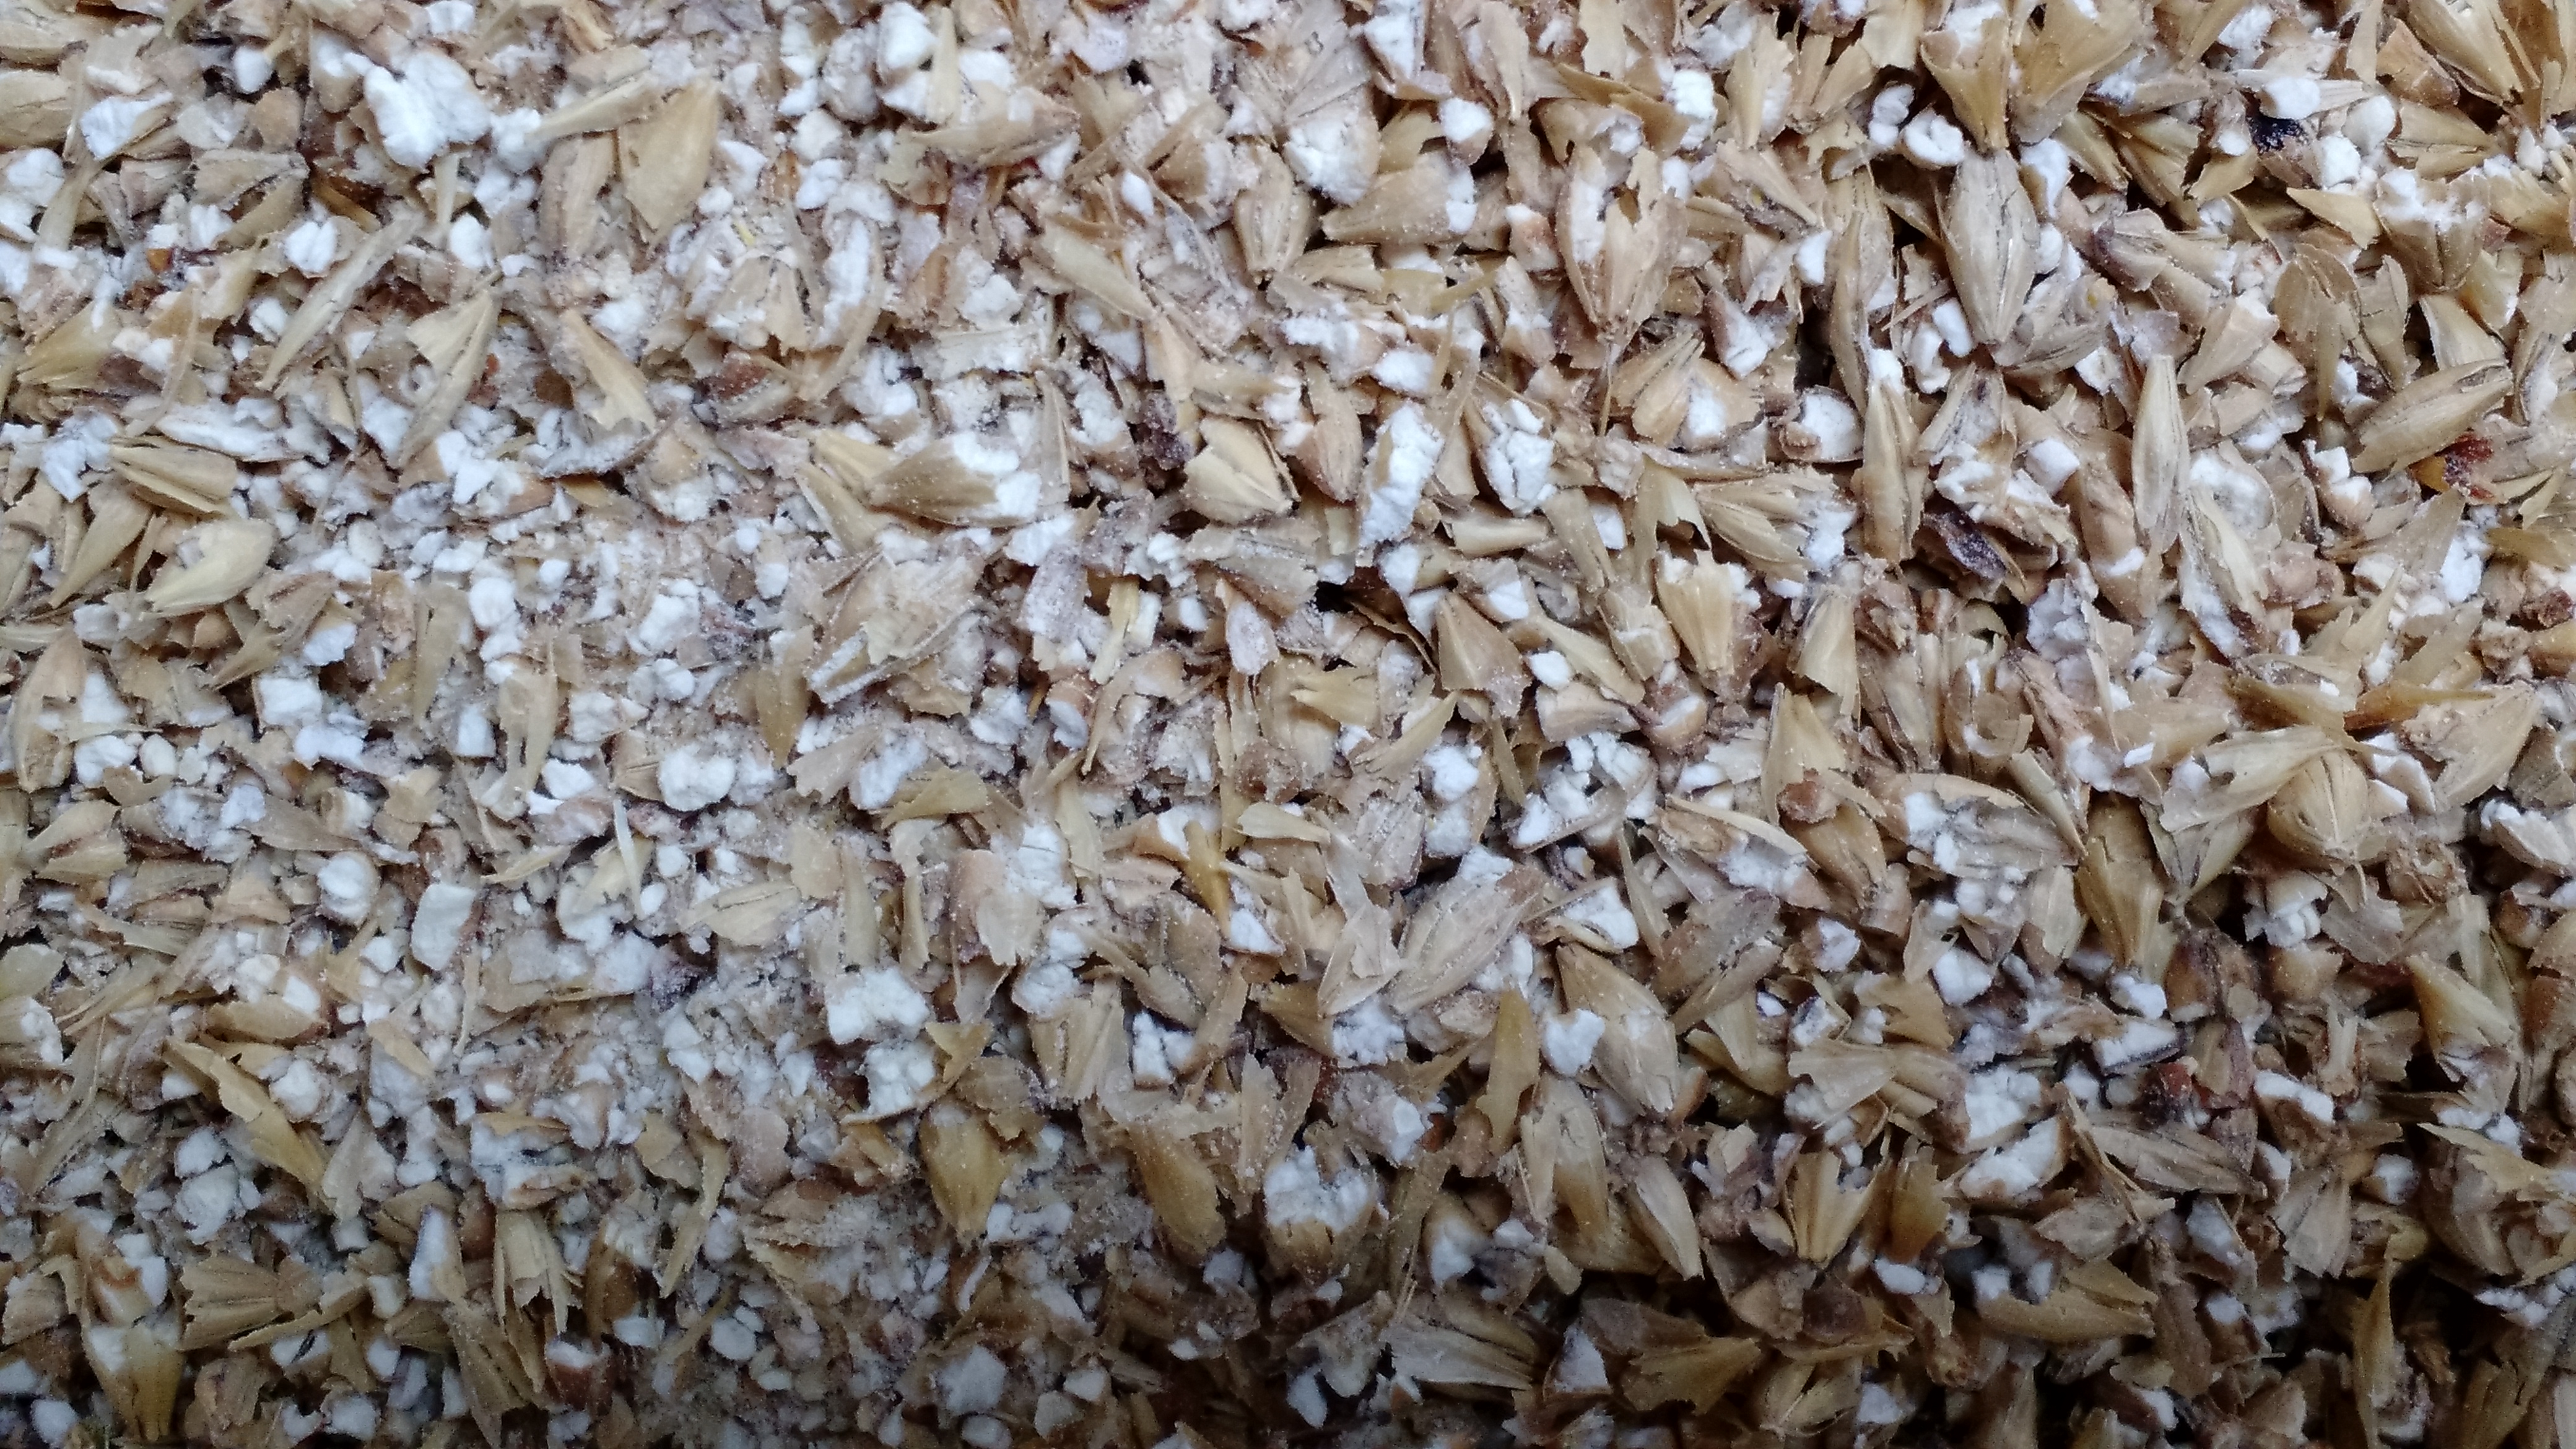
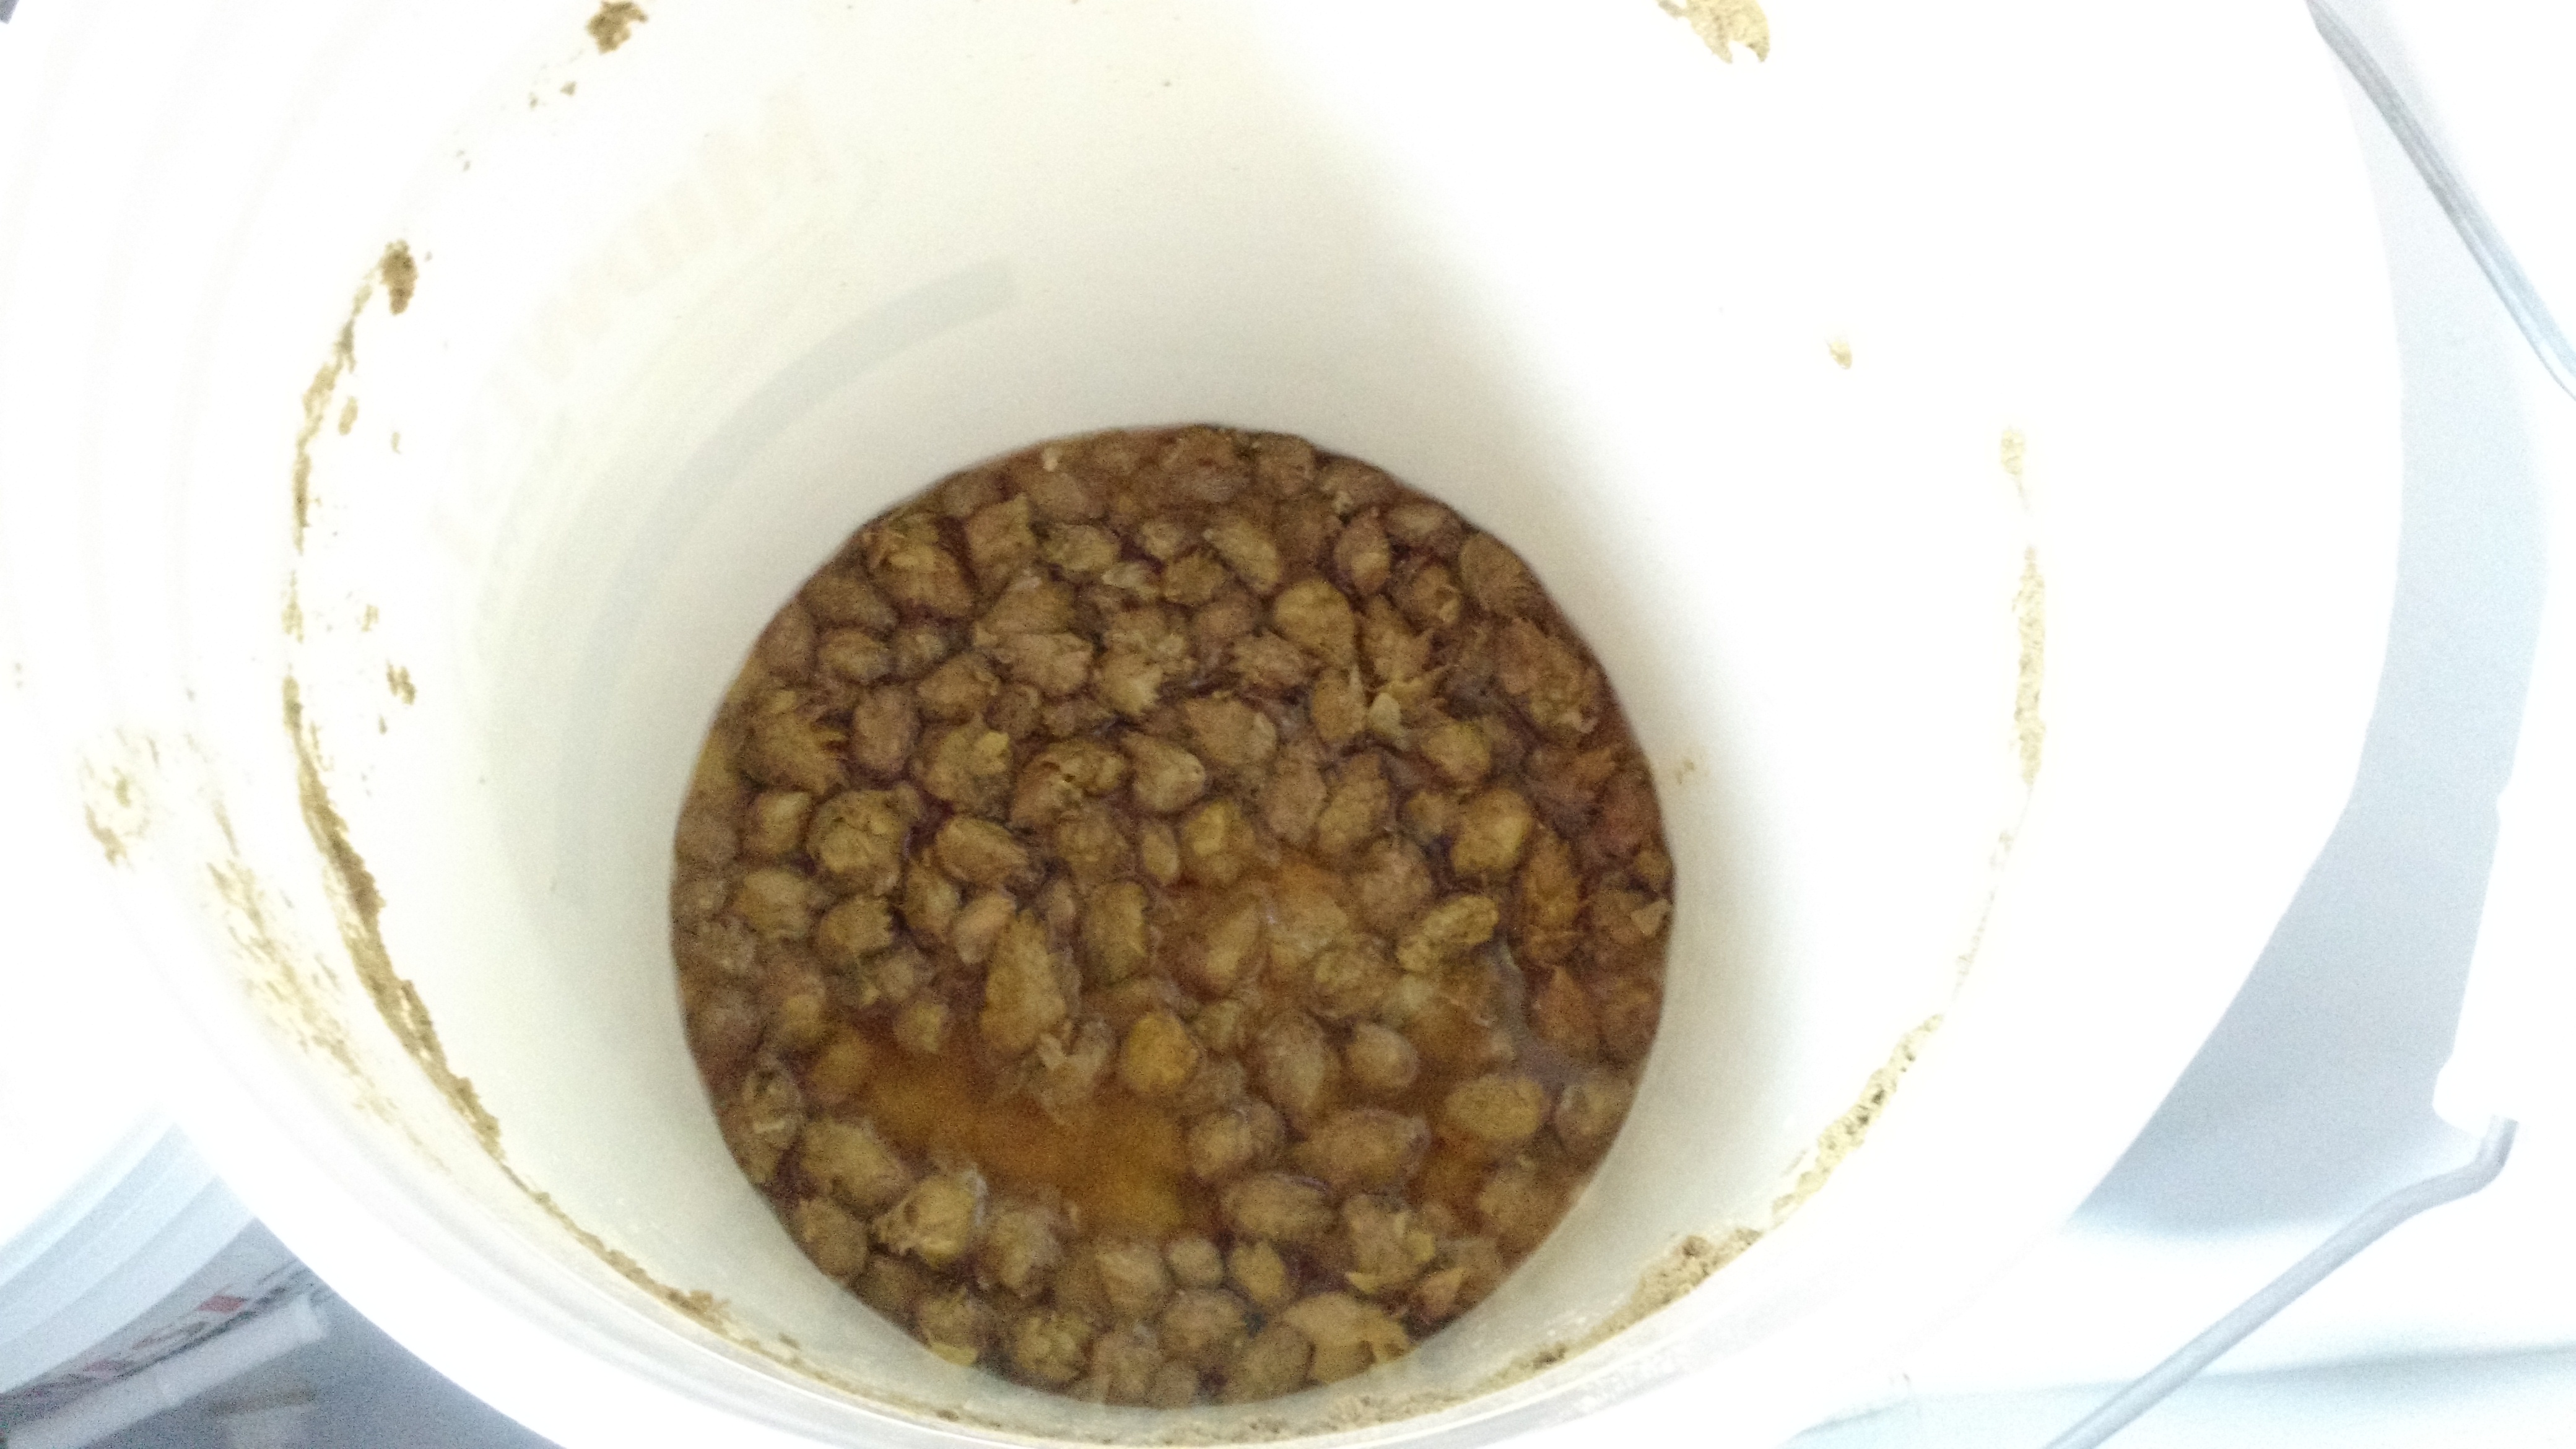
Spent Grains
I decided to do something I haven’t done before – use the spent grains for something other than compost. I laid a bit of the spent grain out on freezer paper in my dehydrator and set it up. I have the grain about 1/2″ deep. The following morning, there was still moisture under the surface of the grain, so I (using my fingers) turned the grain so other parts could be dried. It took maybe 18 hours (possibly less, I had to work while they were drying). When I checked on them after coming home from work the following day, the basement smelled WONDERFUL. It was a mix between bread and cookies.
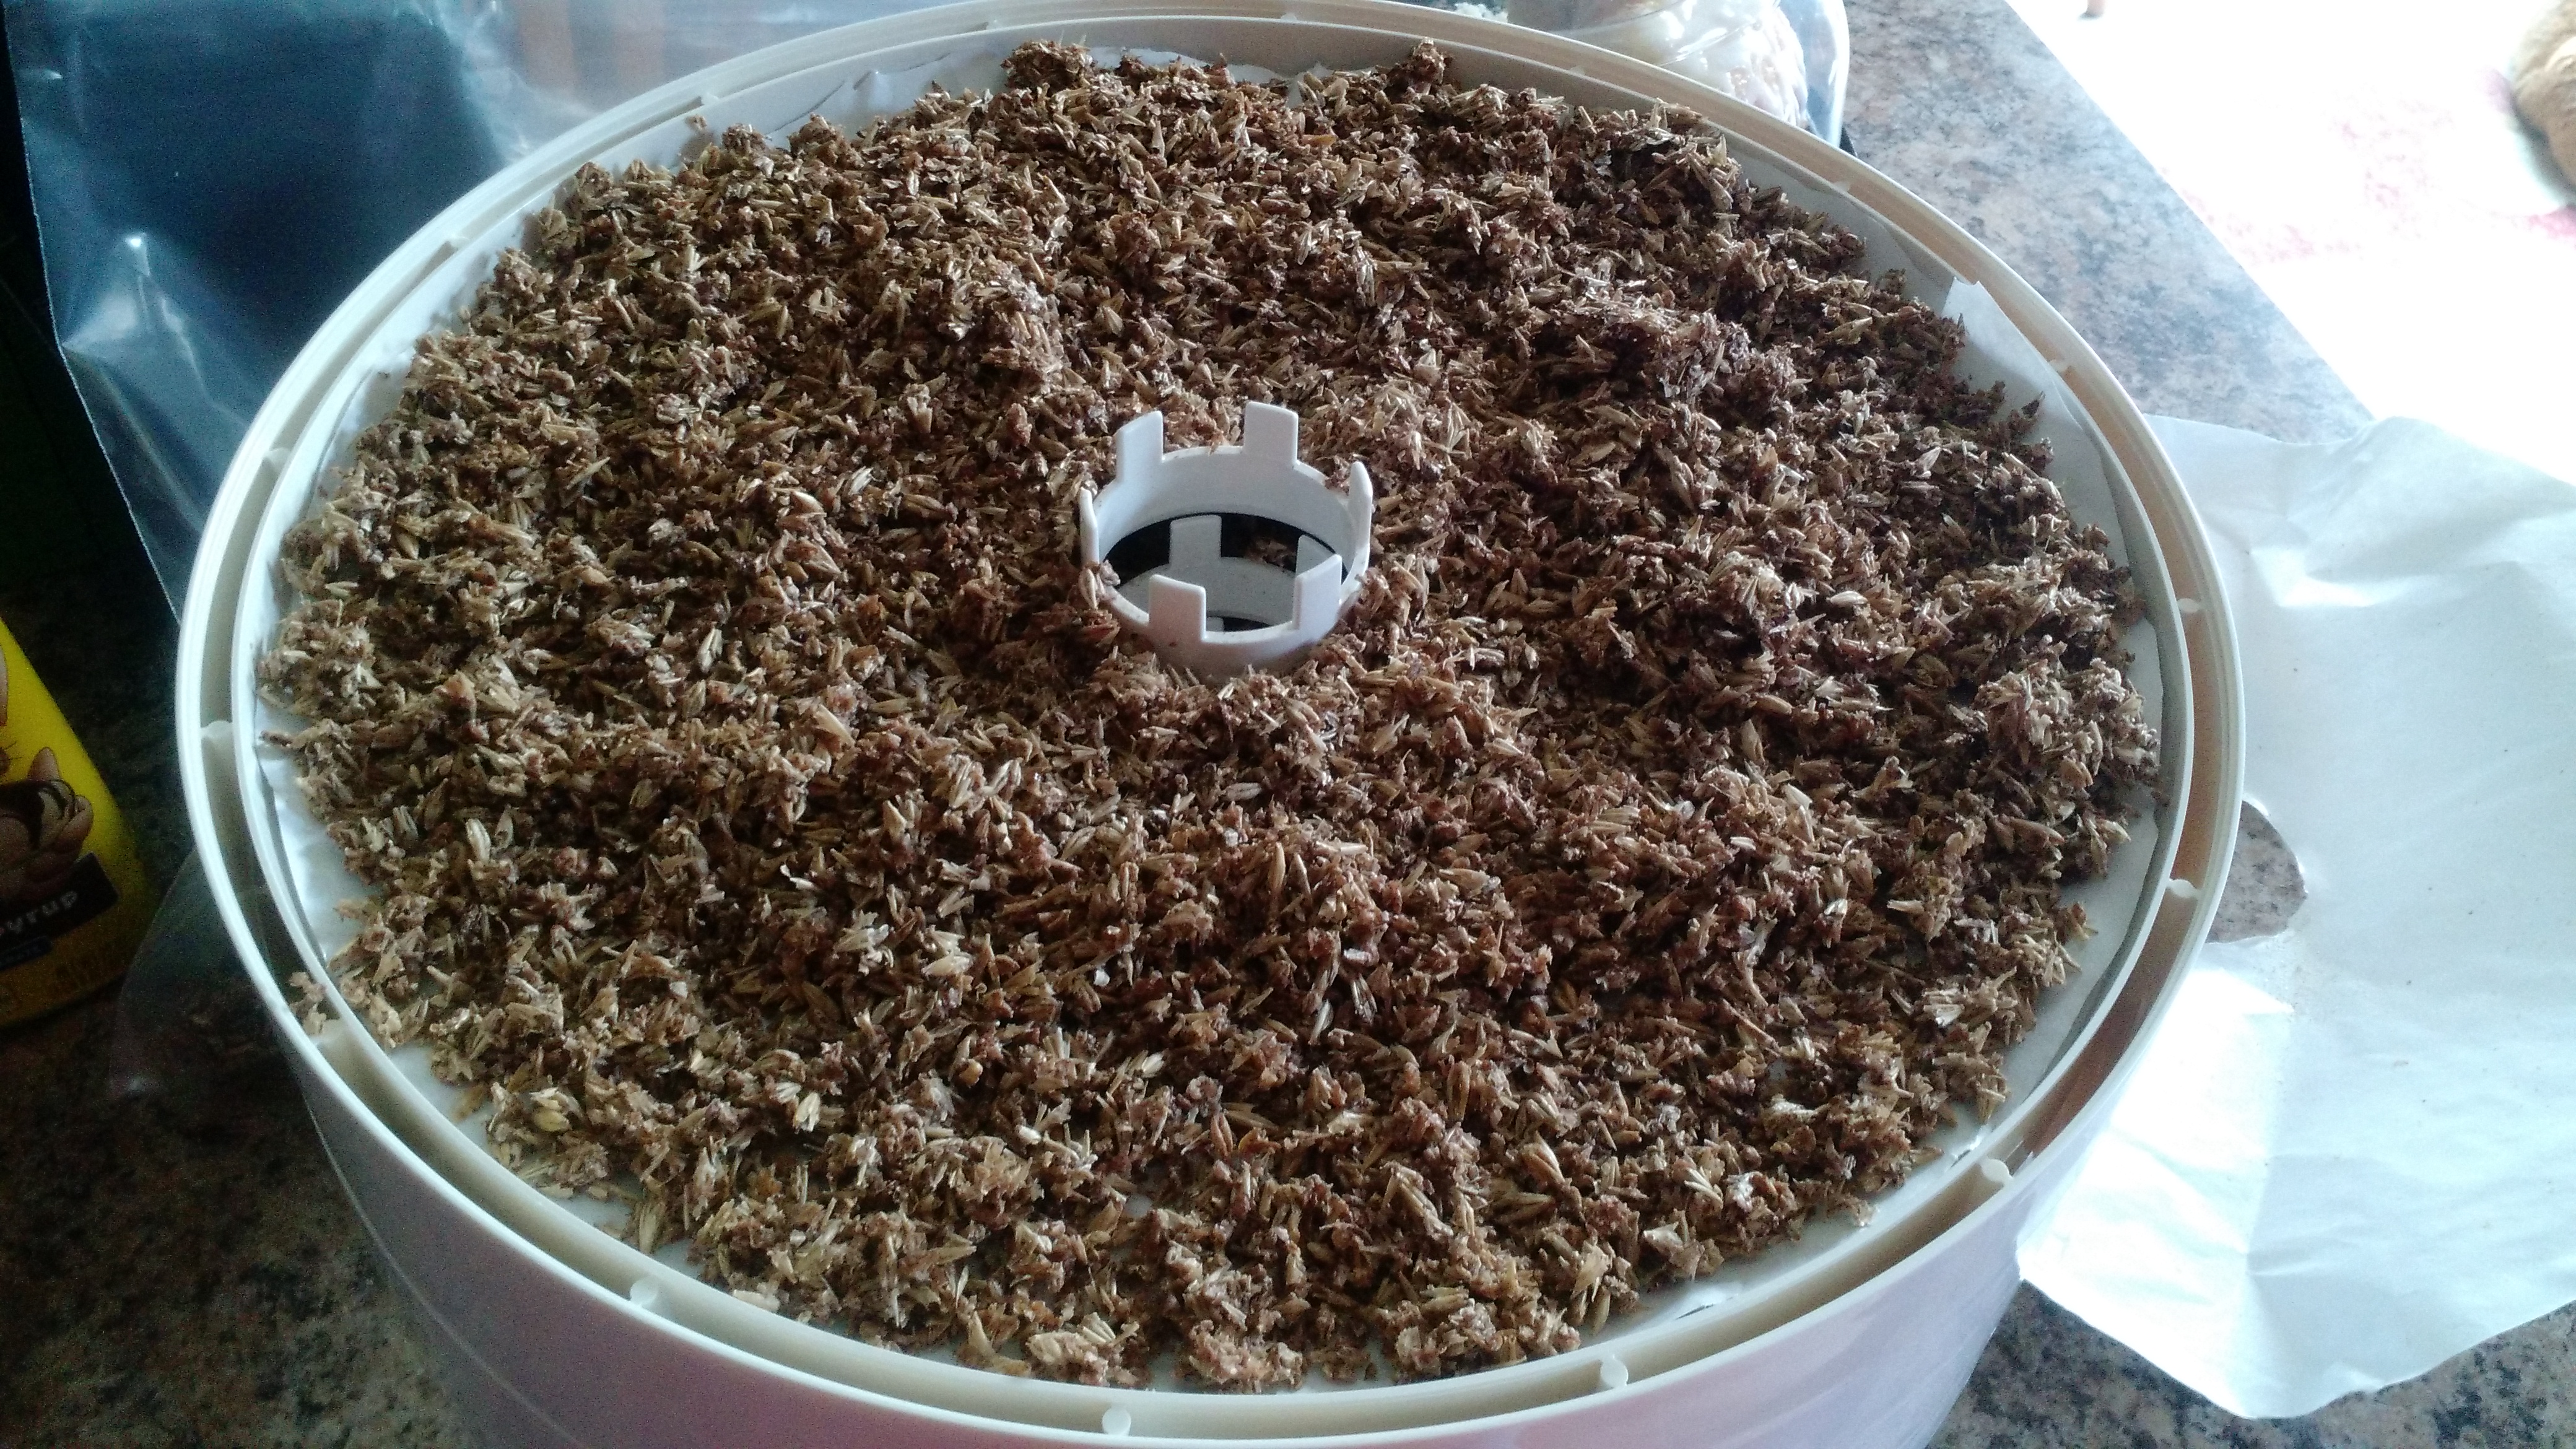
Spent Grains in the Dehydrator
the basement smelled WONDERFUL. It was a mix between bread and cookies.
I gave all the spent grains to one of my directs at work that does a lot of baking. I’ll probably keep the next batch once I figure out what to do with it.
The Taste
The final/first taste from the bottle was still a little estery. I saw a recent post by The Brülosopher where he ran into ester problems with (wait for it… WLP029!). I started looking into it (as suggested by one of the commenters on Brühlosopher’s post), and found this post on BeerSmith’s Forum. I may have fermented too cold causing the production of Isomyl Acetate, which is the classic banana ester. I have noticed that there is a major issue between the temperature reported by the Raspberry Pi and the temperature in the chamber.
The Appearance
I’m pleased with the appearance. It is nice and clear and the carbonation seems to me to be correct.
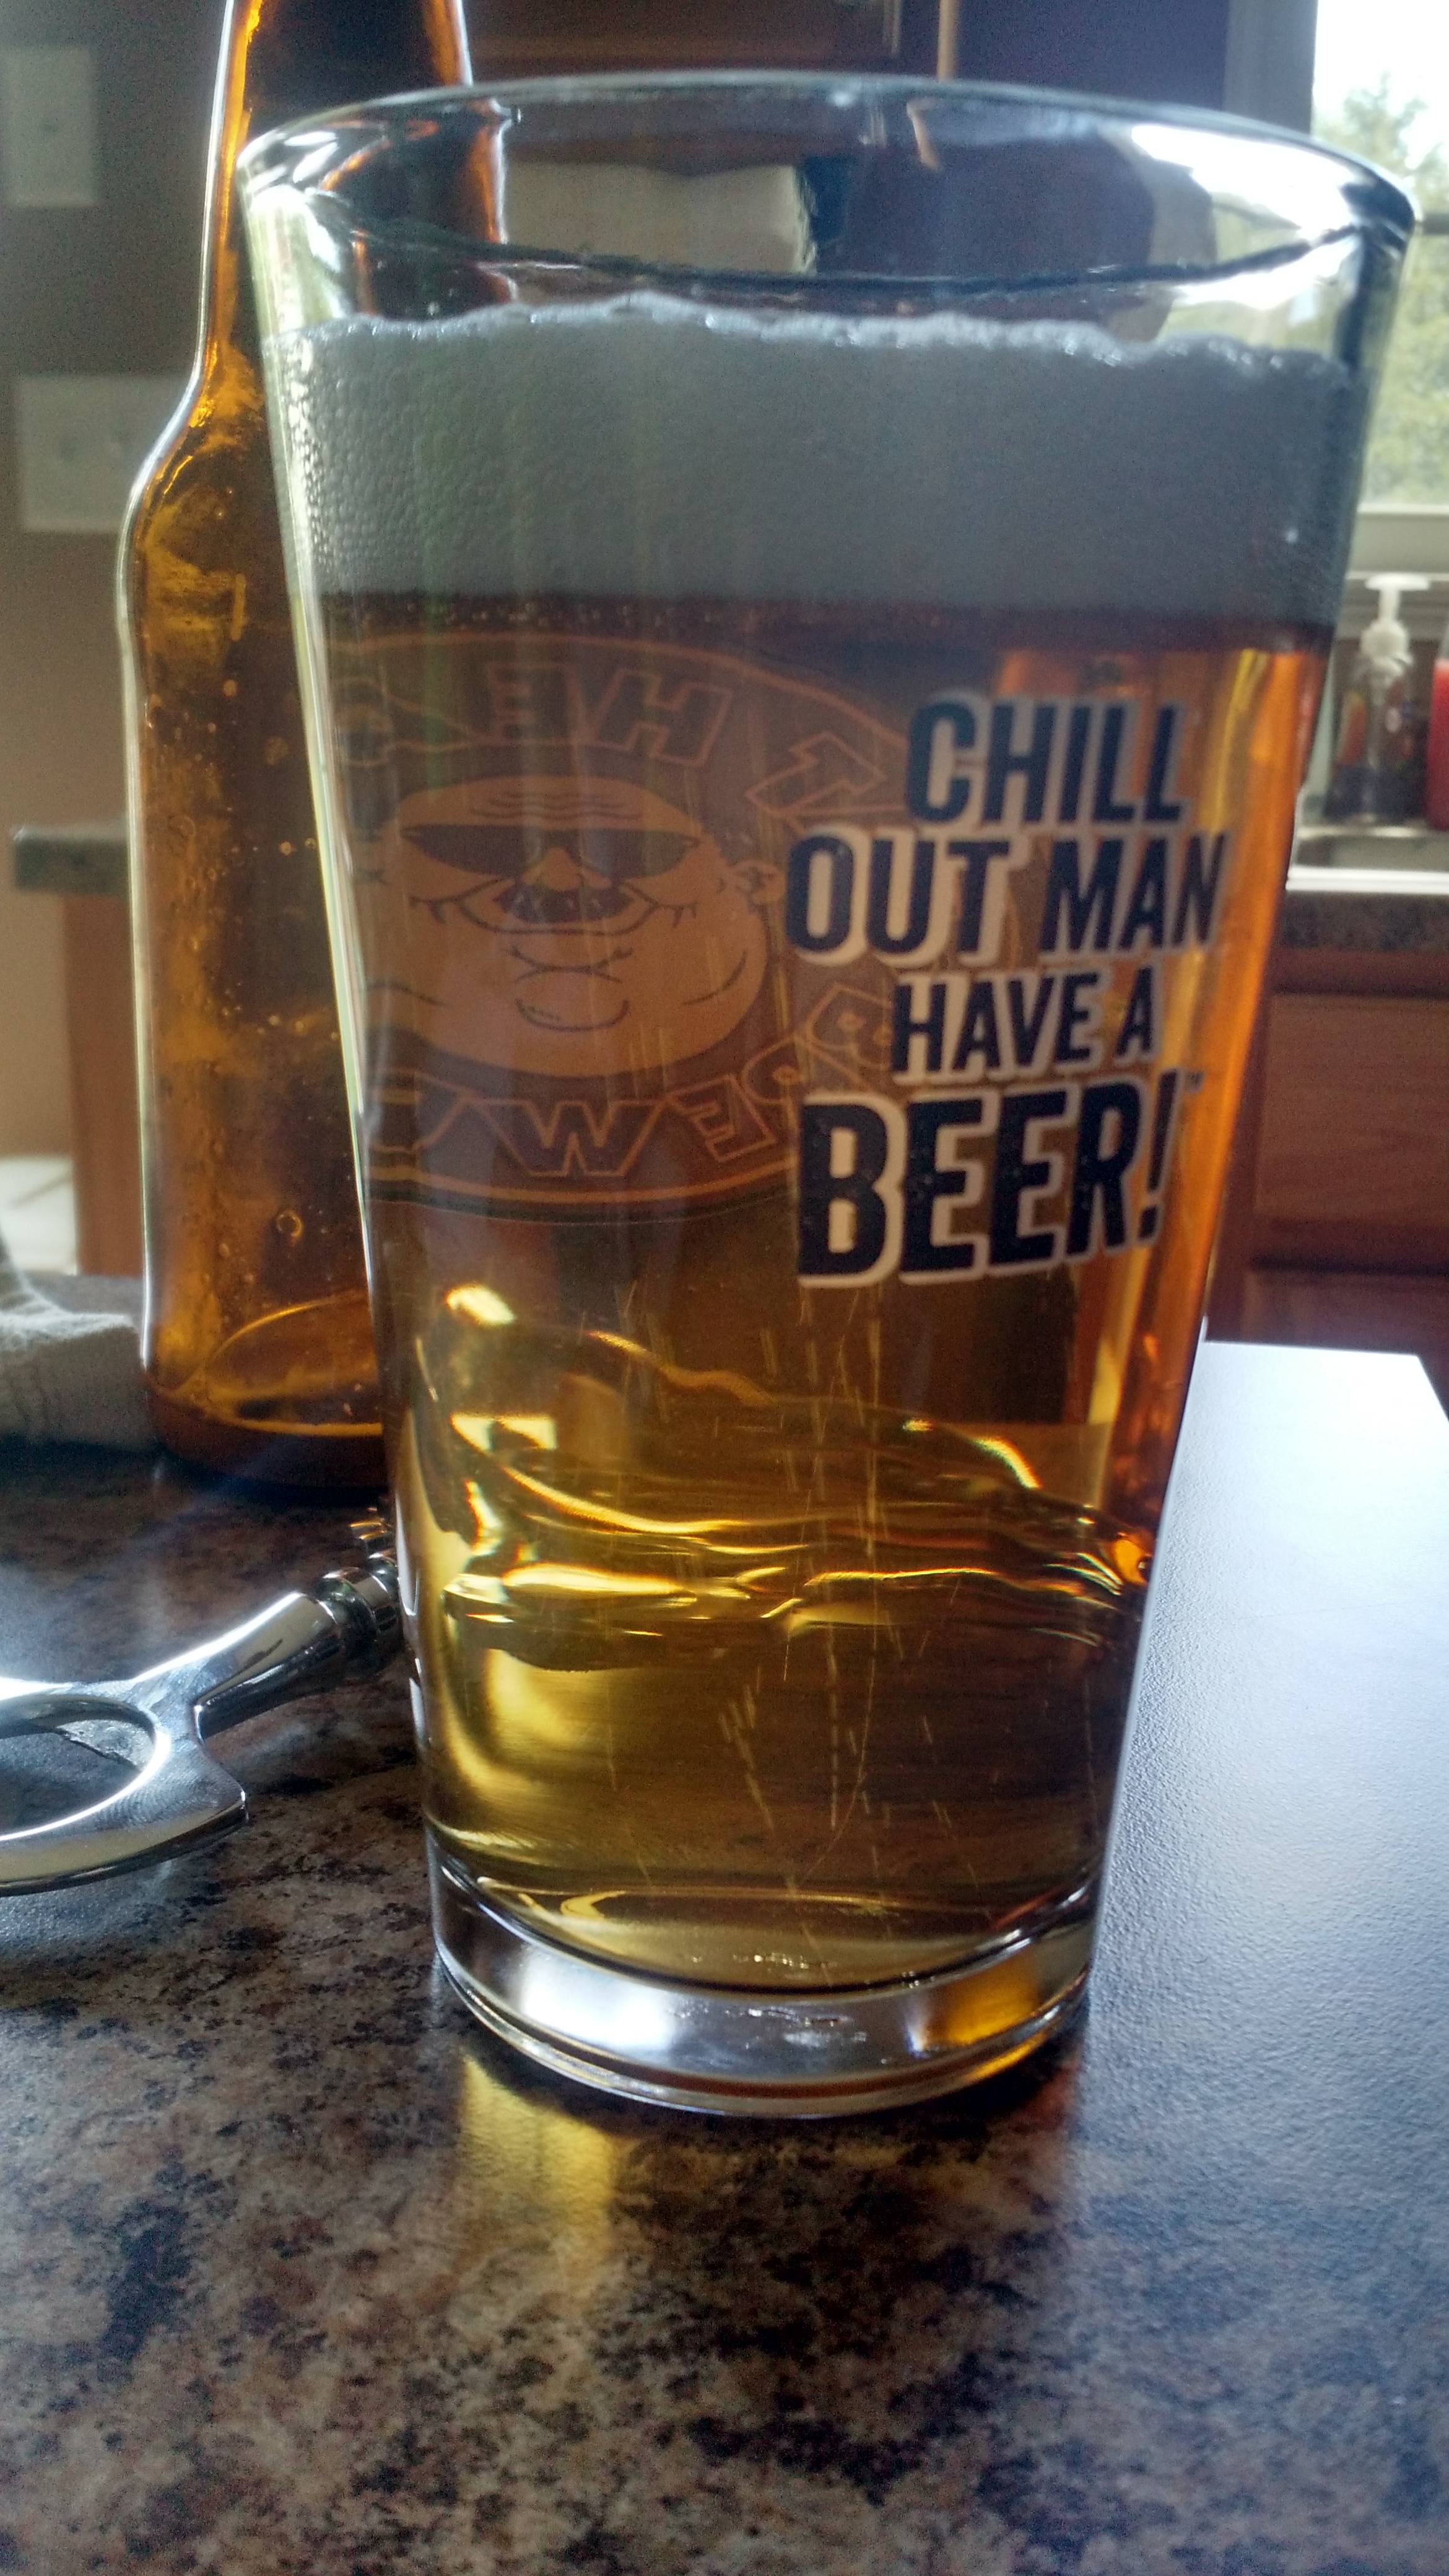
Beautifully clear and nicely carbonated!
Cheers!