Equipment
Beergun!
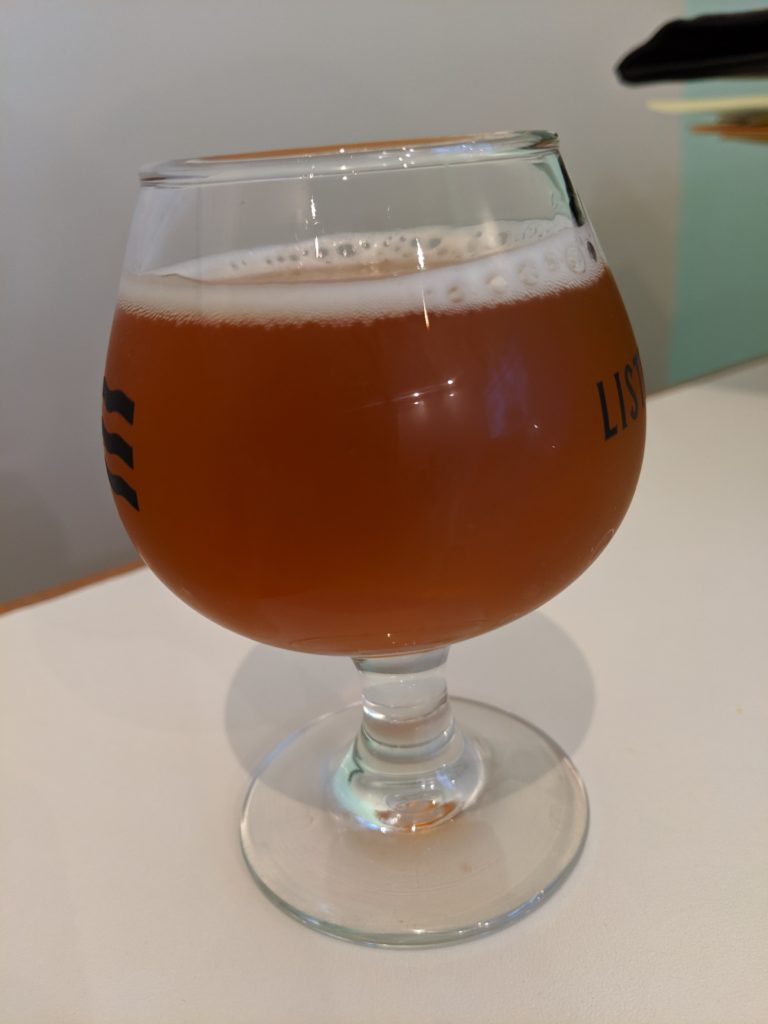
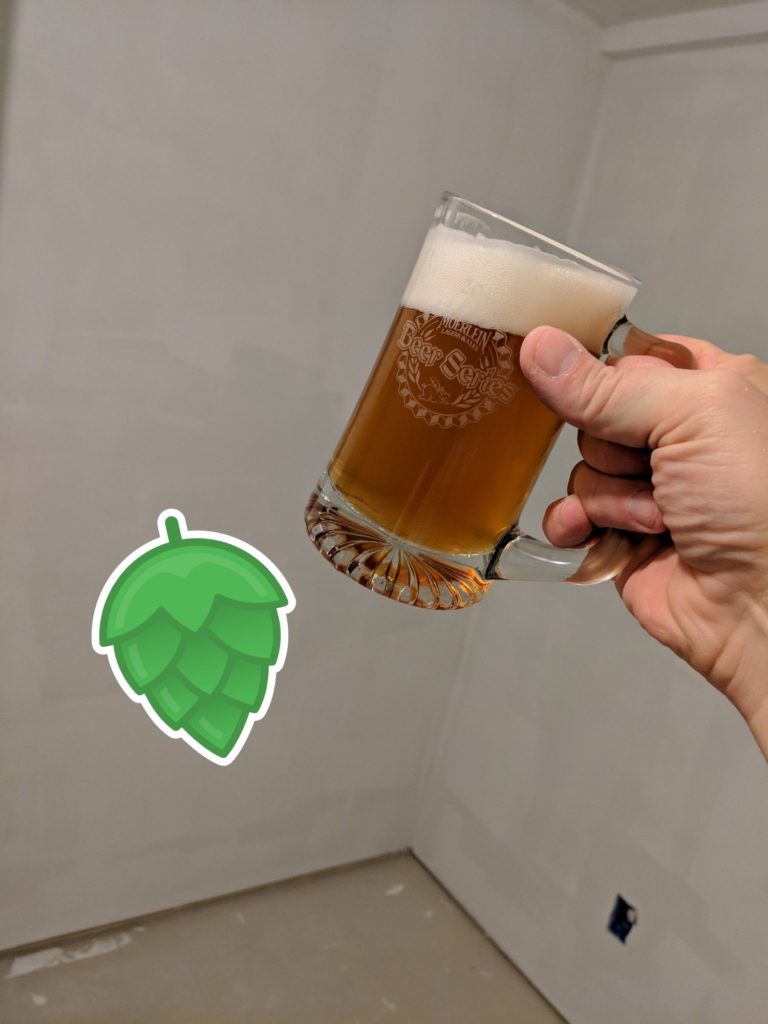
I’m in a predicament… I have a keg of wine barrel aged saison that is very nice, but also not a ‘daily drinker’. I also have to prepare some bottles for the SJ Poor Challenge. So I broke down and bought a Blichmann Beergun v2.
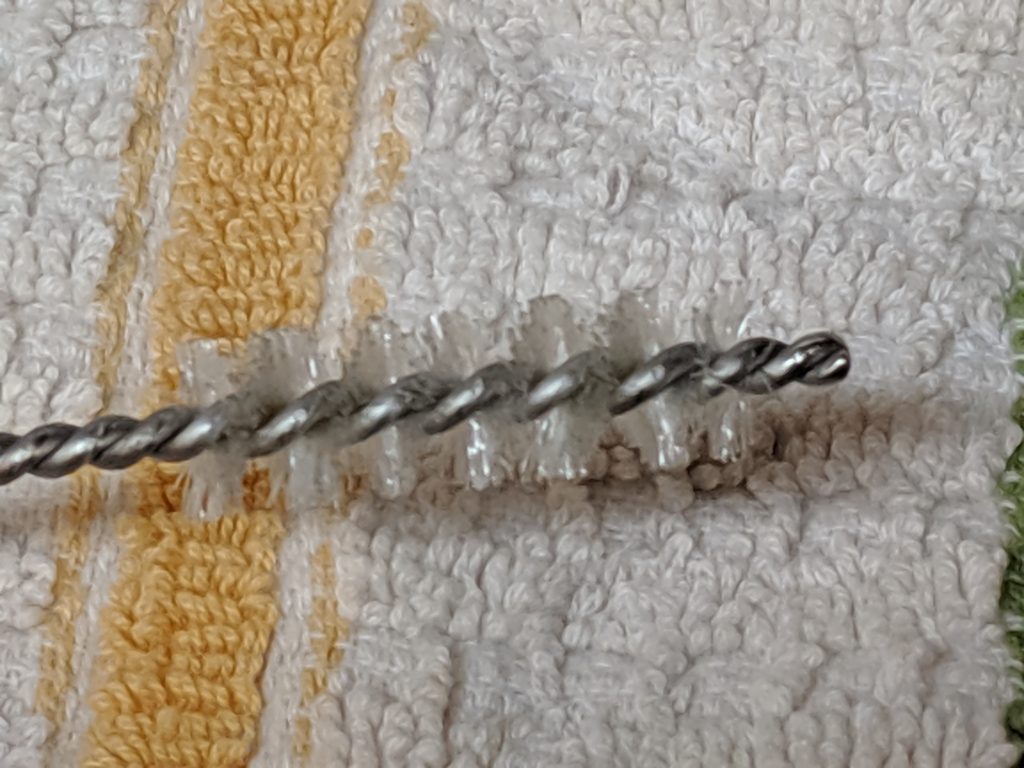
For starters, it comes in a nice box with most of the stuff you need. I had to make some modifications because I use pin-lock kegs, but the modifications were easy enough. Blichmann recommends cleaning prior to the first use, and not only is it a smart thing, it looks like there may have been some machine oil residue in the beer tube of mine…
This was the brush after using it to clean and re-clean the CO2 tube. 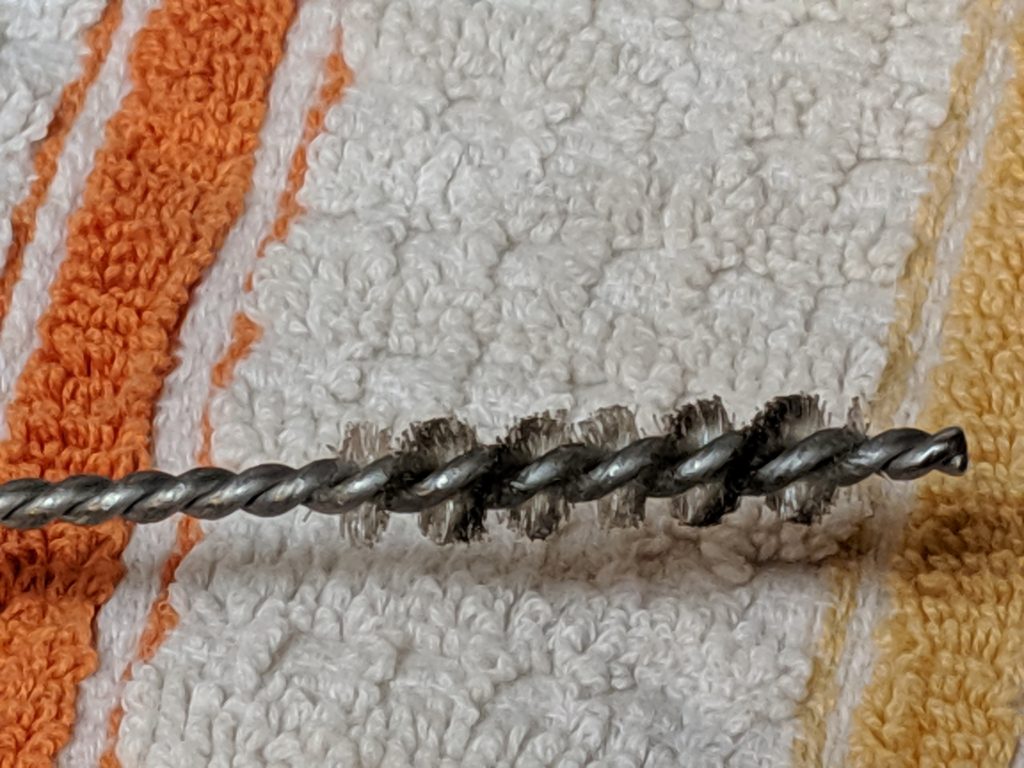
This was the brush after using it to clean and re-clean the beer tube. The dark oily stuff was from the first cleaning.
The Setup
Prior to actually using my Beergun, I looked on YouTube at a few videos. One video showed a nice setup and I took an idea from the author – I used a pitcher full of Star San to hold the Beergun between filling. The other (which I’m not going to link to) showed how important organization is when doing something like this.
My initial setup was less than ideal, but it was semi-functional, and temporary. My table was a piece of plywood on a stool (not the greatest), and that presented some difficulties (if I were to push down at the wrong spot, the whole setup could end up on the floor). The second time I did this (sorry, no picture), I used some sawhorses (definitely more stable) and an old tray to keep the spillage contained.
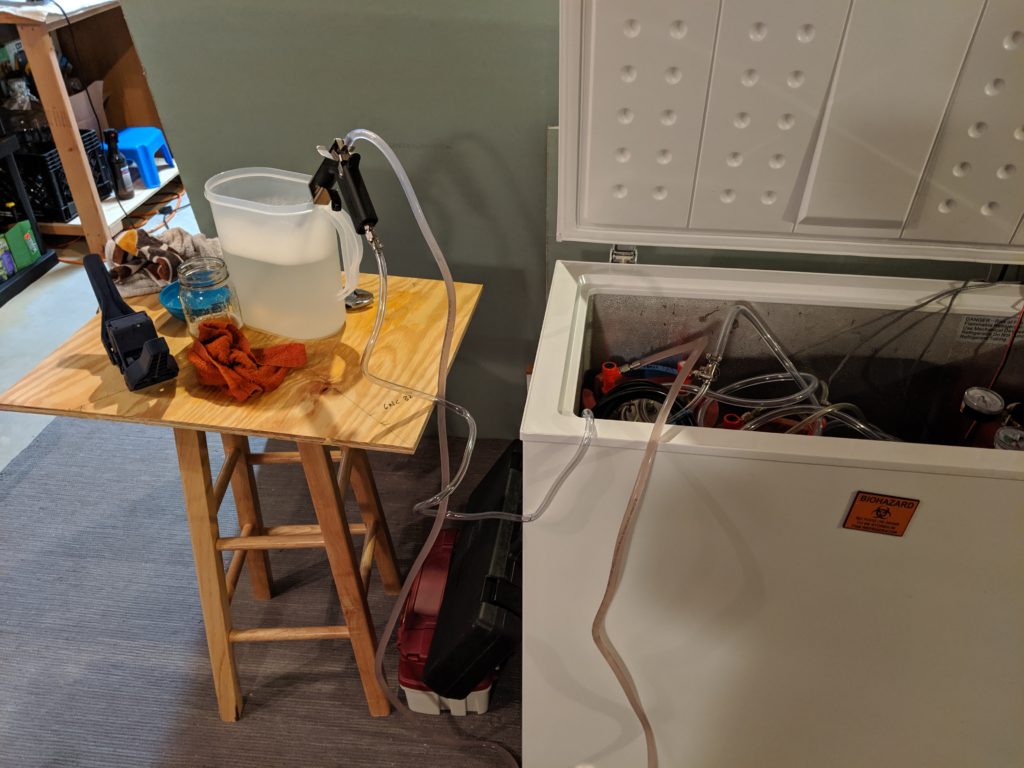
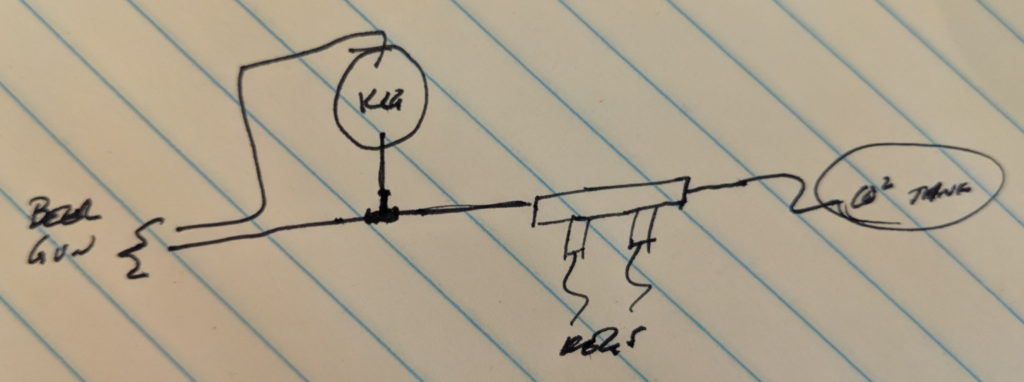
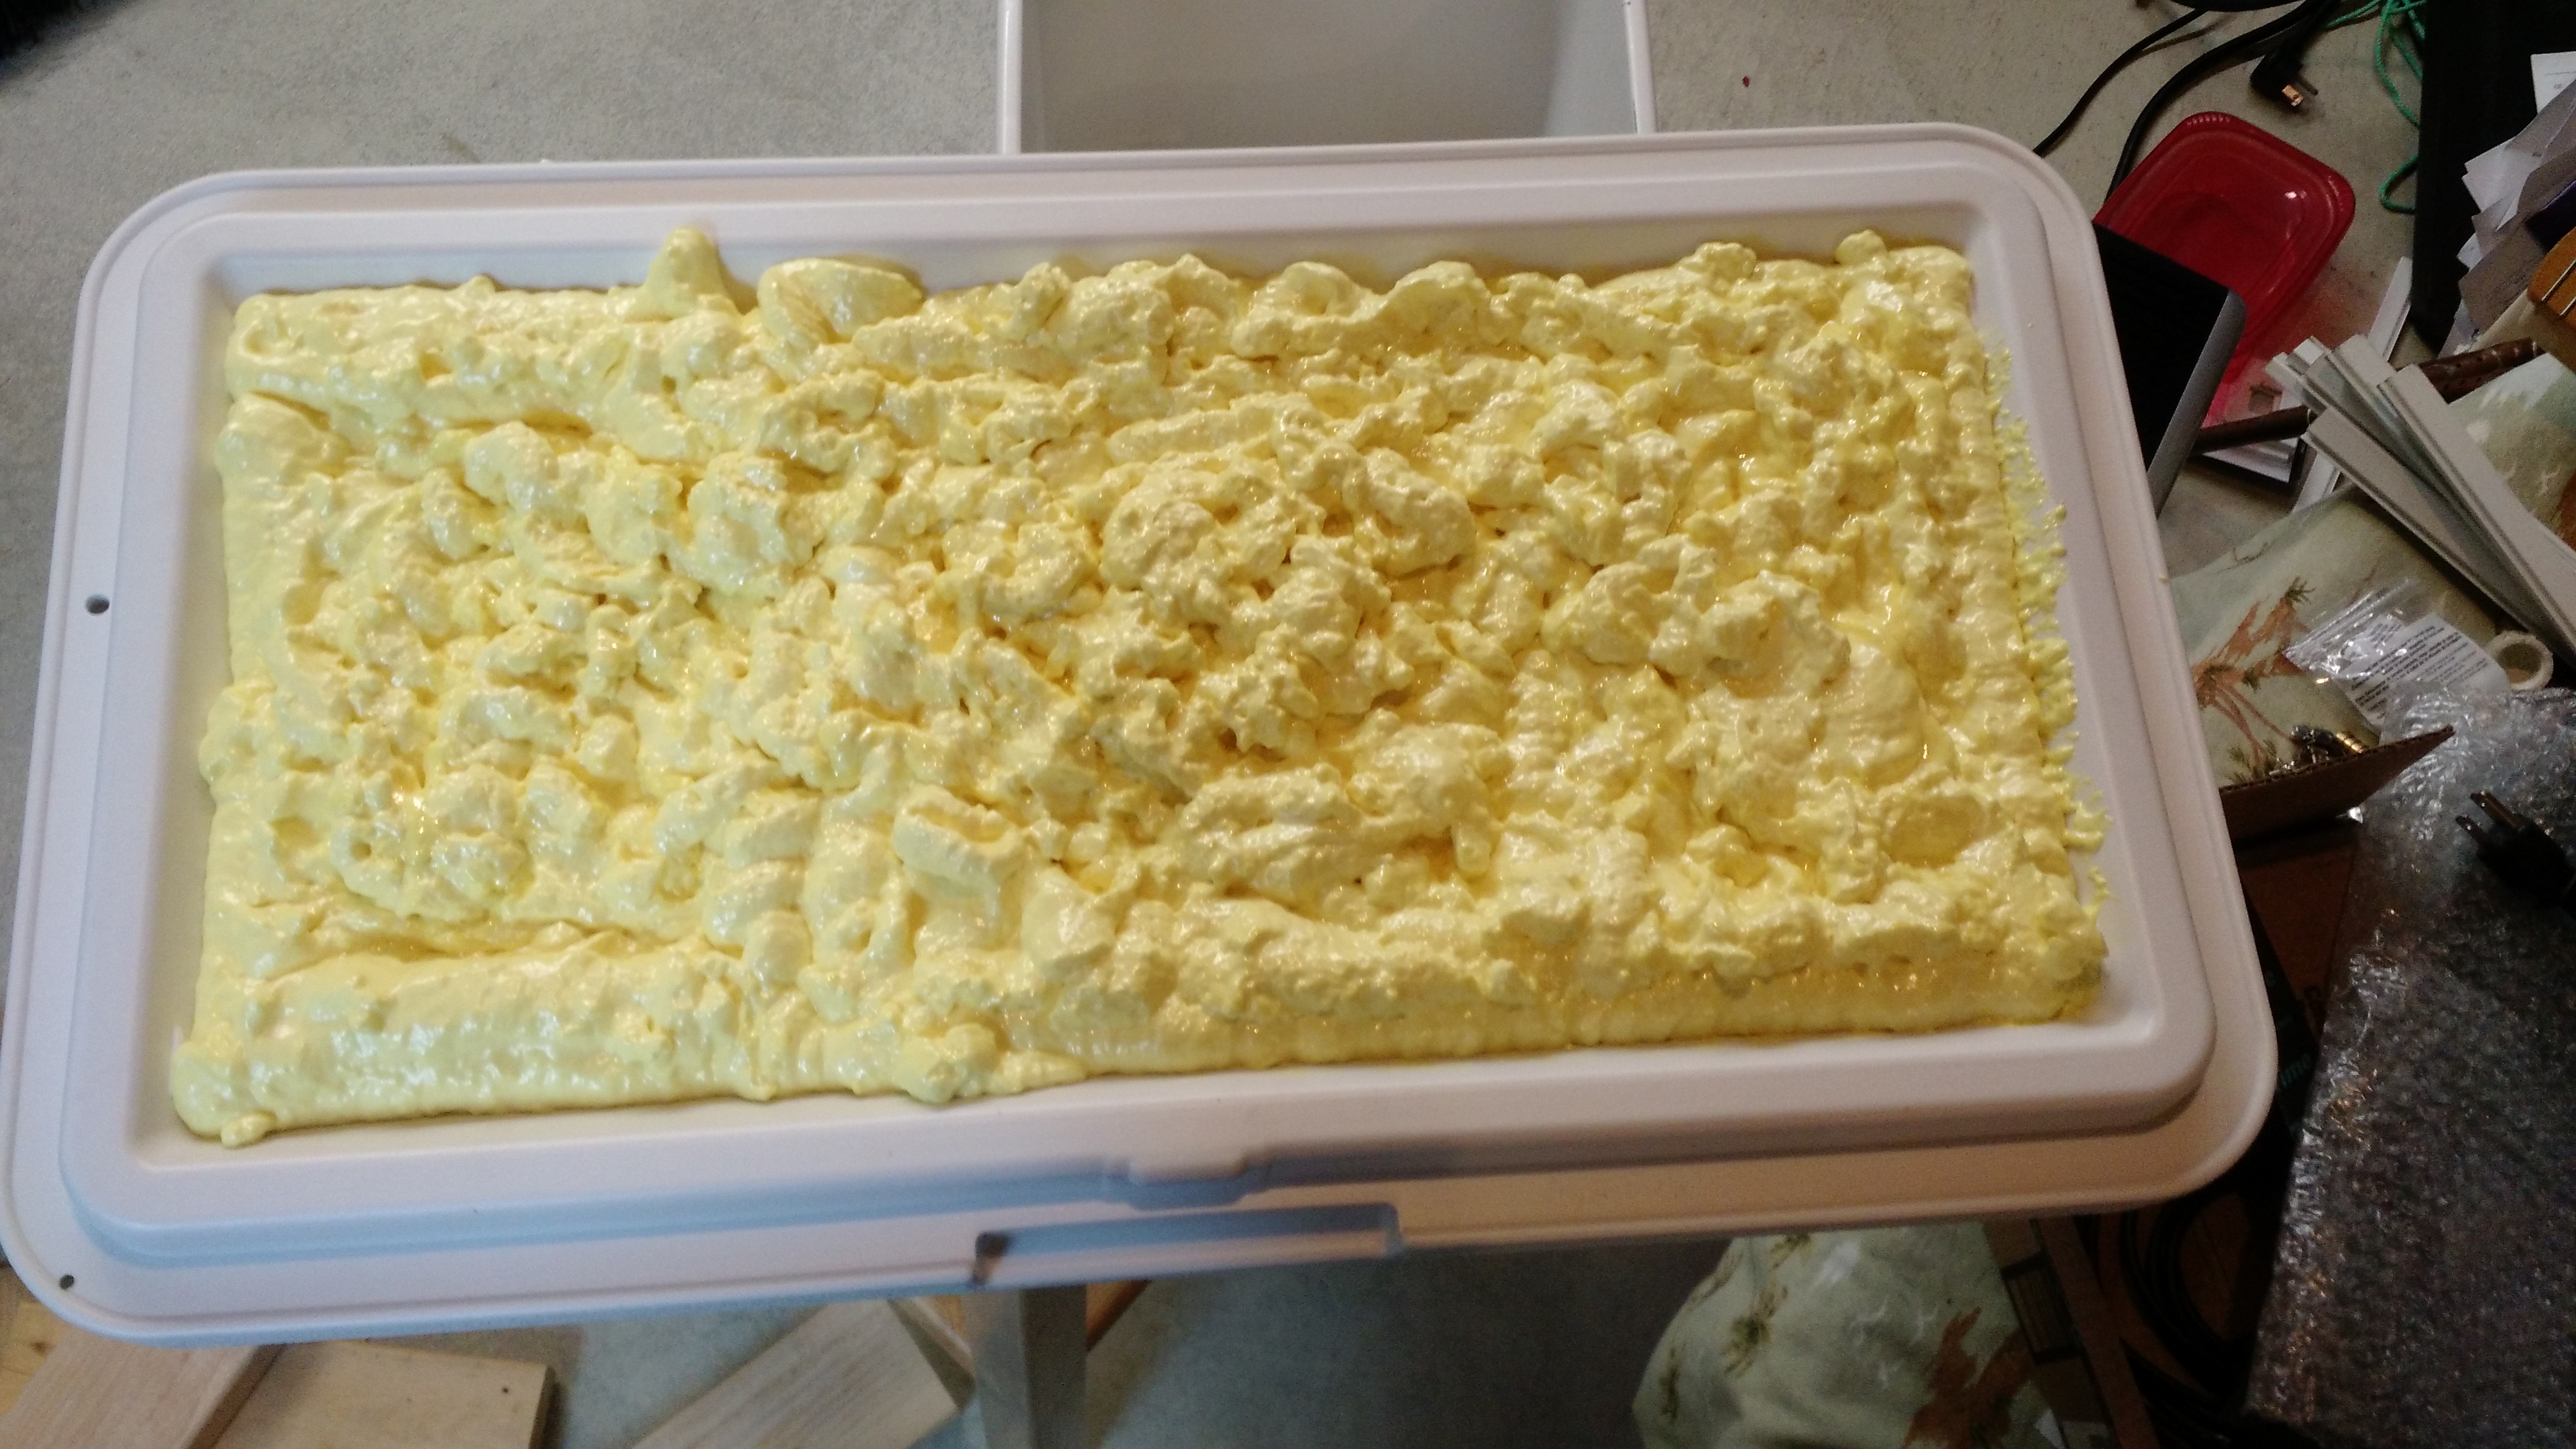
In the image above, I have the beer CO2 line go from my second manifold to a T connection that goes to both the keg and the beer gun (see the diagram below).
My process went largely the same as in the video I linked to, just a bit more rough. Fortunately, nothing ended up on the floor, and I bottled 12 bottles with only one with a low-fill (I need to send 10, so the extra two will stay at home including that low-fill bottle).
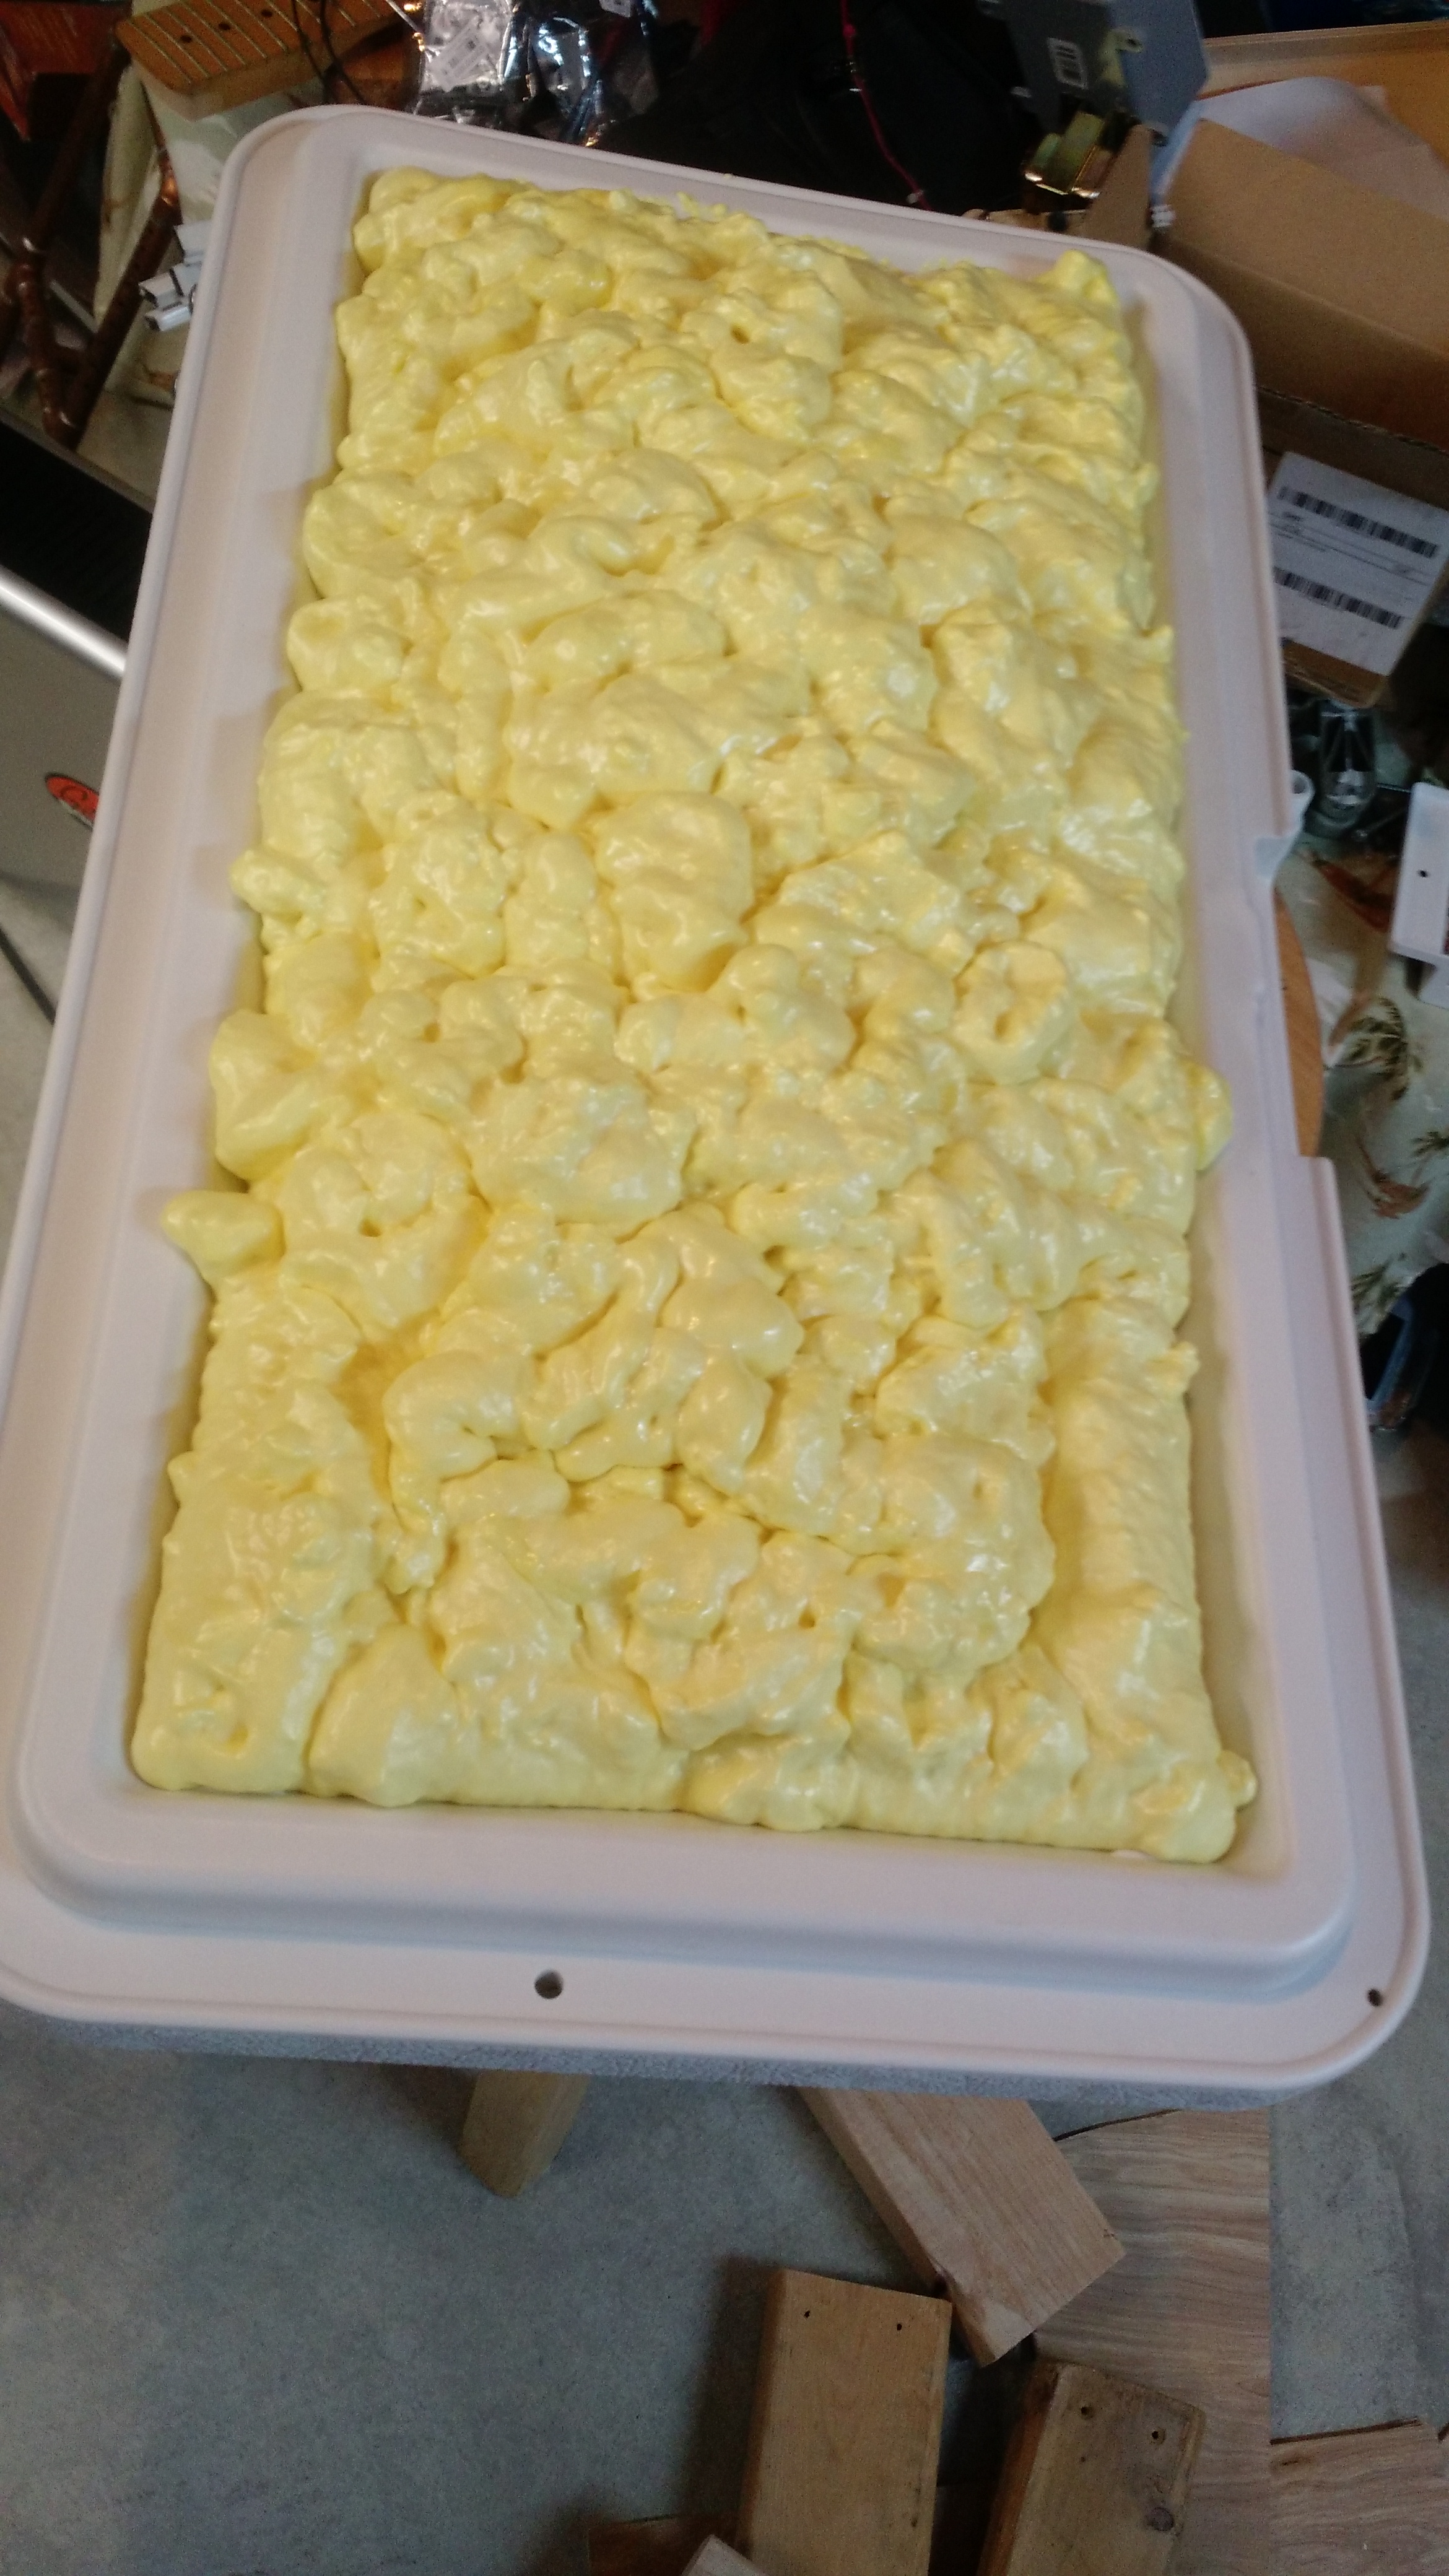
A few weeks later, I bottled that keg of red wine barrel aged saison, and with the exception of one low-fill, it went well.
Homebrewery Improvements: Grain Milling Cart
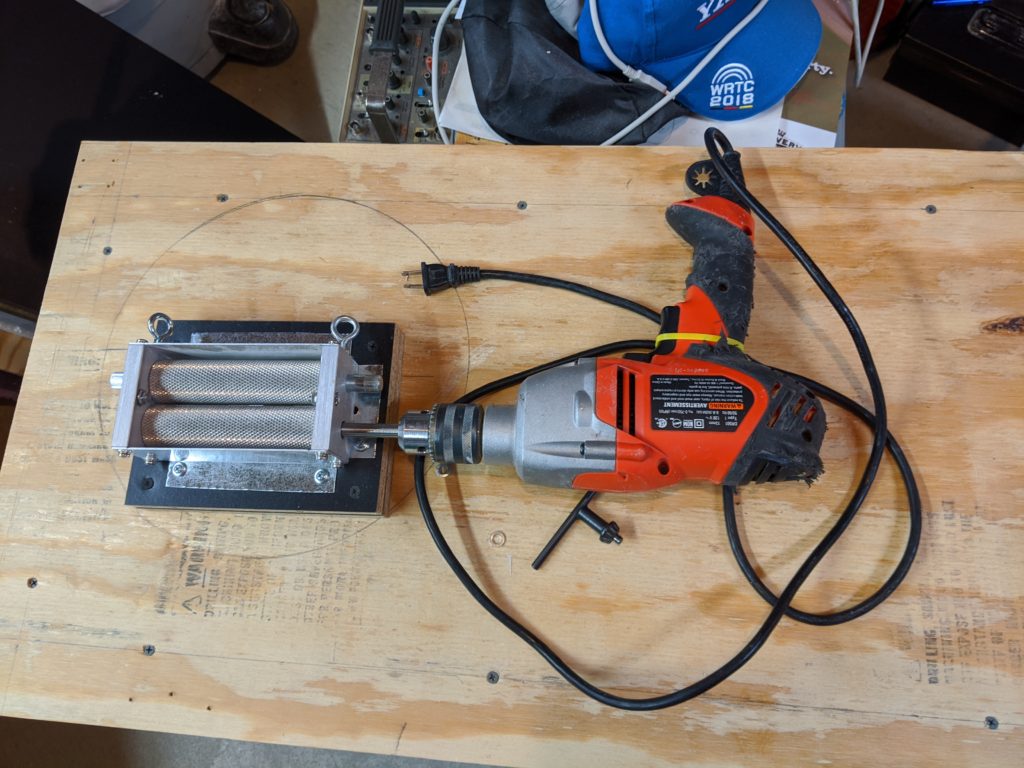
After a wortsplosion caused me to need to clean part of my mill and the cheap drawer-bottom not-even-particleboard piece that I was using to attempt to hold my drill and mill as I milled grain, I decided that an improvement was in order.
Specifically, I wanted to improve three things:
- I don’t want to use my foot to keep the mill from moving off the bucket
- I don’t want milled grain to get ‘stuck’ in the wood frame the mill is attached to
- I don’t want my drill to bind on the platform and I want both hands free of controlling the drill
While it isn’t a criteria, I didn’t want to spend a ton of money on this, so I used a lot of recycled materials. I started with getting a more substantial piece of wood – some half-inch plywood from what was going to be a lagering chamber (I’m going to stick to the water bath method used in the last post) and some shelf pieces from an old stereo cabinet.
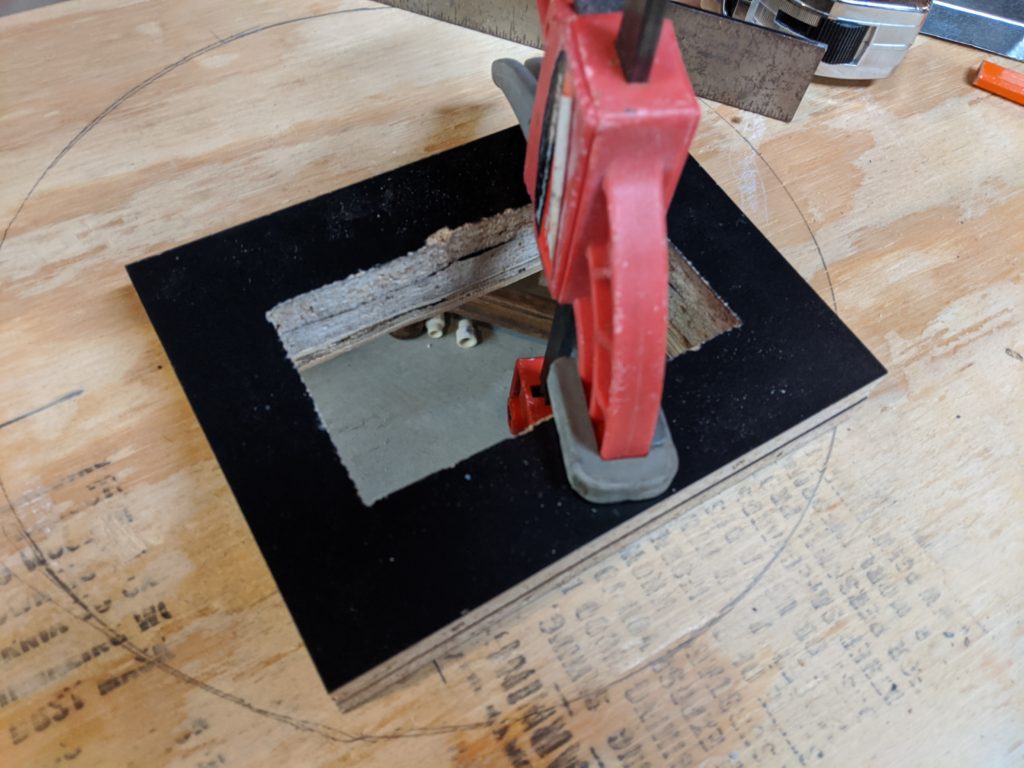
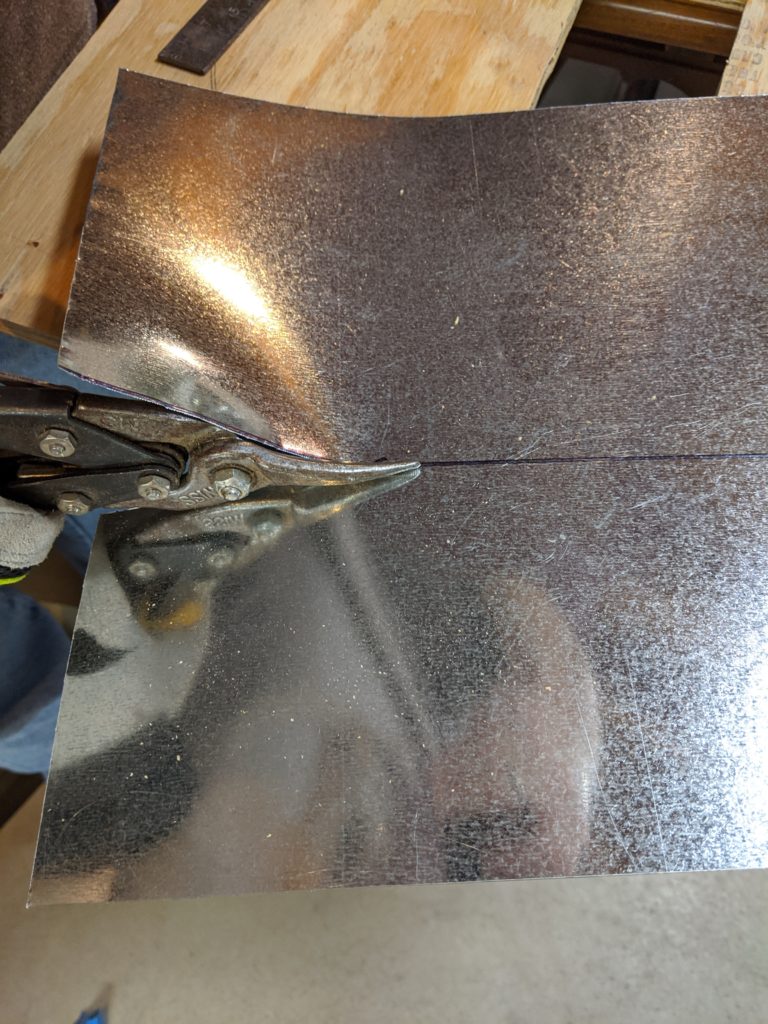
Since I didn’t want a way for milled grain to stick into the ‘chute’, I used some leftover duct metal to build a chute.
Even better, I still have leftover metal for an exhaust hood that I desperately need to build.
After making the chute, I added some legs. I had some leftover casters, so I added those to the legs, although I’m not 100% sure I’m going to keep them (or all four of them – I might change two of the legs to adjustable feet).

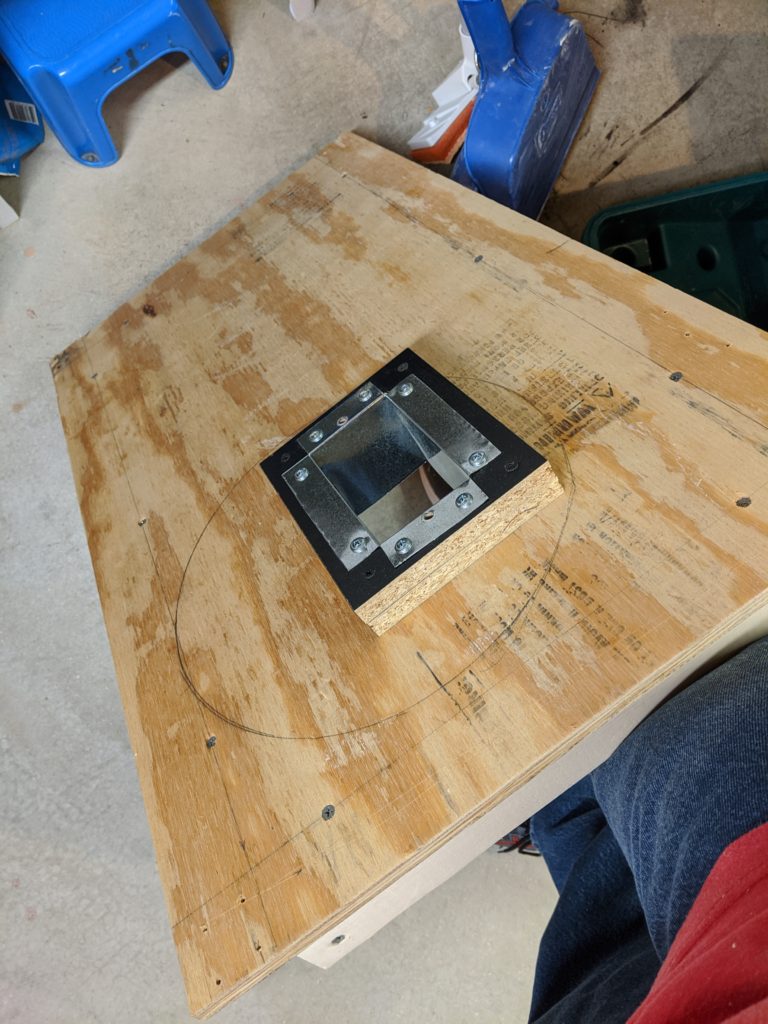
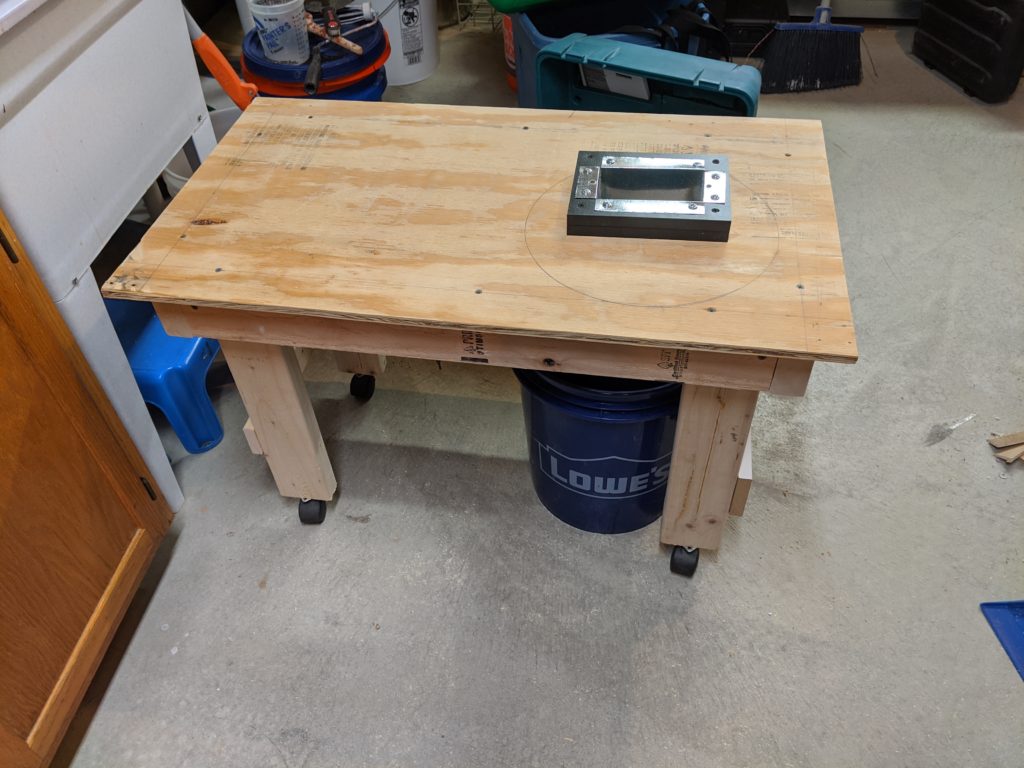
At this point, the only materials taken from new are some cabinet kickplate material (I’m not even sure why I have some) and two 2x4s. Everything was already purchased and was “extra” material except the 2x4s. I will need to purchase a few bolts to hold the mill on, but that is it. I may paint the top also, in case the plywood gets splashed. 🍻
Top Ni… Whatever. (Back/Forward 2019/2020)
Apparently, there’s a thing going on with Instagram that people are posting “Top 9s”. I’ve had a mostly-hate relationship with Instagram because of a variety of reasons… not limited to the lack of a chronological and un-curated feed and a shit ton of newlines ending with a list of hashtags for reasons I don’t care to give a shit about.
I looked back at my post list for the end-of-2018 post, but it wasn’t there. Apparently I care a lot about resolutions! Well, to be fair, I was building out my office as I had just changed jobs from one that required me to drive to downtown Cincinnati every day to one where I work from home.
There was a post at the beginning of 2018… my how things have changed since then! I was complaining about blowing up cheap $20 pumps from eBay and doorbell transformers (and other power supplies). I’ve since graduated to the real world of a pump that plugs into the wall (and thank God I haven’t blown that one up!)
I also talked about building a wall. I’m not sure how my speed relates to that of the Federal Government, but I’m close. I have about two feet built.
Last Year’s Progress
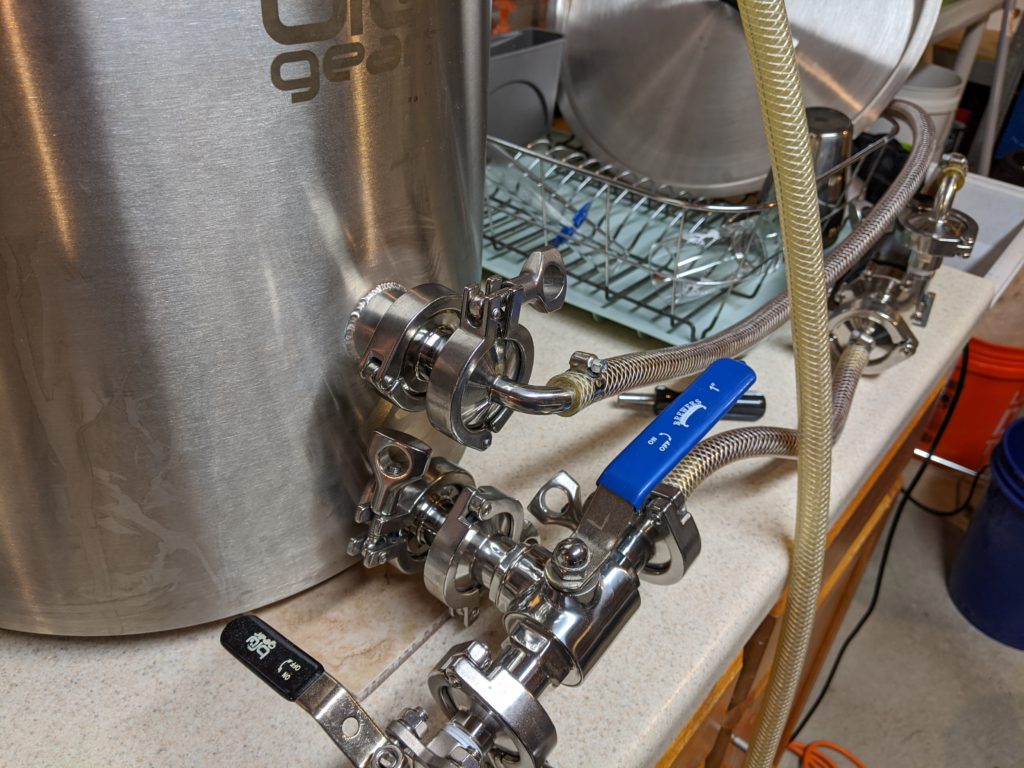
On the equipment front, I bought some stainless stuff. I got sick of dealing with barbed connectors and began moving towards tri-clamp fittings on everything. Also, I decided to use an upper port on my kettle for whirlpooling.
I also got extremely angry at my plate chiller and decided to buy a counterflow chiller. I’m pleased with it (even more pleased that I didn’t clog it in a recent brew).
I decided I’d build a spunding valve setup. I haven’t used it yet, though.
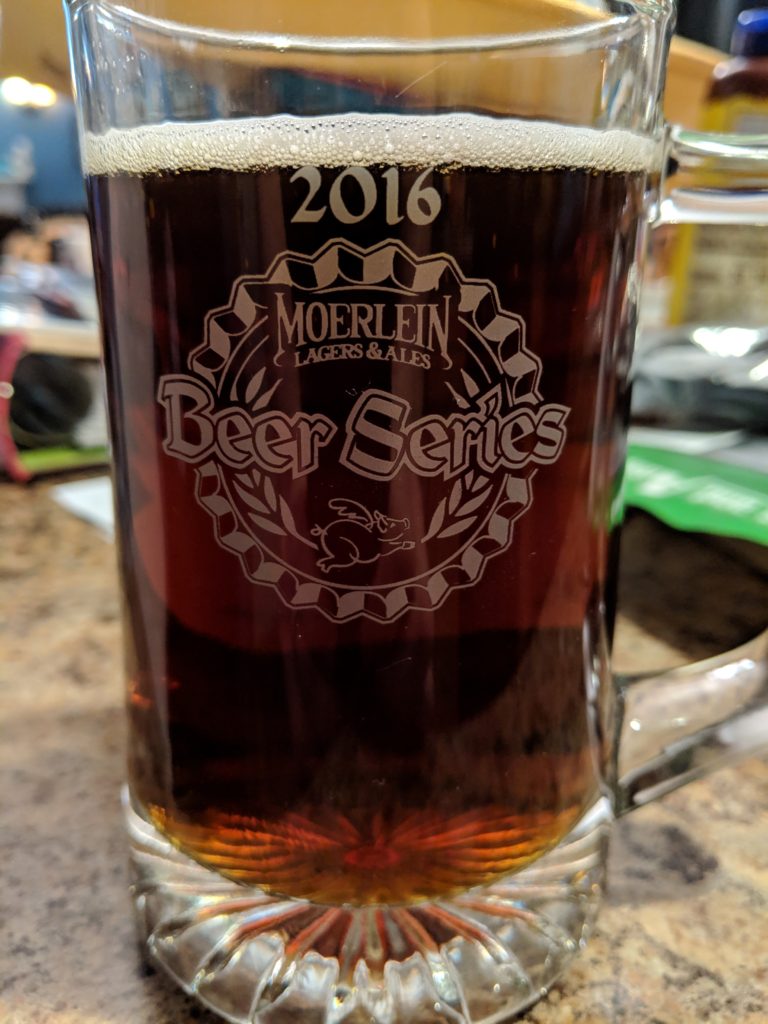
The last equipment news is that I bought a Blichman Beergun. I entered the SJ Poor Challenge and wanted a better way to bottle beer, this was particularly due to some differences in scores between the only two competitions I entered.
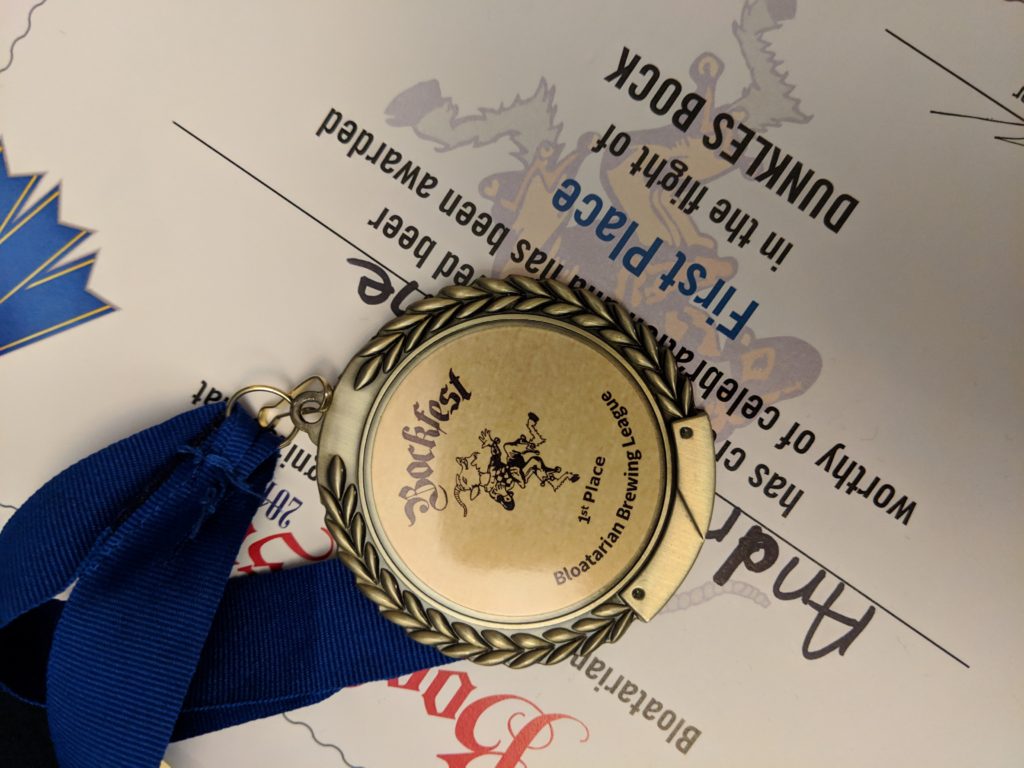
On the brewing front, I won a gold medal in one of the competitions I entered, with a Dunkles Bock. The same beer went into a second competition a week or two later and the scores were not as good. When I entered the SJ Poor Challenge with a fruited milkshake IPA, I decided I wanted to ensure oxidization was not a factor.
2020 Stuff
There’s a few things I want to do in 2020 (other than brew more).
I want to get started on being a BJCP Judge. I want to get my Provisional (I think… it’s hard to figure out which/what when their websites have been a hot mess for the past three years). The other side of that is trying to ensure I can actually USE the certification (e.g. SWMBO will let me go drink beer all day).
I want to continue improving my homebrewery. There’s already a few improvements that haven’t been posted by this blog, and there’s one big one that I still need to do – an exhaust hood. I run a dehumidifier in my basement, which generally runs for two days following a brew session. I do need to change that. I also have some drywall that can be installed, although I need to add insulation and studs first.
I want to try to post more on this blog. I posted six things last year. I want to try for more. I do have a backlog, so every week in January (on Wednesdays) will have a post. I also want to fix the format/look/feel of this blog. The one I have is free (and feels like it). I’m not really all that pleased with it, and I have a ton of WordPress experience from the other sites I work on.
Finally, I want to do more with video. I’ve always had a mild interest in doing video ever since working in 3D Visualization in the early 2000s. I’ve been kinda following along with a few people, and probably overthinking the video thing (although I do want good sound, good video, and good everything else too). Video is one of those tough things to get right because a simple YouTube search shows that, like nutrition, everyone is an expert… unlike nutrition, there are many experts with many different approaches that all work!
That’s all for now. Happy New Beer… er, I mean Year! 🍻
DIY Spunding Valve Setup!
After sitting in a pool drinking a can of Sam ’76 that a friend gave me, I decided that I do want to be able to lager. However, my basement is currently a mess and I don’t have room for anything like another chest freezer. Enter pressure fermentation. There is some scientific evidence that pressure fermentation reduces esters from yeast (although there’s some anecdotal evidence that yeasts like W-34/70 can handle fermentation at room temperature (and I’ve made a Tropical Stout with Wyeast 2124 Bohemian Lager and fermented it at room temperature… which is claimed to be the liquid version of W-34/70).
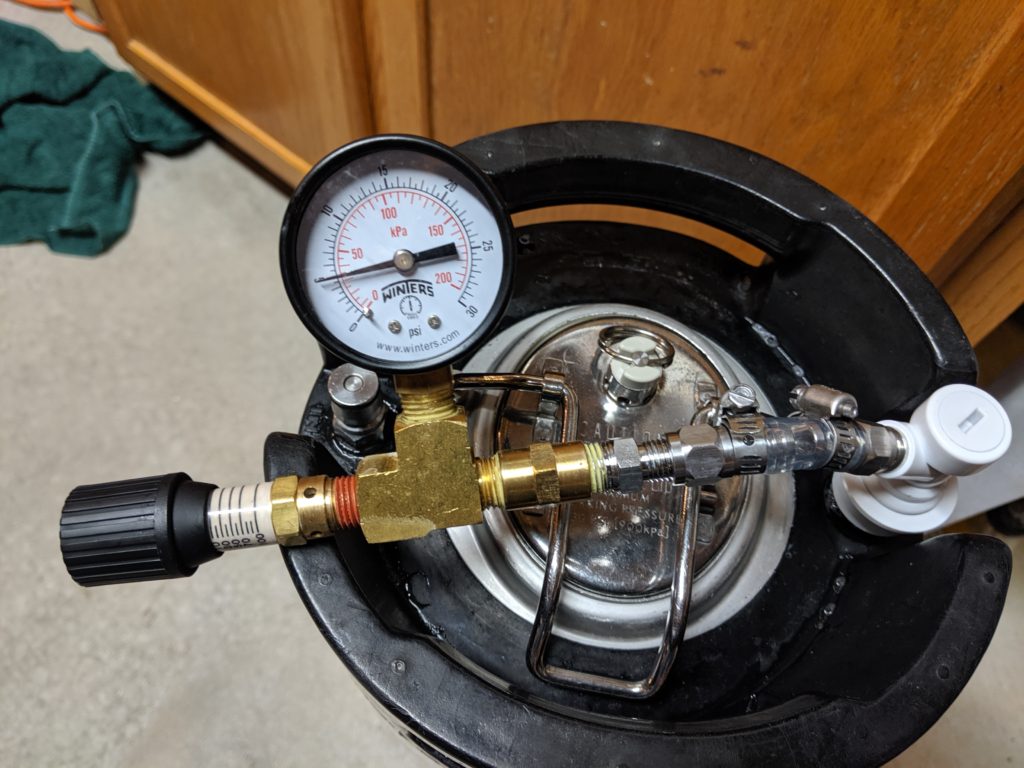
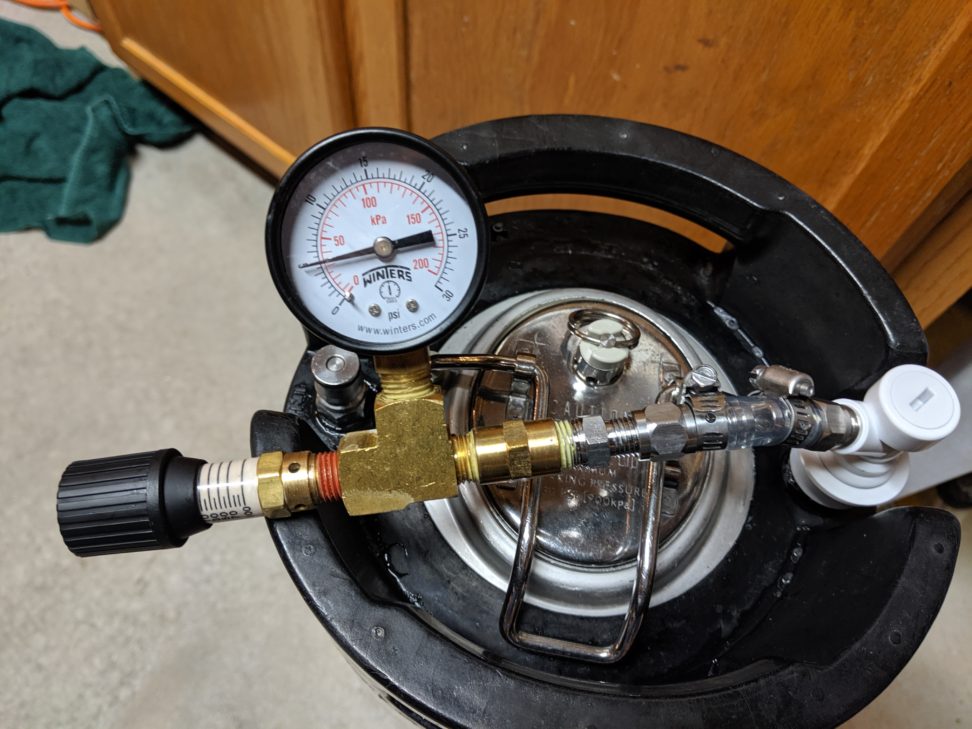
Spunding valve setups are pretty easy to make – at it’s most basic, it’s just a spunding valve connected to a keg post. Since people generally want to know what pressure they’re at (that can become really important), a smart thing to do is add a pressure gauge in the setup.
I happen to have an extra ball-lock keg that I used once in a kettle sour process. I did have to replace the lid with a new one, and I bought new O-rings (I kept the old ones in a bag marked “sour”, because I’m sure I’ll be making more sour beers too). I also had to buy some posts and disconnects.
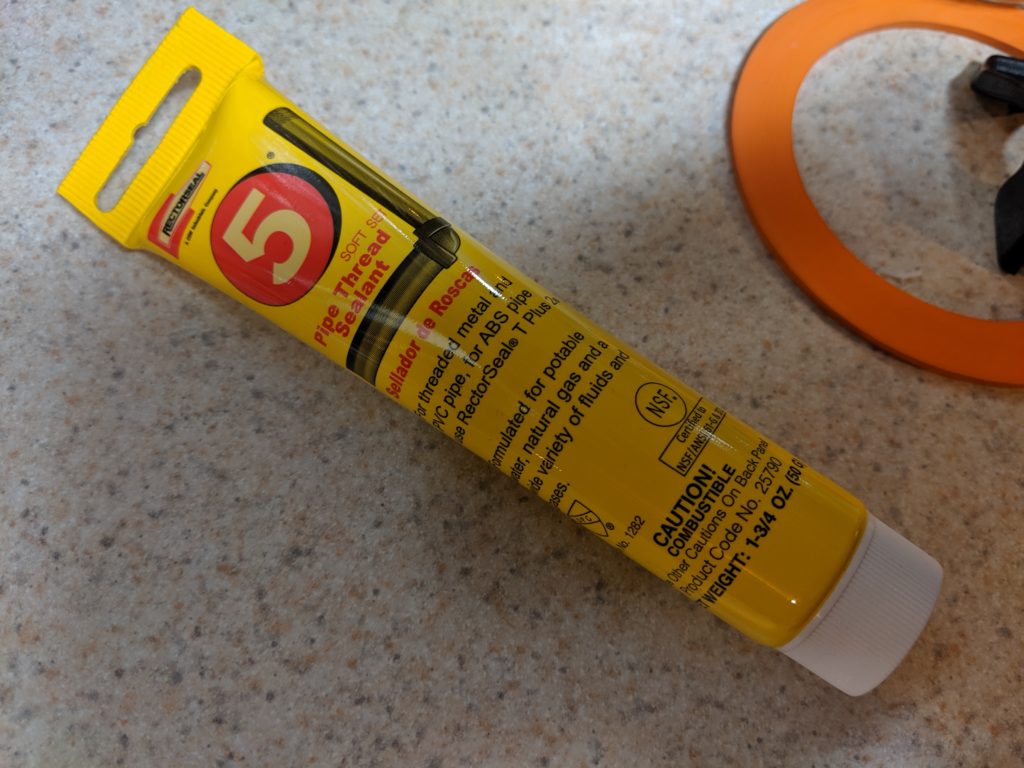
From the post, there’s a short length of hose to connect to some adapters and then to a T connection, which has the pressure gauge off the top and the spunding valve at the side. I used a liquid thread sealant on all threaded joints, although I imagine teflon tape would have been fine as well.
After some false starts with the posts being reversed (I usually use pin-lock kegs), I got it to hold air – it held 5 PSI for quite some time before I started typing this, and it was still at 5 PSI when I finished typing.
Cheers!
Brewery Reorganization
I’ve had some organization issues in the homebrewery, so I decided to use some Christmas money to fix.
-
- Before (angle 1)
-
- Before (angle 2)
-
- Sizing new shelves
-
- After! Much nicer!
The shelves are wire shelves from Target. I only used four of the five shelves. The bottom two shelves are tall enough for a keg or carboy, and the uppers are good for bottles and other glassware. The bottom shelf is off the floor enough that I can sweep under it and get a mop under it if necessary.
I do have future plans to move more stuff around – I want the keezer closer to the stairs (currently it is as far from the stairs as possible), and I want to eventually change the sink to a double-tub sink.
Cheers!
Homebrew Tool Calibration
I have issues. Efficiency issues. The first step to fixing a problem is admitting you have a problem. The second step is finding out who/where to blame the problem on!
This is the first in a series, although I do not know how long the series will be (until I fix the problem).
The most likely problem based on the sheer number of times I’ve done Internet research on this problem and had conversations with other homebrewers is the crush. I’ve never wanted to accept this as the problem because my LHBS uses the same mill (that may have changed now that they’ve moved to being an actual brewery and don’t want to spend two hours milling grain). However, I did my due diligence and accused asked them…
we sit right about 74-75%
— Paradise Brewing (@paradisebrews) August 12, 2016
The Twitter conversation goes on longer, but the end result is to check everything. So I did…
Temperature Probes
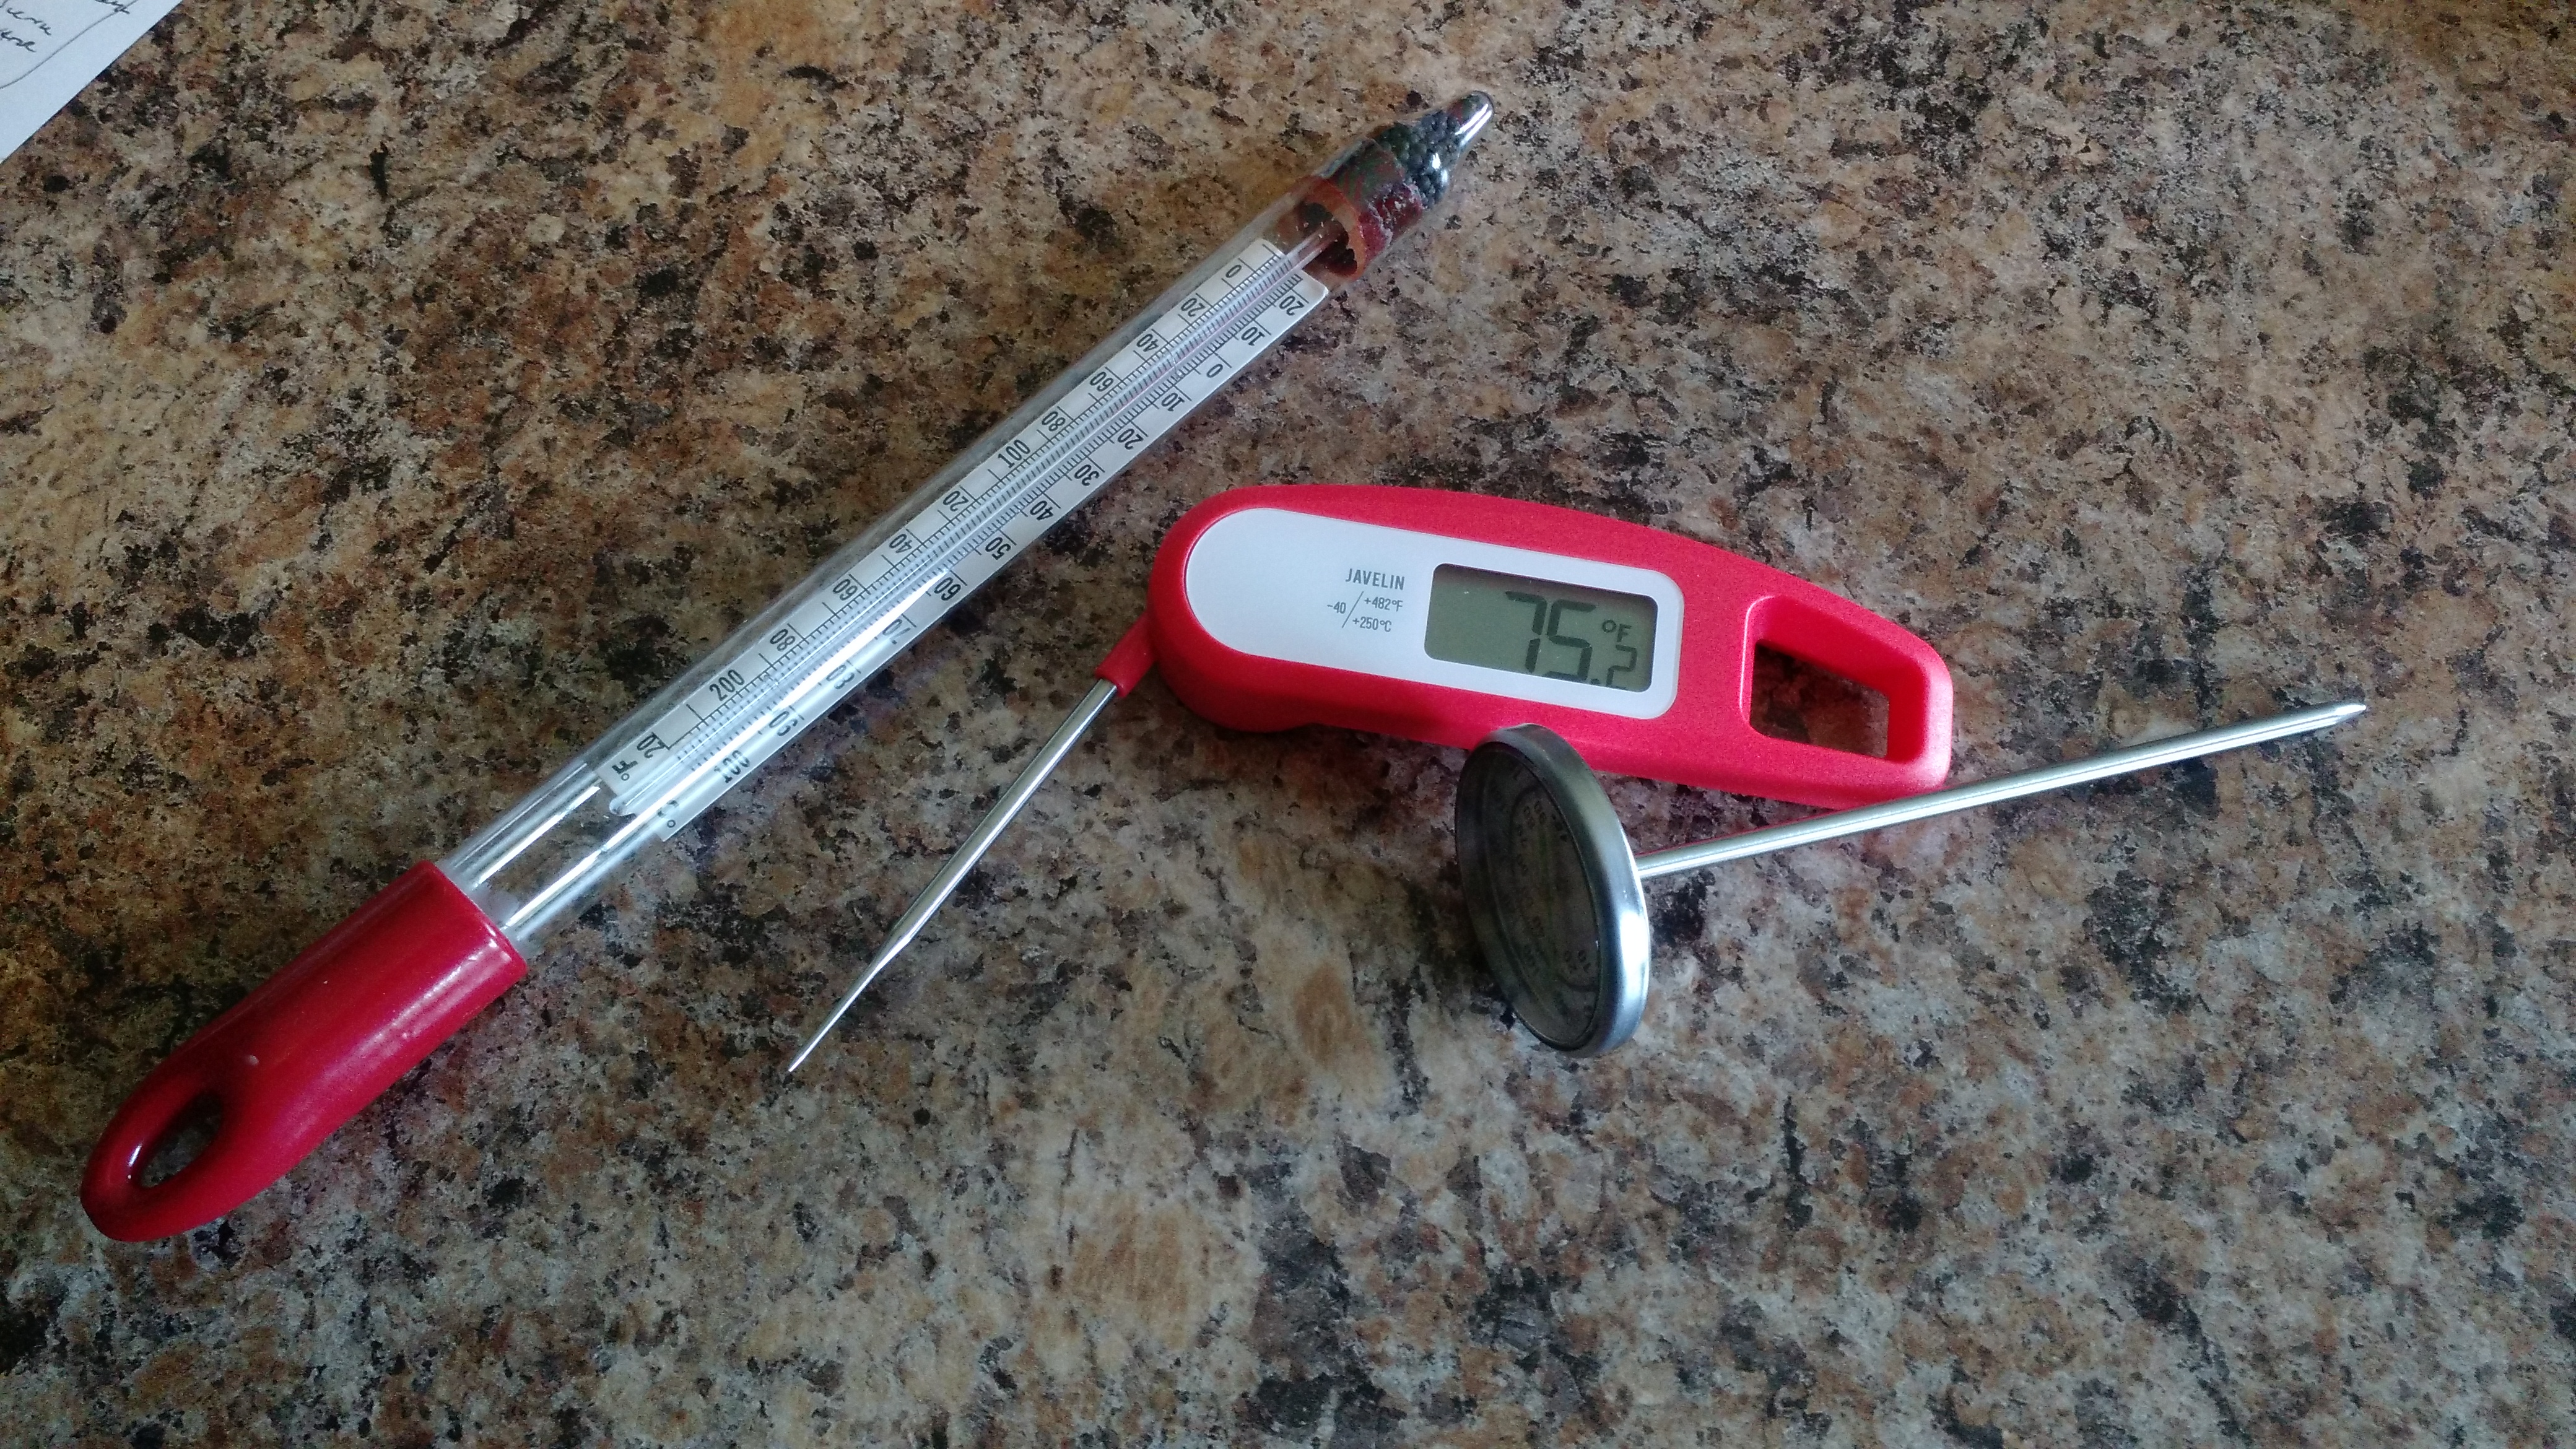
Three temperature measuring devices: a dial, a Javelin, and an old school floating thermometer.
I compared the three at two temperatures and two of them (the dial and the Javelin that I normally use) at a third. In ice water, the floating thermometer and the dial agreed at 34ºF while the Javelin read 35ºF when the battery was kept out of the ice water (while it is waterproof, I think it is better to keep the battery out of the water). In tap temperature water, they all read 73ºF. In near-boiling water (with the stove turned off), the dial said 194ºF and the Javelin said 195ºF (I didn’t try the floating thermometer). I feel fairly confident that the Javelin, which I use the most, is close enough.
Hydrometer
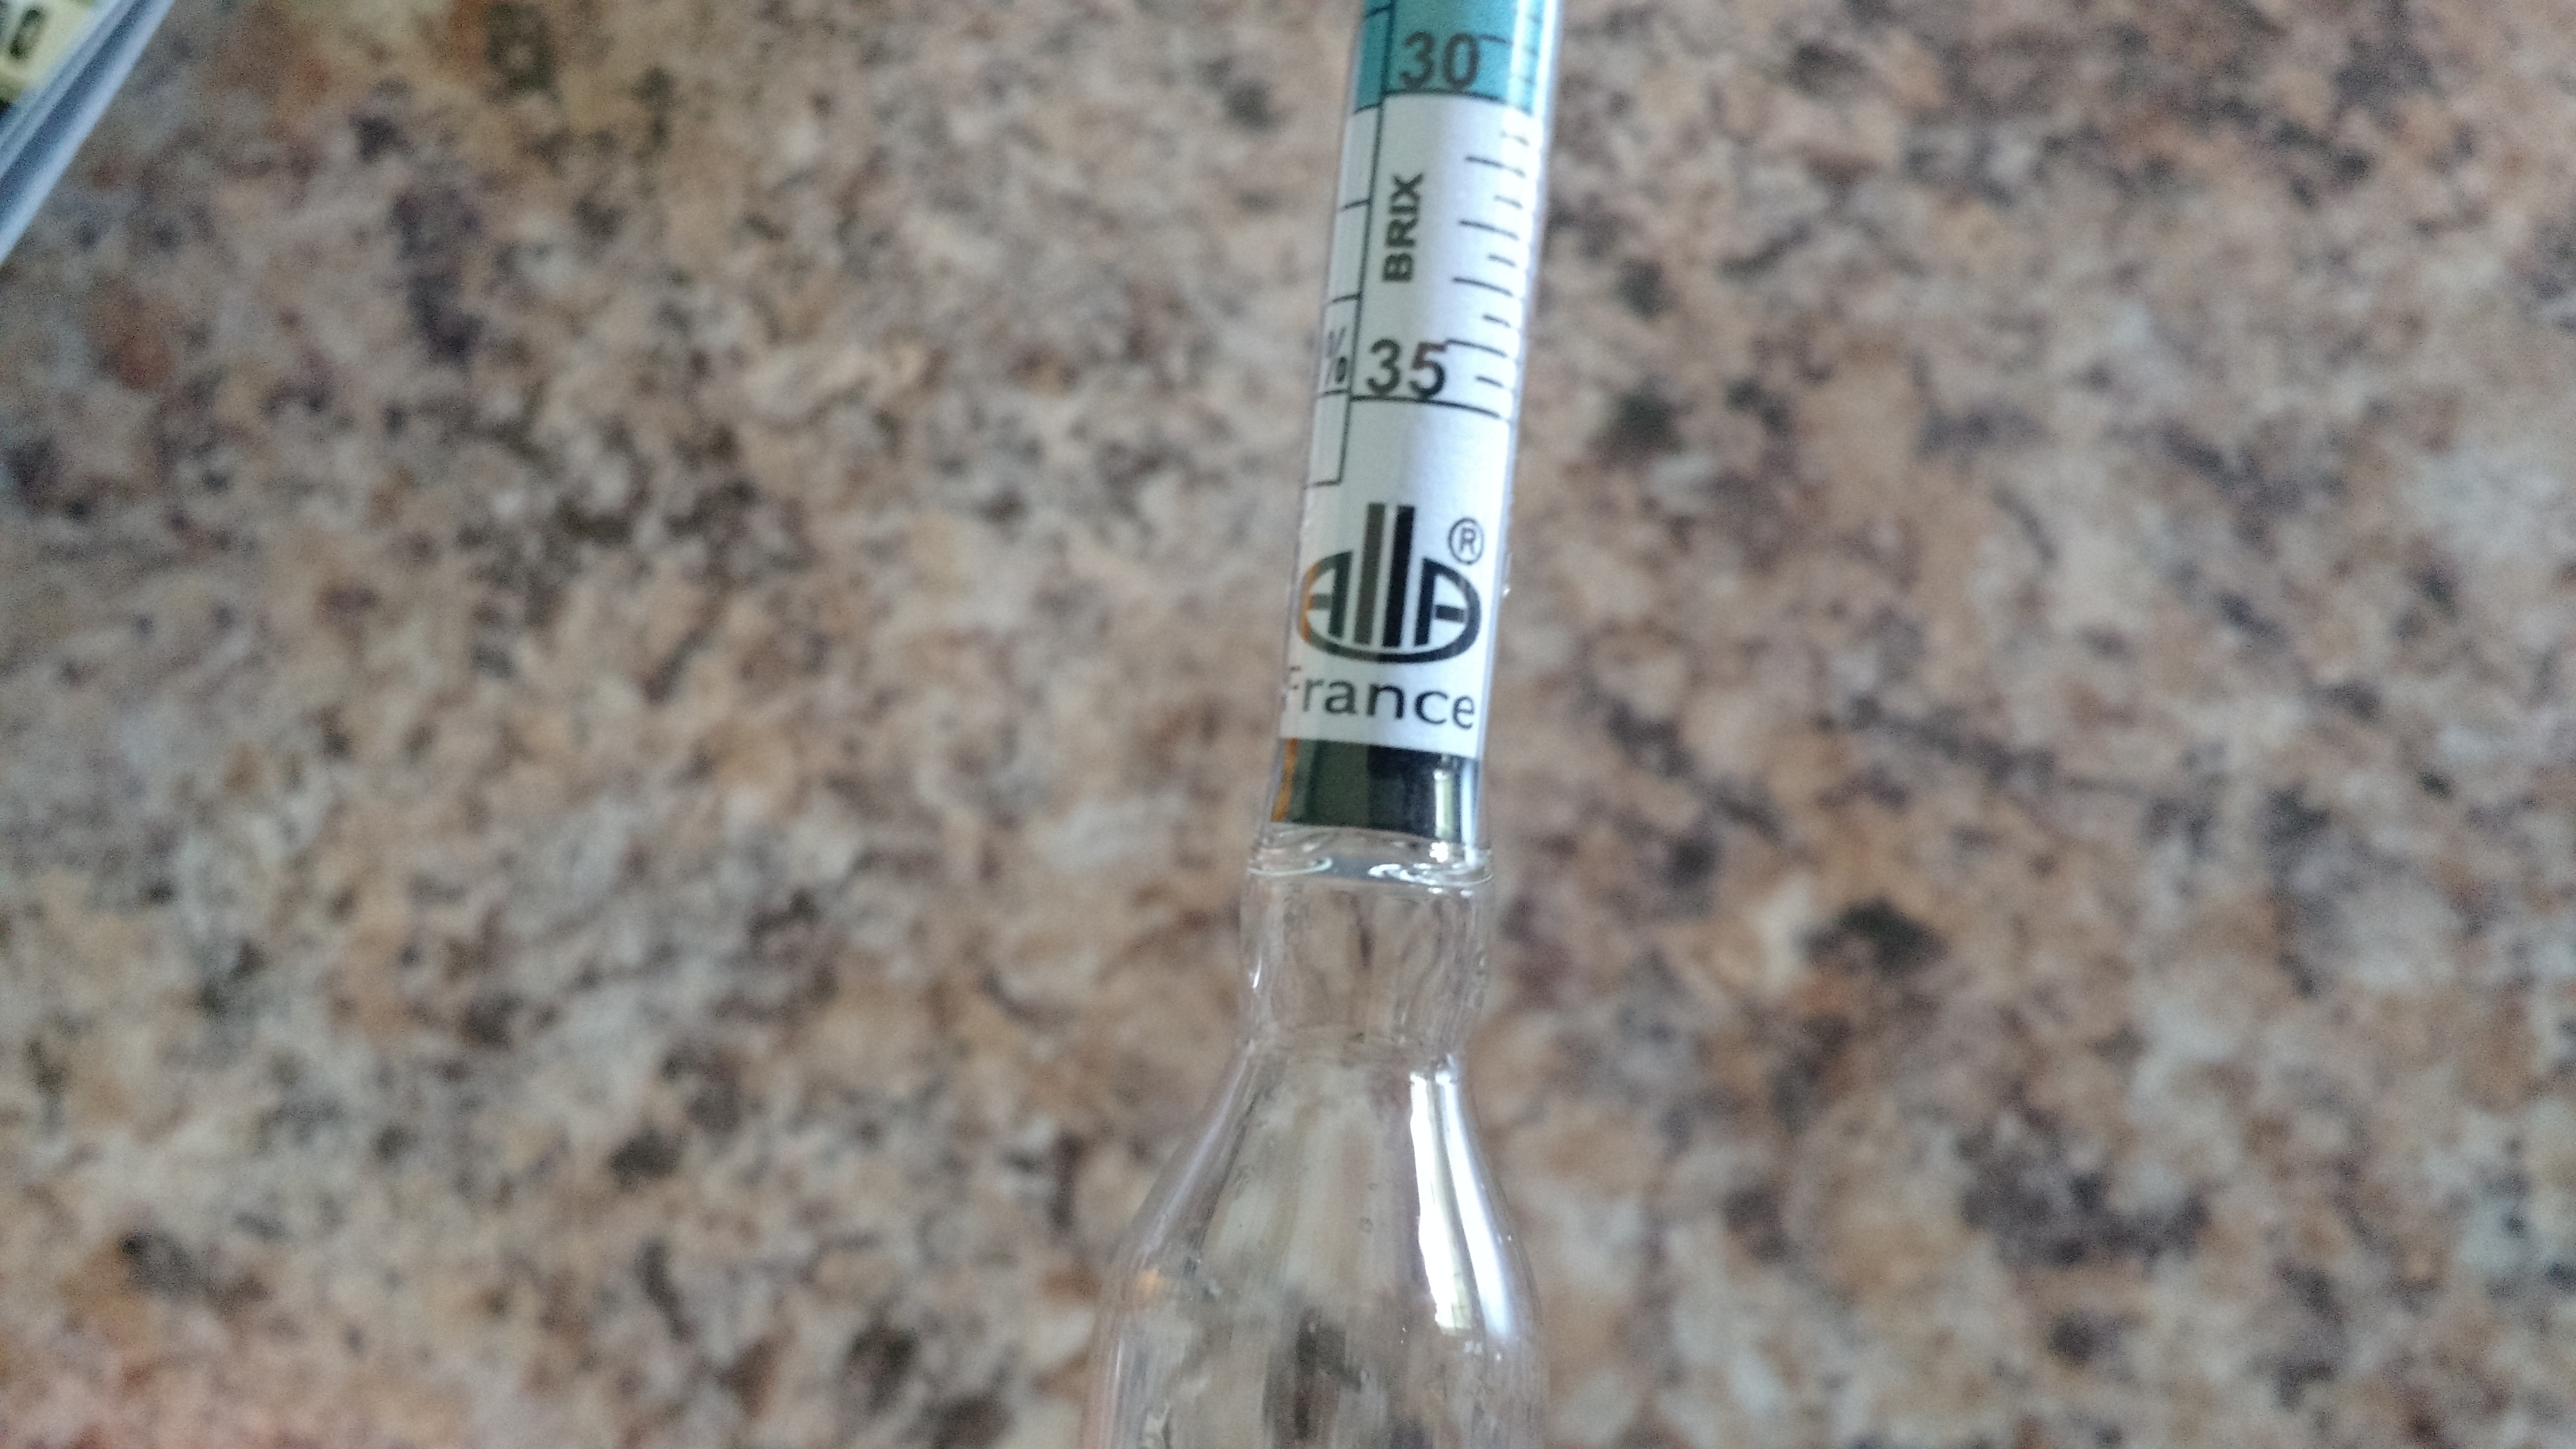
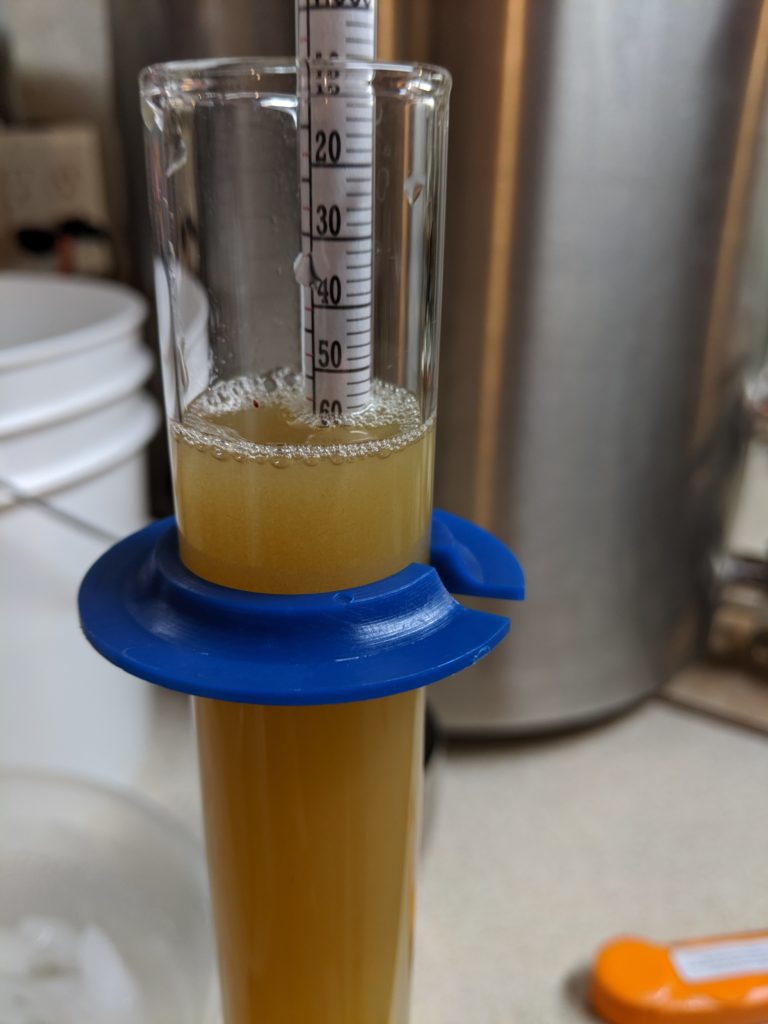
My Alla Hydrometer.
My tap water (not distilled!) is at 0.999 SG after correcting for temperature, so we’ll go with 1.000. That’s a single-point calibration, which assumes that the hydrometer correctly measures throughout it’s range… which is a lofty assumption.
The second point was 15g sugar + 150g water, which by calculation should be 9.1º Plato, I got 10.2º Plato. HOWEVER, my scale is only accurate to 1g, so the range is 14.5g – 15.4g sugar + 149.5g – 150.4g water. This means that the calculated error could be anywhere from 8.8º Plato to 9.3º Plato. So I’m reading about 1.1º Plato high there.
I did a third point as well. 30g sugar (29.5g – 30.4g) +150g (149.5g – 150.4g) water. Should be 16.7º Plato in the range of 16.3º Plato to 17º Plato. I got 15.8º Plato, 1.1º Plato low. 16.5º Plato is 1.068, 15.8º Plato is 1.065. While this sounds like a lot, it isn’t, and I’ve been having problems on the order of 10 points (e.g. wanting 1.052 for 75% efficiency pre-boil and getting 1.043).
All this stuff seems so screwy (I tried the third point test twice) that I’m not considering this to be a done deal. But I’m buying a few more hydrometers!
pH Meter
I admit that I haven’t been as nice to this meter as I should – I dropped it in wort and rinsed it off, and I’m pretty sure it isn’t waterproof. But this thing is currently unusable. I checked it using distilled water (pH of 7.0), my tap water (pH of 8.1) and tap water with cream of tartar dissolved in it – which creates a buffer at a pH of 3.6.
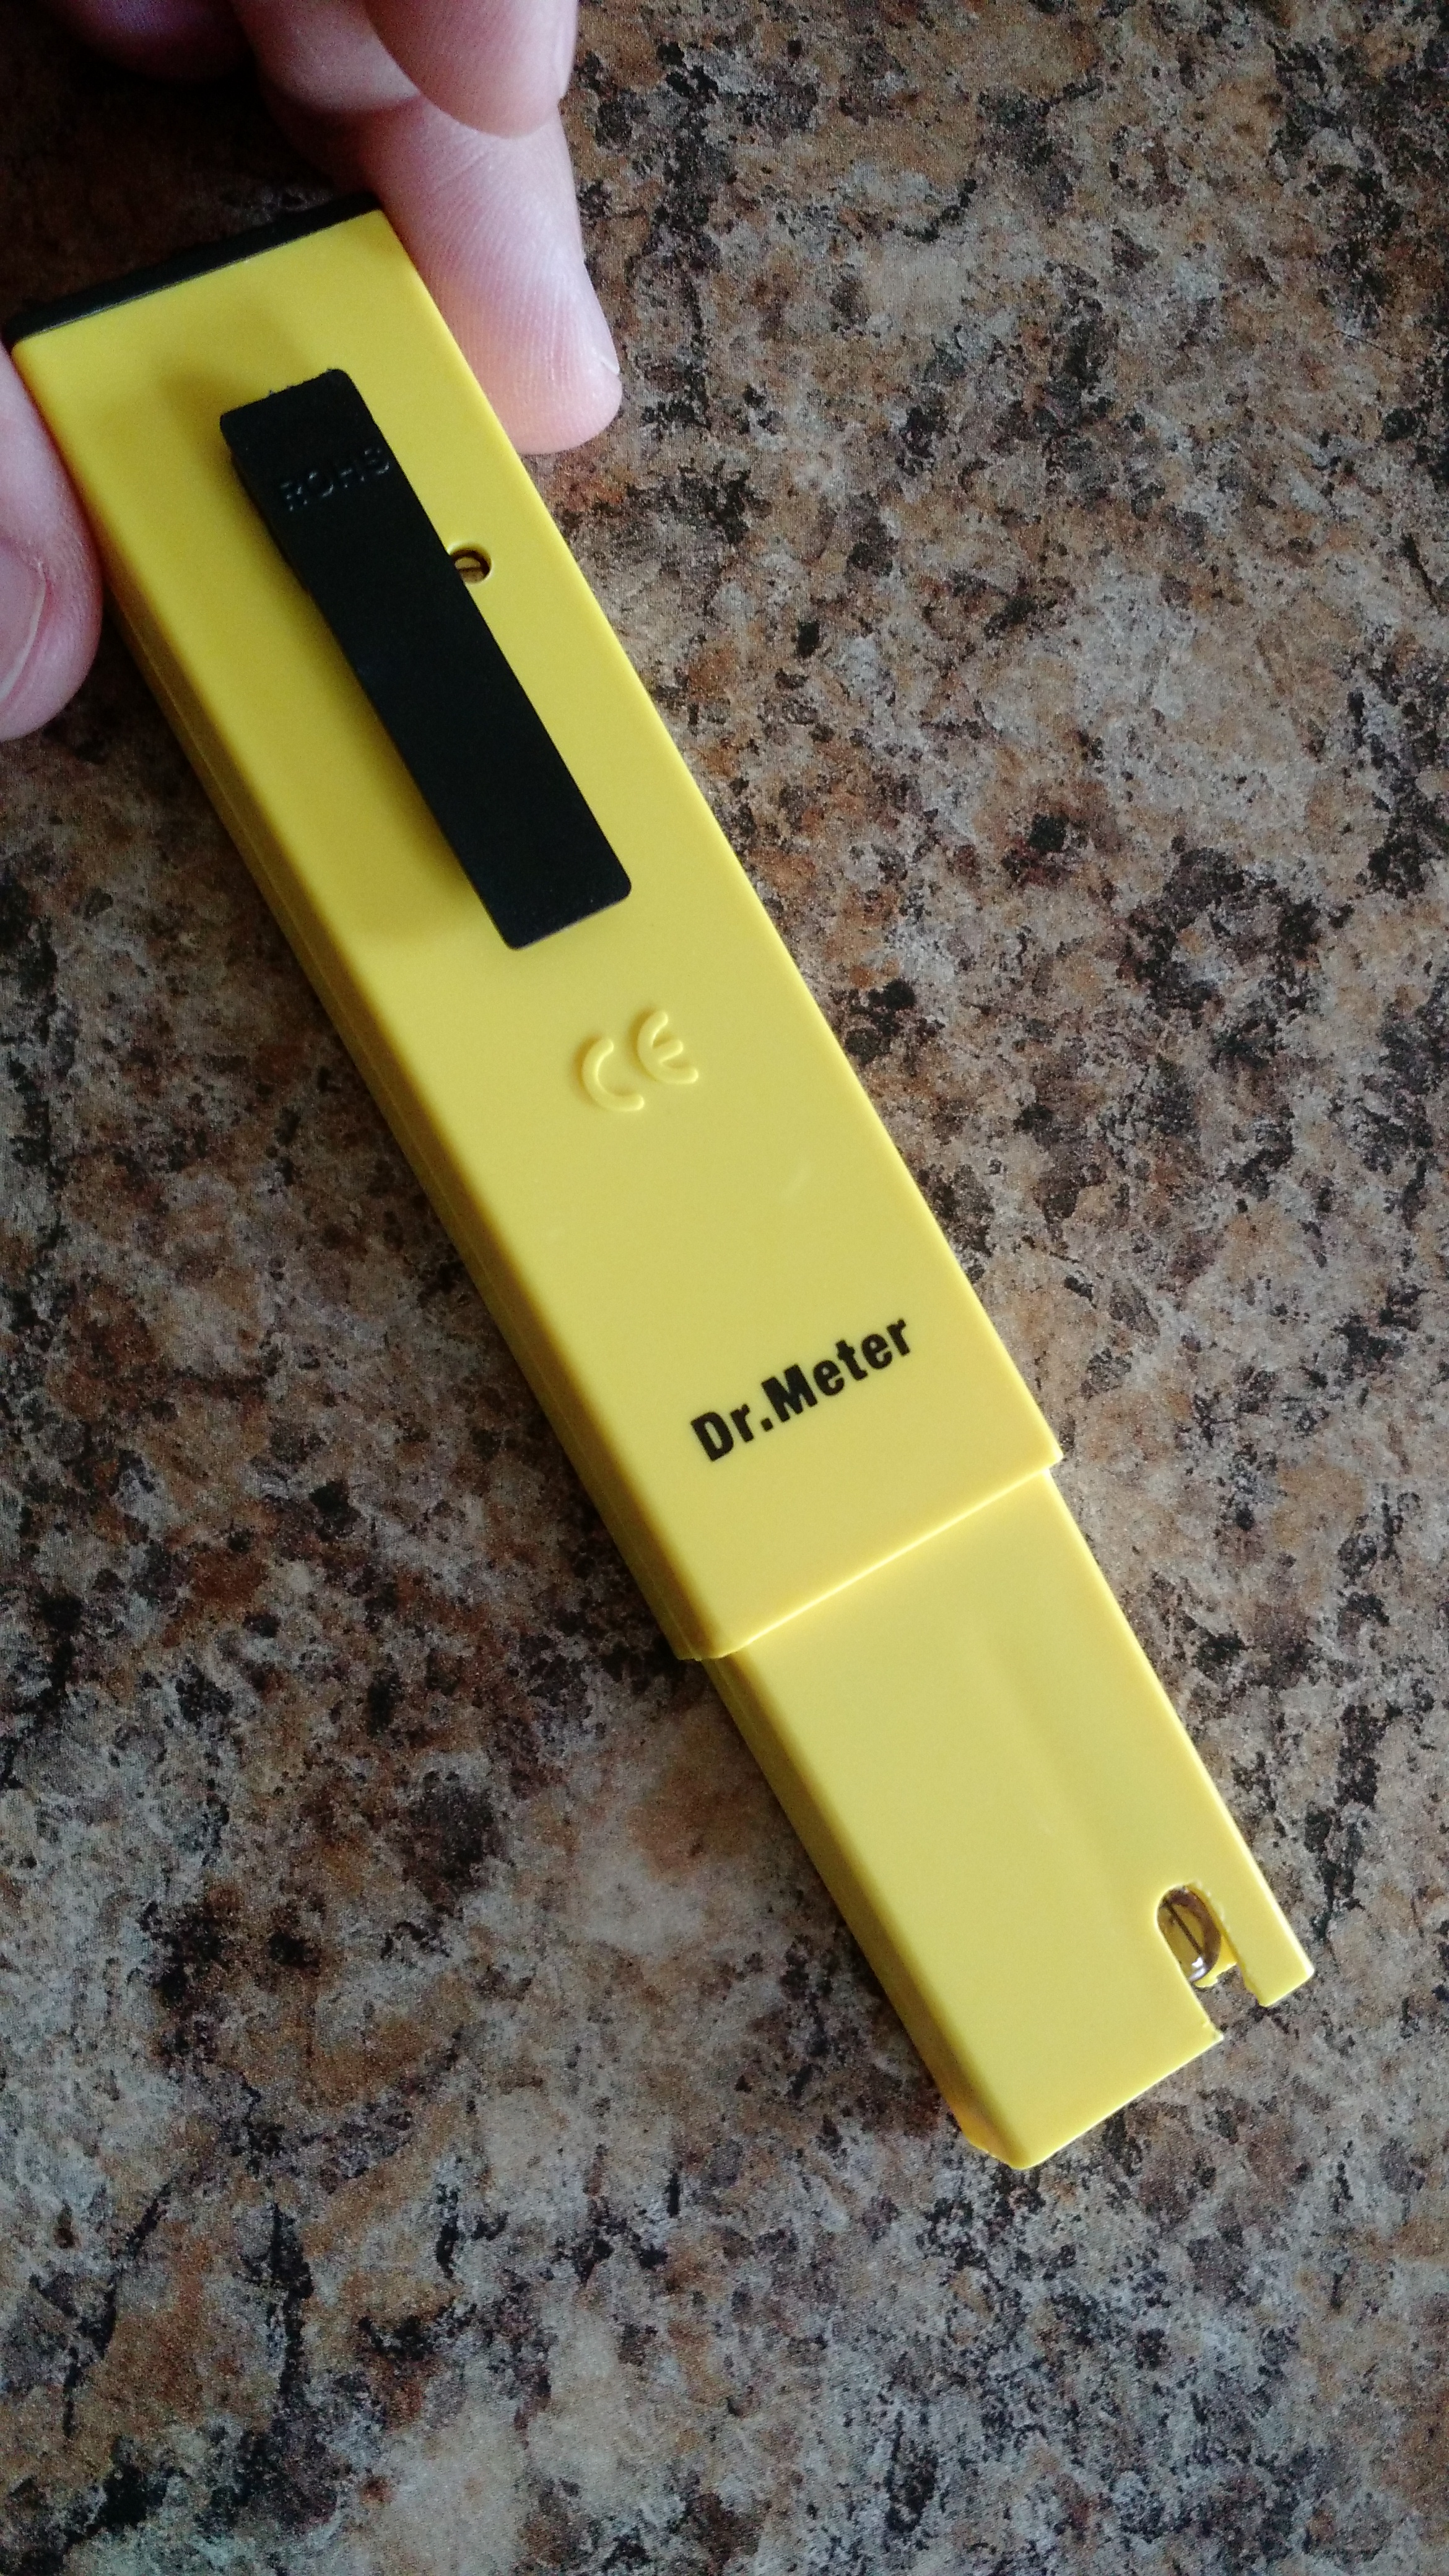
Dr, Meter pH Meter.
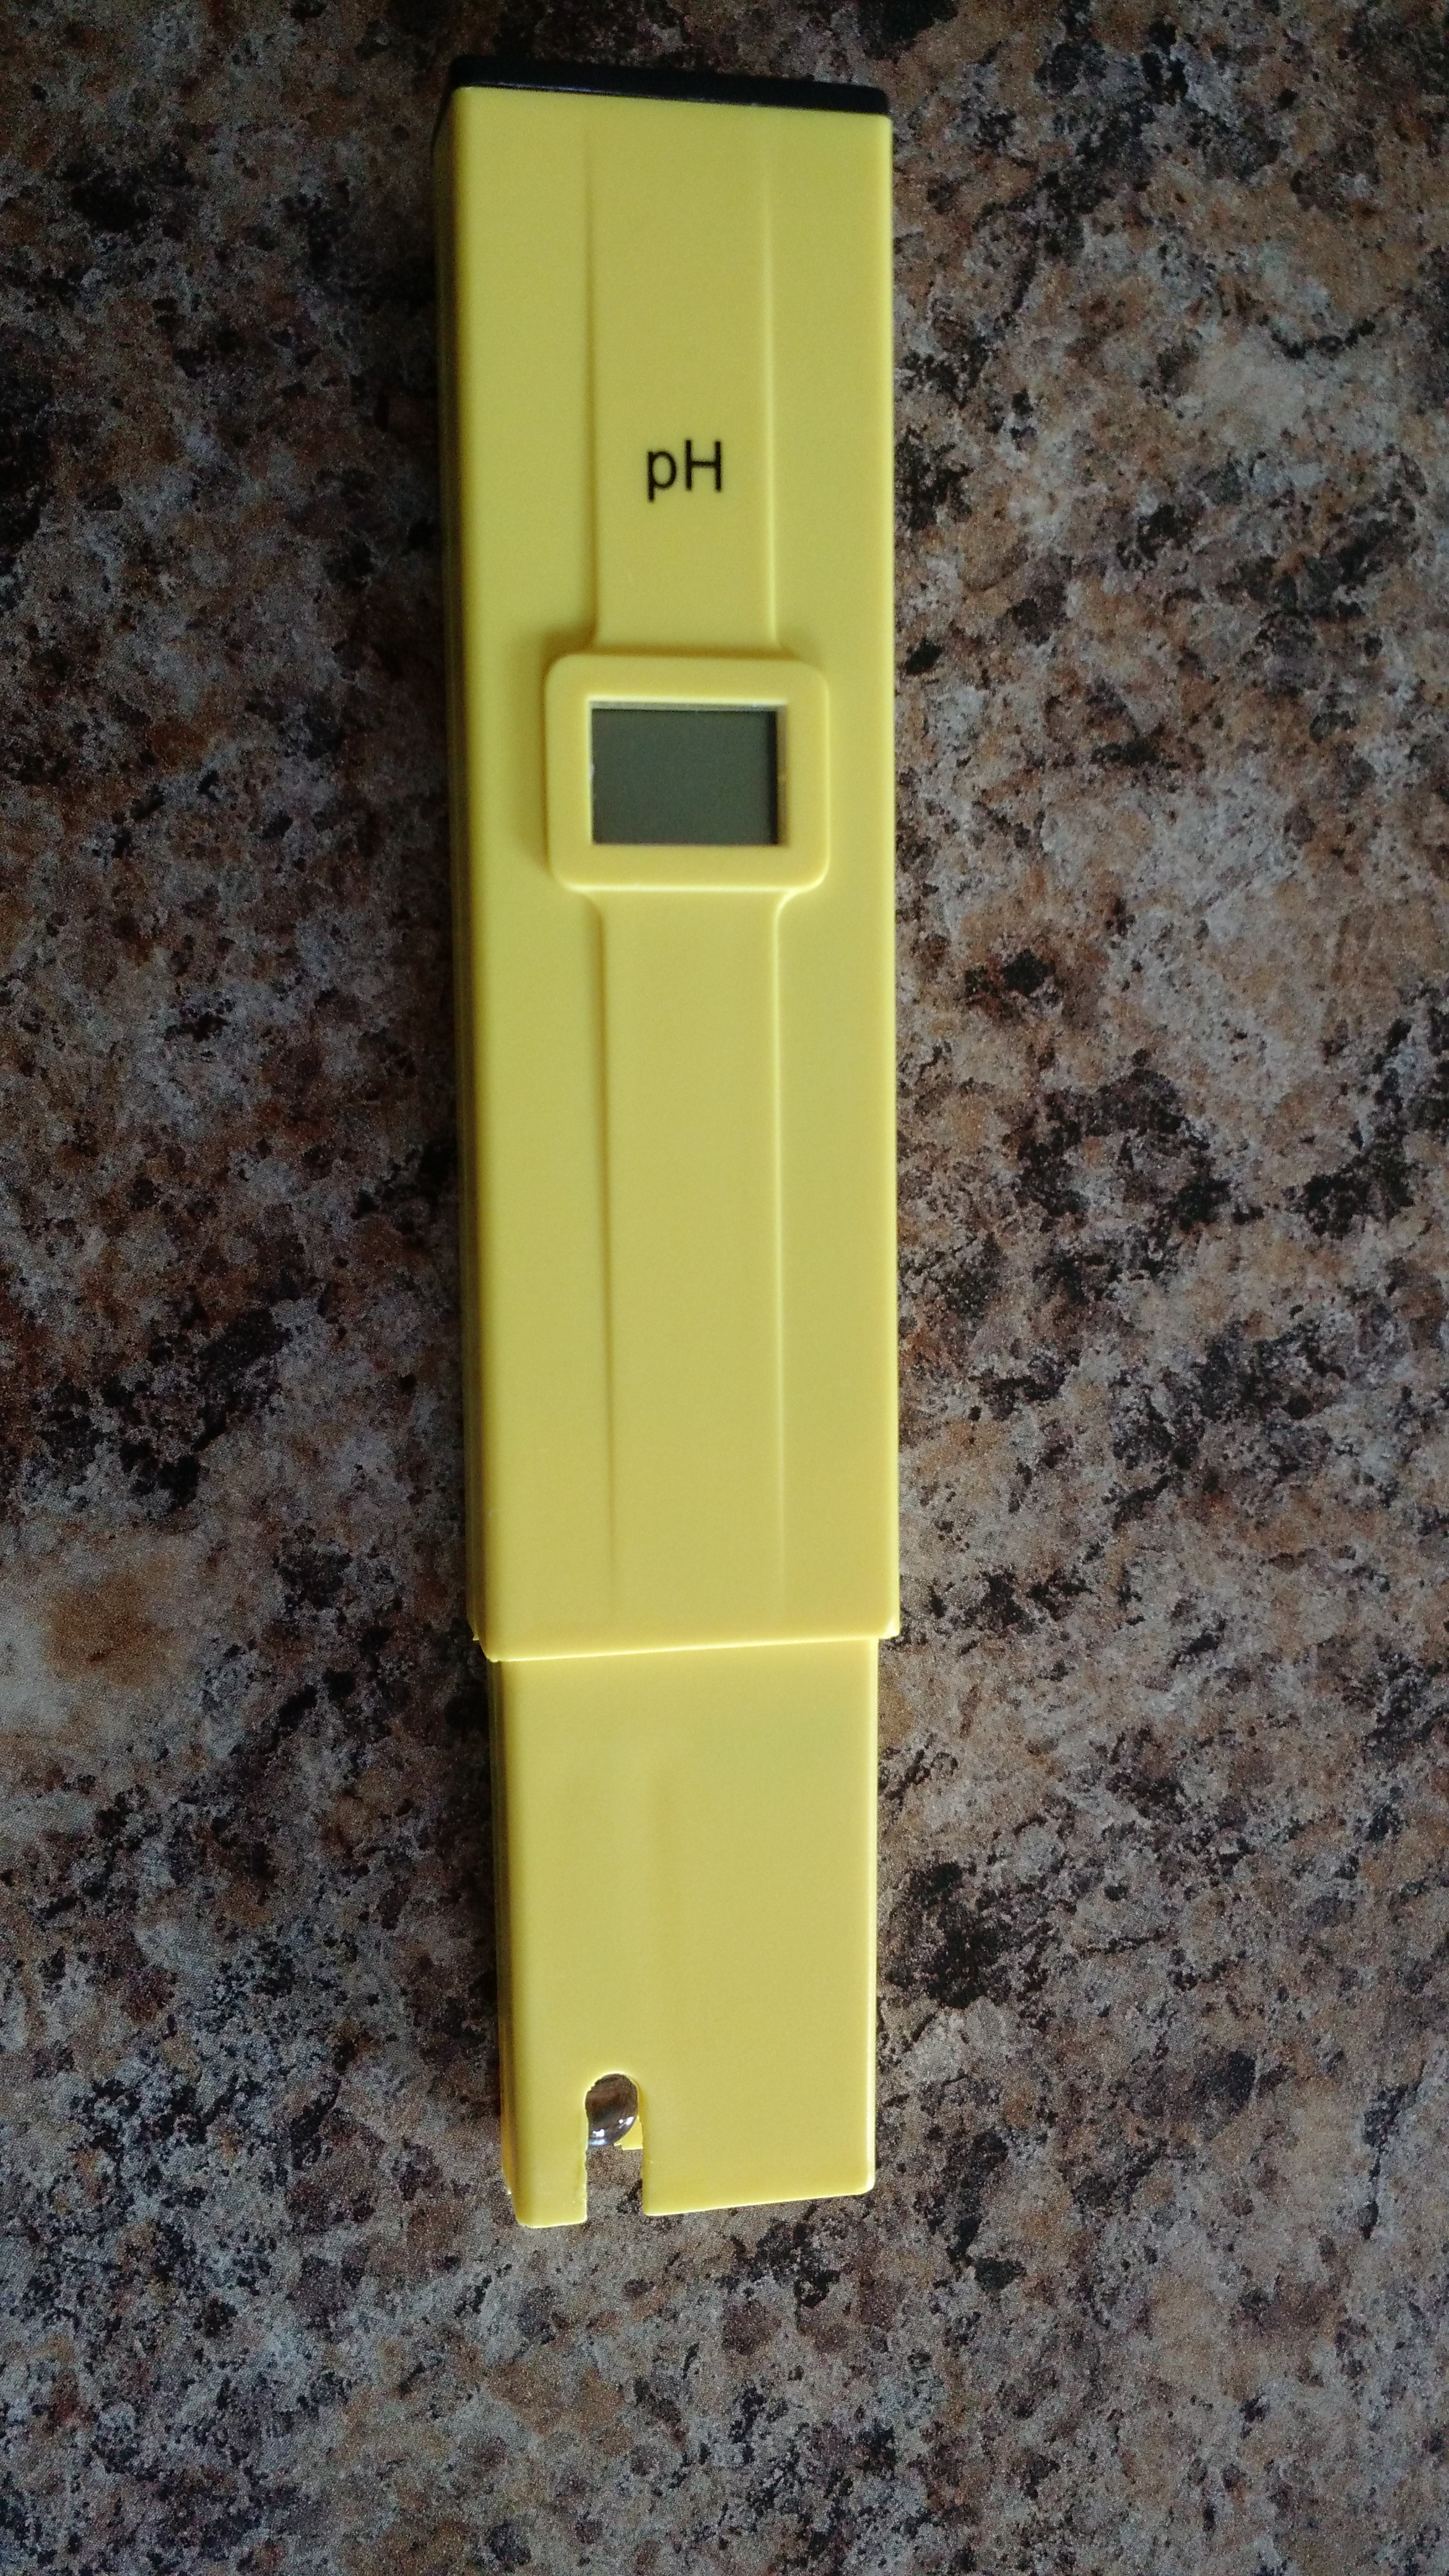
Front of the pH Meter.
I believe this meter worked correctly once. However, it no longer does. If I calibrate it at 7.0 (distilled water), the 3.6 pH buffer solution from cream of tartar is about 4.6 – 5.7 (that’s a huge range!) and it sets my tap water around 9.2 (it’s alkaline, but it’s not THAT alkaline!).
I’m going to replace this, but for now I’m going to rely on calculations using John Palmer’s spreadsheet.
Next Steps
I’m going to reread How To Brew (just the section about mash tuns) to make sure I didn’t screw up the mash tun somehow (I probably didn’t, but you never know). I’m going to redo the hydrometer test with at least two more hydrometers that I’m going to get this week (this is one of those things that we should have extras of anyway). I’m going to replace my pH meter (I kinda implied that already). I also may get a water sample to Ward Labs to see what my water is actually like coming out of the pipe.
Cheers!
Kegs!
So last week this happened:
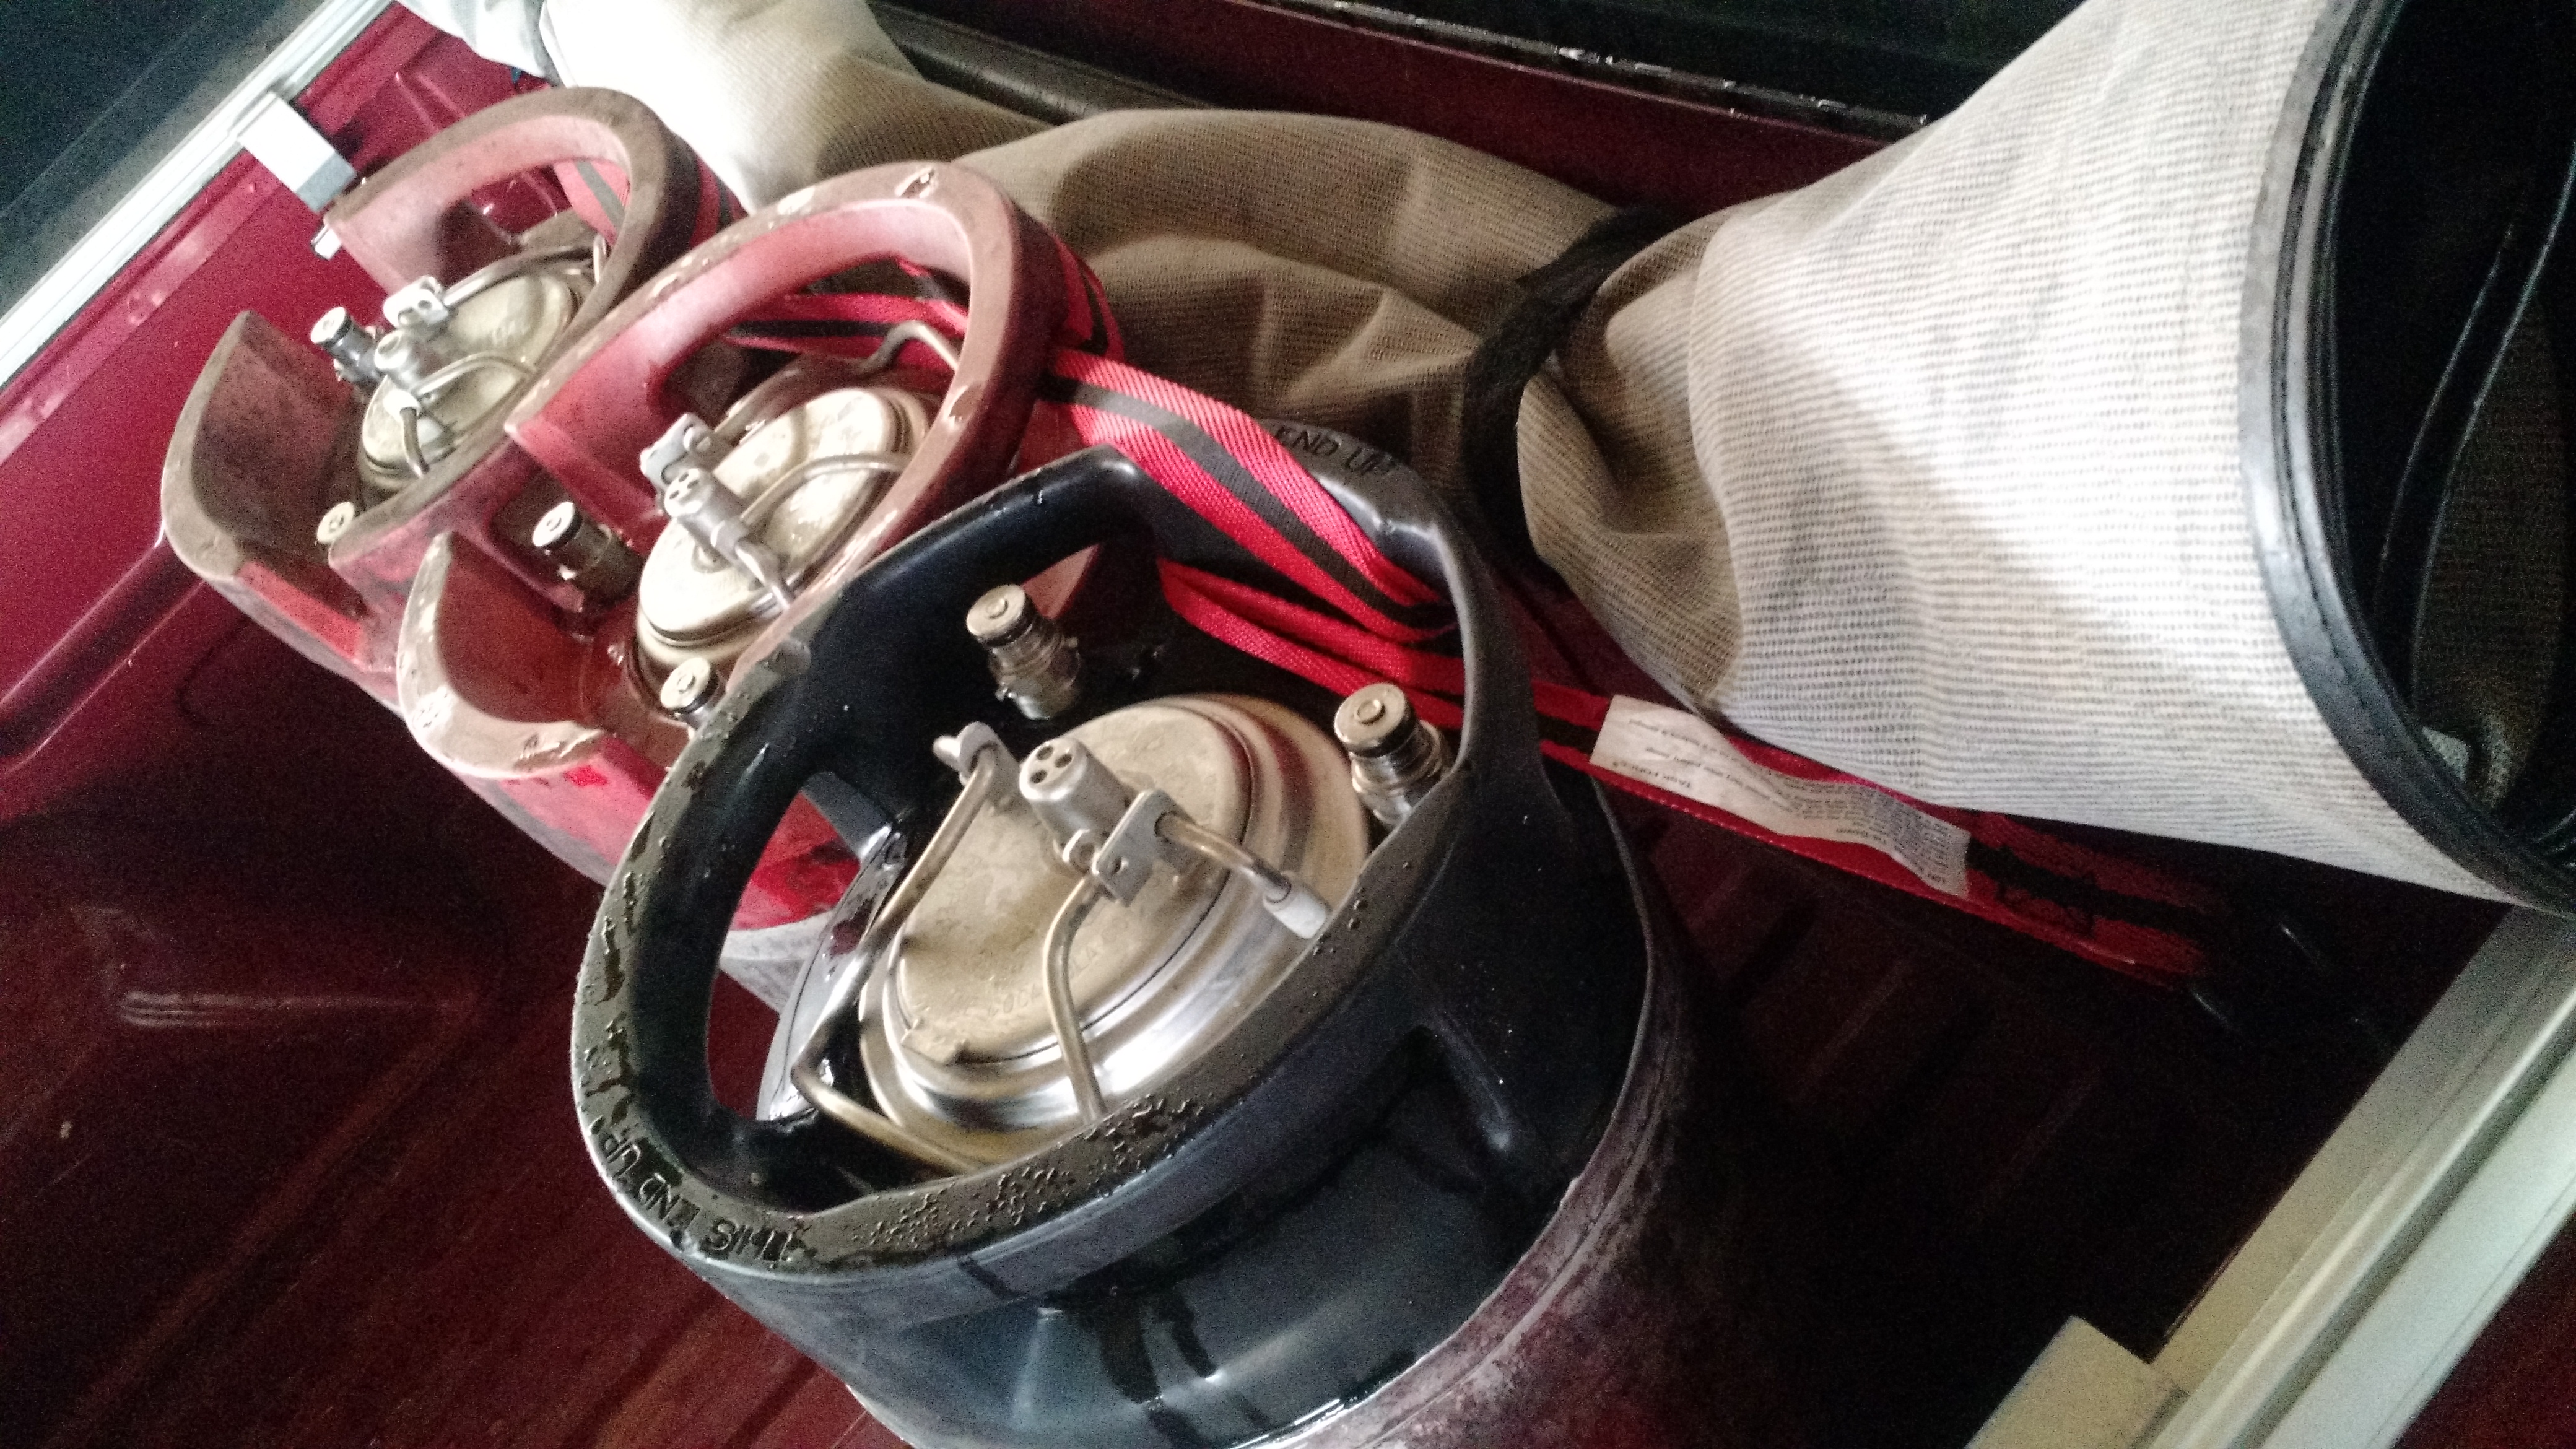
Three kegs getting hauled home!
I spent an evening scrubbing – the kegs were reasonably clean inside, but the outside was a bit of a mess. PBW and an Ocello scrubbing pad were the tools of choice there. I then proceeded to learn a few things, some of these will make it to a poster in my basement:
- The black-handled keg has a different diptube
- 3 pins = liquid
- 2 pins = gas
- The Pin Lock Socket is worth the exorbitant price tag
- Keg lube is pretty important. It may not be totally required, but protect your O-rings!
- Corny Keg in Cincinnati gets a five star review. The prices are inexpensive compared to a lot of what I’ve seen out there.
- Before putting a beer in one of these, it’s probably best to test these babies!
Testing
I did a fairly simple test – water! After cleaning everything, I put about a gallon of water in each of the kegs, sealed, and pressurized to about 12PSI. I wasn’t really trying to make carbonated water (else I would have let it go for several more days), but just wanted to make sure the kegs held pressure. I did not leave the kegs hooked to gas during this. I checked each of three or four evenings to ensure the kegs had enough pressure to dispense the water. After the three or four evenings, I rewashed everything. They’re ready for the Vienna Lager, which is not ready yet.
Cheers!
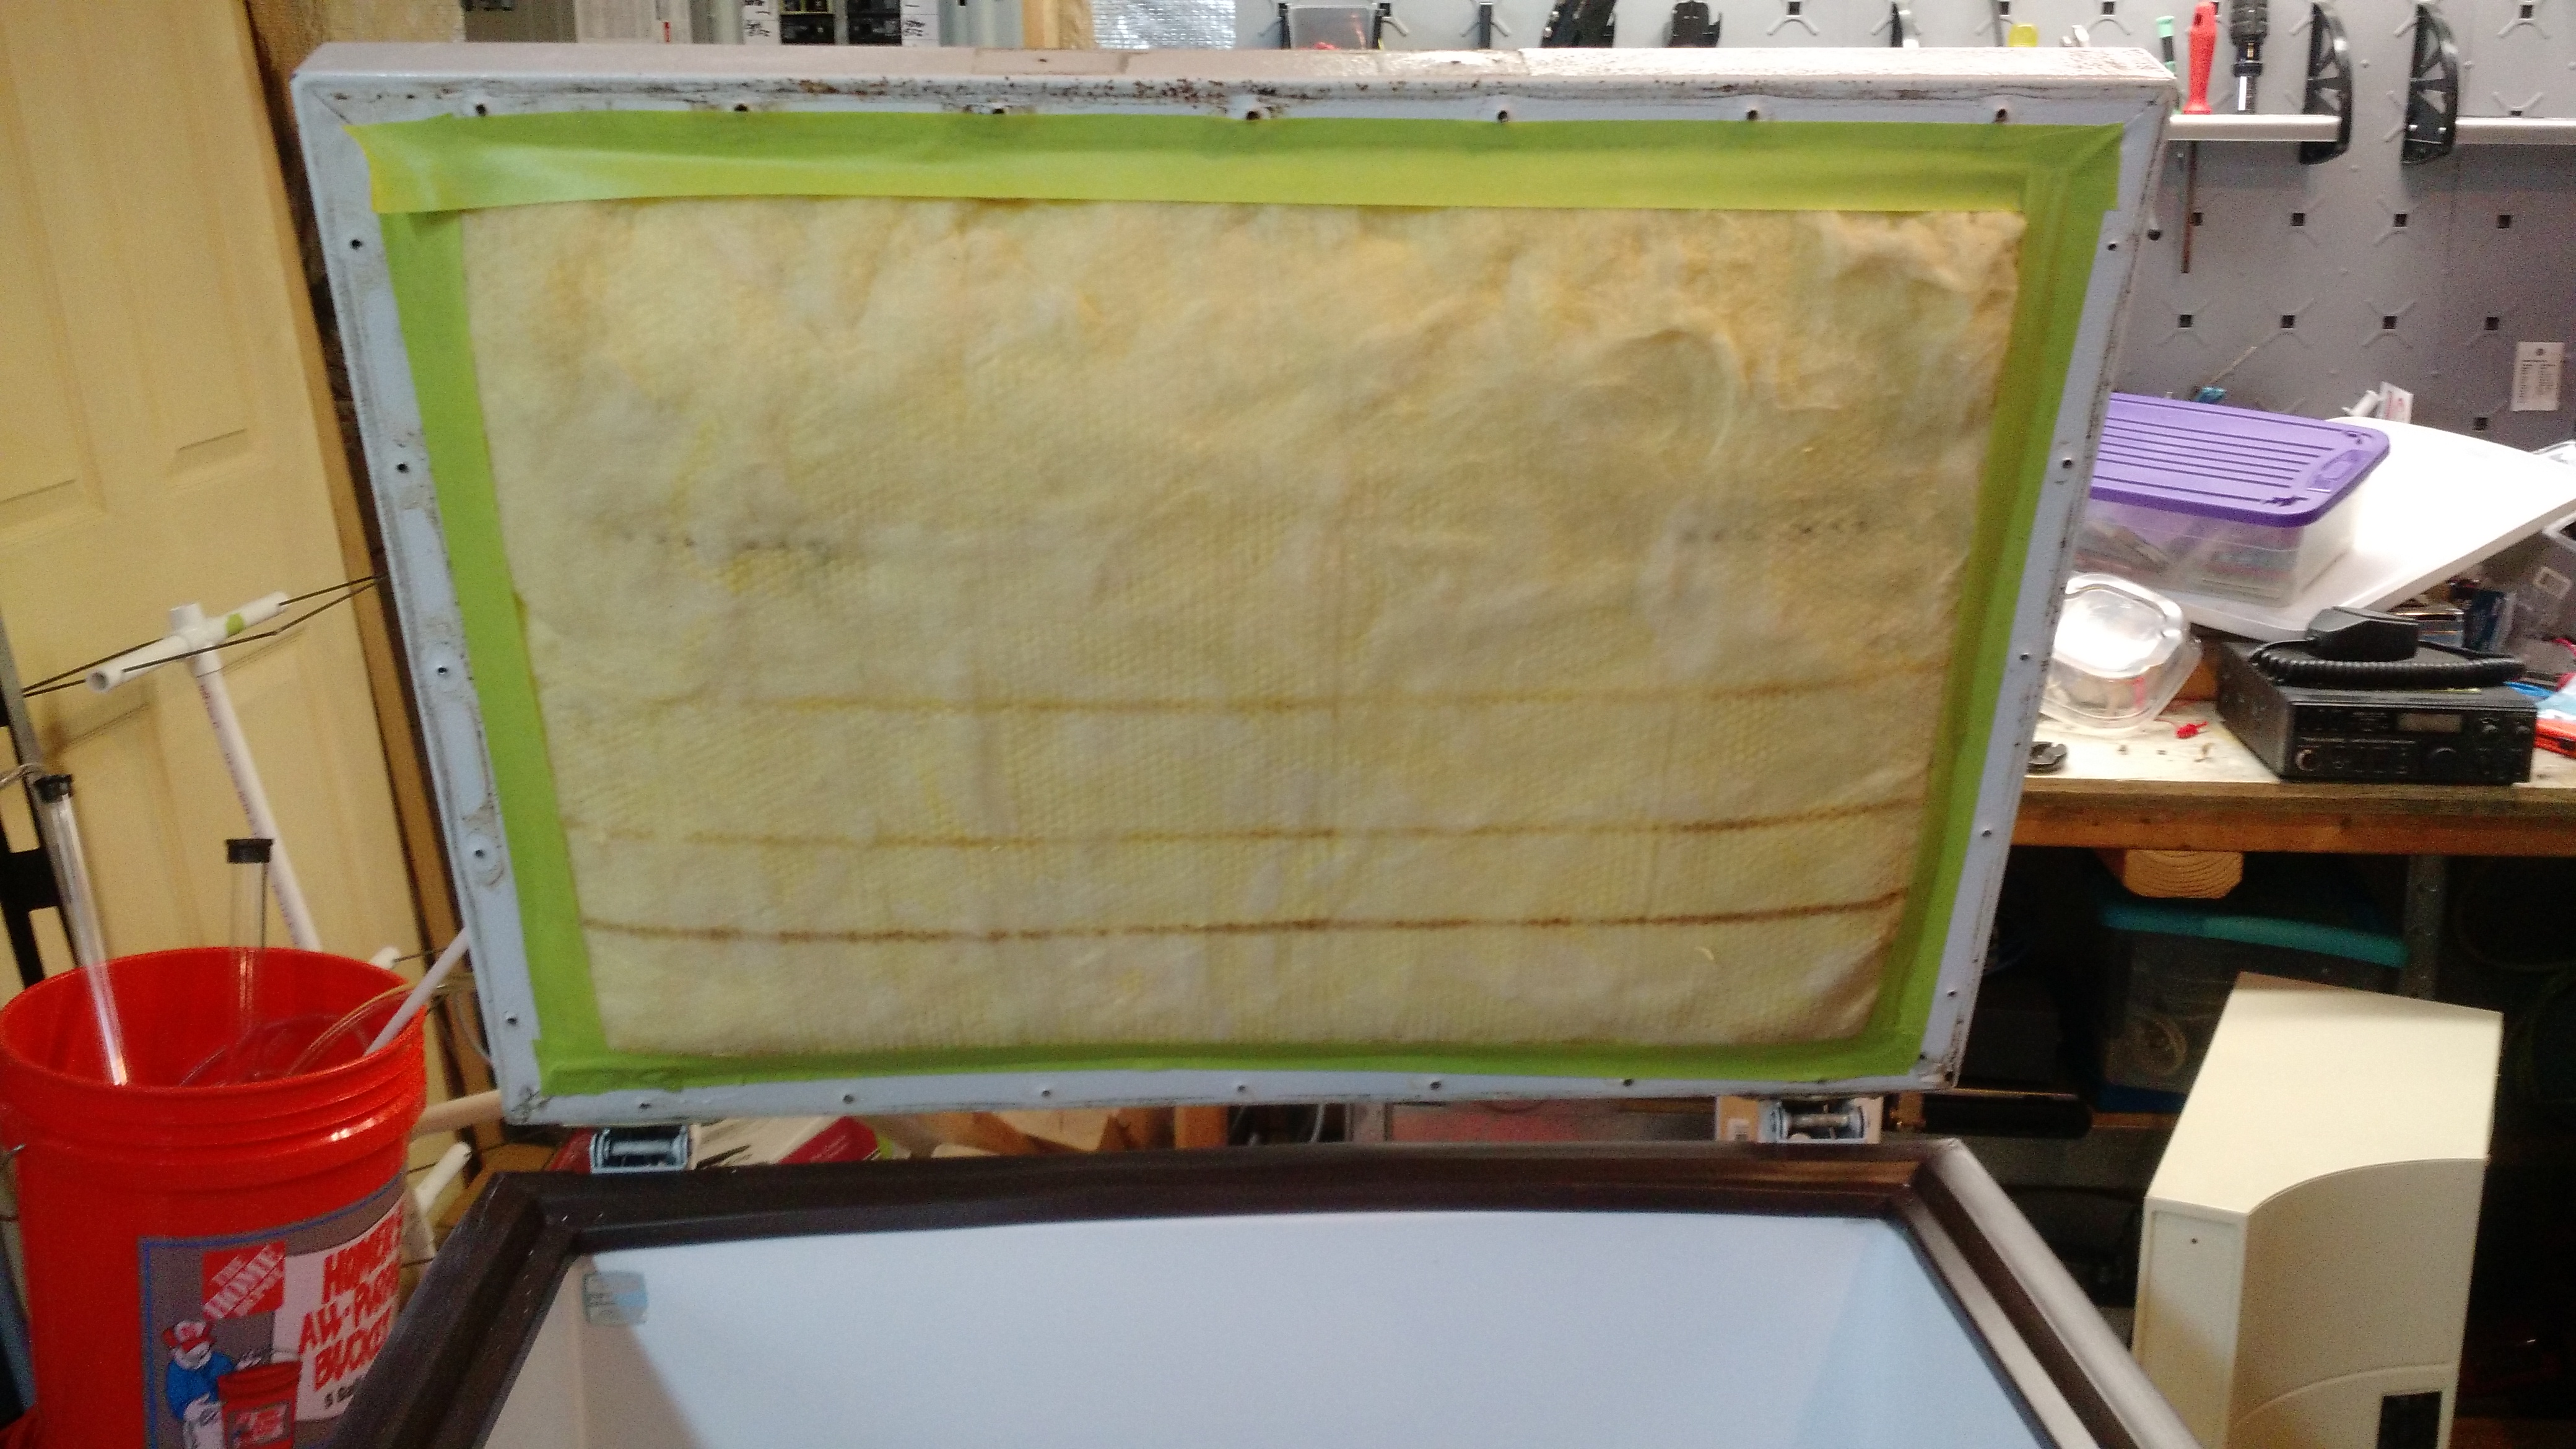
Chasing 2 Degrees Loss in the Mash Tun
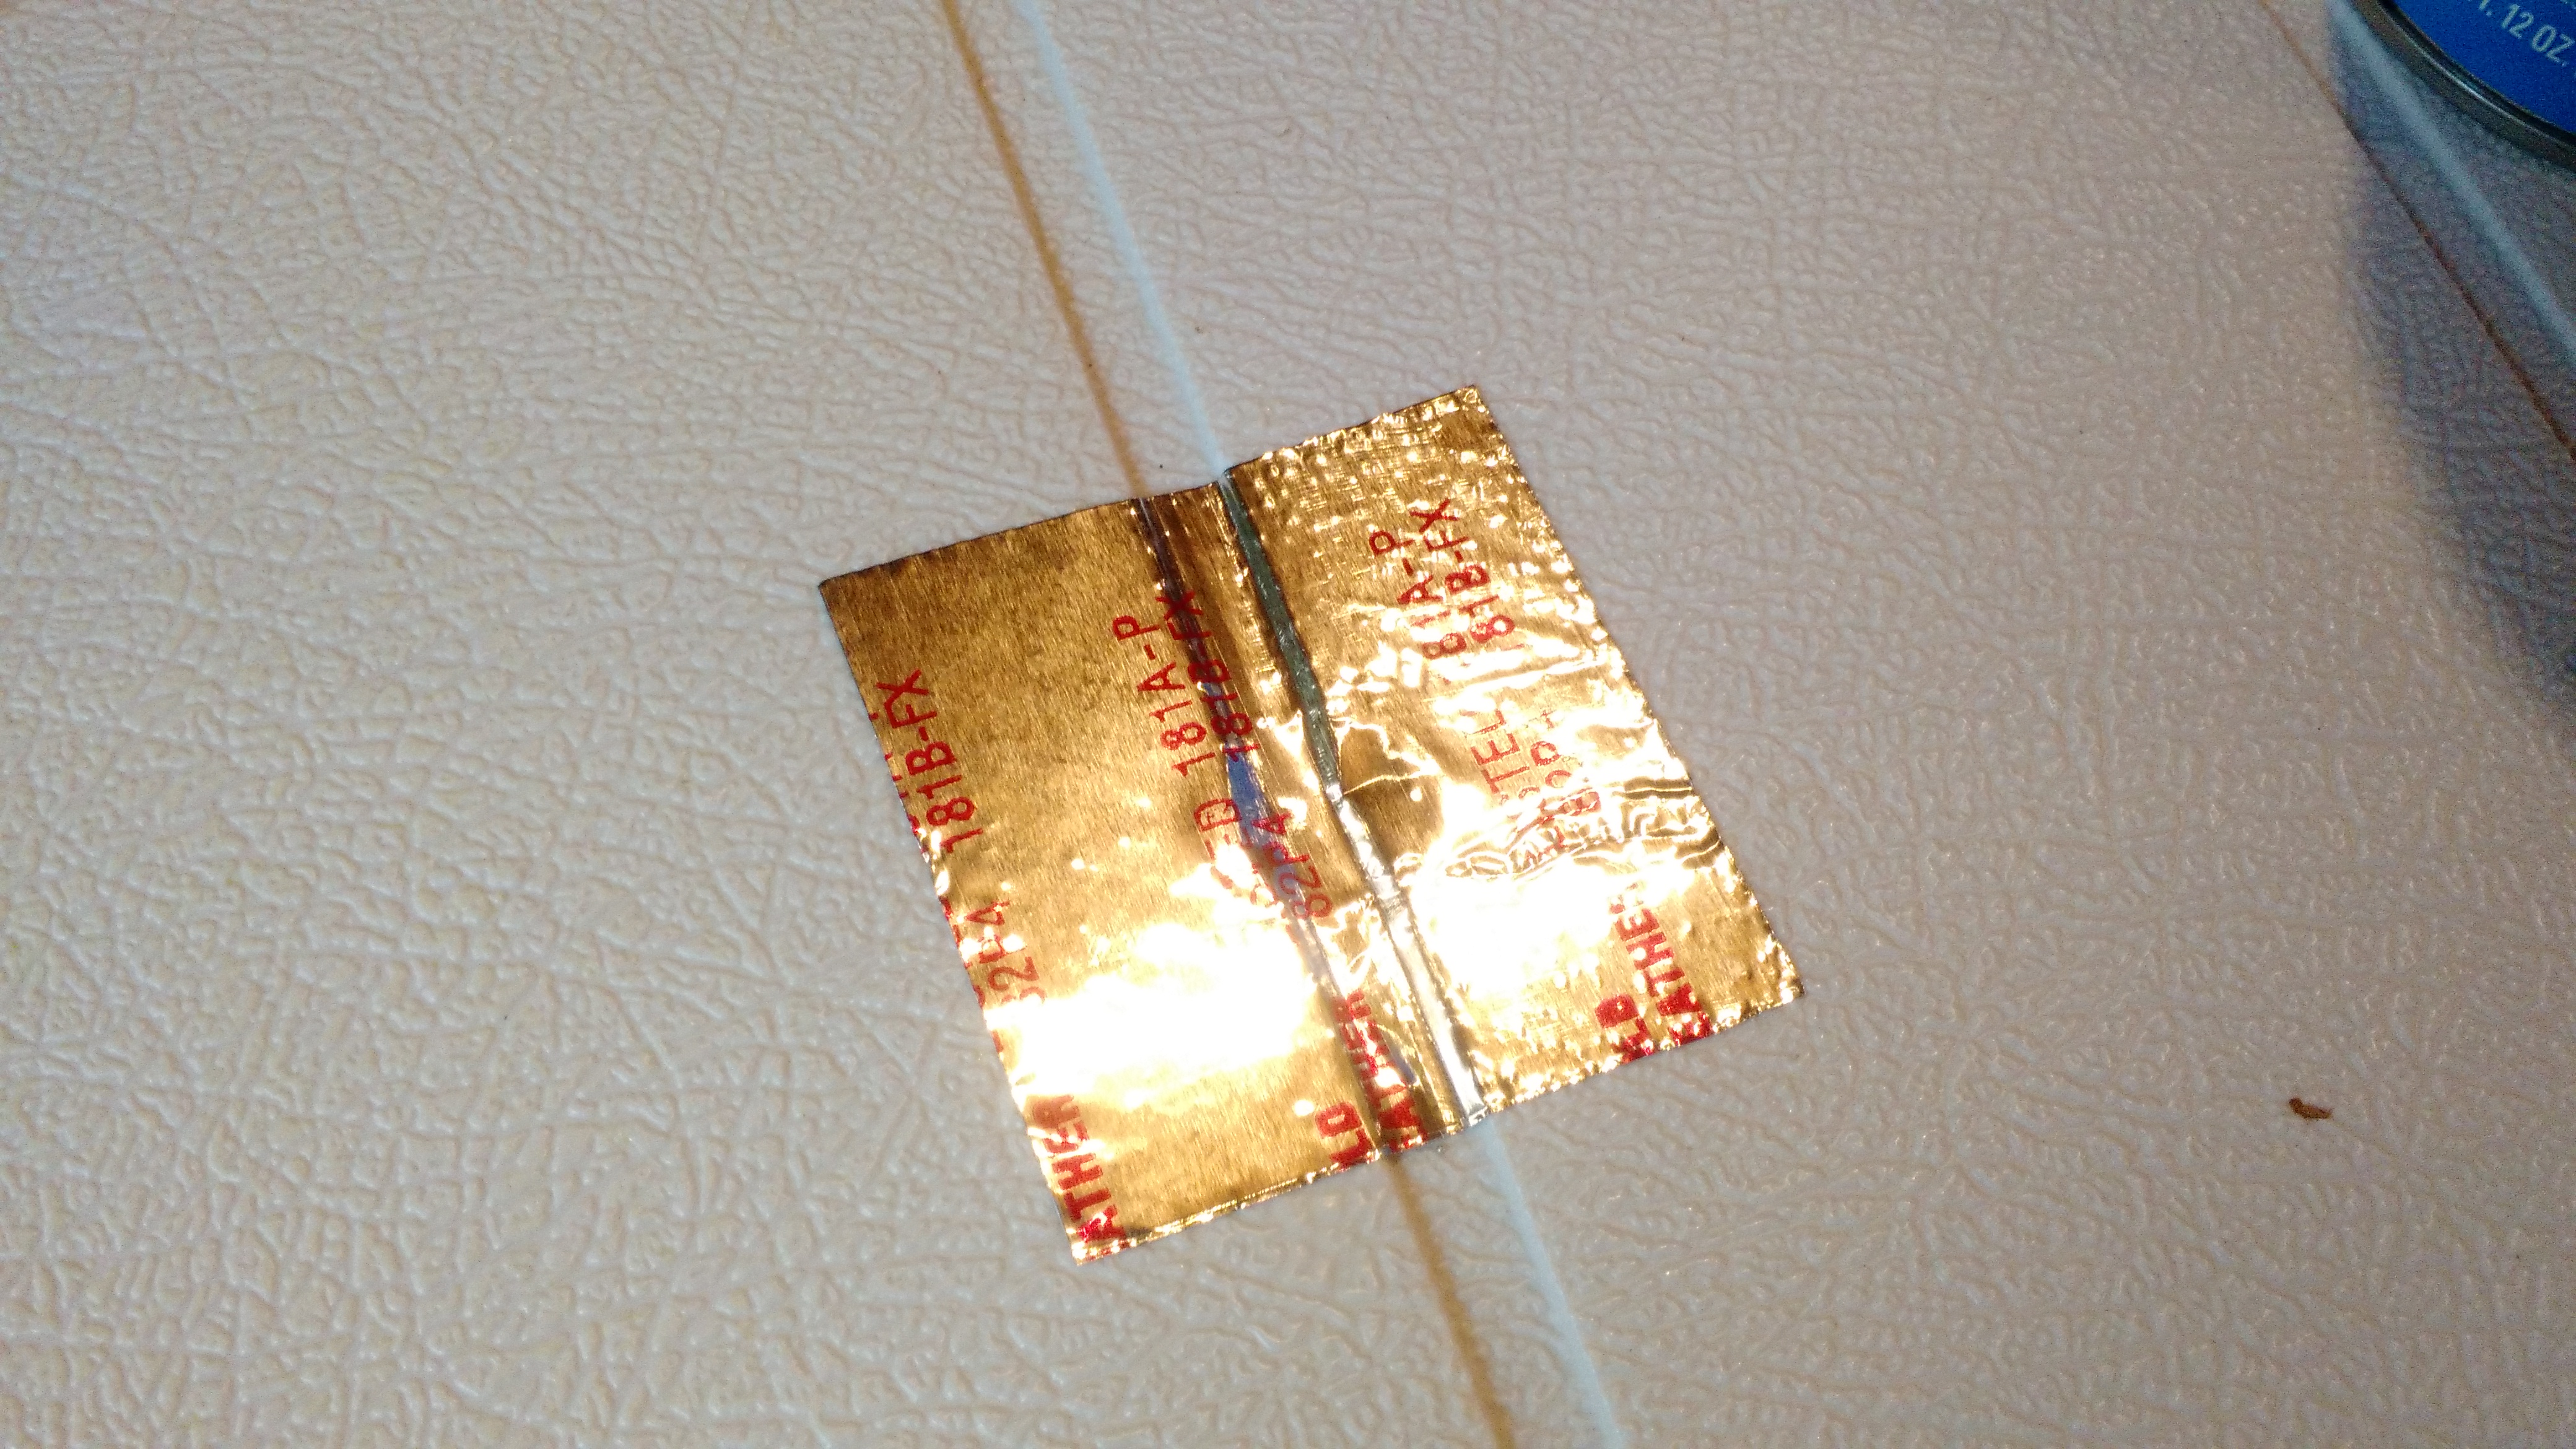
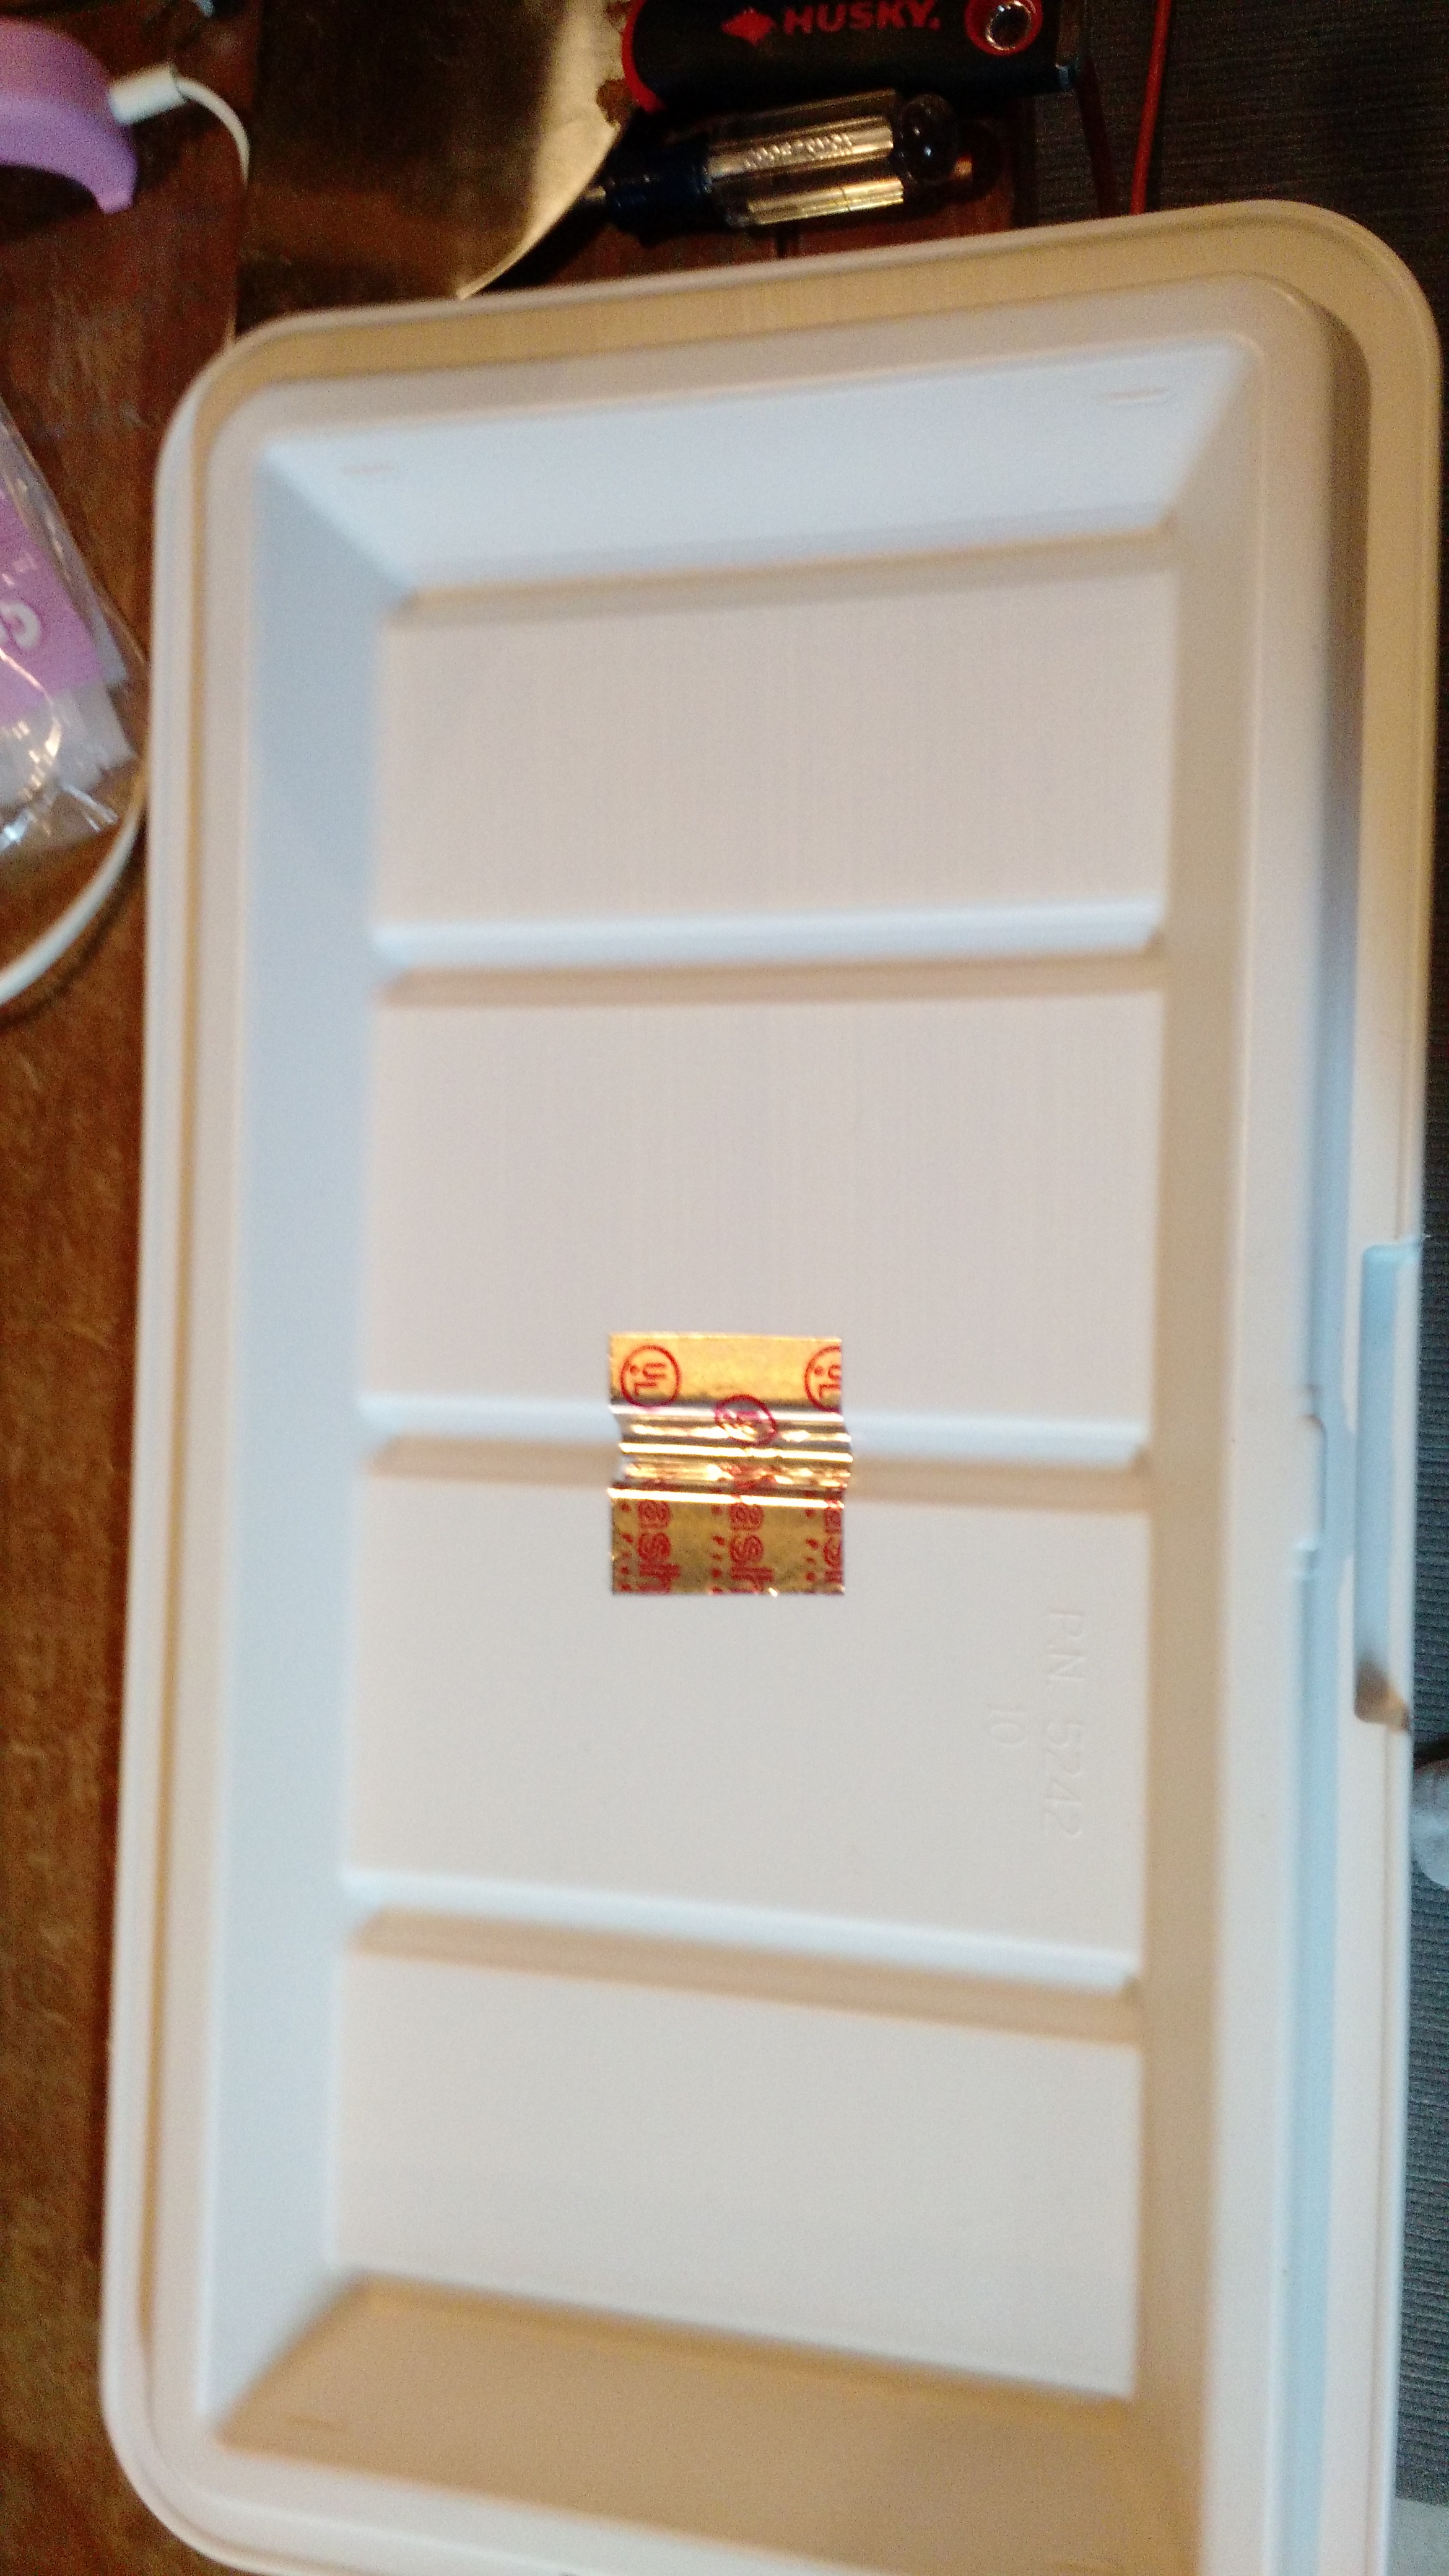
A few months ago, I thought I’d fly sparge in my Mash Tun. I had built a sprinkler to help in this. I’ve since decided to batch sparge, since fly sparging is more difficult and is cumbersome to do with my setup. So for a while I left the sprinkler in place and didn’t use it. I noticed after my last brew day that I lost 2°F during the hour-long saccharification rest. I decided to get the sprinkler out of the way and removed it, which left a big hole in the lid. So I decided to add some extra insulation to see if I can ensure that there is less than 1°F of temperature loss.
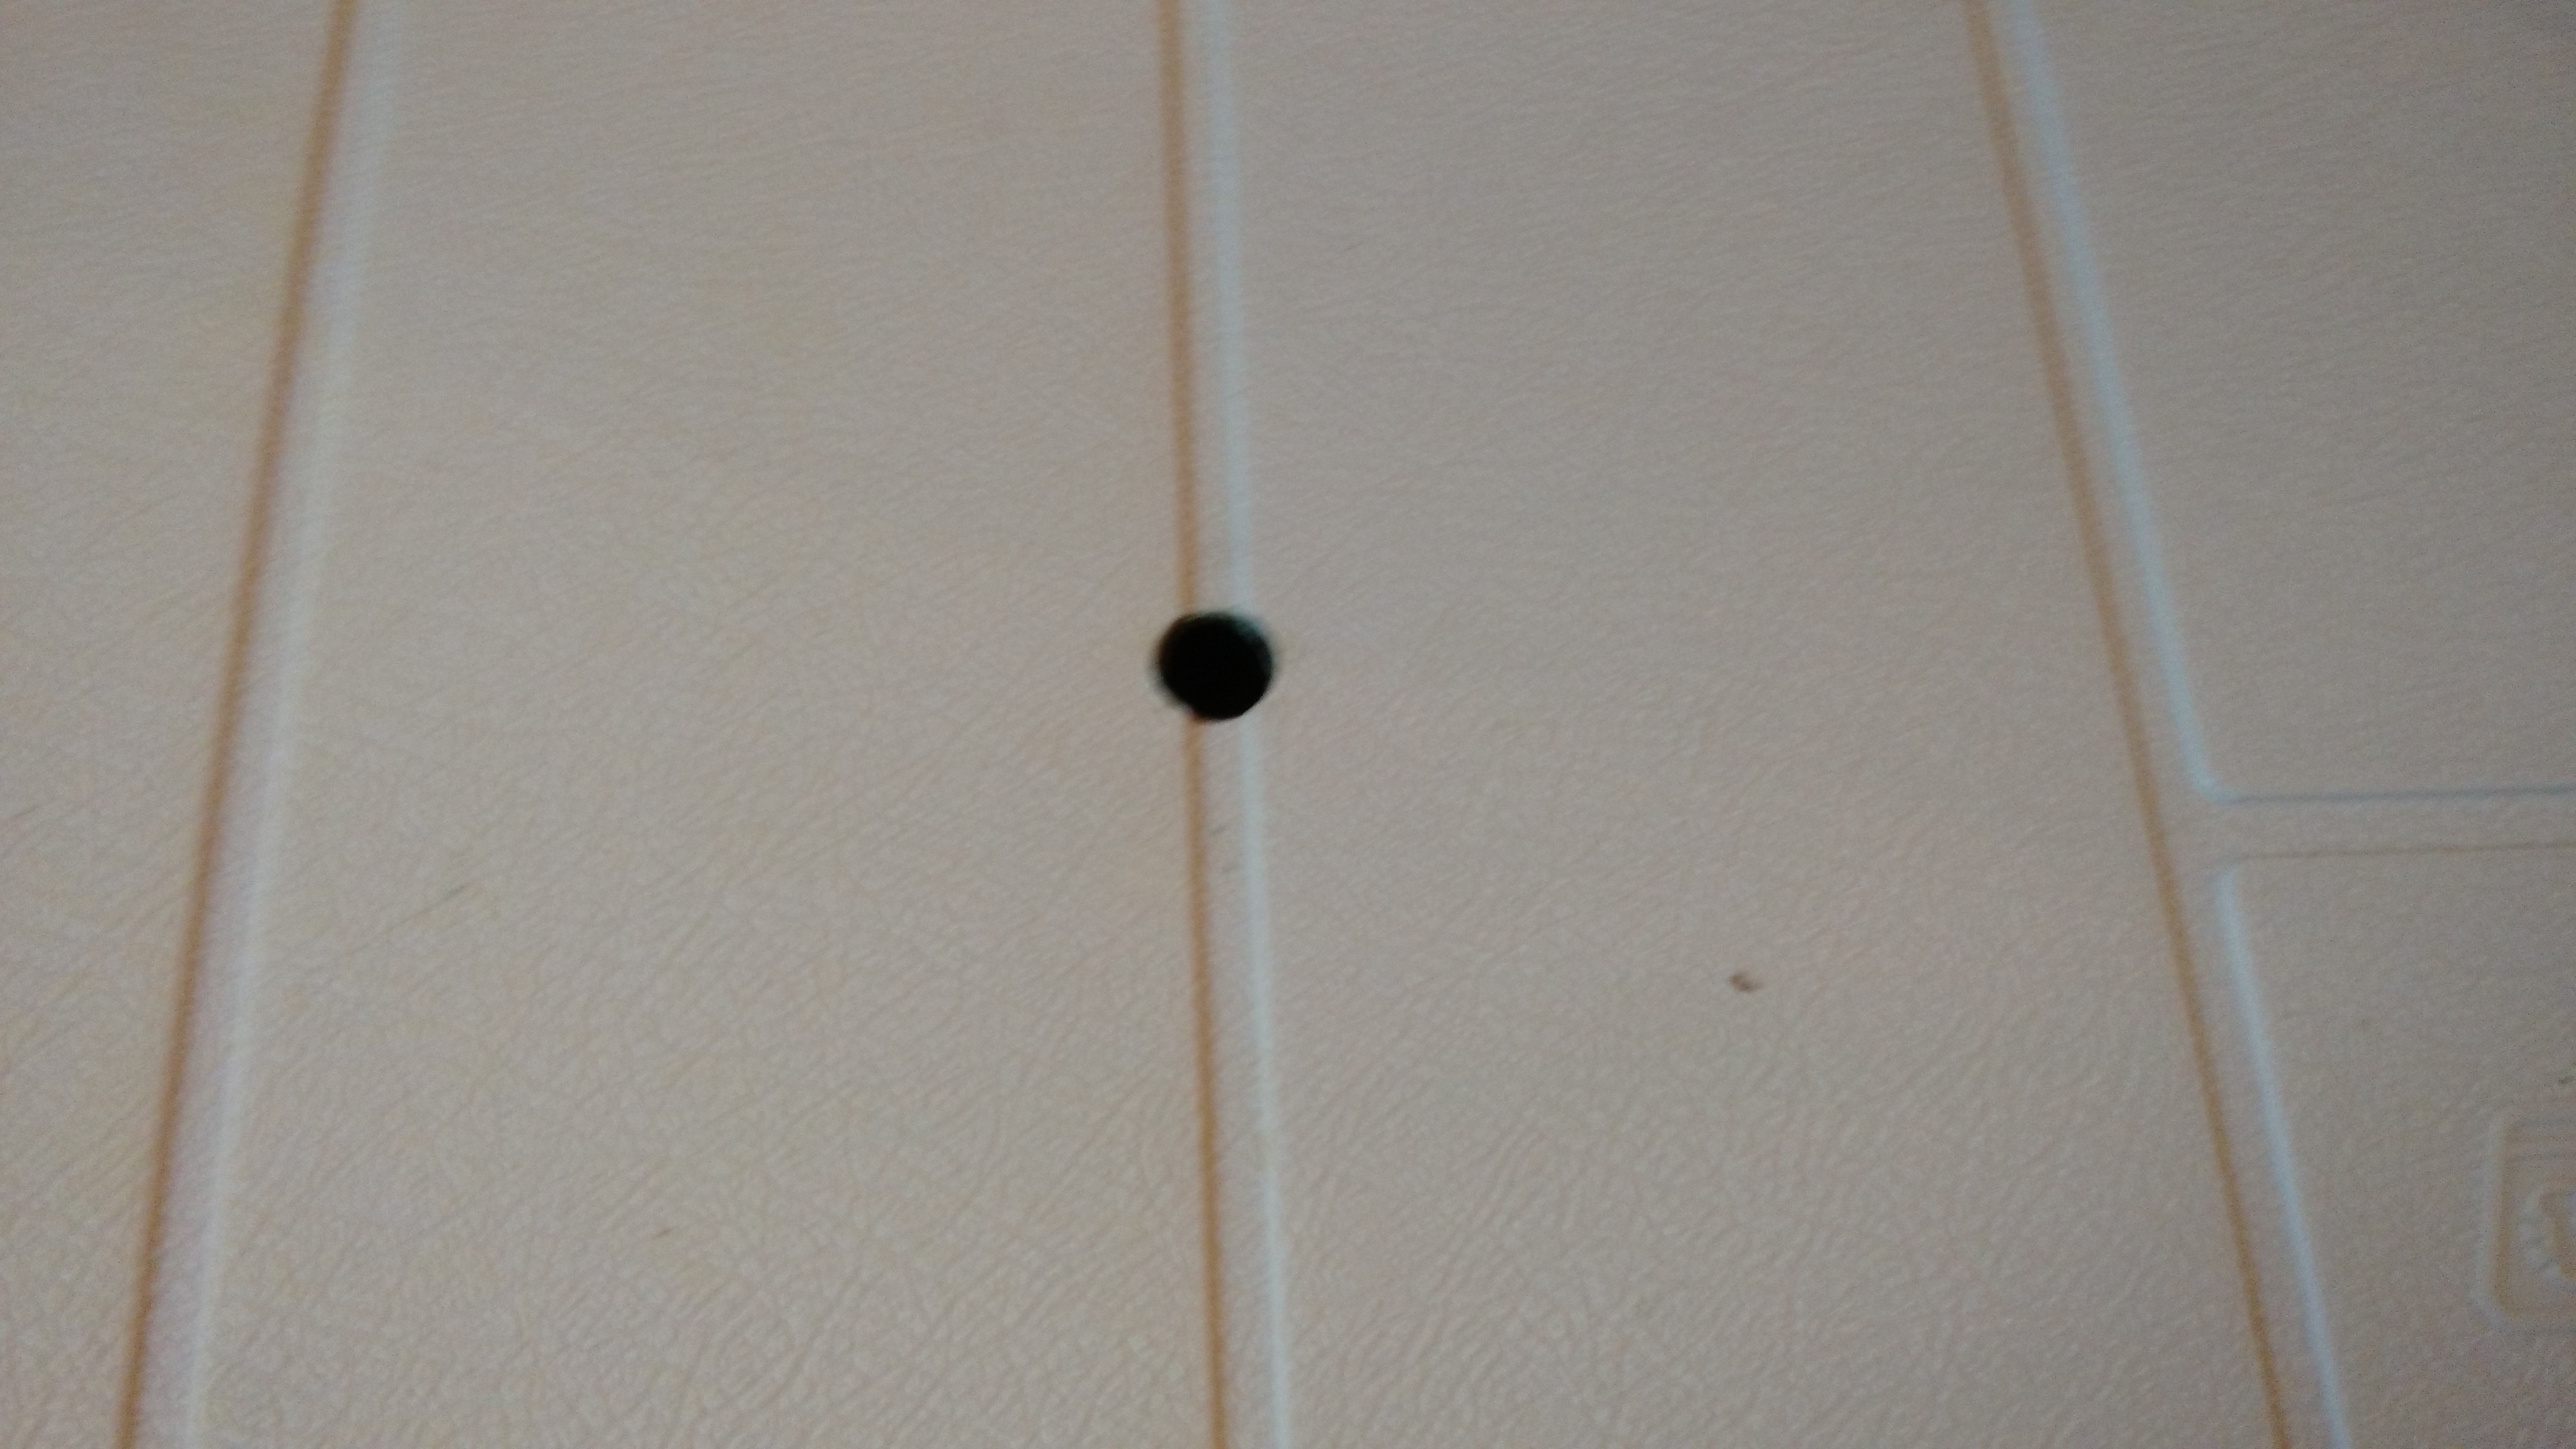
The hole. Seems like this would cause a lot of temperature loss over an hour.
Cover over the top.
Cover inside.
This is what I tried.
Looks like a popcorn ceiling for a cooler.
So after nearly a day, I checked on it. It seems to have stuck – I couldn’t easily pull it off, although I don’t know how well it’ll hold during an hour-long mash… we’ll see next weekend.
It expanded a little. Which is okay.
It throws off the balance of the lid a little, but not too bad. Heck, the cheap hinges will probably go someday soon anyway.
Cheers!
Kegerator! The Plan.
If my last post didn’t indicate that I LOATHE bottling, I’m not sure what I could have said to get that point across.

He’s really talking about bottling his homebrew, not those poor little Whos in Whoville.
While bottling has the cost part down (a 6-pack of bottles costs around $10 and comes with free craft beer), it has a number of disadvantages:
- Bottles are breakable
- Bottles take up a ton of room
- Capping 30-50 bottles at a time is no fun
- There’s no reliable, easy way to store clean bottles
The last point may be what has aggravated my wife. Despite the basement being “mine”, she is not at all happy with the several 6-packs of bottles in the middle of the floor. They’re in the middle courtesy of a crack in my foundation that leaks after extreme rains. Which has so far been twice, the second time left several 6-packs of empty bottles in a puddle. So they’ve been moved out for now. Into the middle of the floor.
This is pretty much the worst way to store bottles.
The Plan – “Begin With The End In Mind”
My ultimate goal is a three tap keezer. One tap will (occasionally?) be a stout faucet. 95% of my beer is consumed by me, so I can have an IPA, a stout, and something else on tap. And nothing says that I can’t bottle the remains of a keg if it gets low, although the bottle guns I see look like a pain to use.
After looking at this guy’s nice keezer build on Reddit, my wife feels that it must be black and I must build a similarly nice looking collar. However, she feels mine should have a red pinstripe on it because it would make it look good with University of Cincinnati Bearcat decor. It’s really cool of her to say that since her degree is from Southwest Florida College, mine are from UC and University of South Florida.
After looking at my budget, my first few kegs will be with picnic faucets. I have more budget numbers, but they’re boring. I have more plans, but that’s boring too. The overall plan is something like:
- Paint Keezer Black, fix temperature sensor issue, and run it (for now) with the Raspberry Pi
- Begin using (seriously, I LOATHE BOTTLING ENTIRELY!)
- Build collar (may be done before #2, depending on many things)
- …?
- Profit
- Add nice faucets
I taped the insulation to paint around it. Of course I used gloves when moving the insulation to remove the handle.
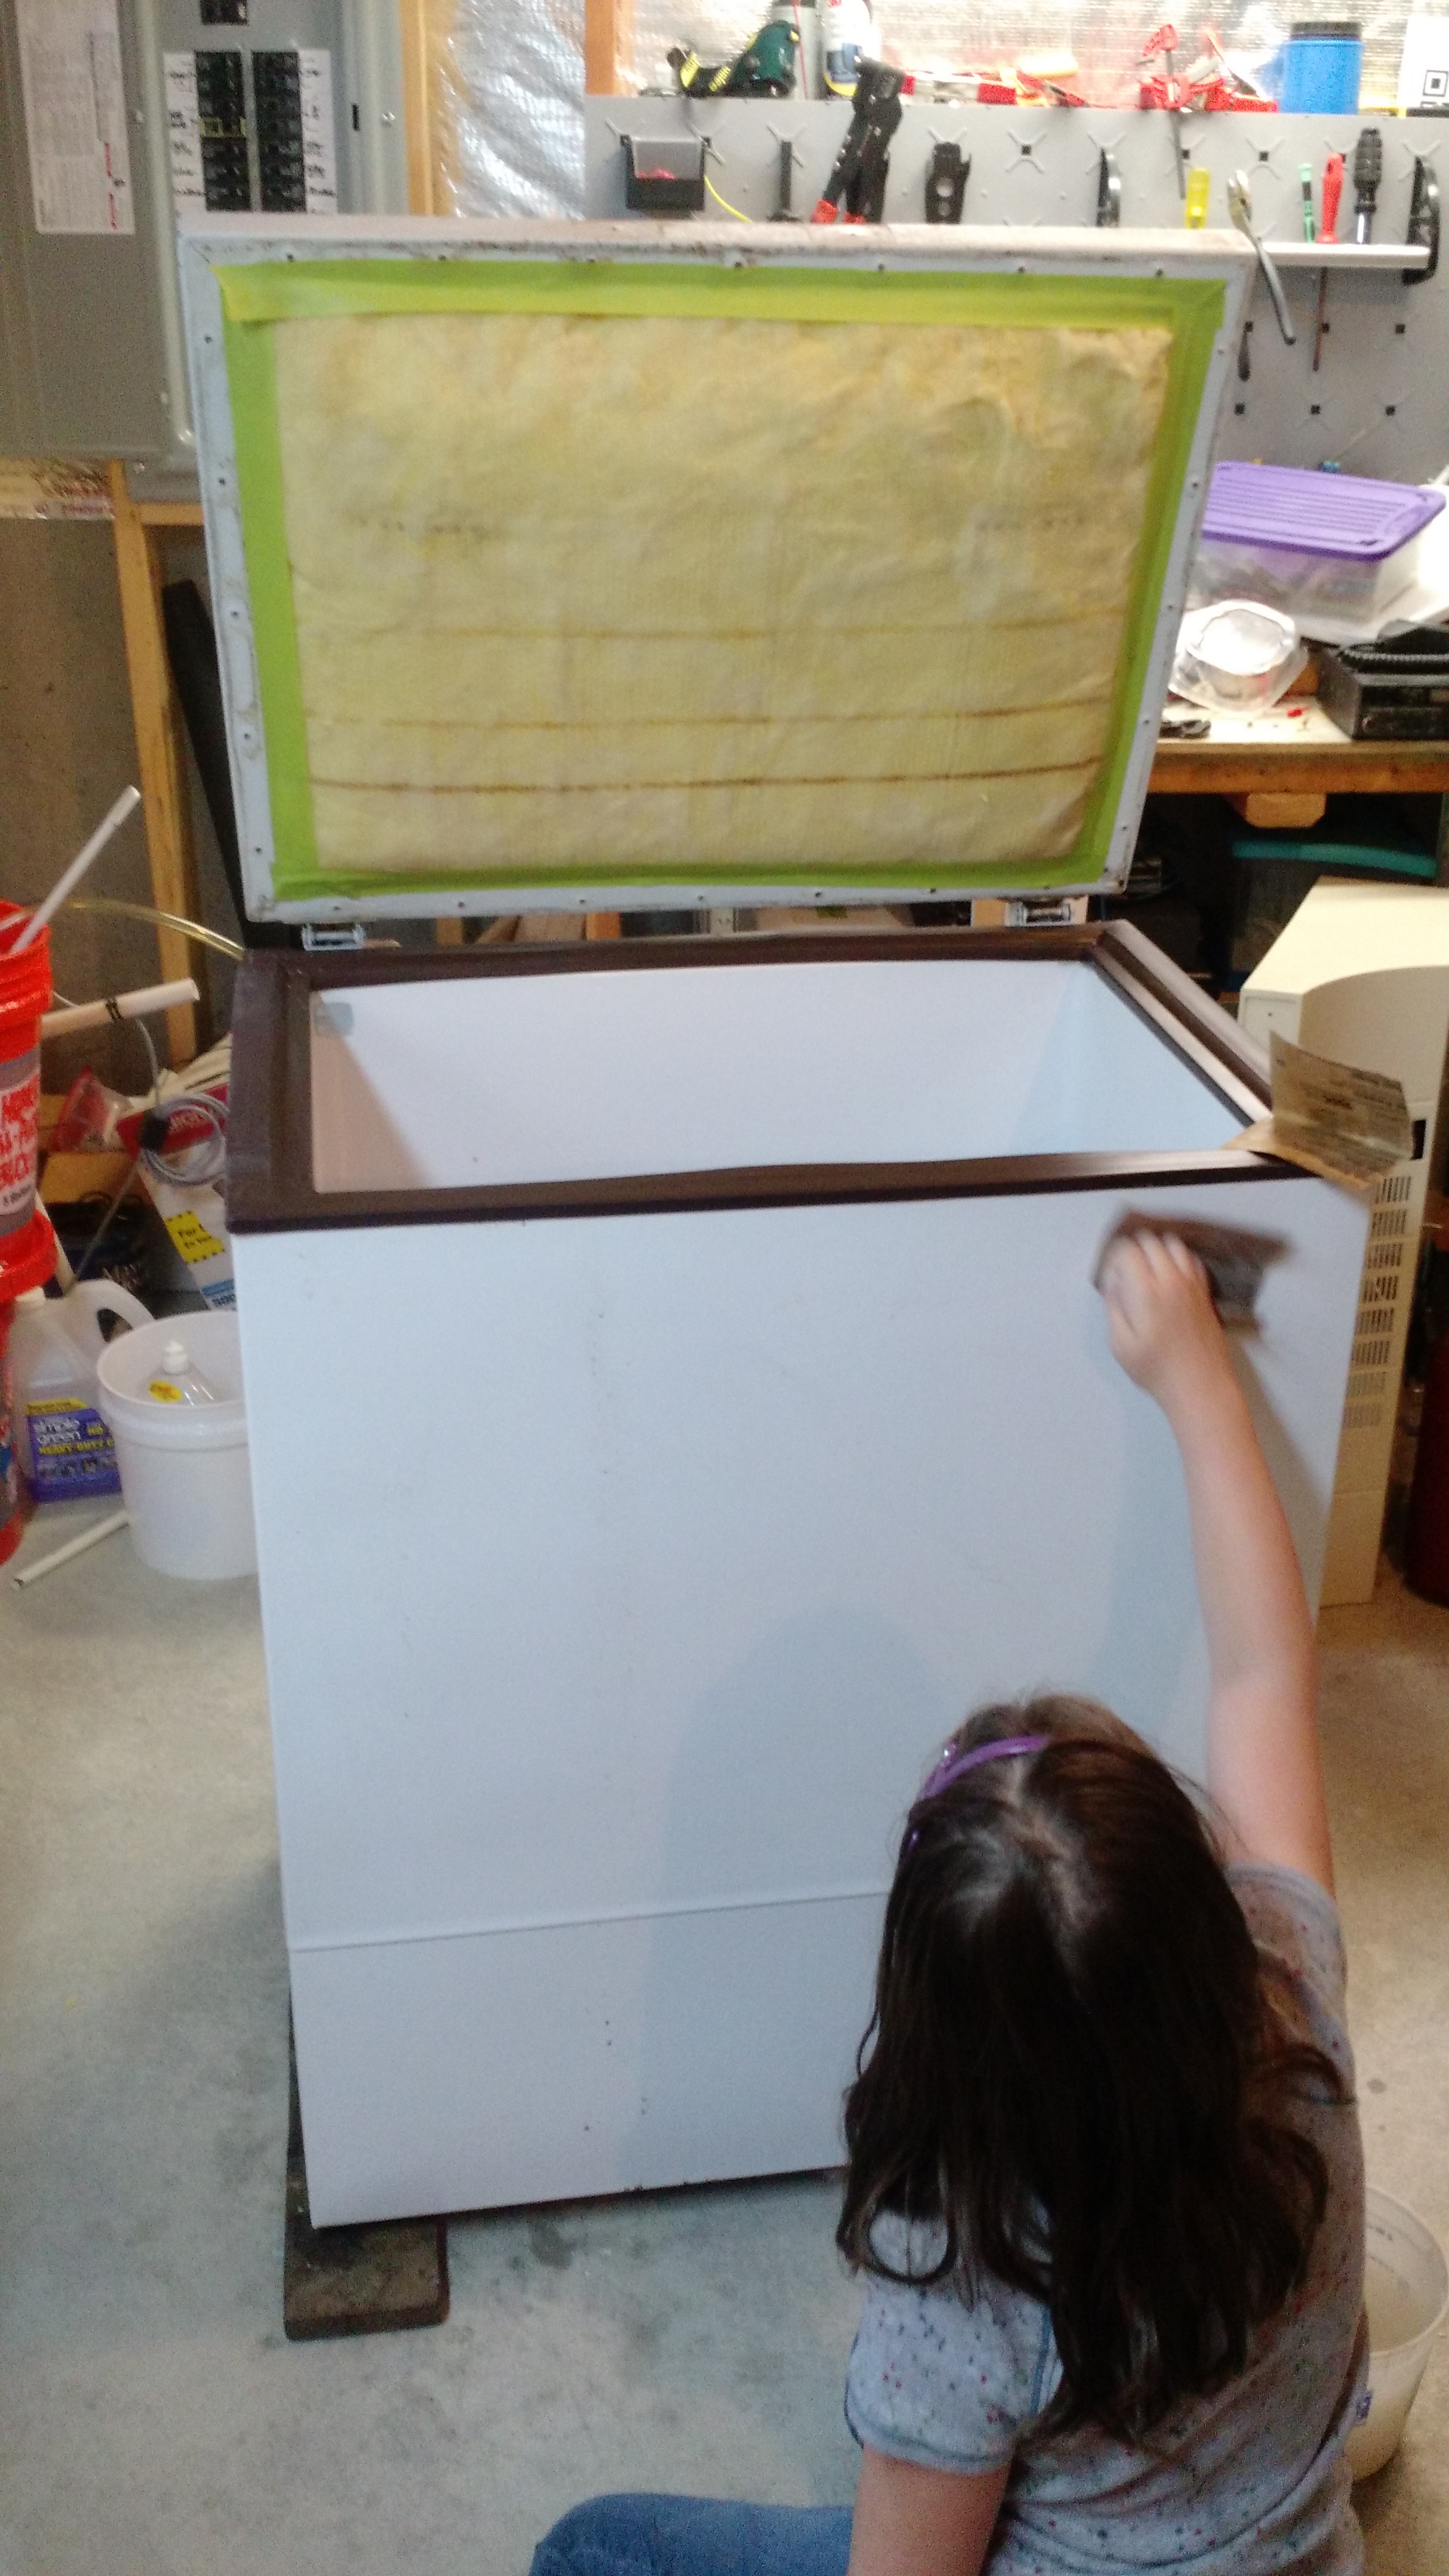
The kid’s on work detail. This is what happens when you don’t respect your elders!
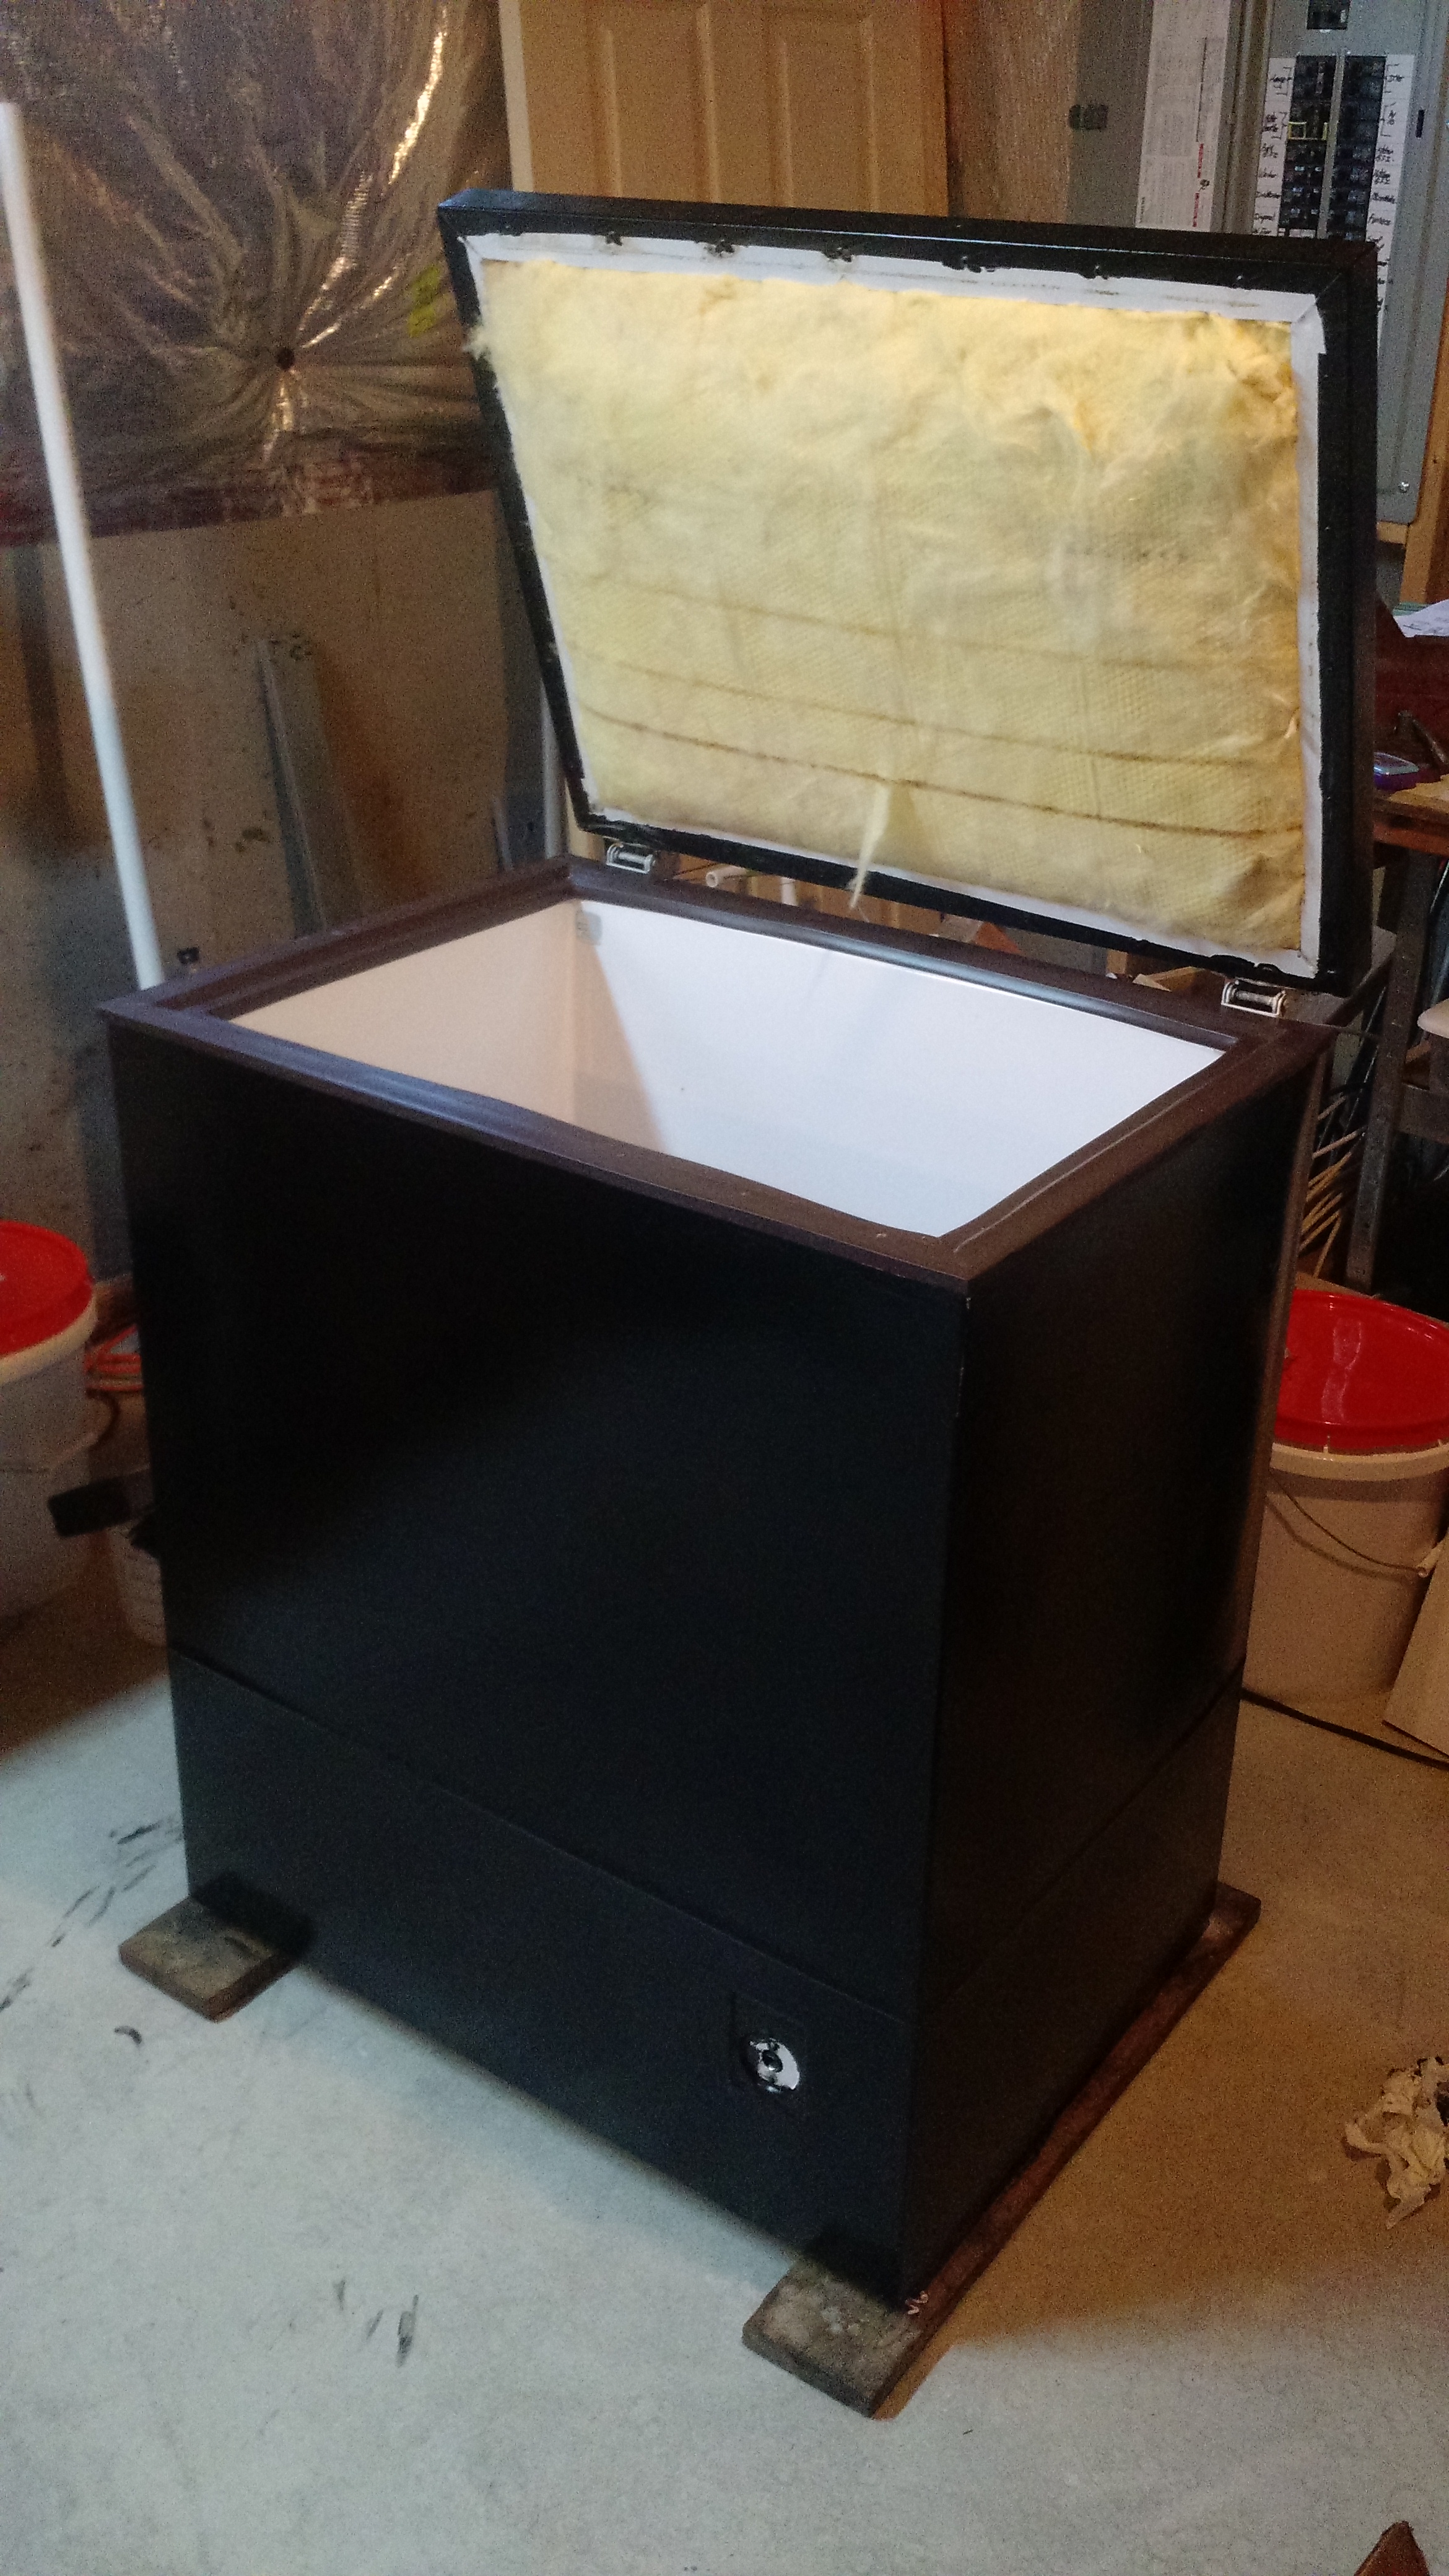
Painted!
There’s a few other things I want to do. I’d love to have some way to know how much beer is left in a keg. One way I can do this is using a flow meter (such as in this article on Adafruit’s website). I don’t like the idea of a flow meter. Adafruit’s has a 1/2″ inlet and outlet, and the beer lines are smaller, so the geeky engineer in me questions the accuracy, and the homebrewer in me questions what happens to the beer in this thing. Then I thought about using weight sensors that I saw on Sparkfun’s website. As I was typing this, I found a post on HBT that even points to Sparkfun’s tutorial on their kegerator. While my implementation might deviate from this, it will be with inspiration from Sparkfun… although the first thing I thought of was this.
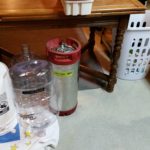
The Mystery Cylinder
I have a 5 lb beverage cylinder that I evidently purchased for another use in May of 2000. Yes, fifteen years ago. The gas shouldn’t go bad, but there was no label on the cylinder ever. I thought I’d call the place that I purchased the cylinder from (because it was either “air” or “CO2”, IIRC), but it appeared they went out of business many years ago (they may not have, but earlier I thought they did). I looked into things and found that as long as your tank was filled by a legitimate business (and this was), the ONLY valve on top of the tank should be a CGA 320… Okay, it could be Methyl Flouride, but I’d be shocked if I got that from a Fire Suppression Store and that it’d have a green collar on it, normally flammable stuff is red (but I could be wrong, I didn’t look into this).
I know of no other tests, but since I’m 99% sure this is CO2, I’m going to go with it.
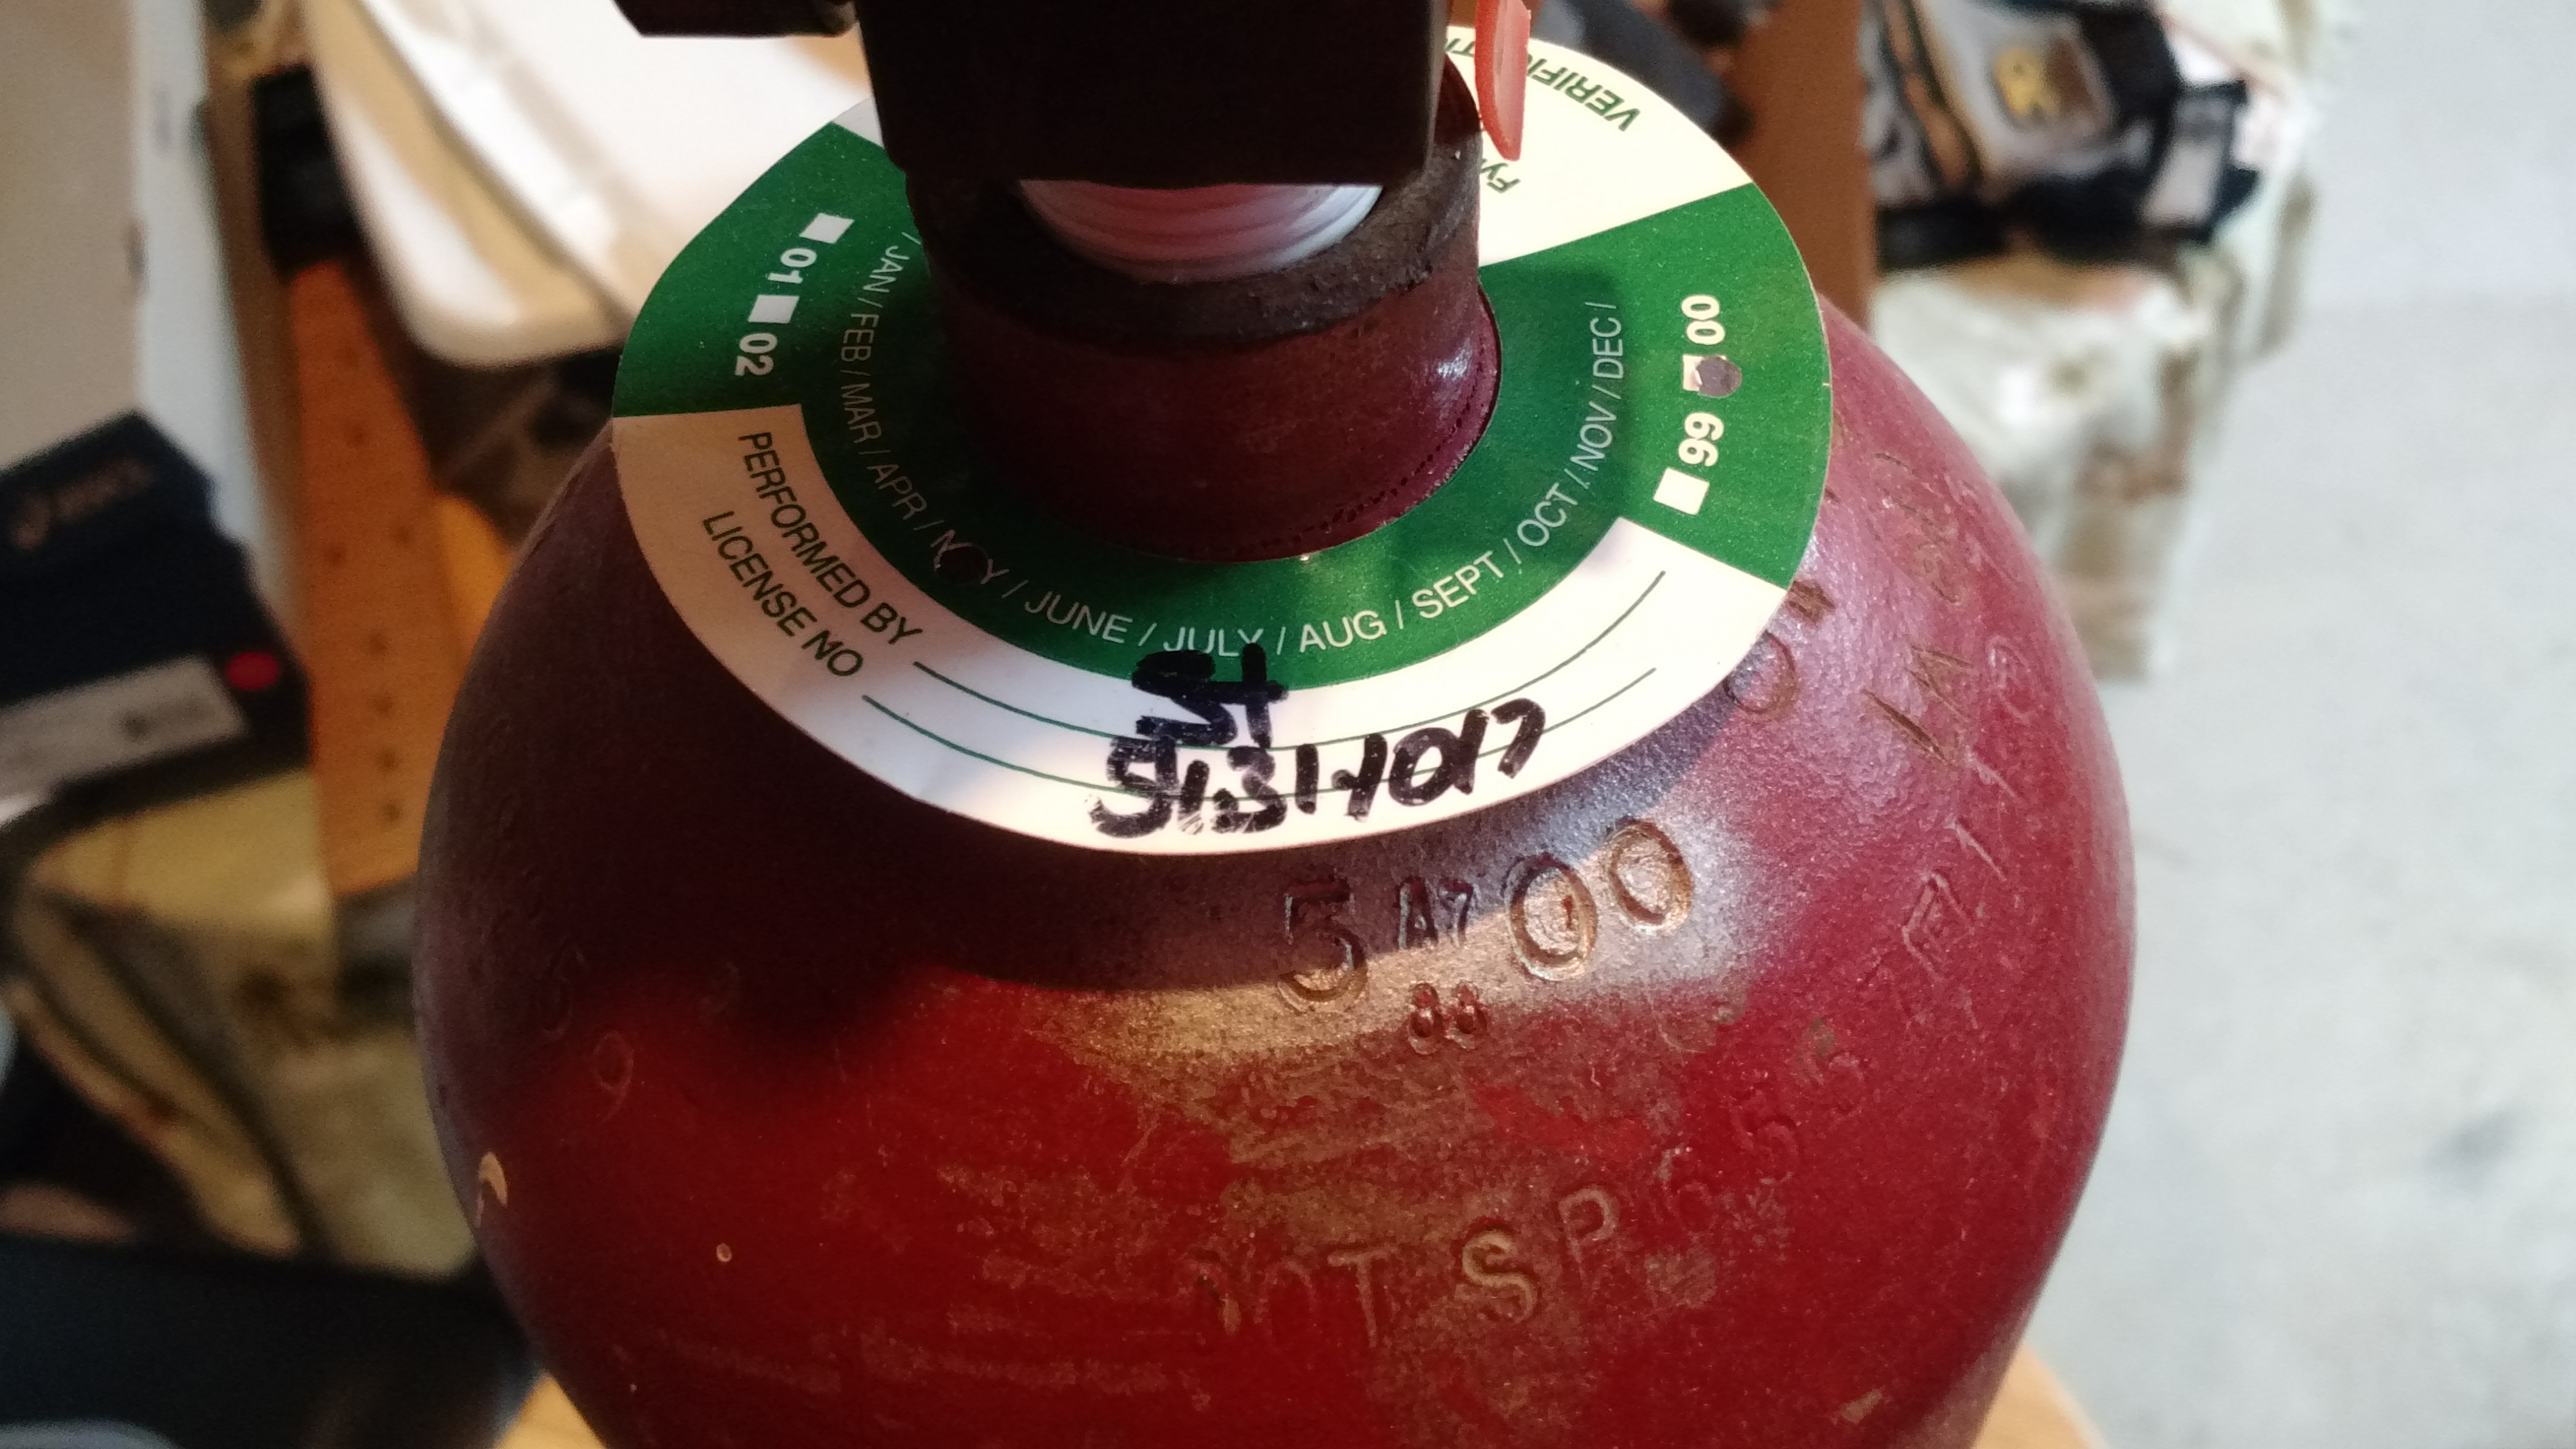
This is the date collar ring. May of 2000. This means that I will have to have the tank inspected and re-certified prior to having it filled.
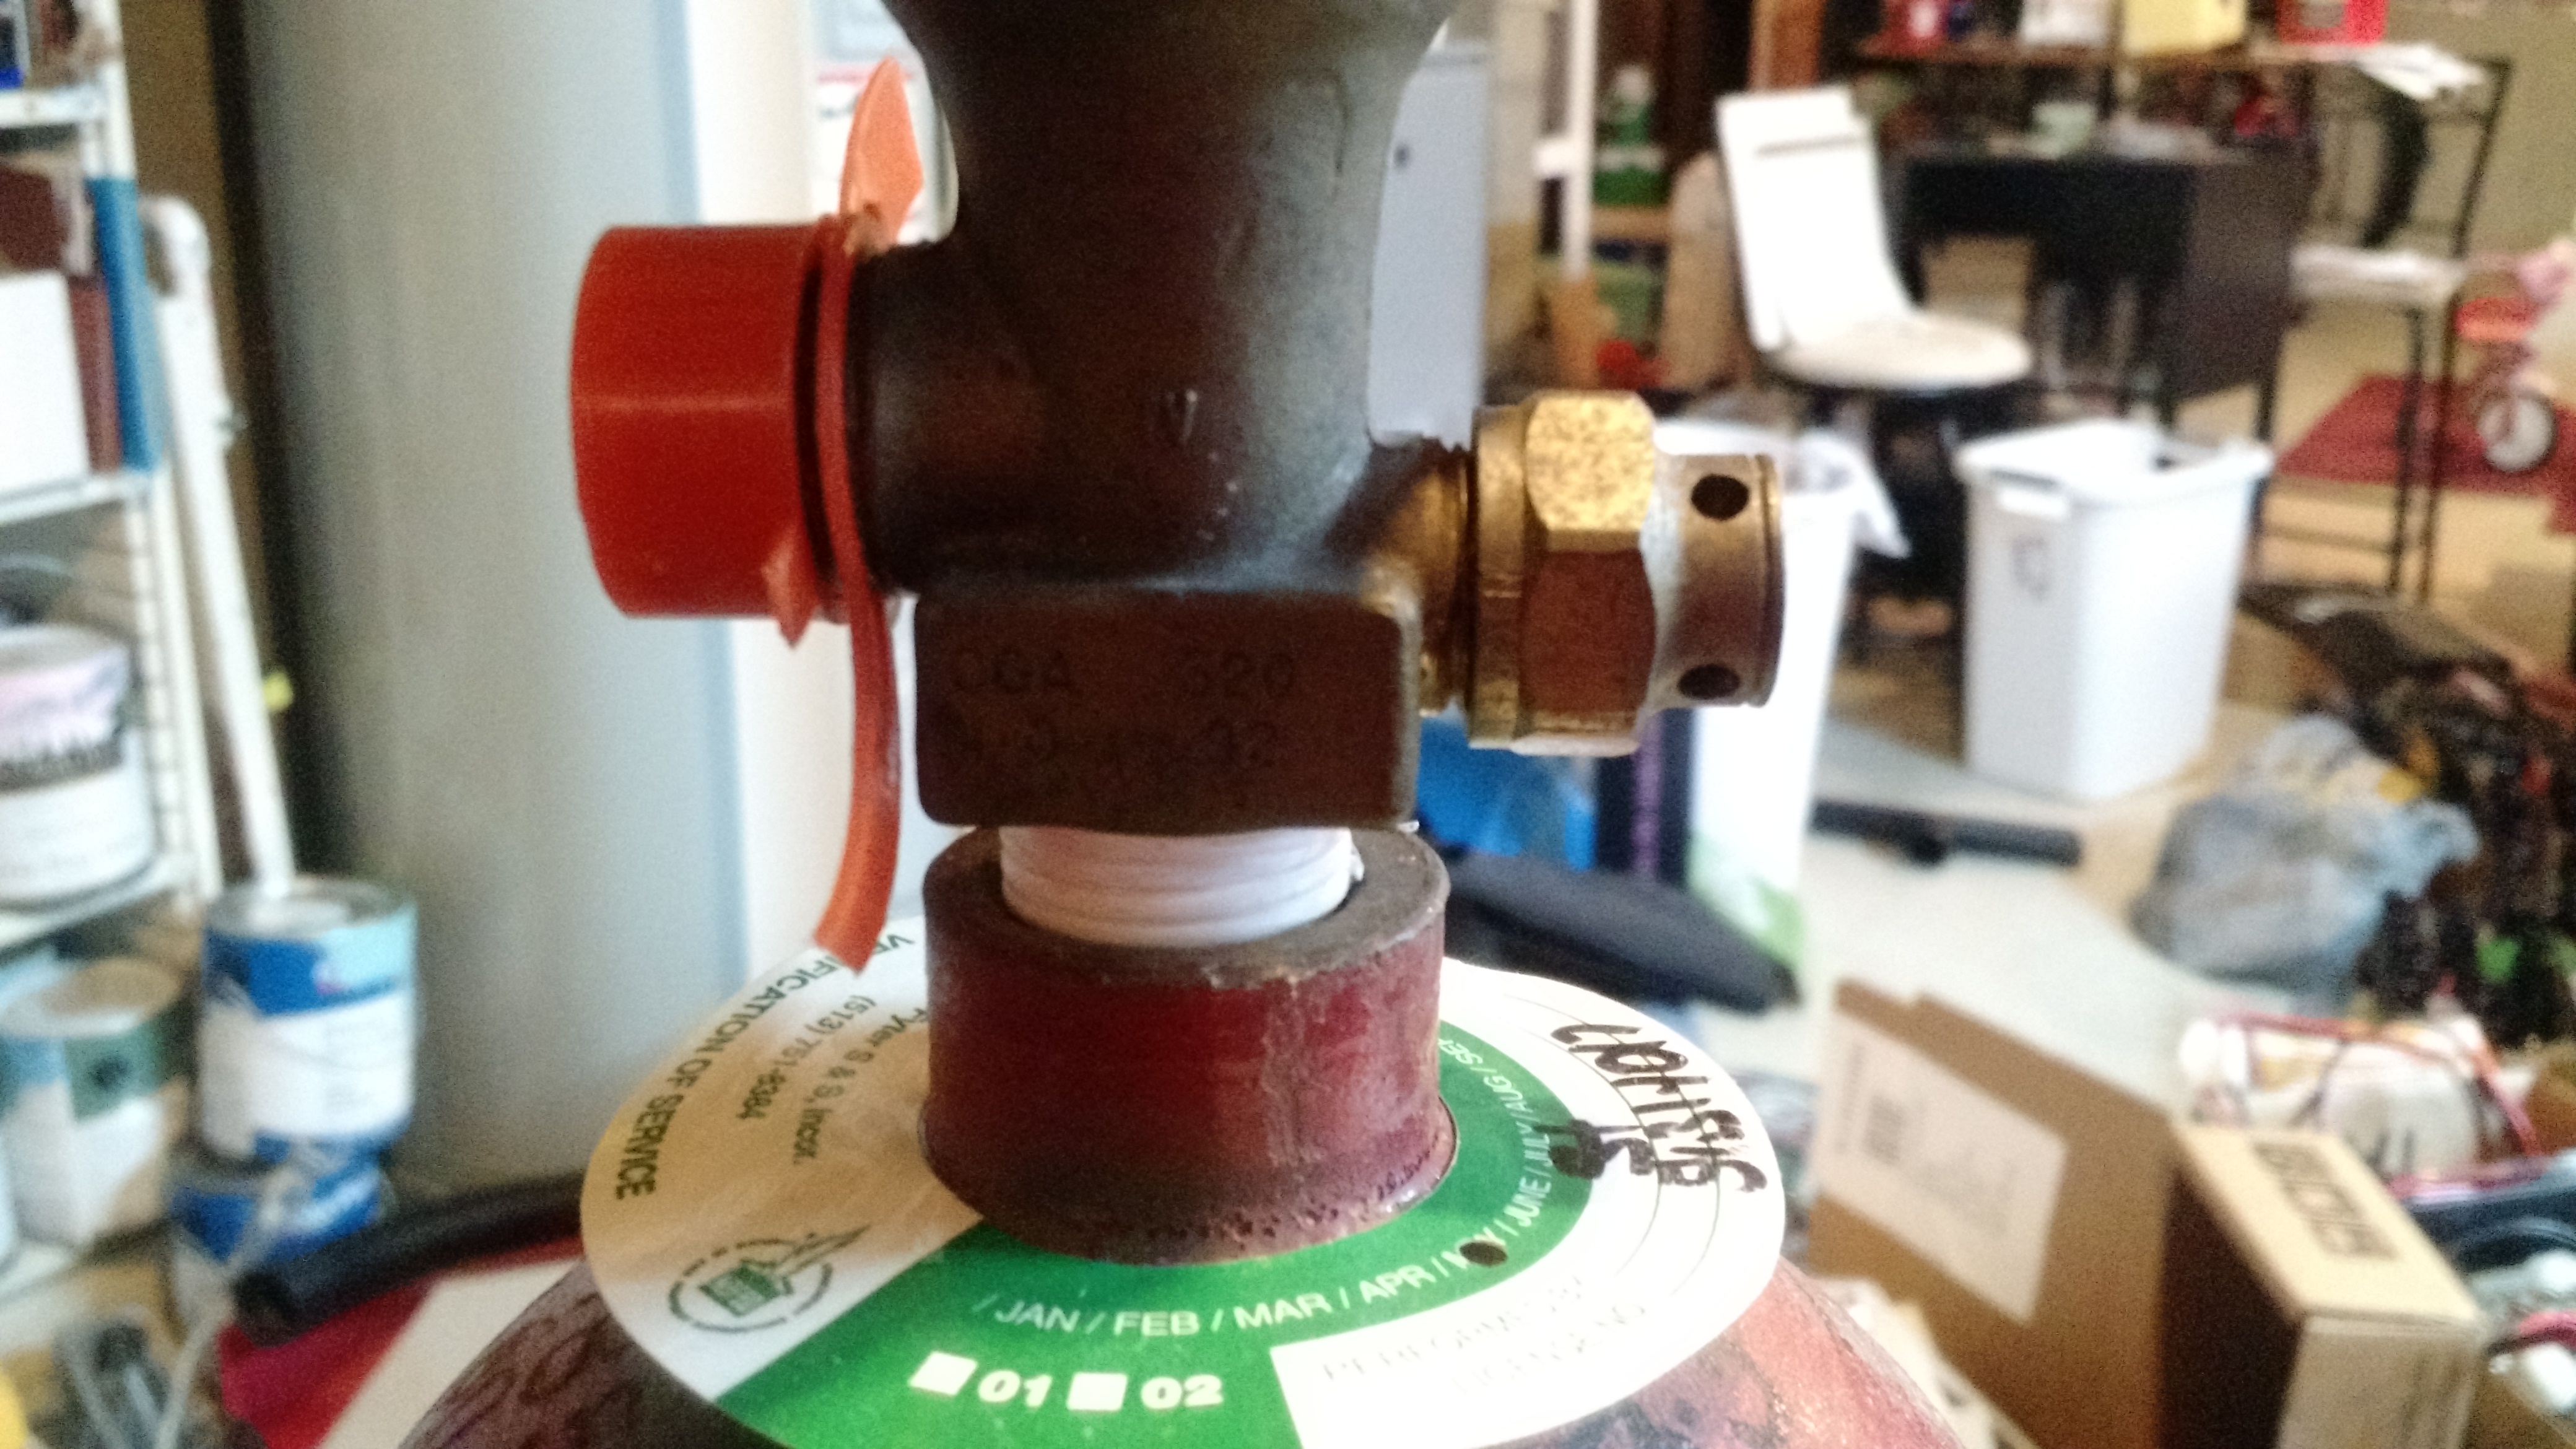
This does say CGA 320, which can only be used for CO2.
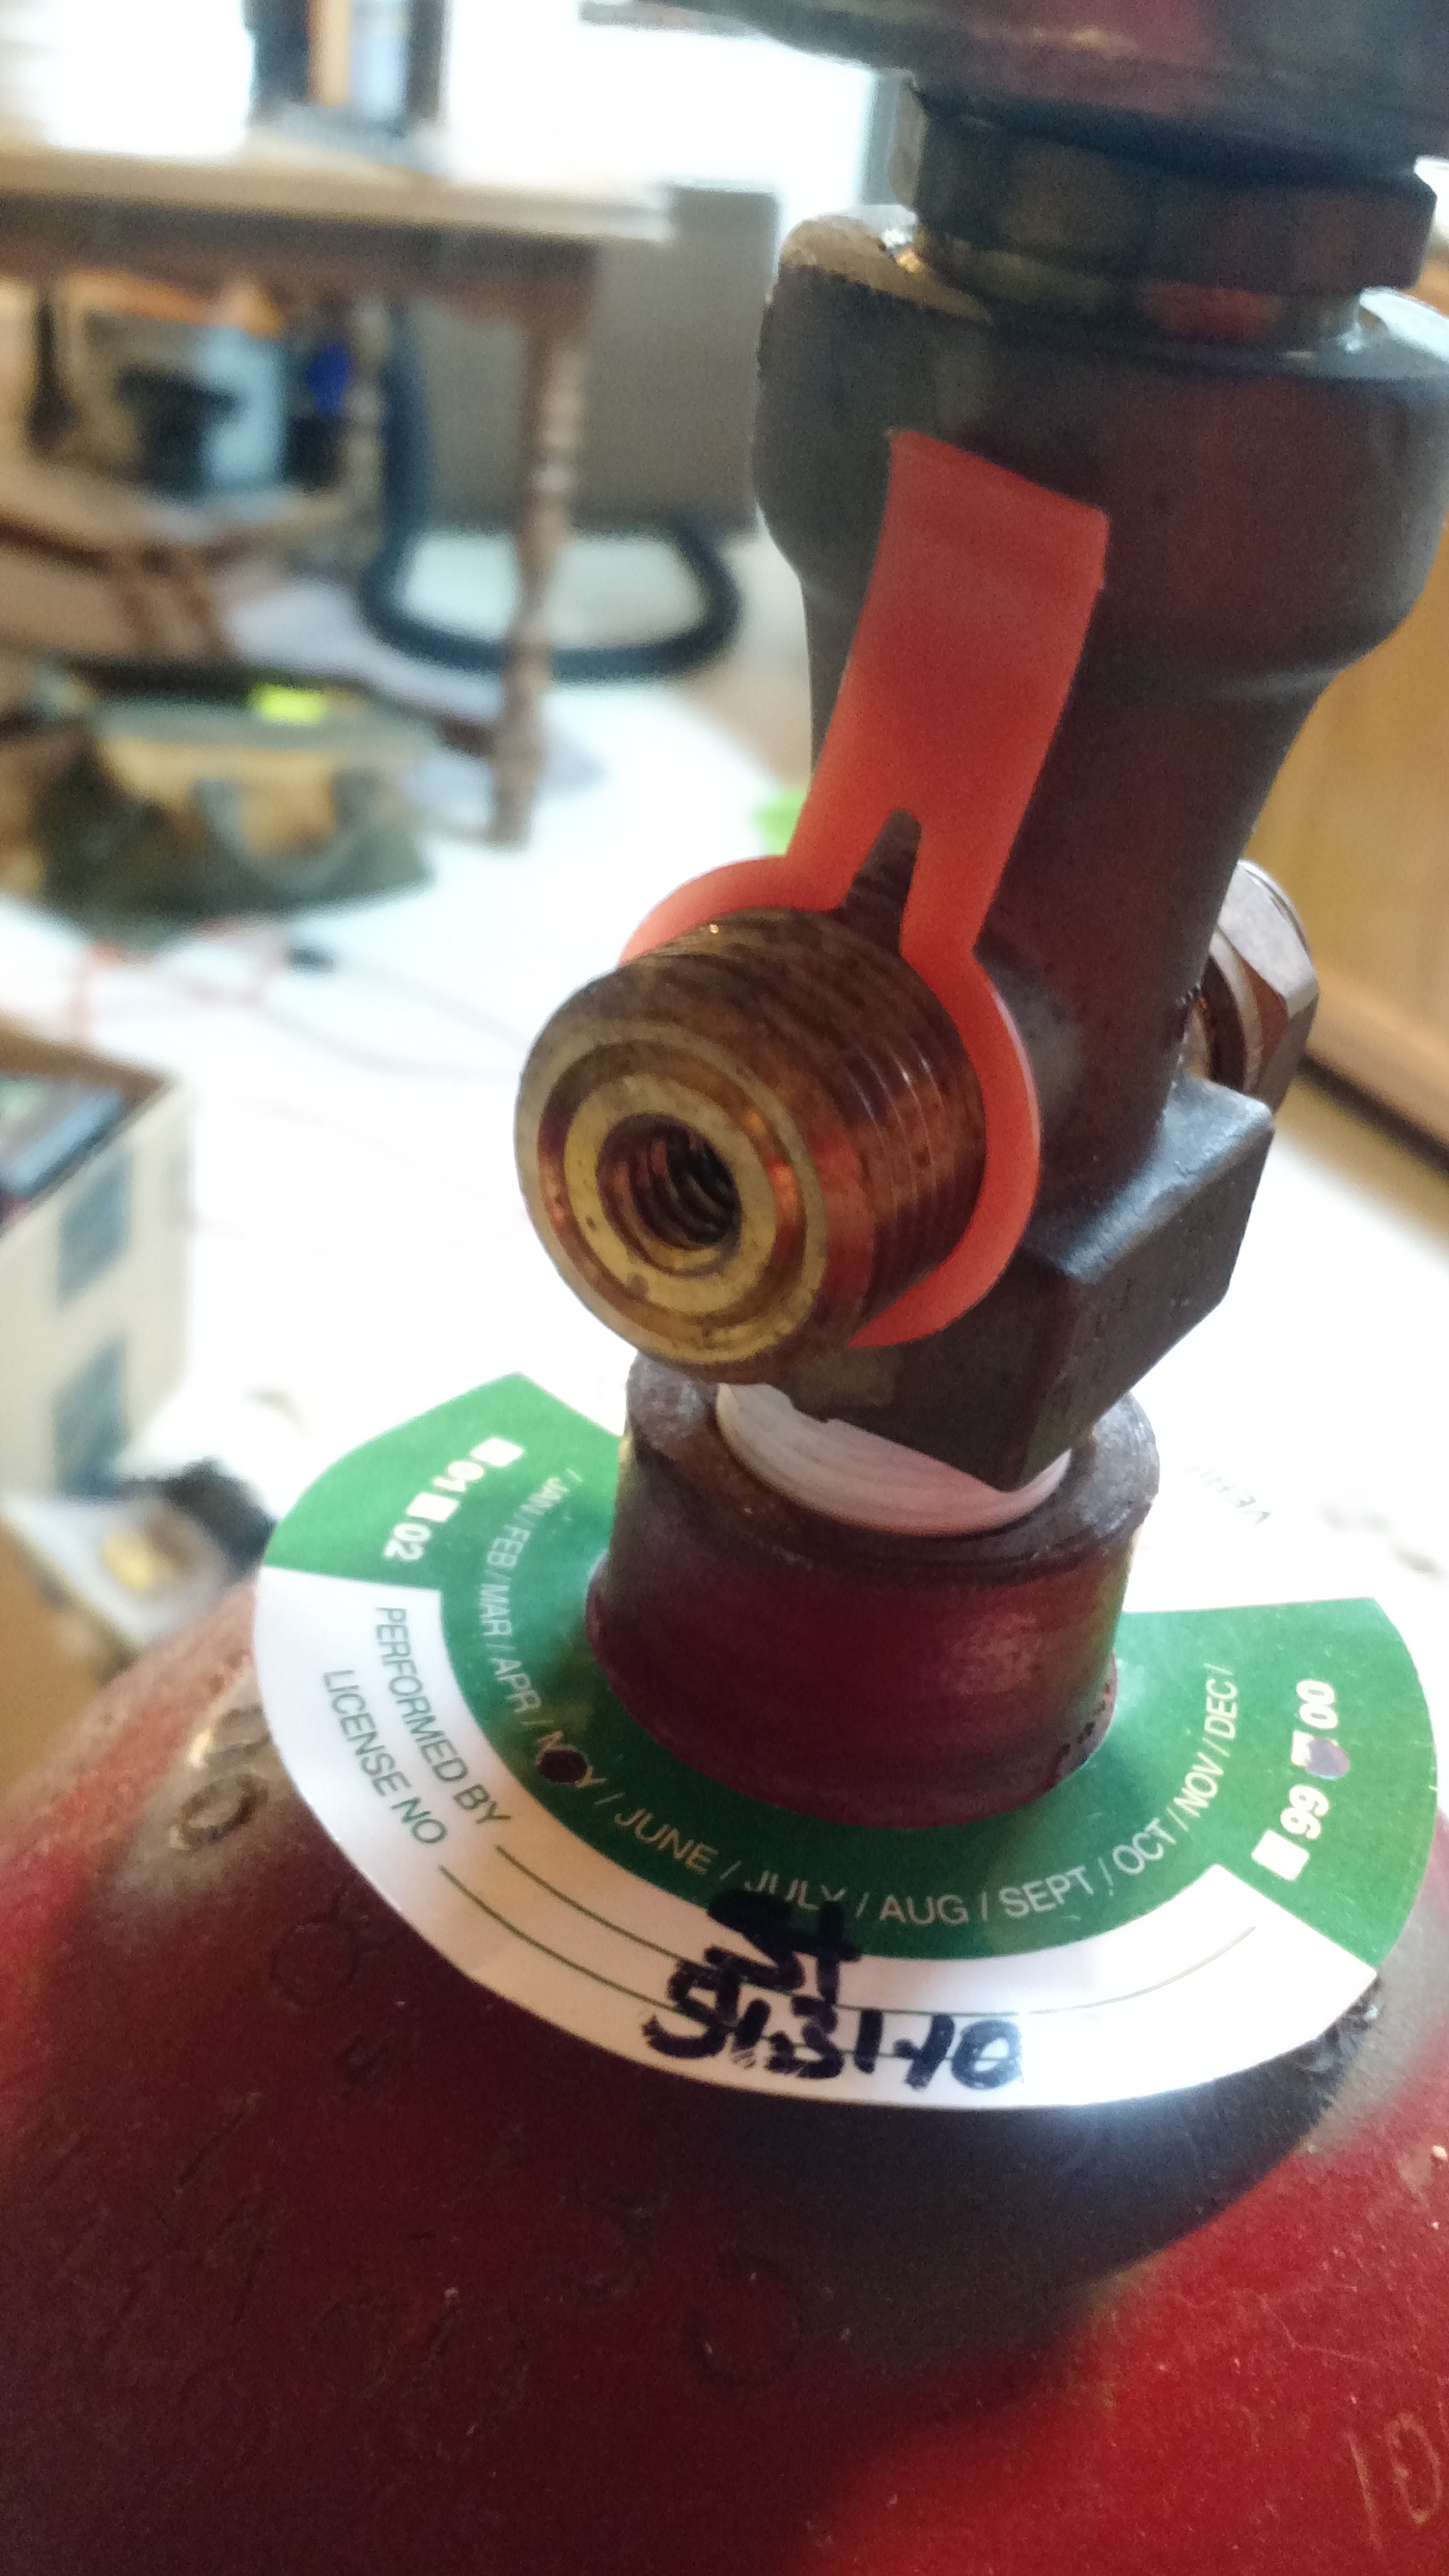
This confused me a little. There are threads on the inside as well as the outside.
Cheers!
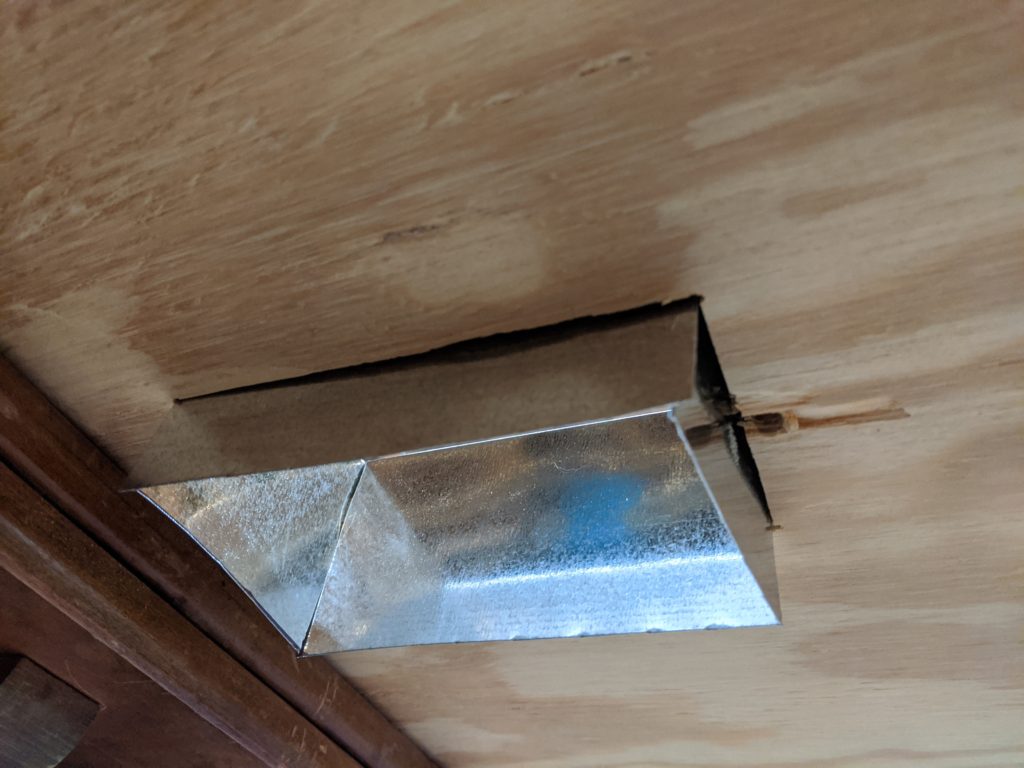
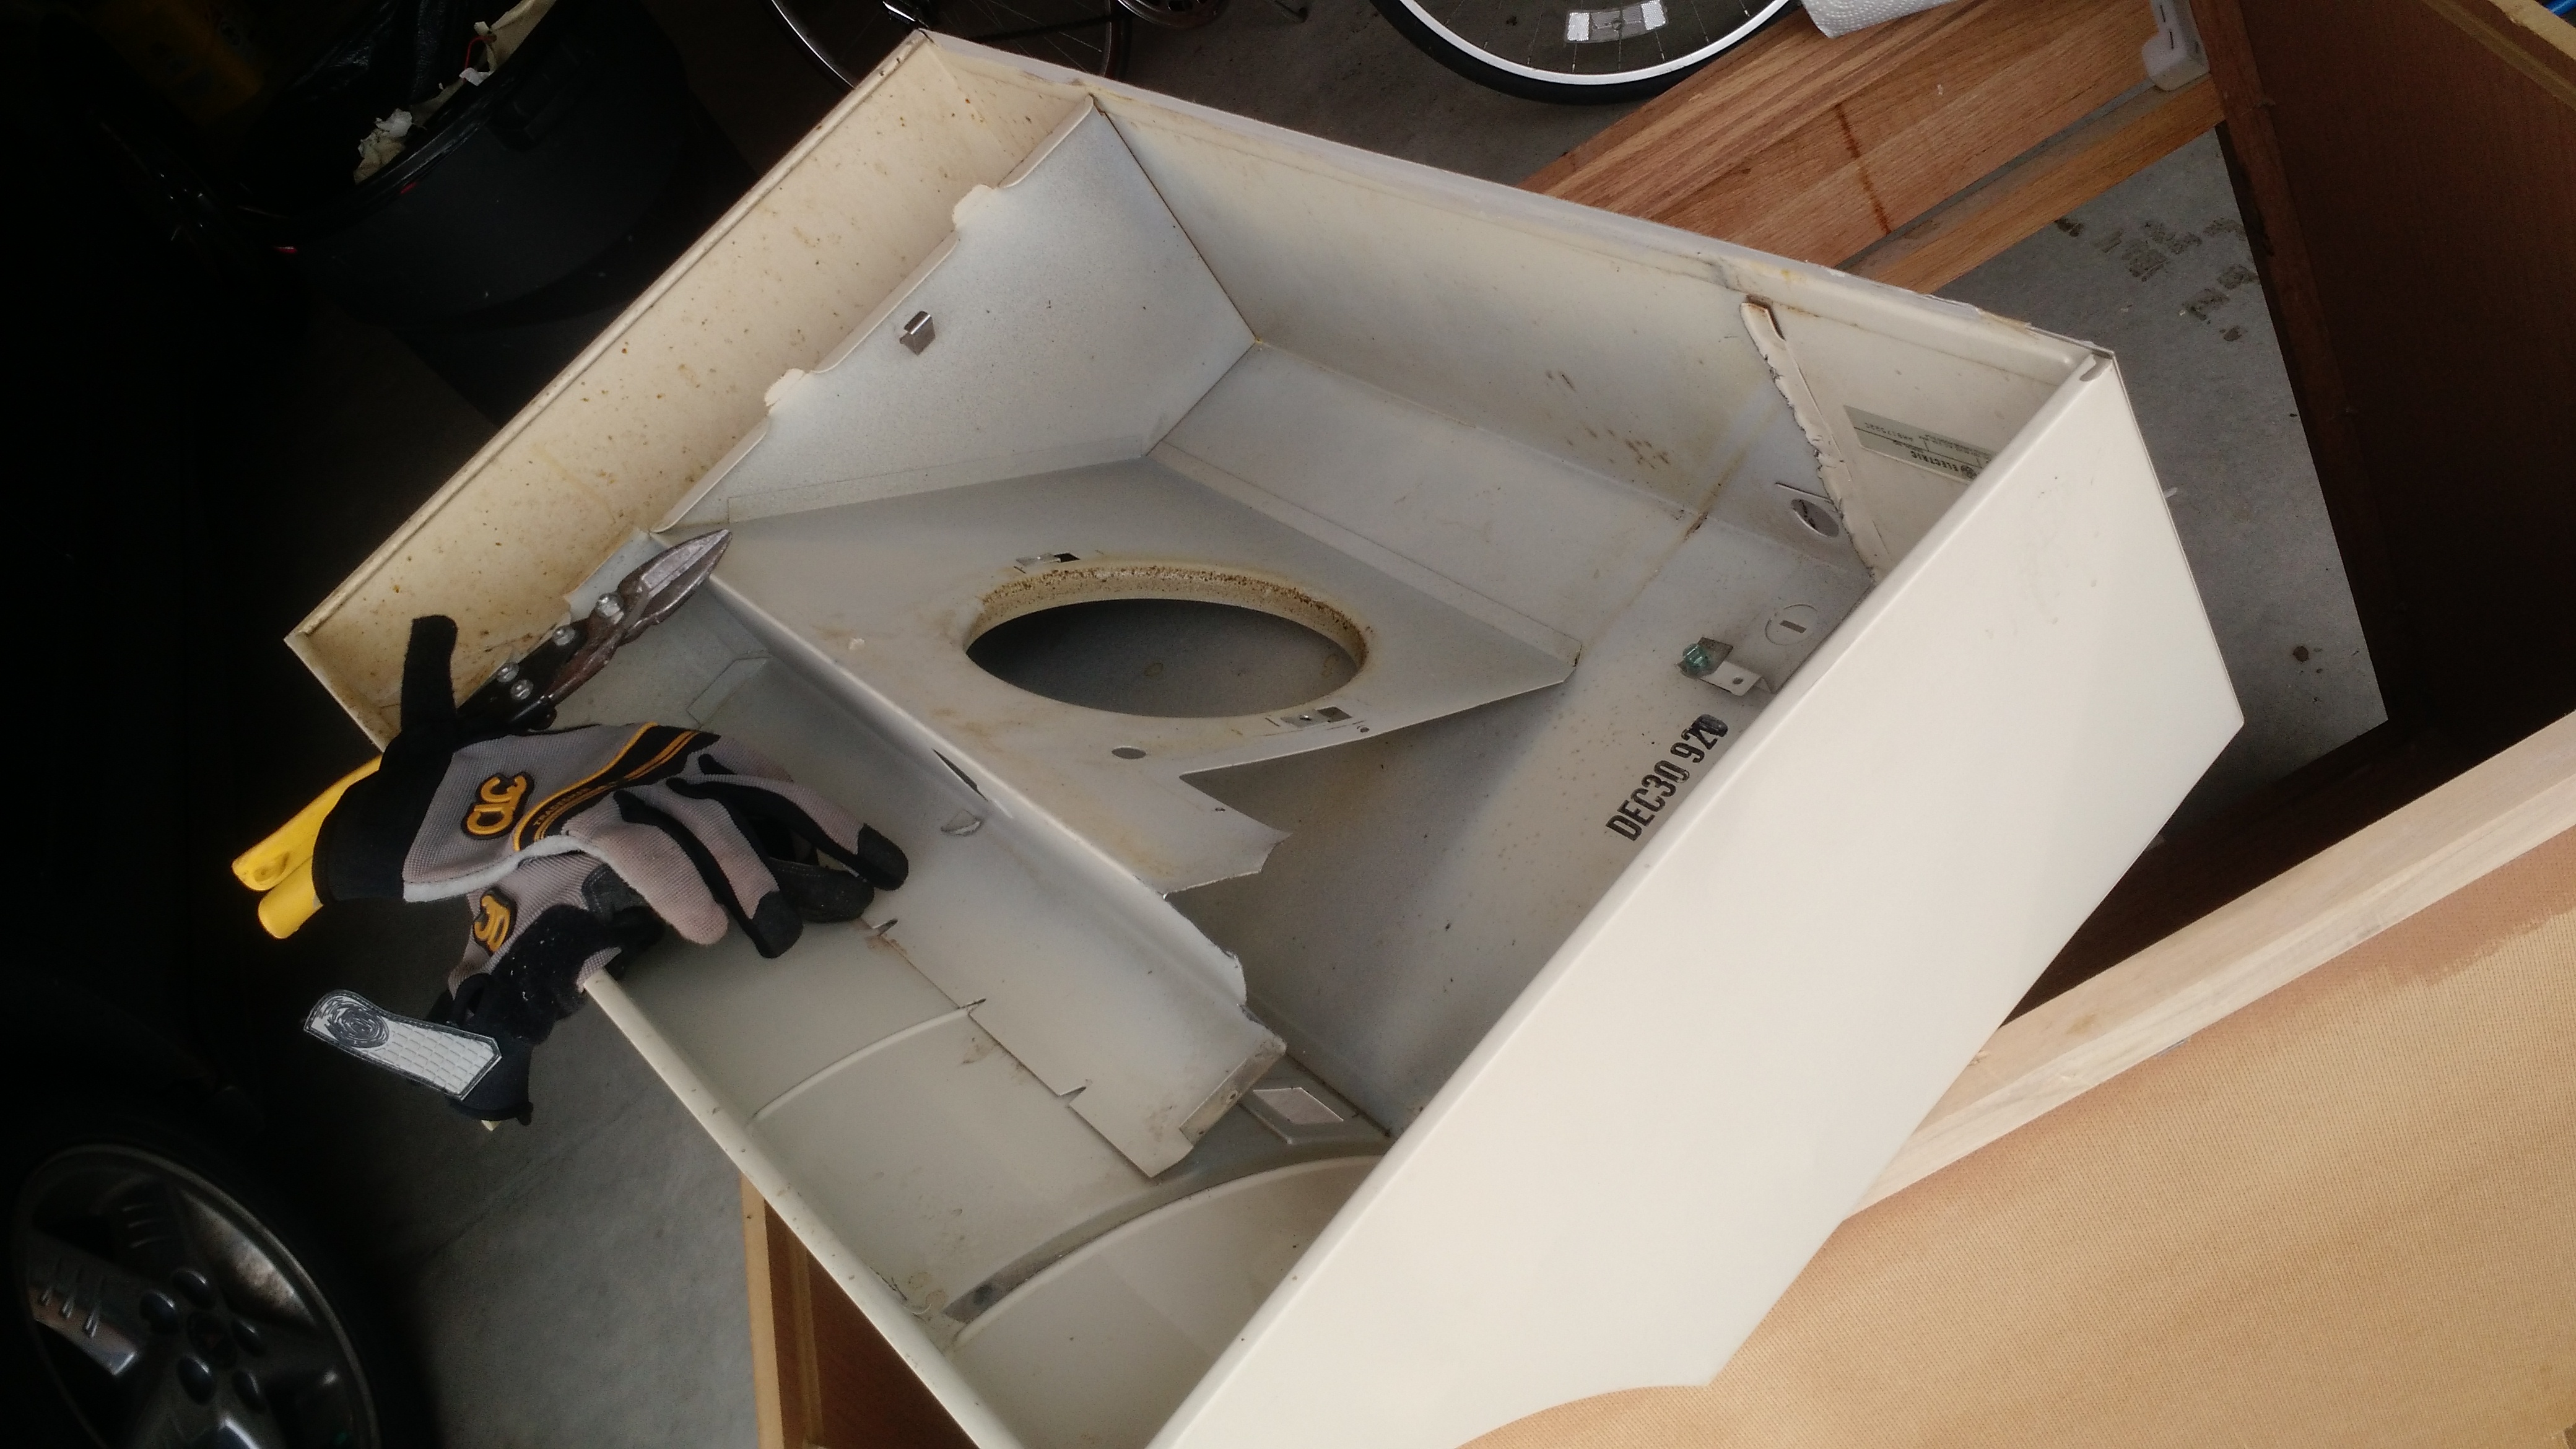
Old Range Hood Turned Into a Brewery Exhaust Hood
Since I brew in my basement, it’s pretty important to exhaust the vapor from the wort outside the house. When it’s any temperature that isn’t between 50 and 65 degrees, opening a window isn’t the greatest way.
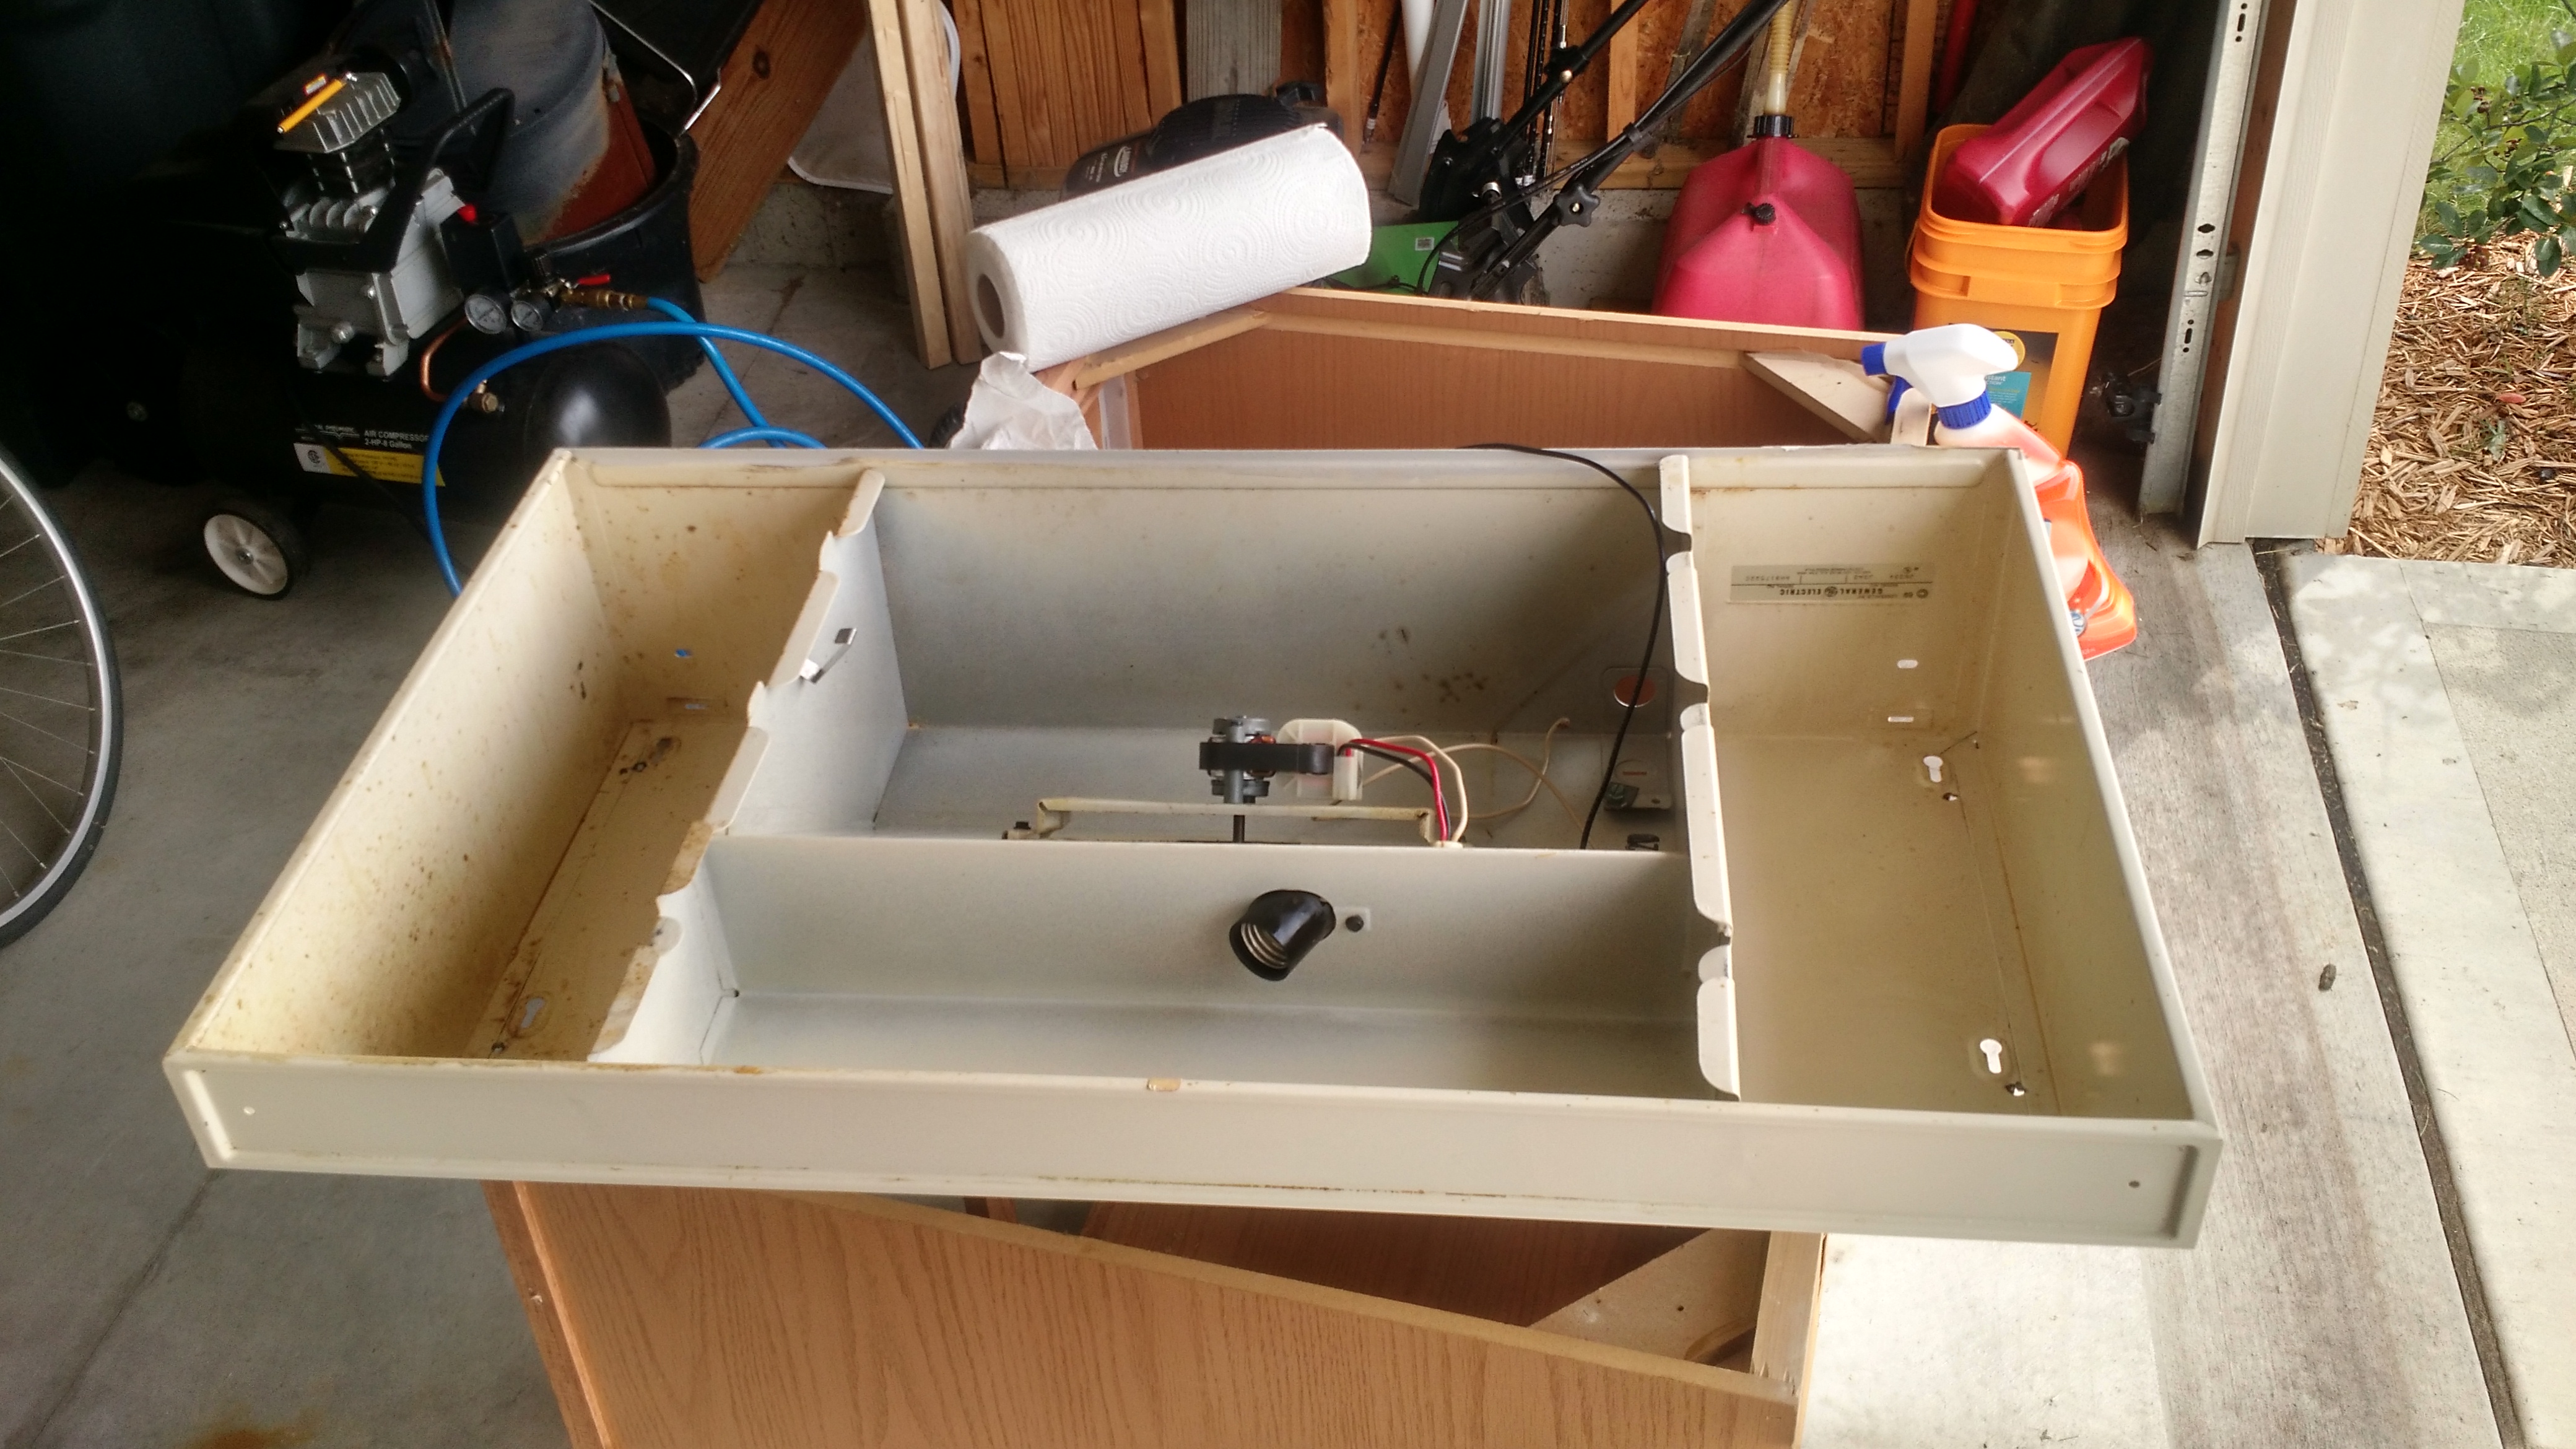
A friend was remodeling his kitchen and gave me a sink base cabinet (which will make it’s way down into the brewery) and his old range hood. the range hood was one that recirculates the air (as opposed to exhausting it), so it’s actually kinda useless. But with some modifications, it can exhaust the air.
One note about this is that safety is paramount. Sharp metal edges can cut like a broken glass carboy.
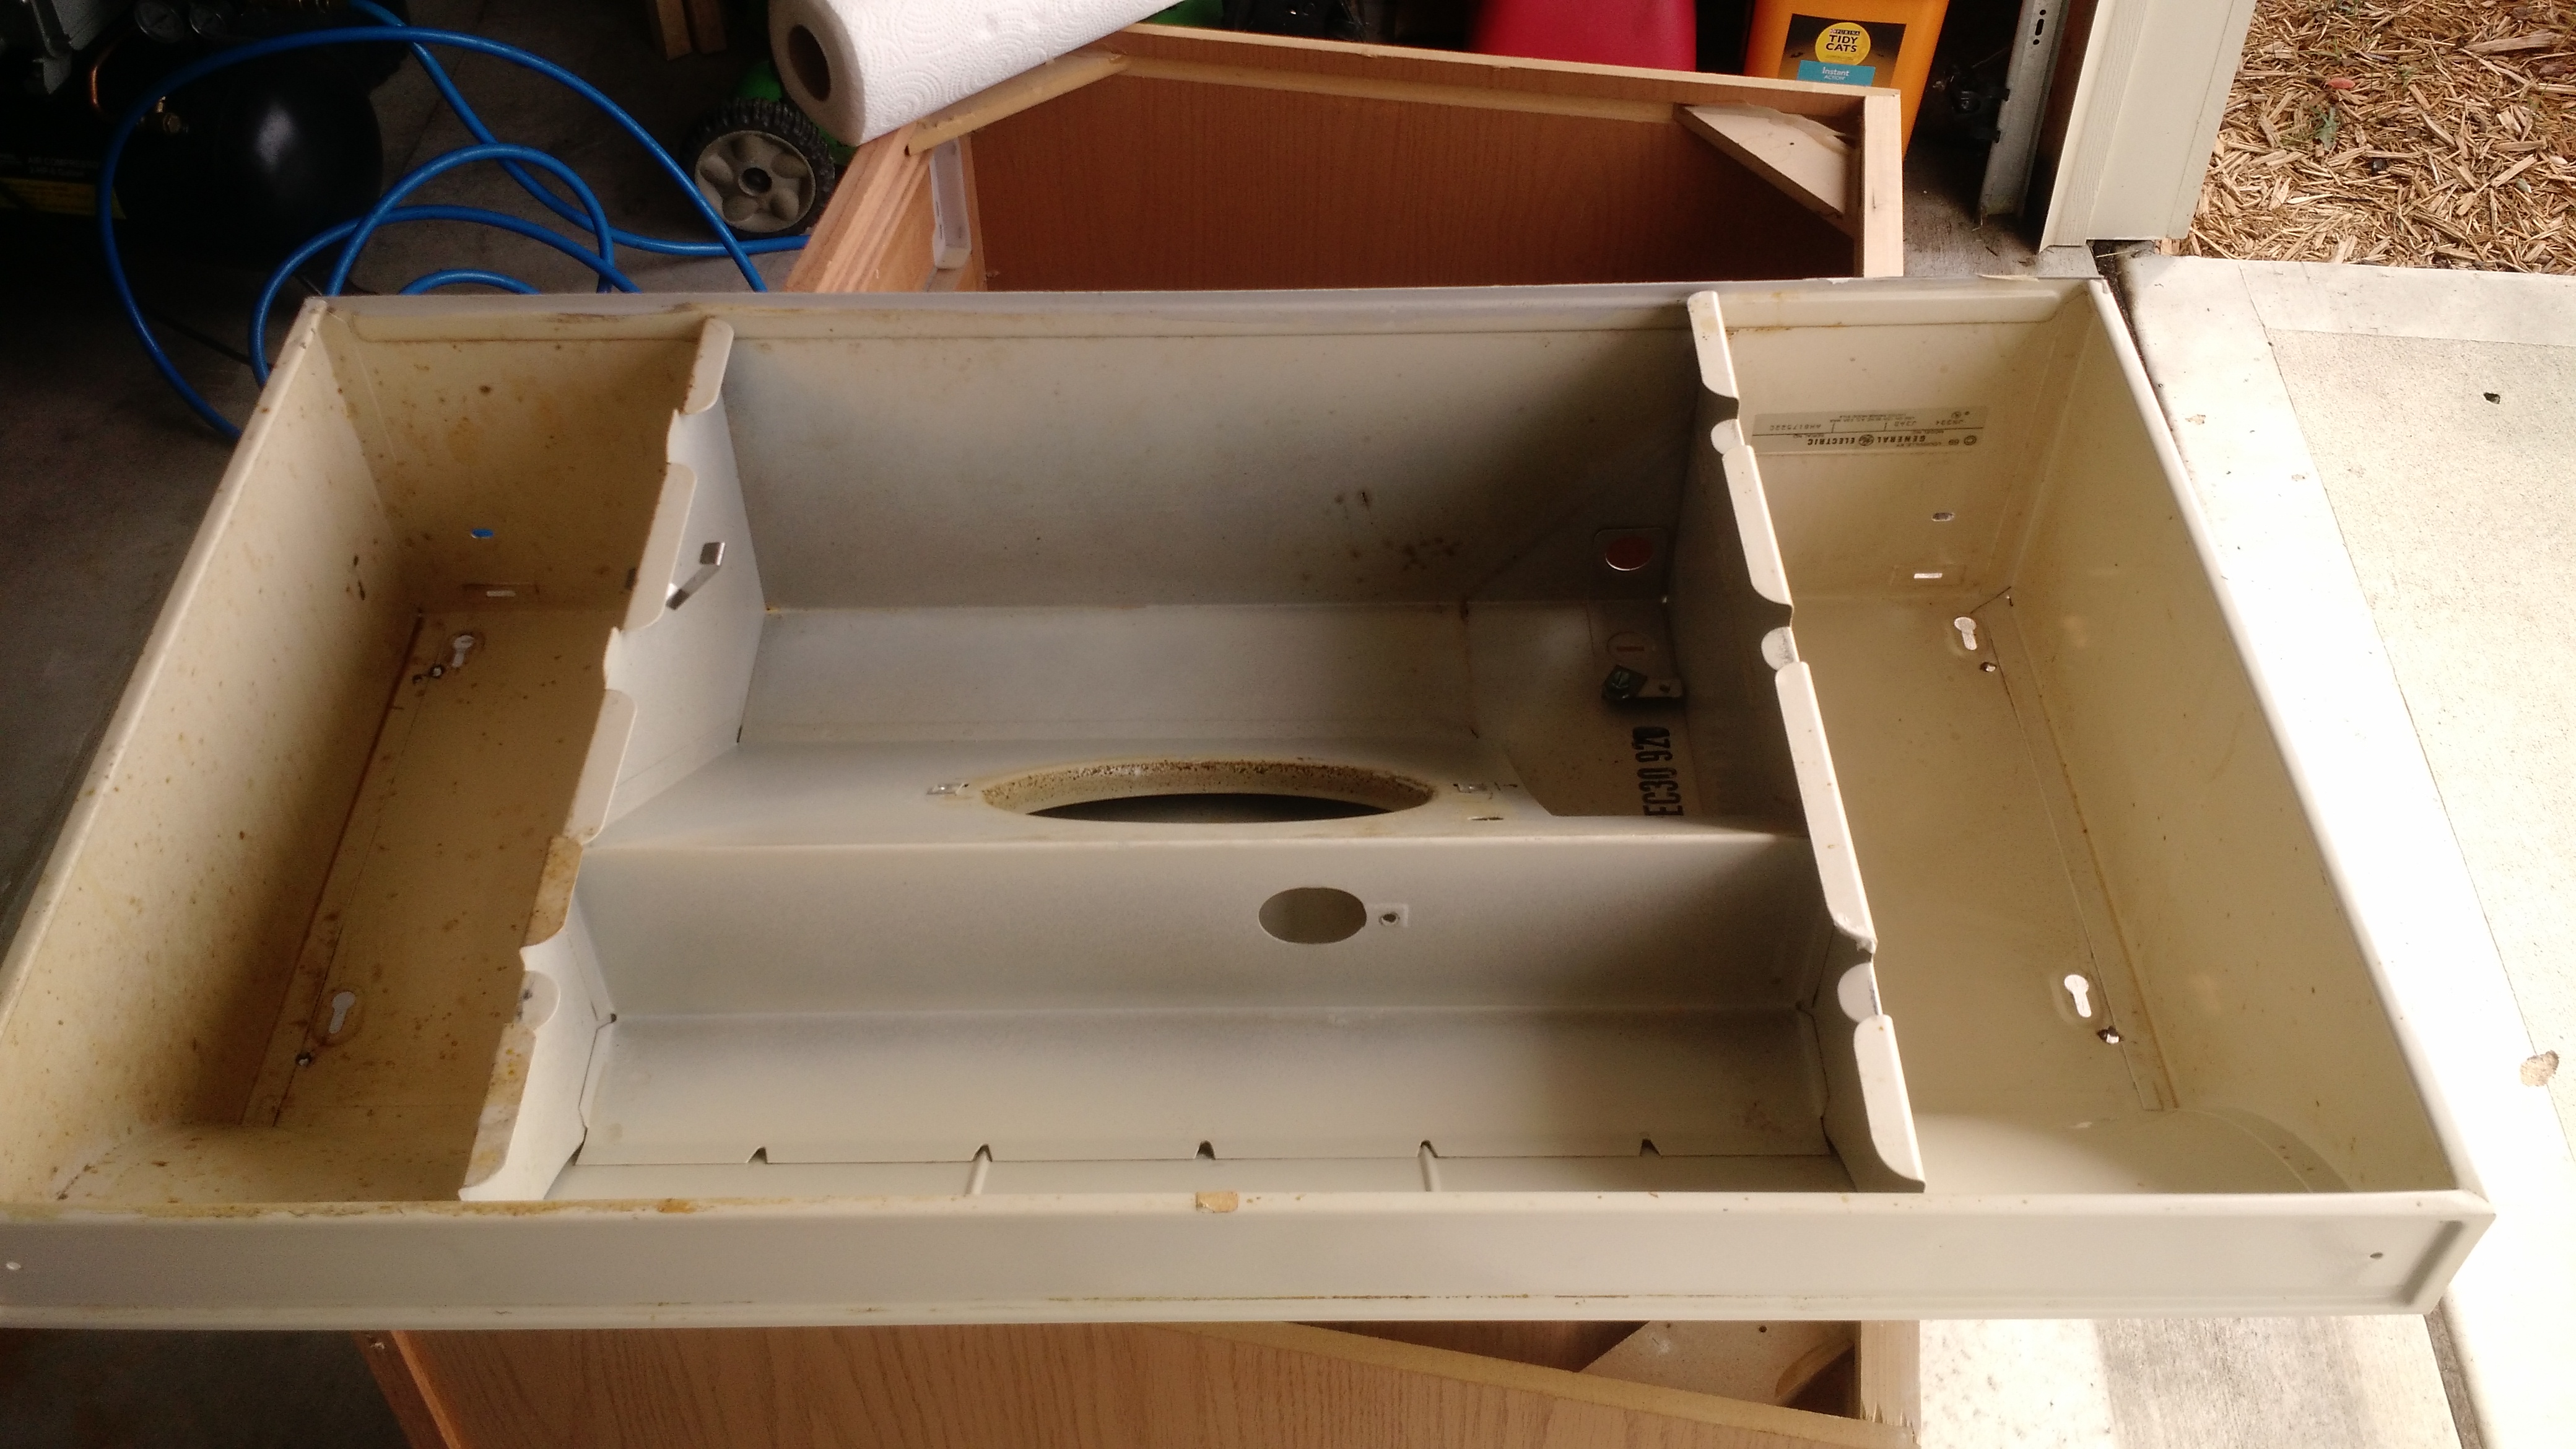
Start. Note the idiotic ribs that block air on the left and right side.
Electronics removed
Part of one of the ribs removed.

All ribs removed and ready for the fan to be re-mounted.
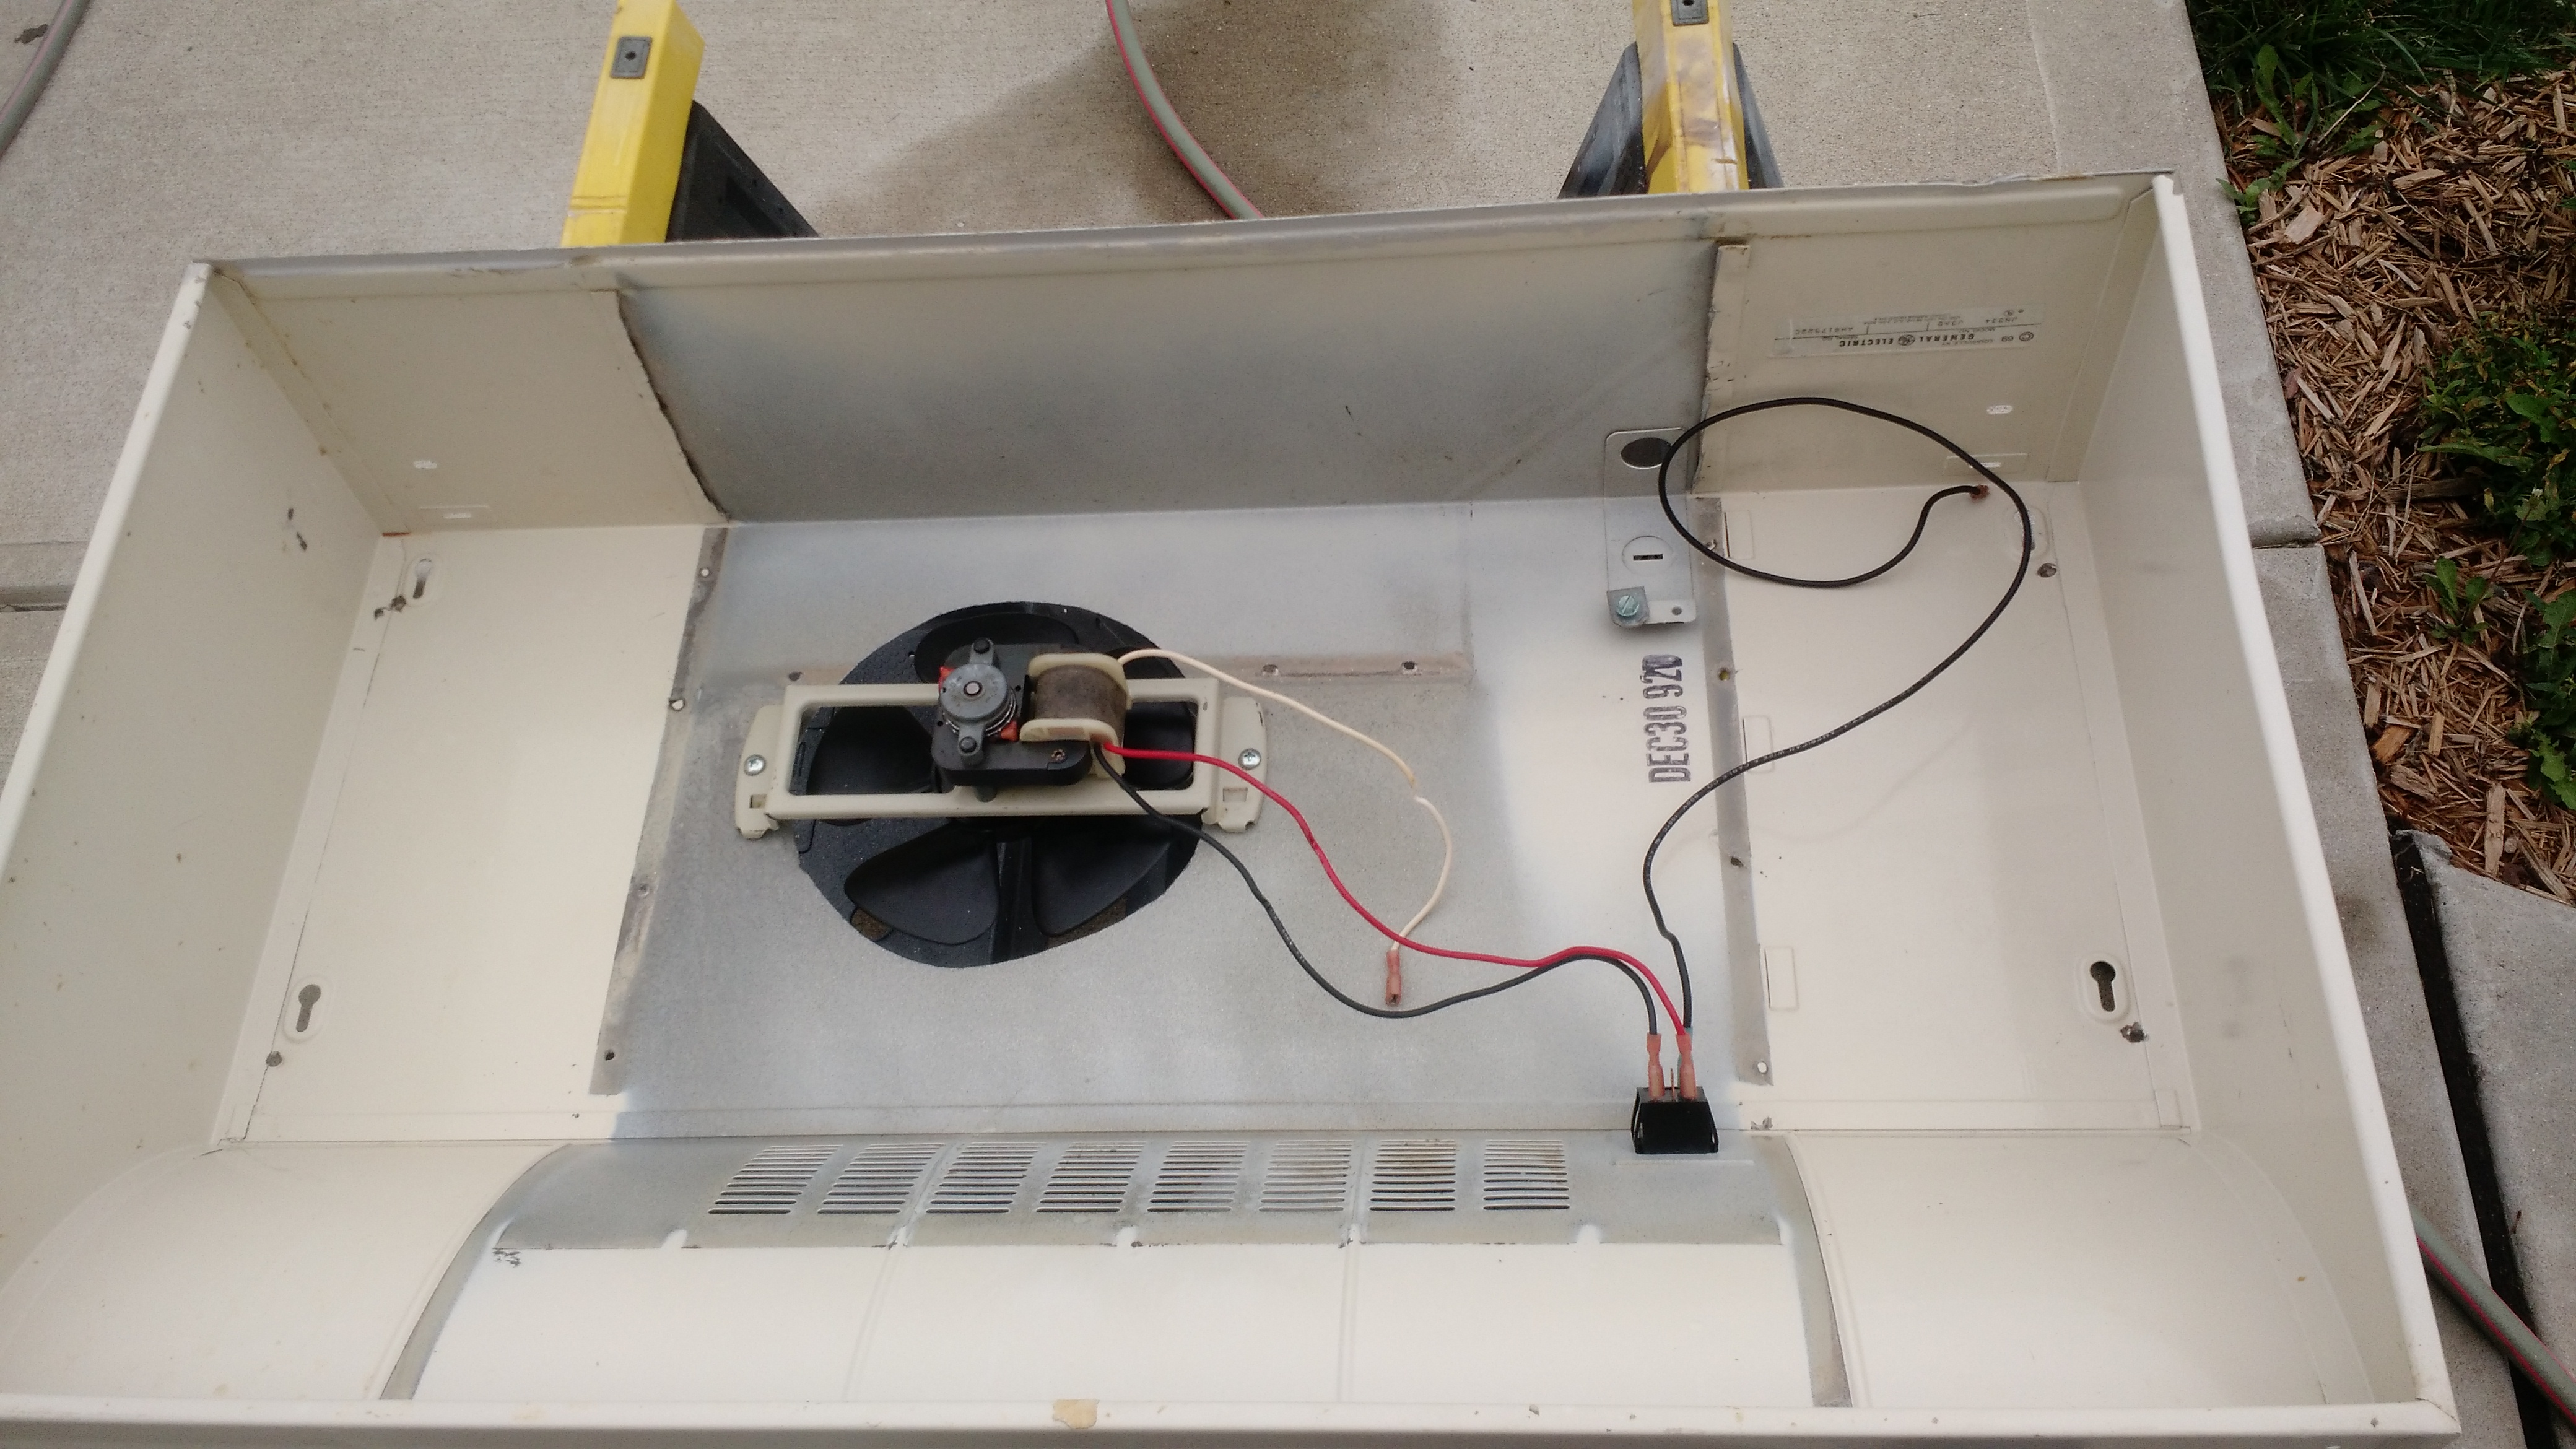
Hole for fan cut, fan installed. Ignore the wiring on this, it isn’t checked.
After this, I went to pull my truck back into the garage and noticed a bunch of coolant under my truck and trailing into the garage. The water pump blew.
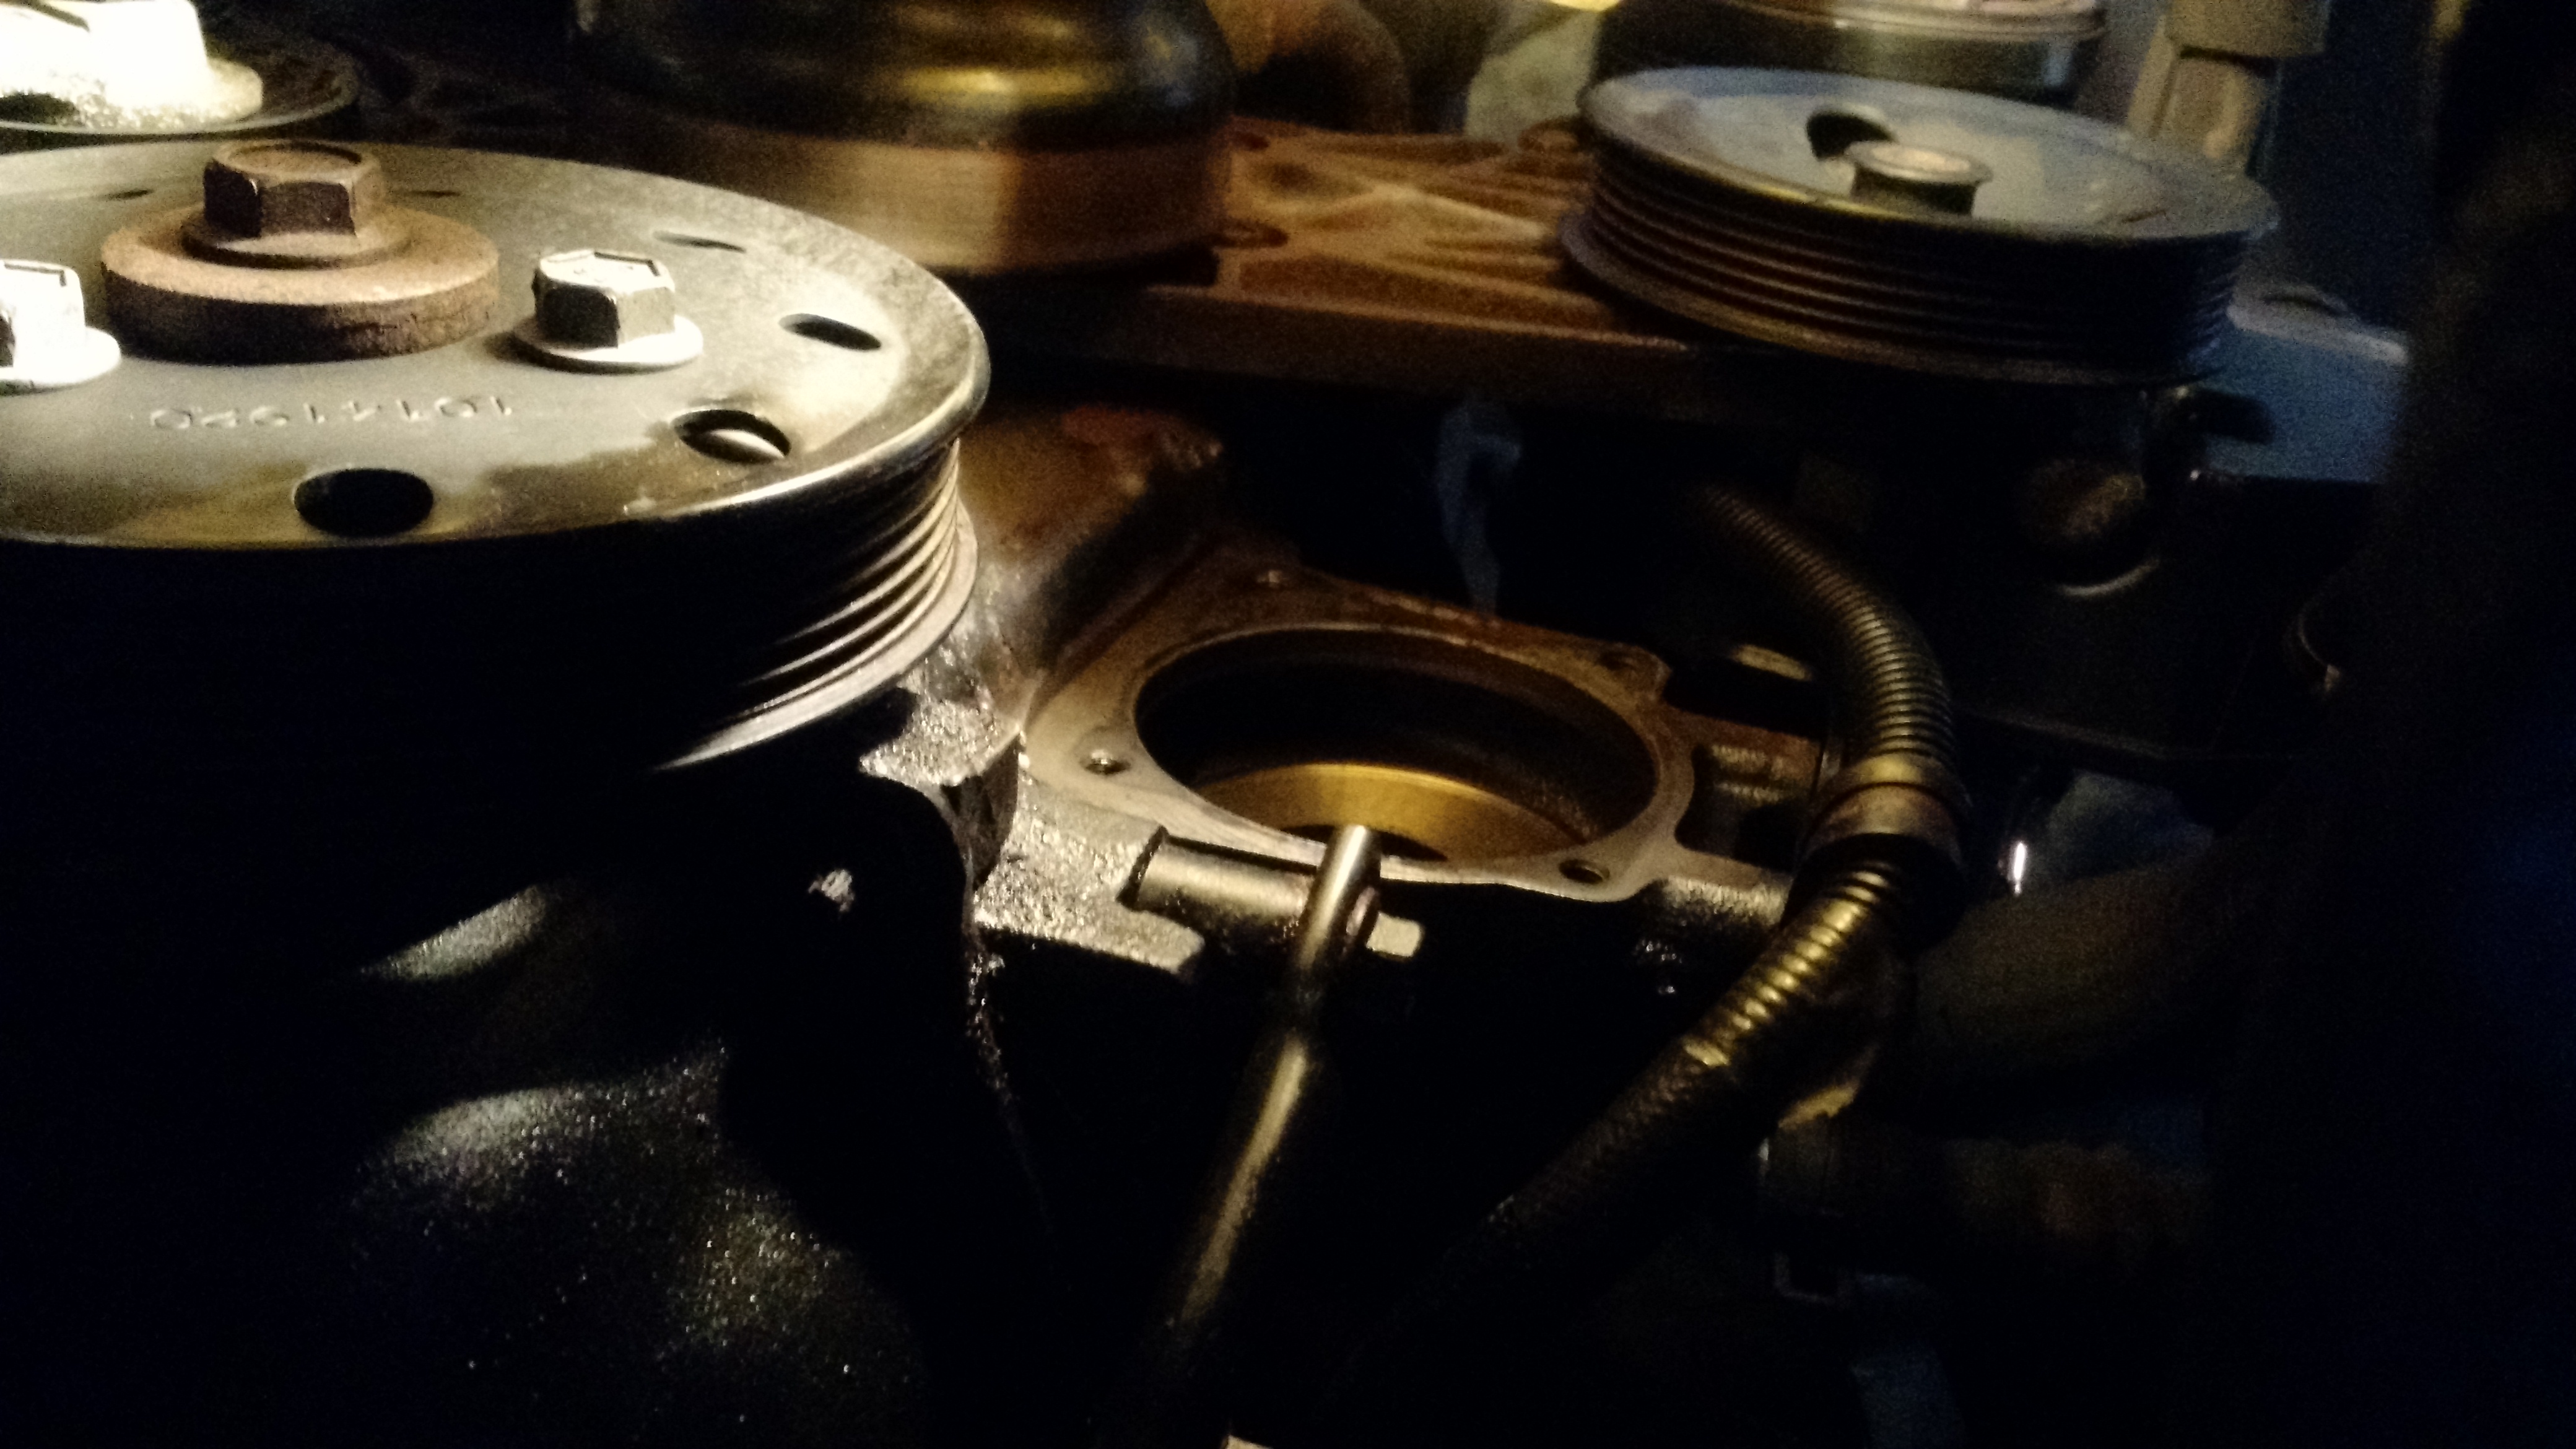
The view from down here sucked.
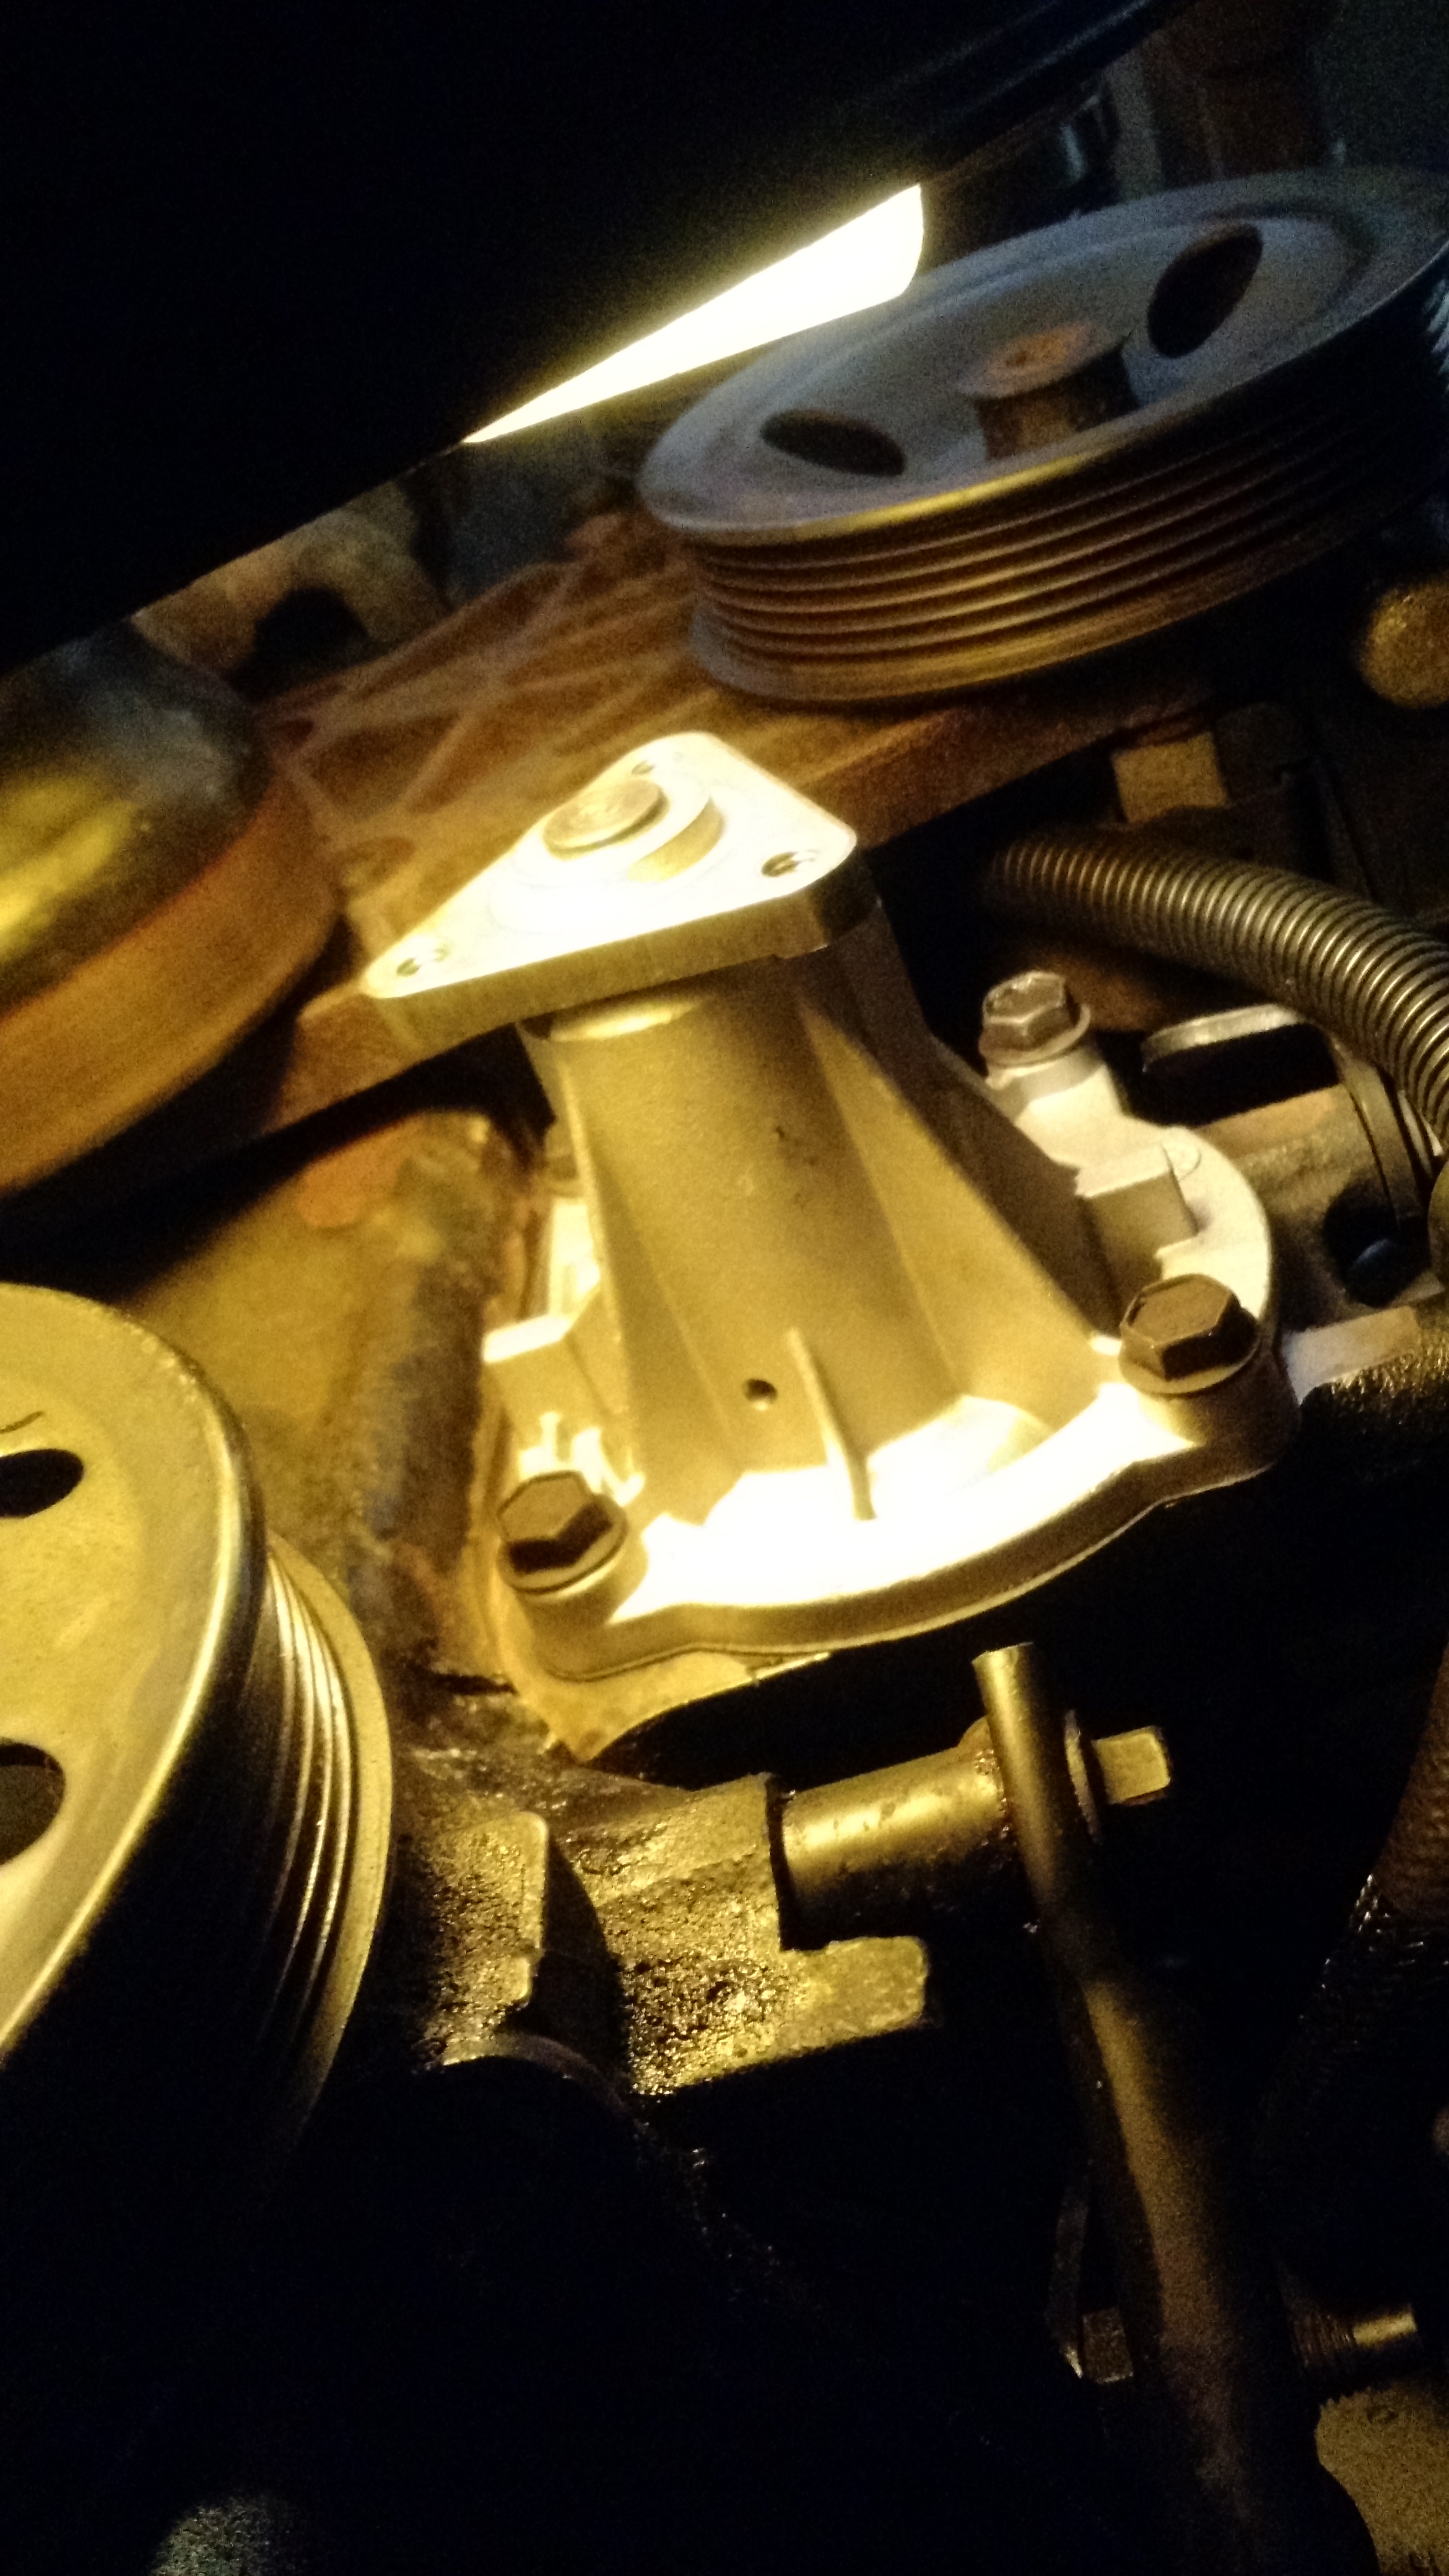
Water pump mischief managed!
Cheers!