Tag Archive: brewery
Old Range Hood Turned Into a Brewery Exhaust Hood
Since I brew in my basement, it’s pretty important to exhaust the vapor from the wort outside the house. When it’s any temperature that isn’t between 50 and 65 degrees, opening a window isn’t the greatest way.
A friend was remodeling his kitchen and gave me a sink base cabinet (which will make it’s way down into the brewery) and his old range hood. the range hood was one that recirculates the air (as opposed to exhausting it), so it’s actually kinda useless. But with some modifications, it can exhaust the air.
One note about this is that safety is paramount. Sharp metal edges can cut like a broken glass carboy.
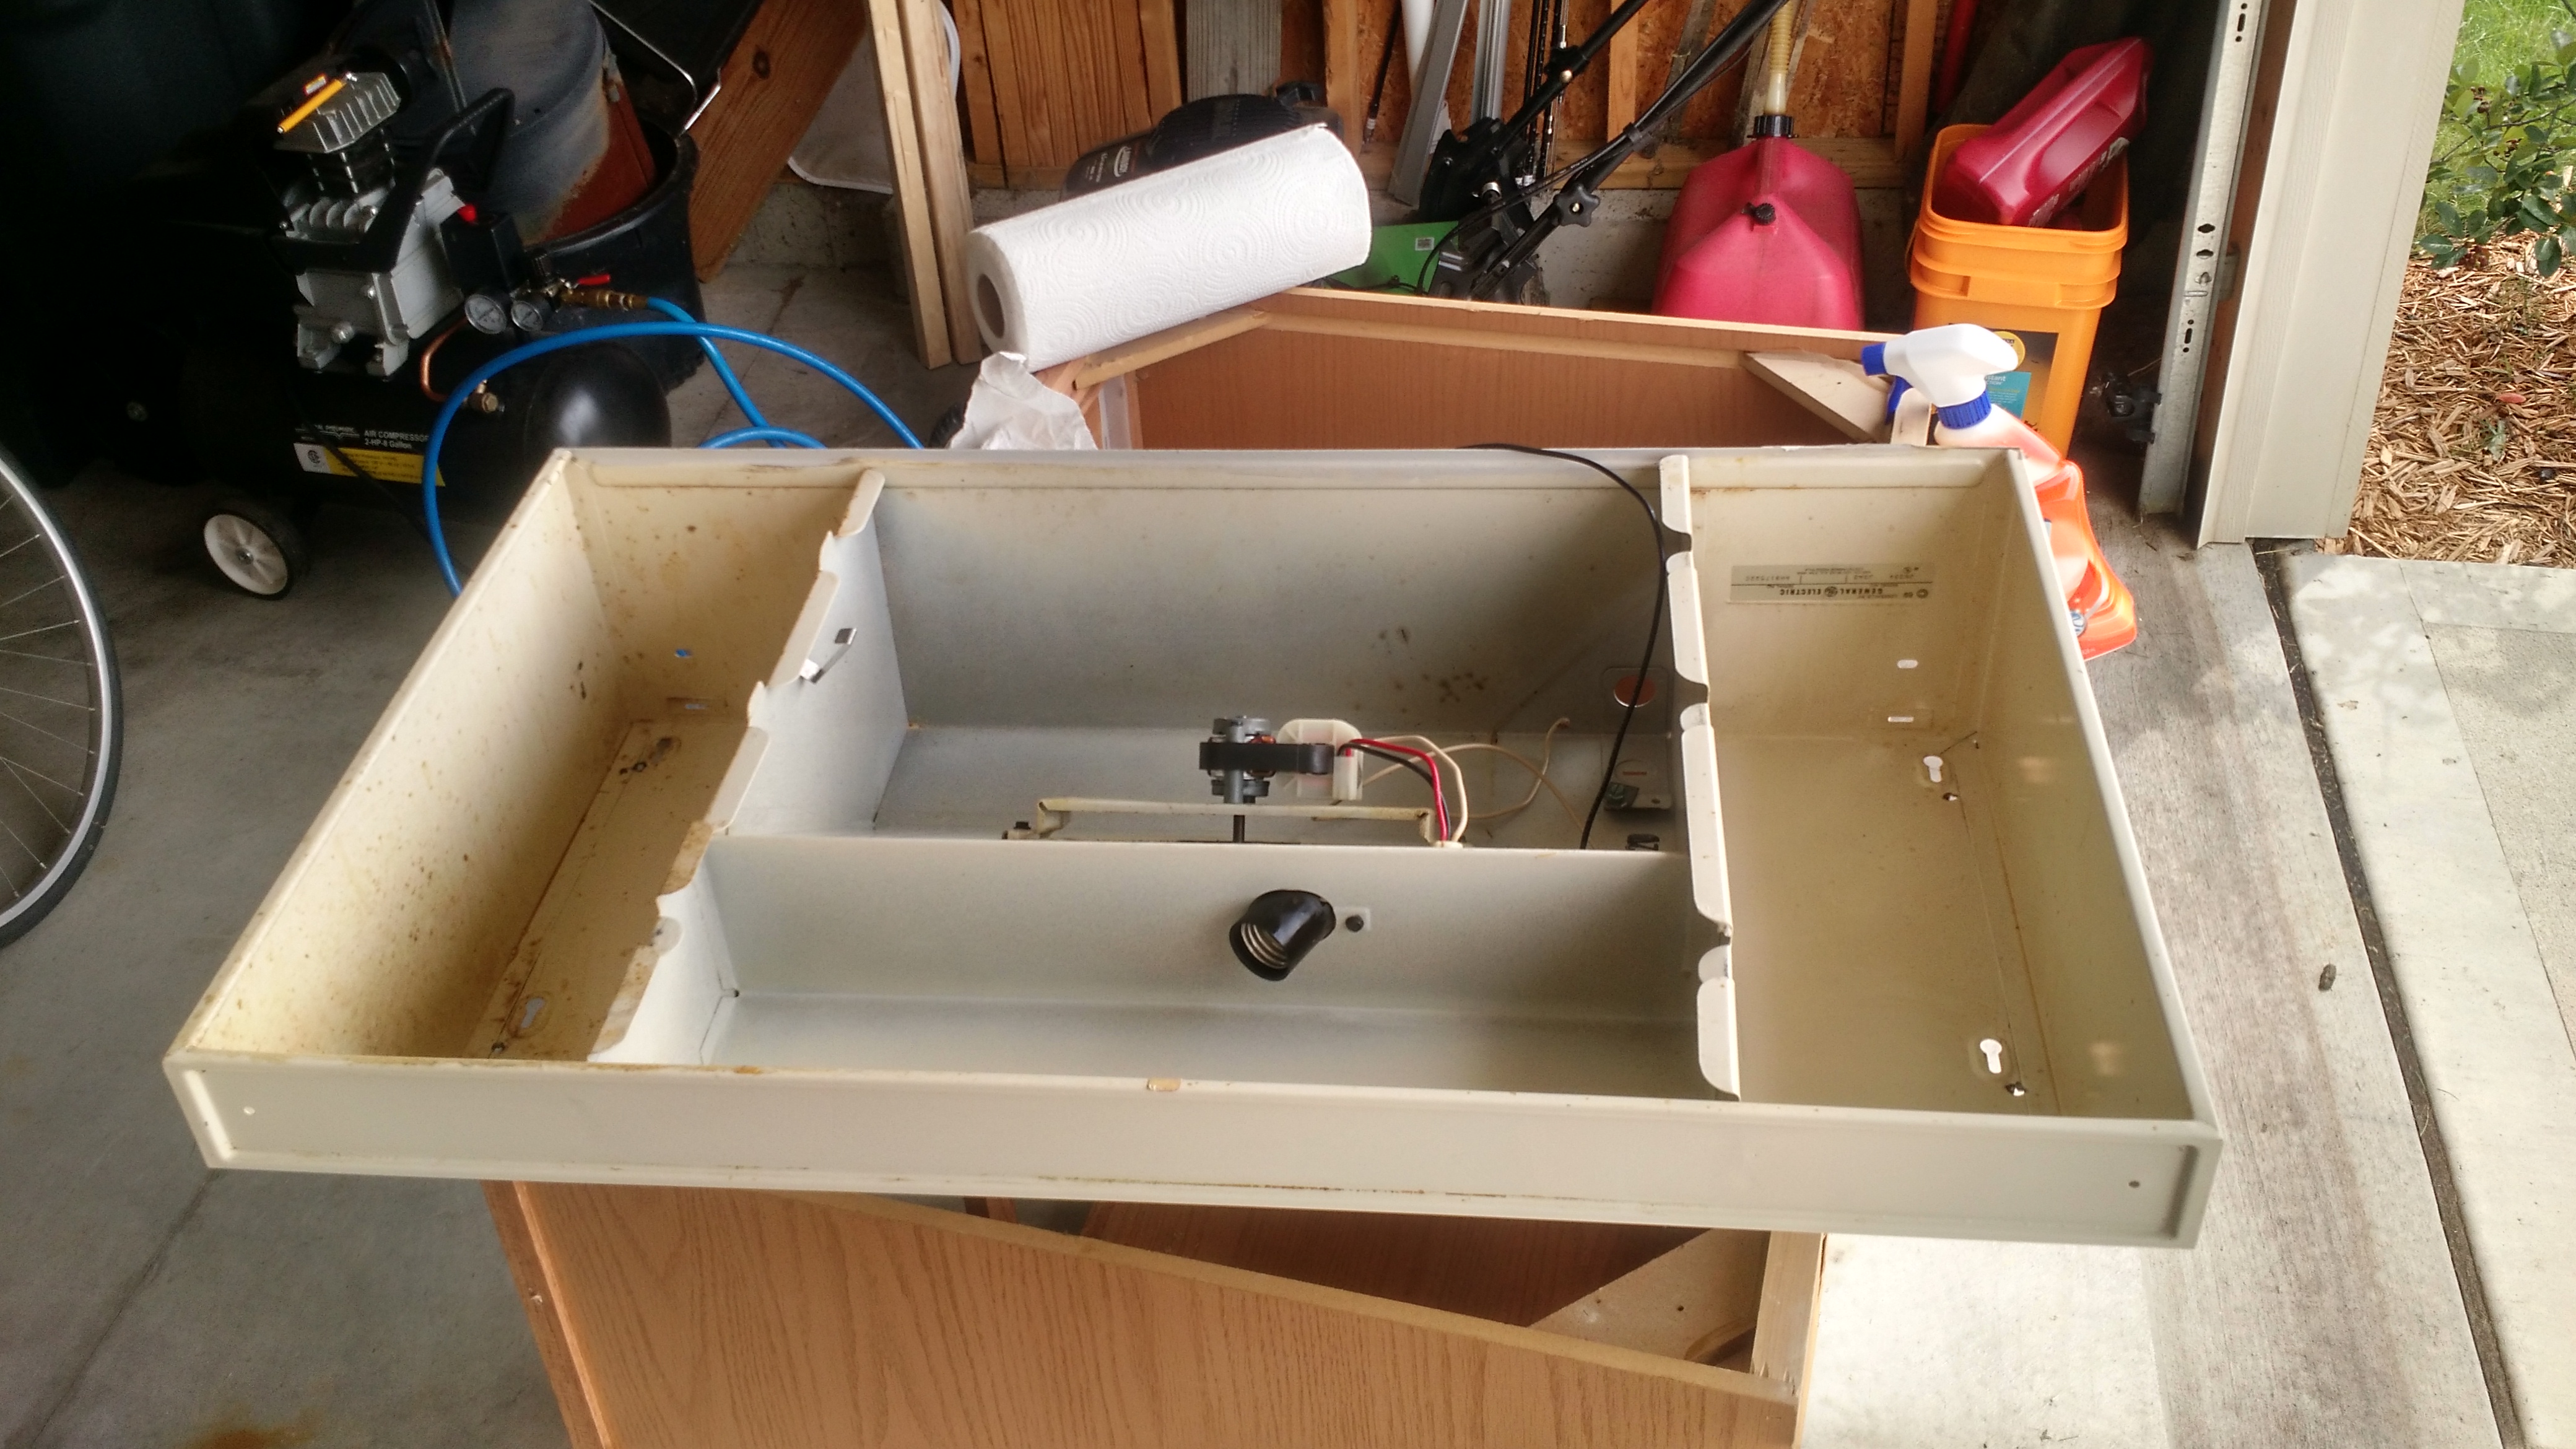
Start. Note the idiotic ribs that block air on the left and right side.
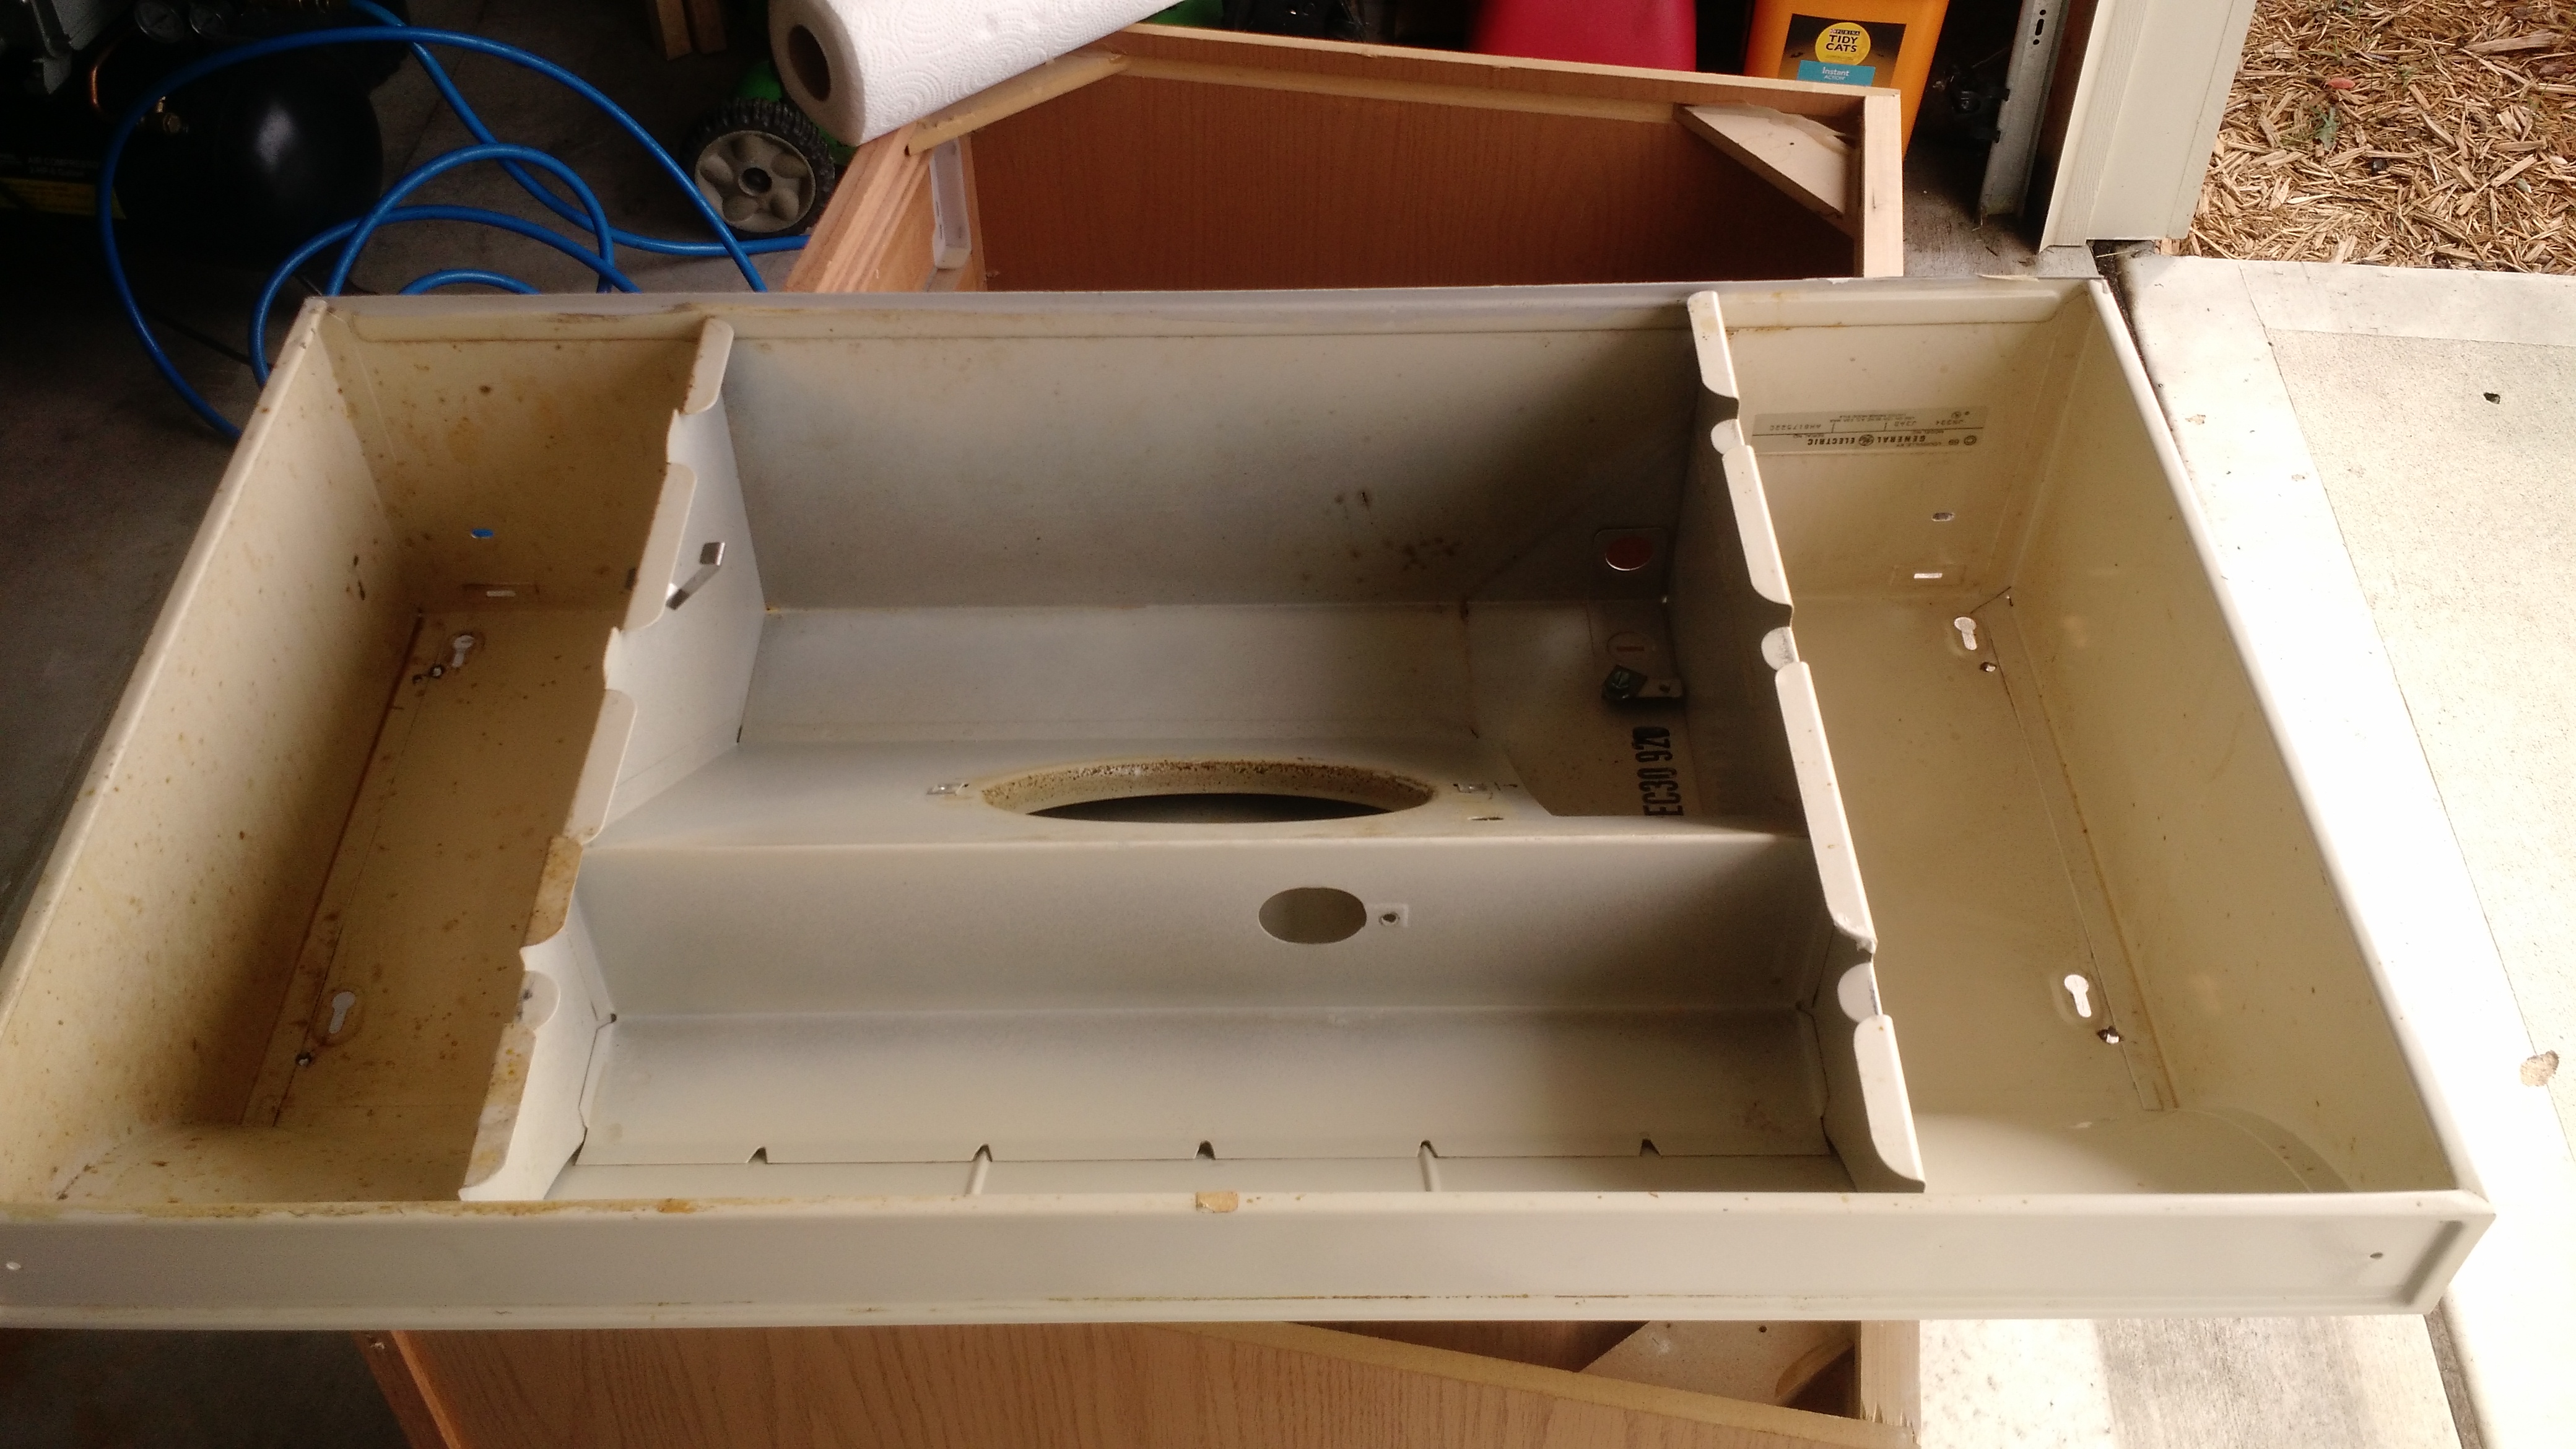
Electronics removed
Part of one of the ribs removed.

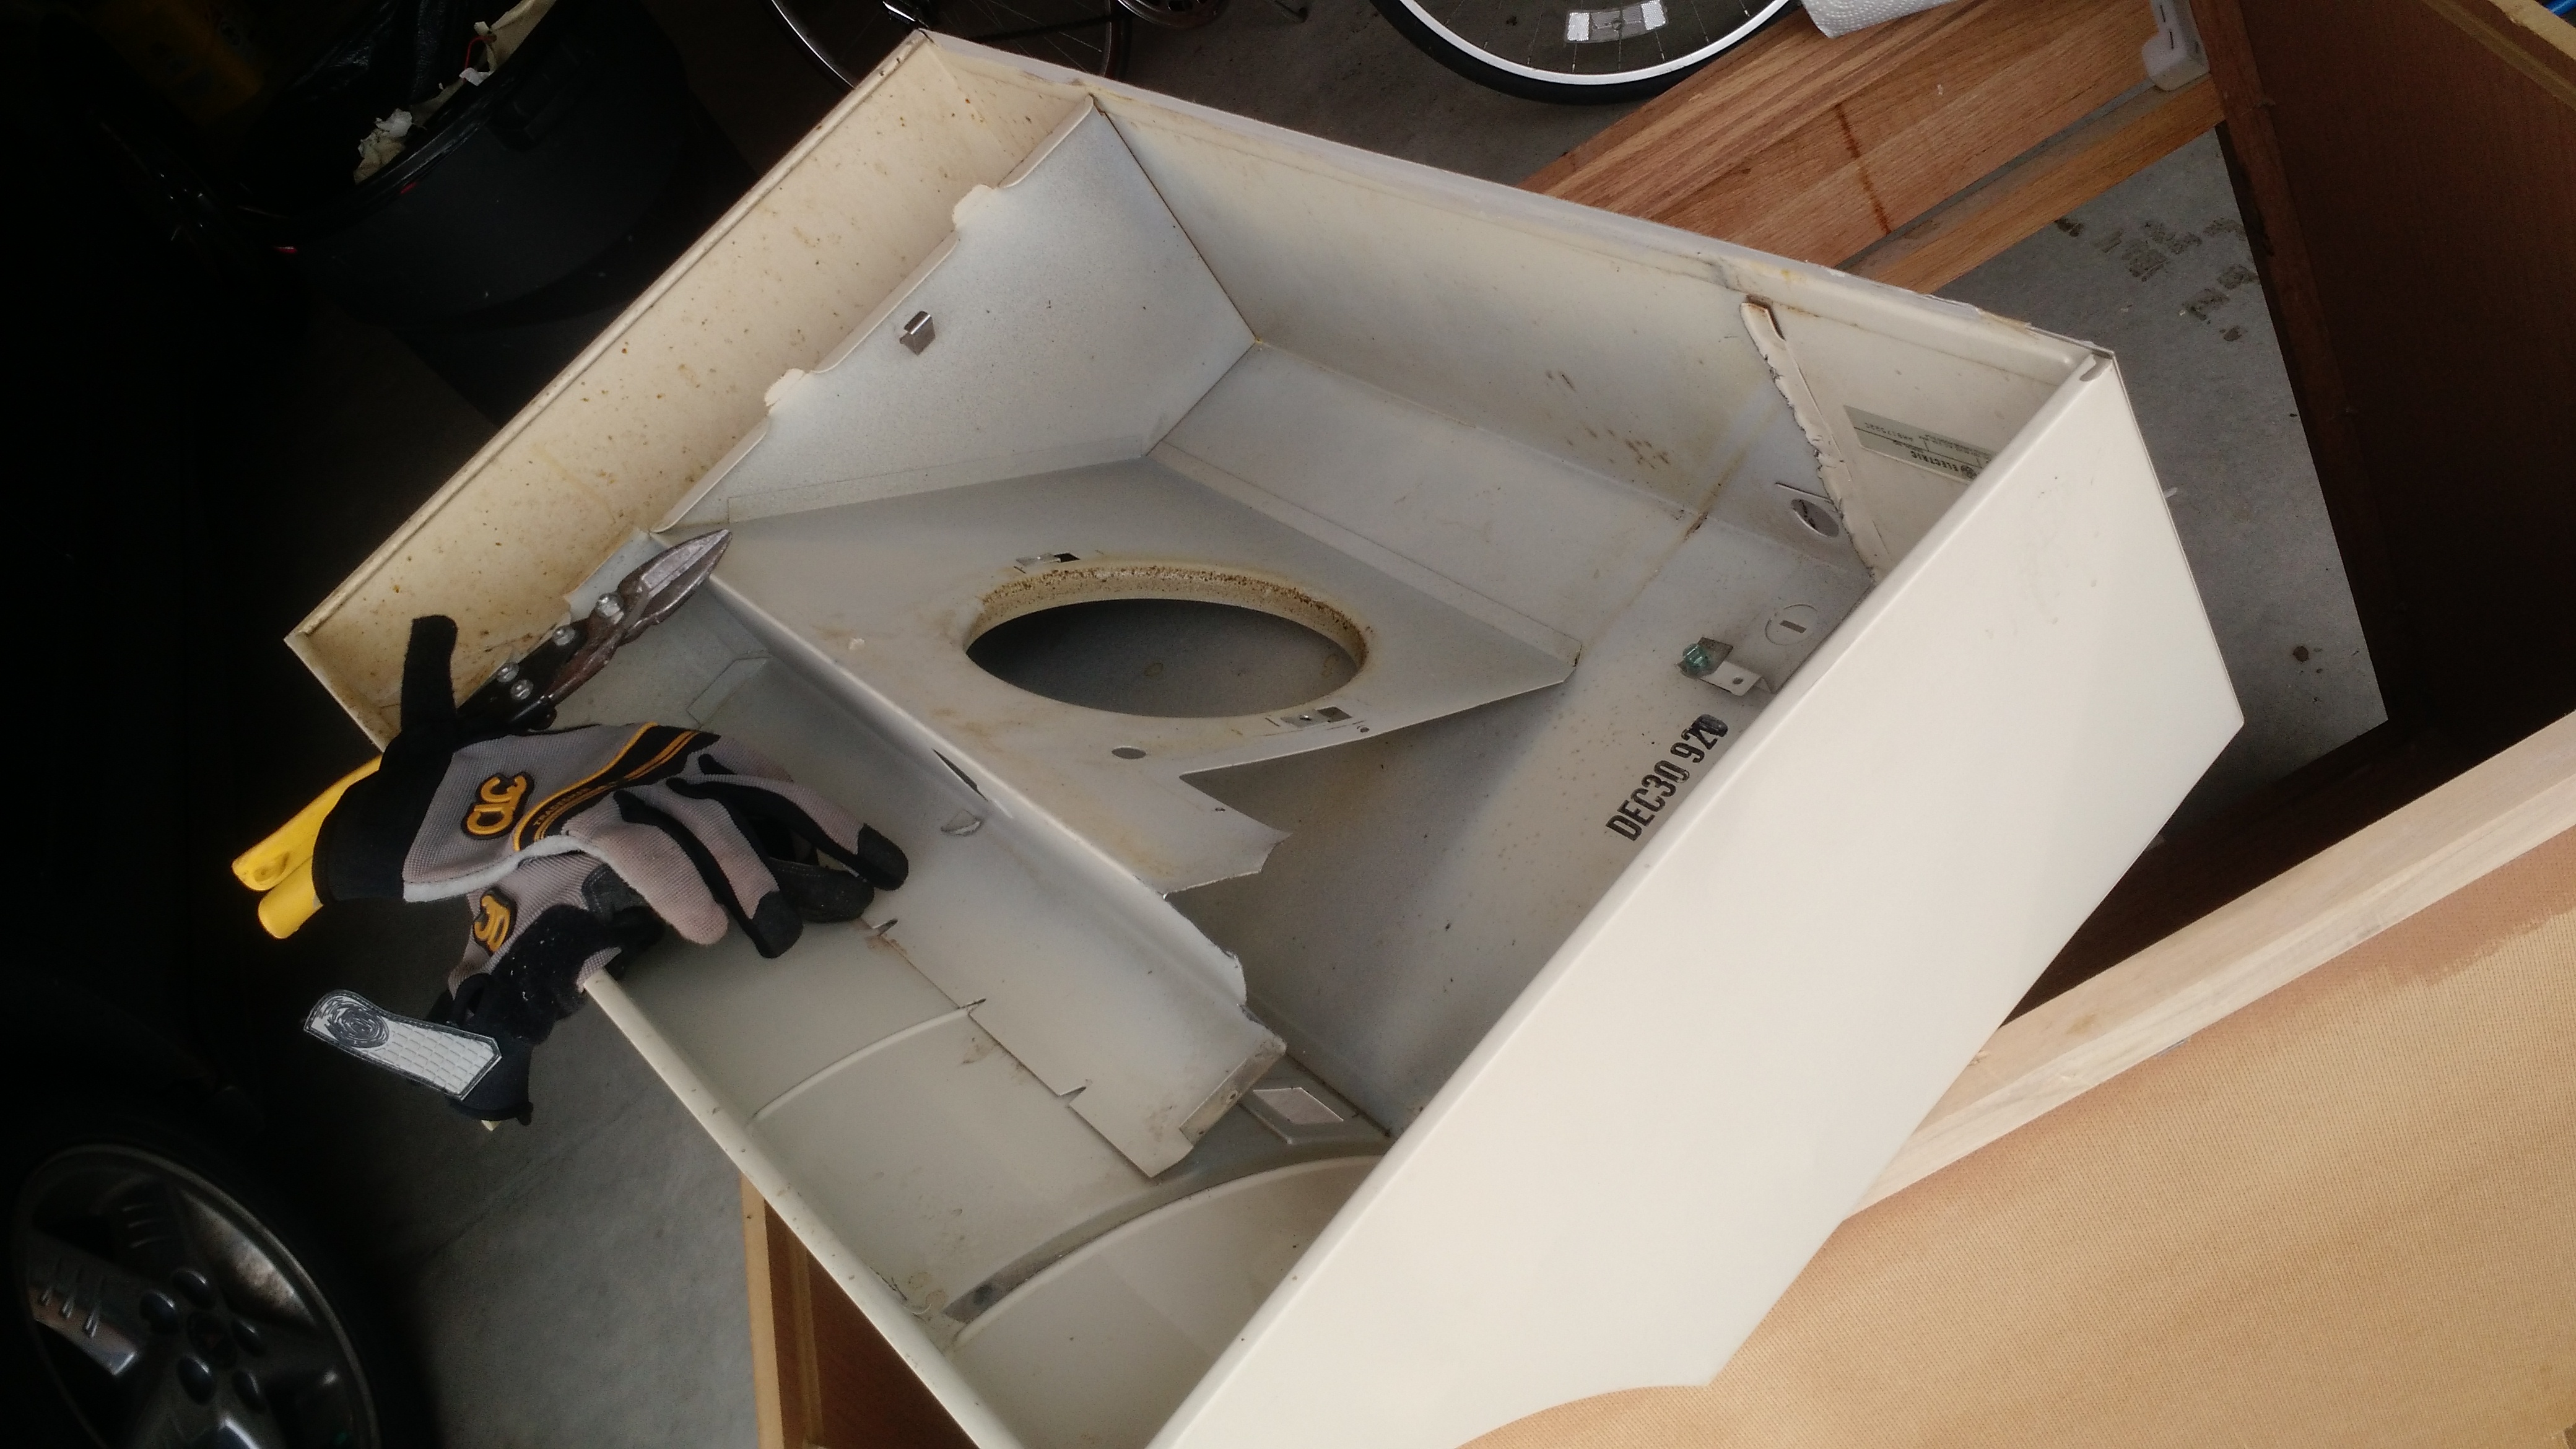
All ribs removed and ready for the fan to be re-mounted.
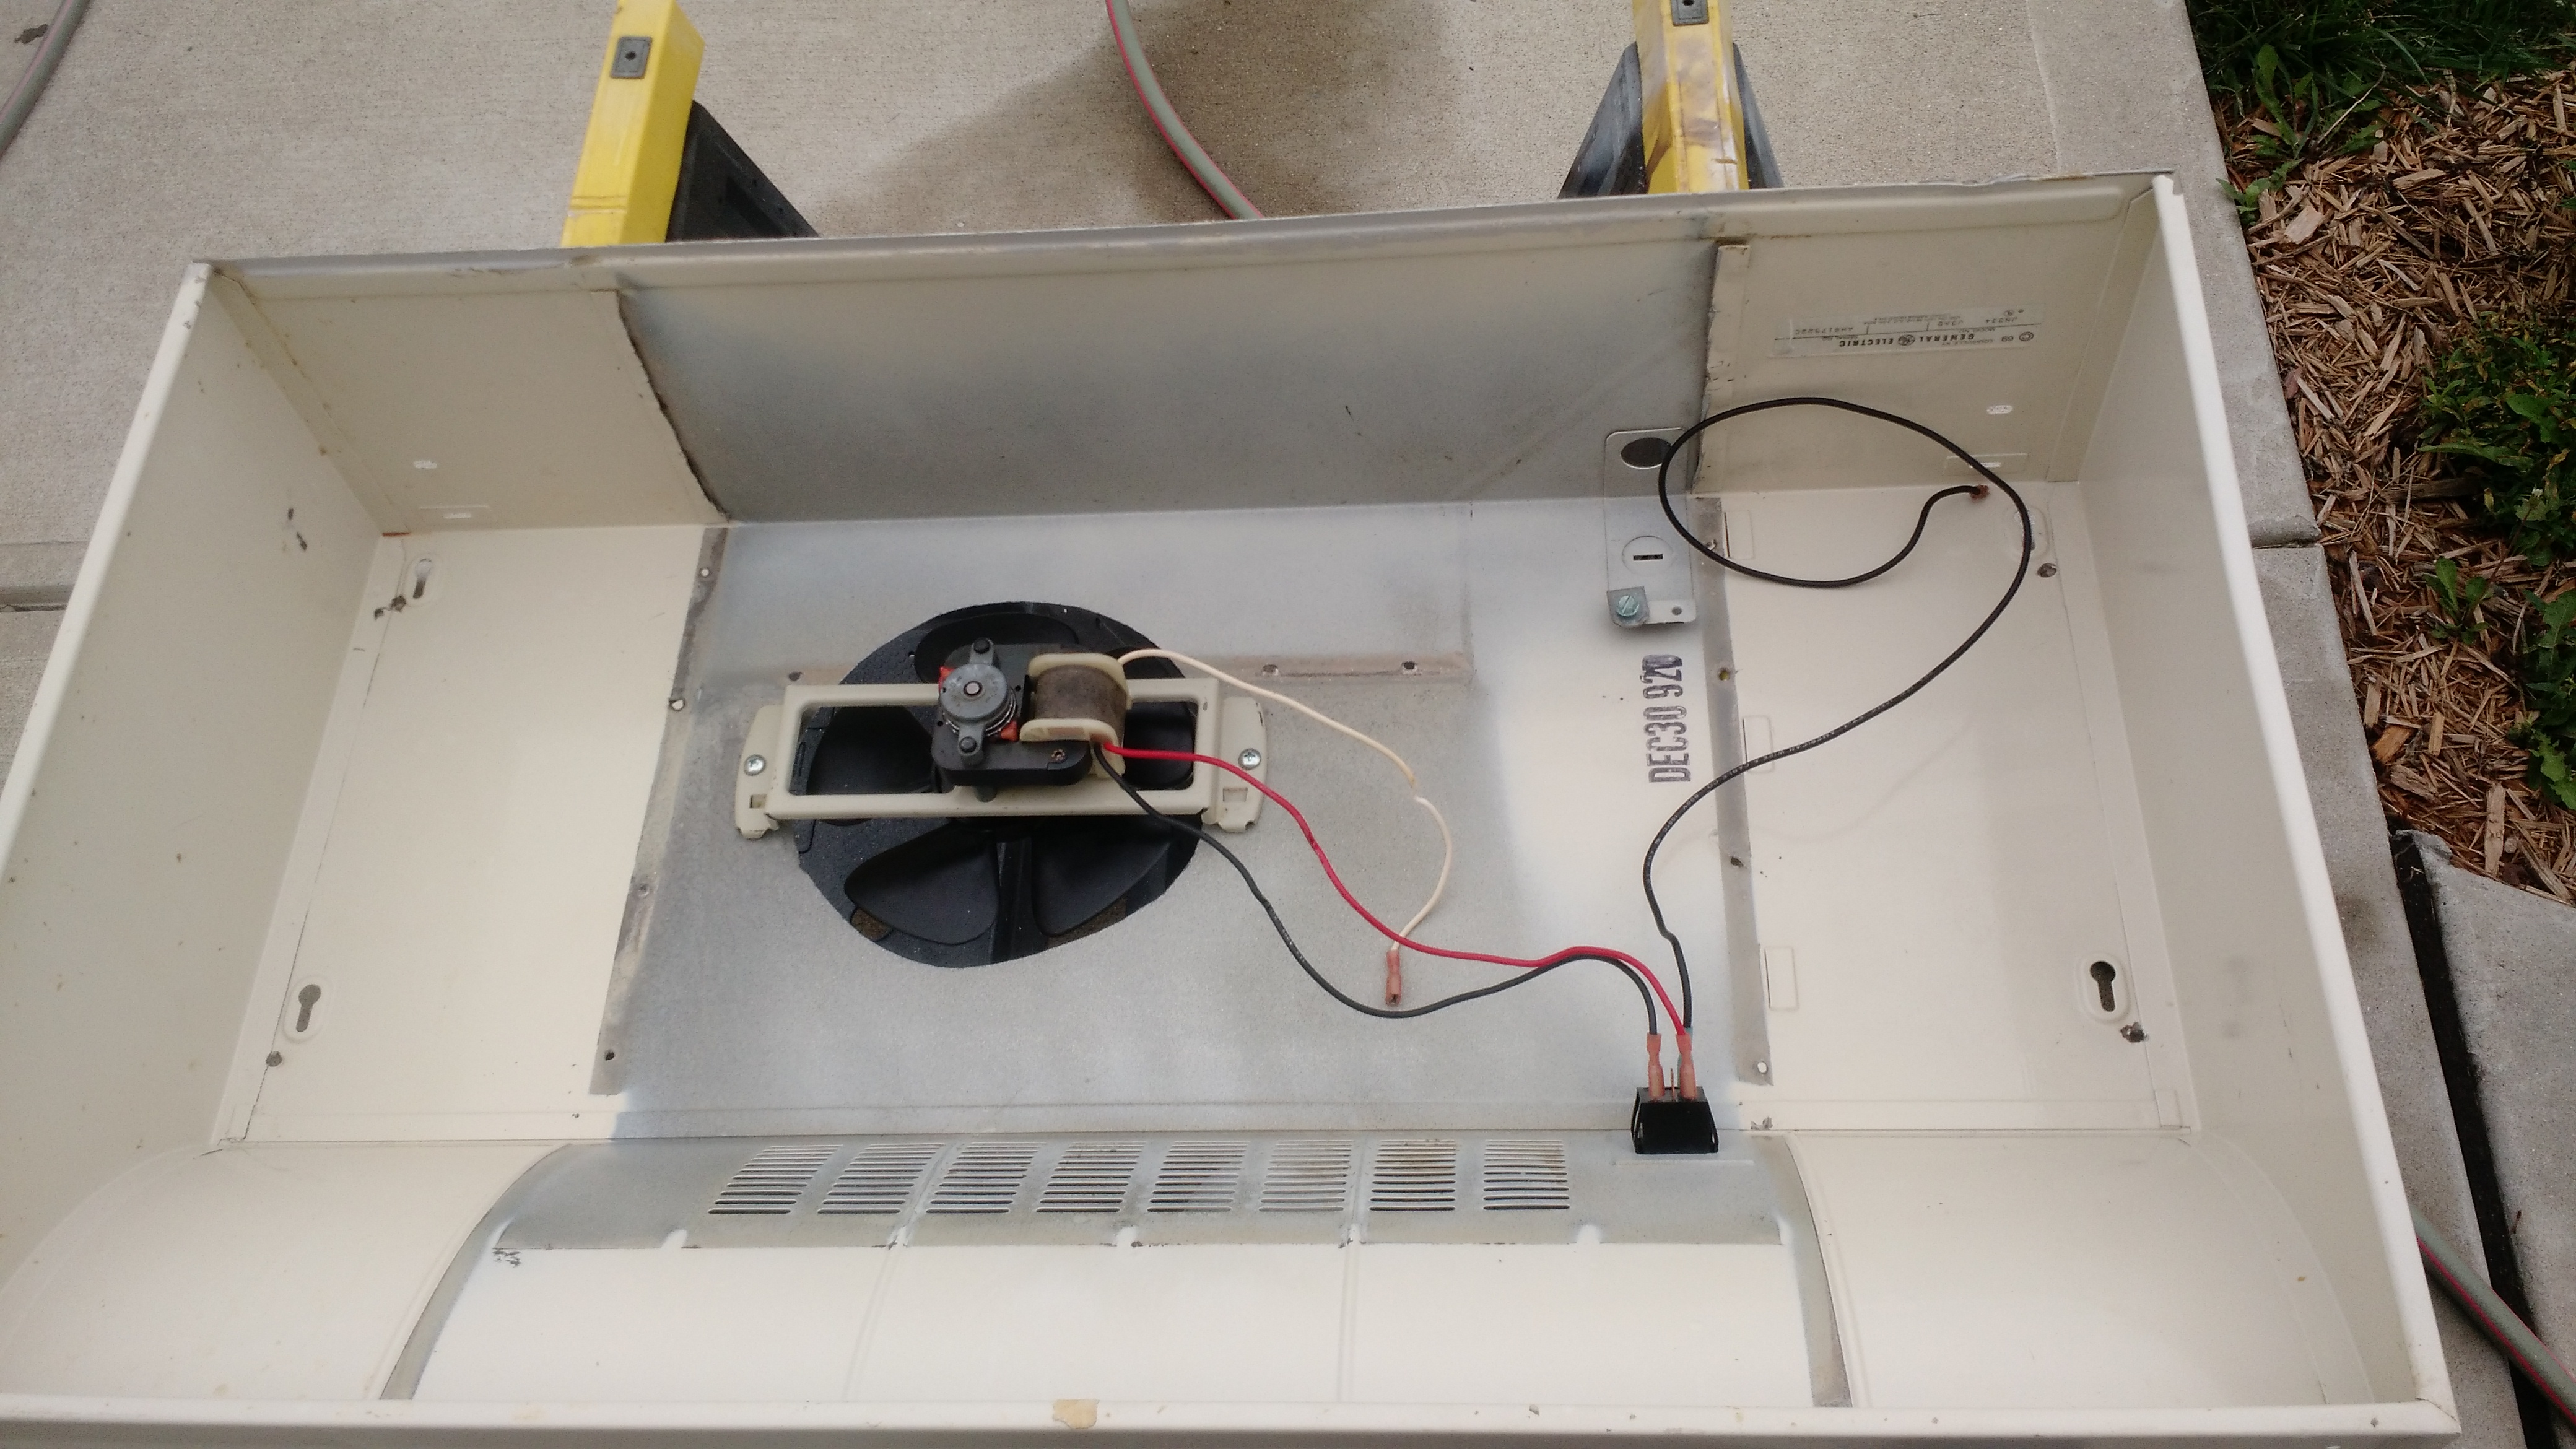
Hole for fan cut, fan installed. Ignore the wiring on this, it isn’t checked.
After this, I went to pull my truck back into the garage and noticed a bunch of coolant under my truck and trailing into the garage. The water pump blew.
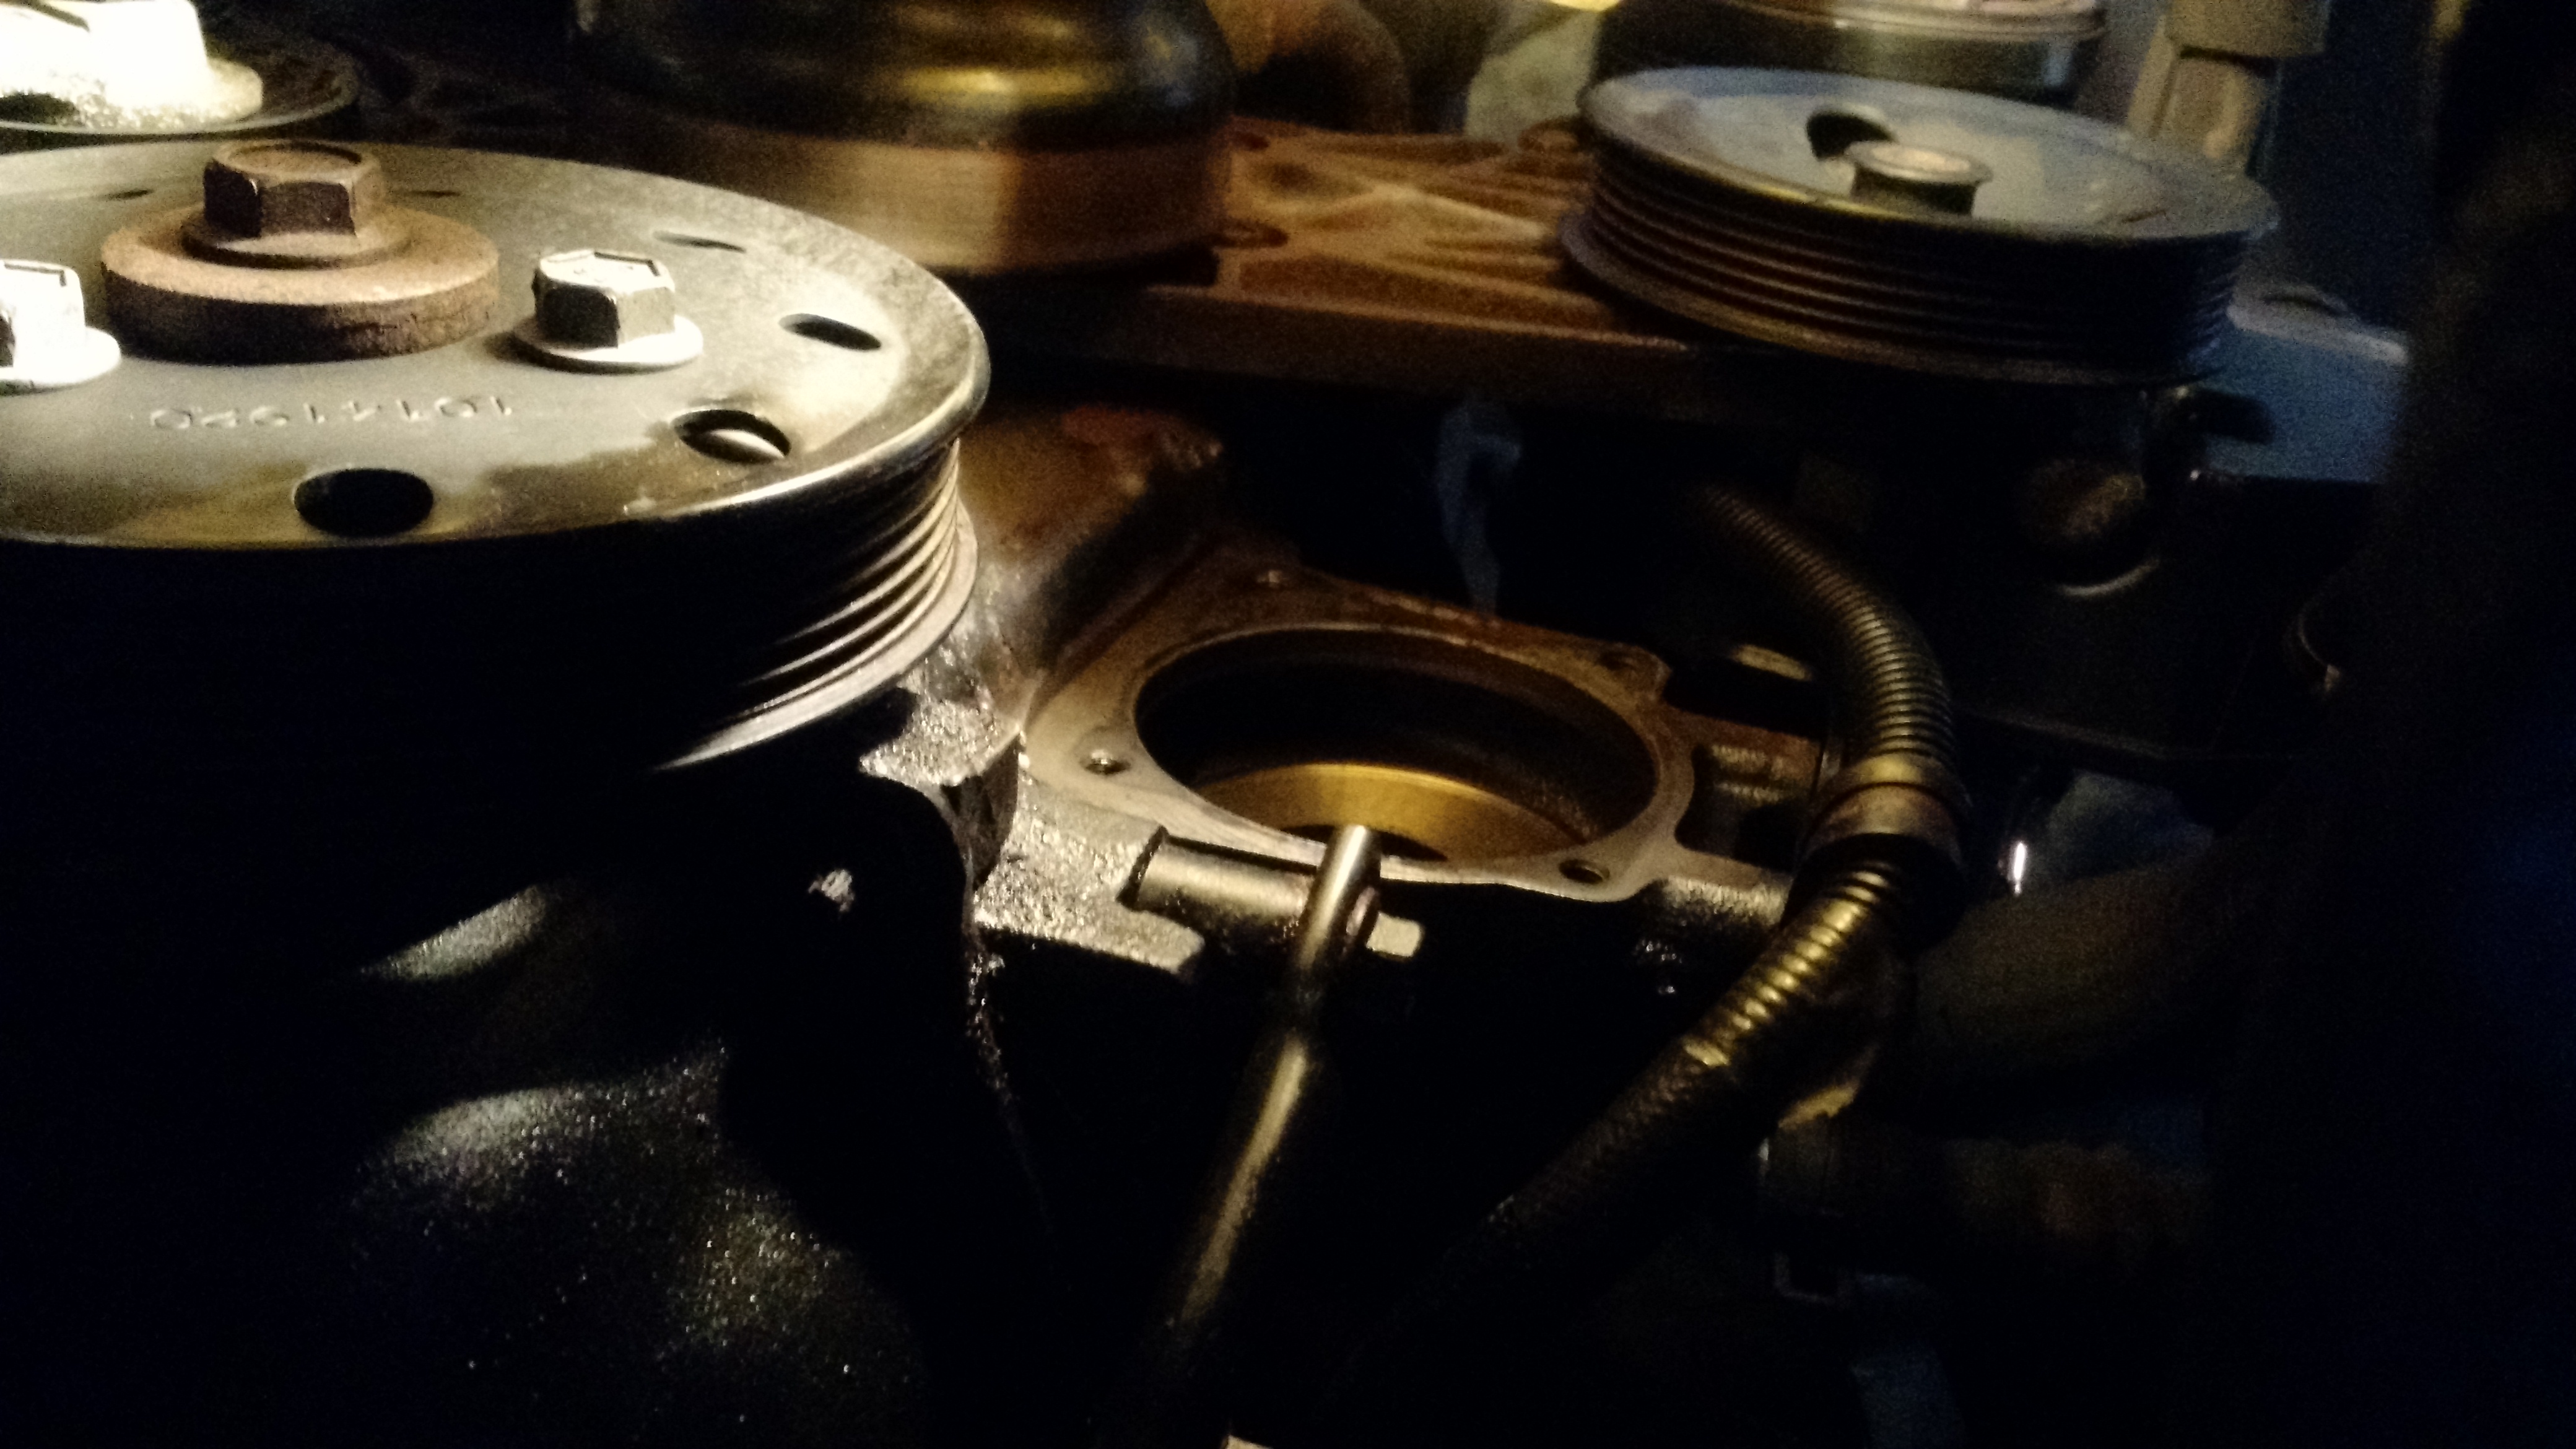
The view from down here sucked.
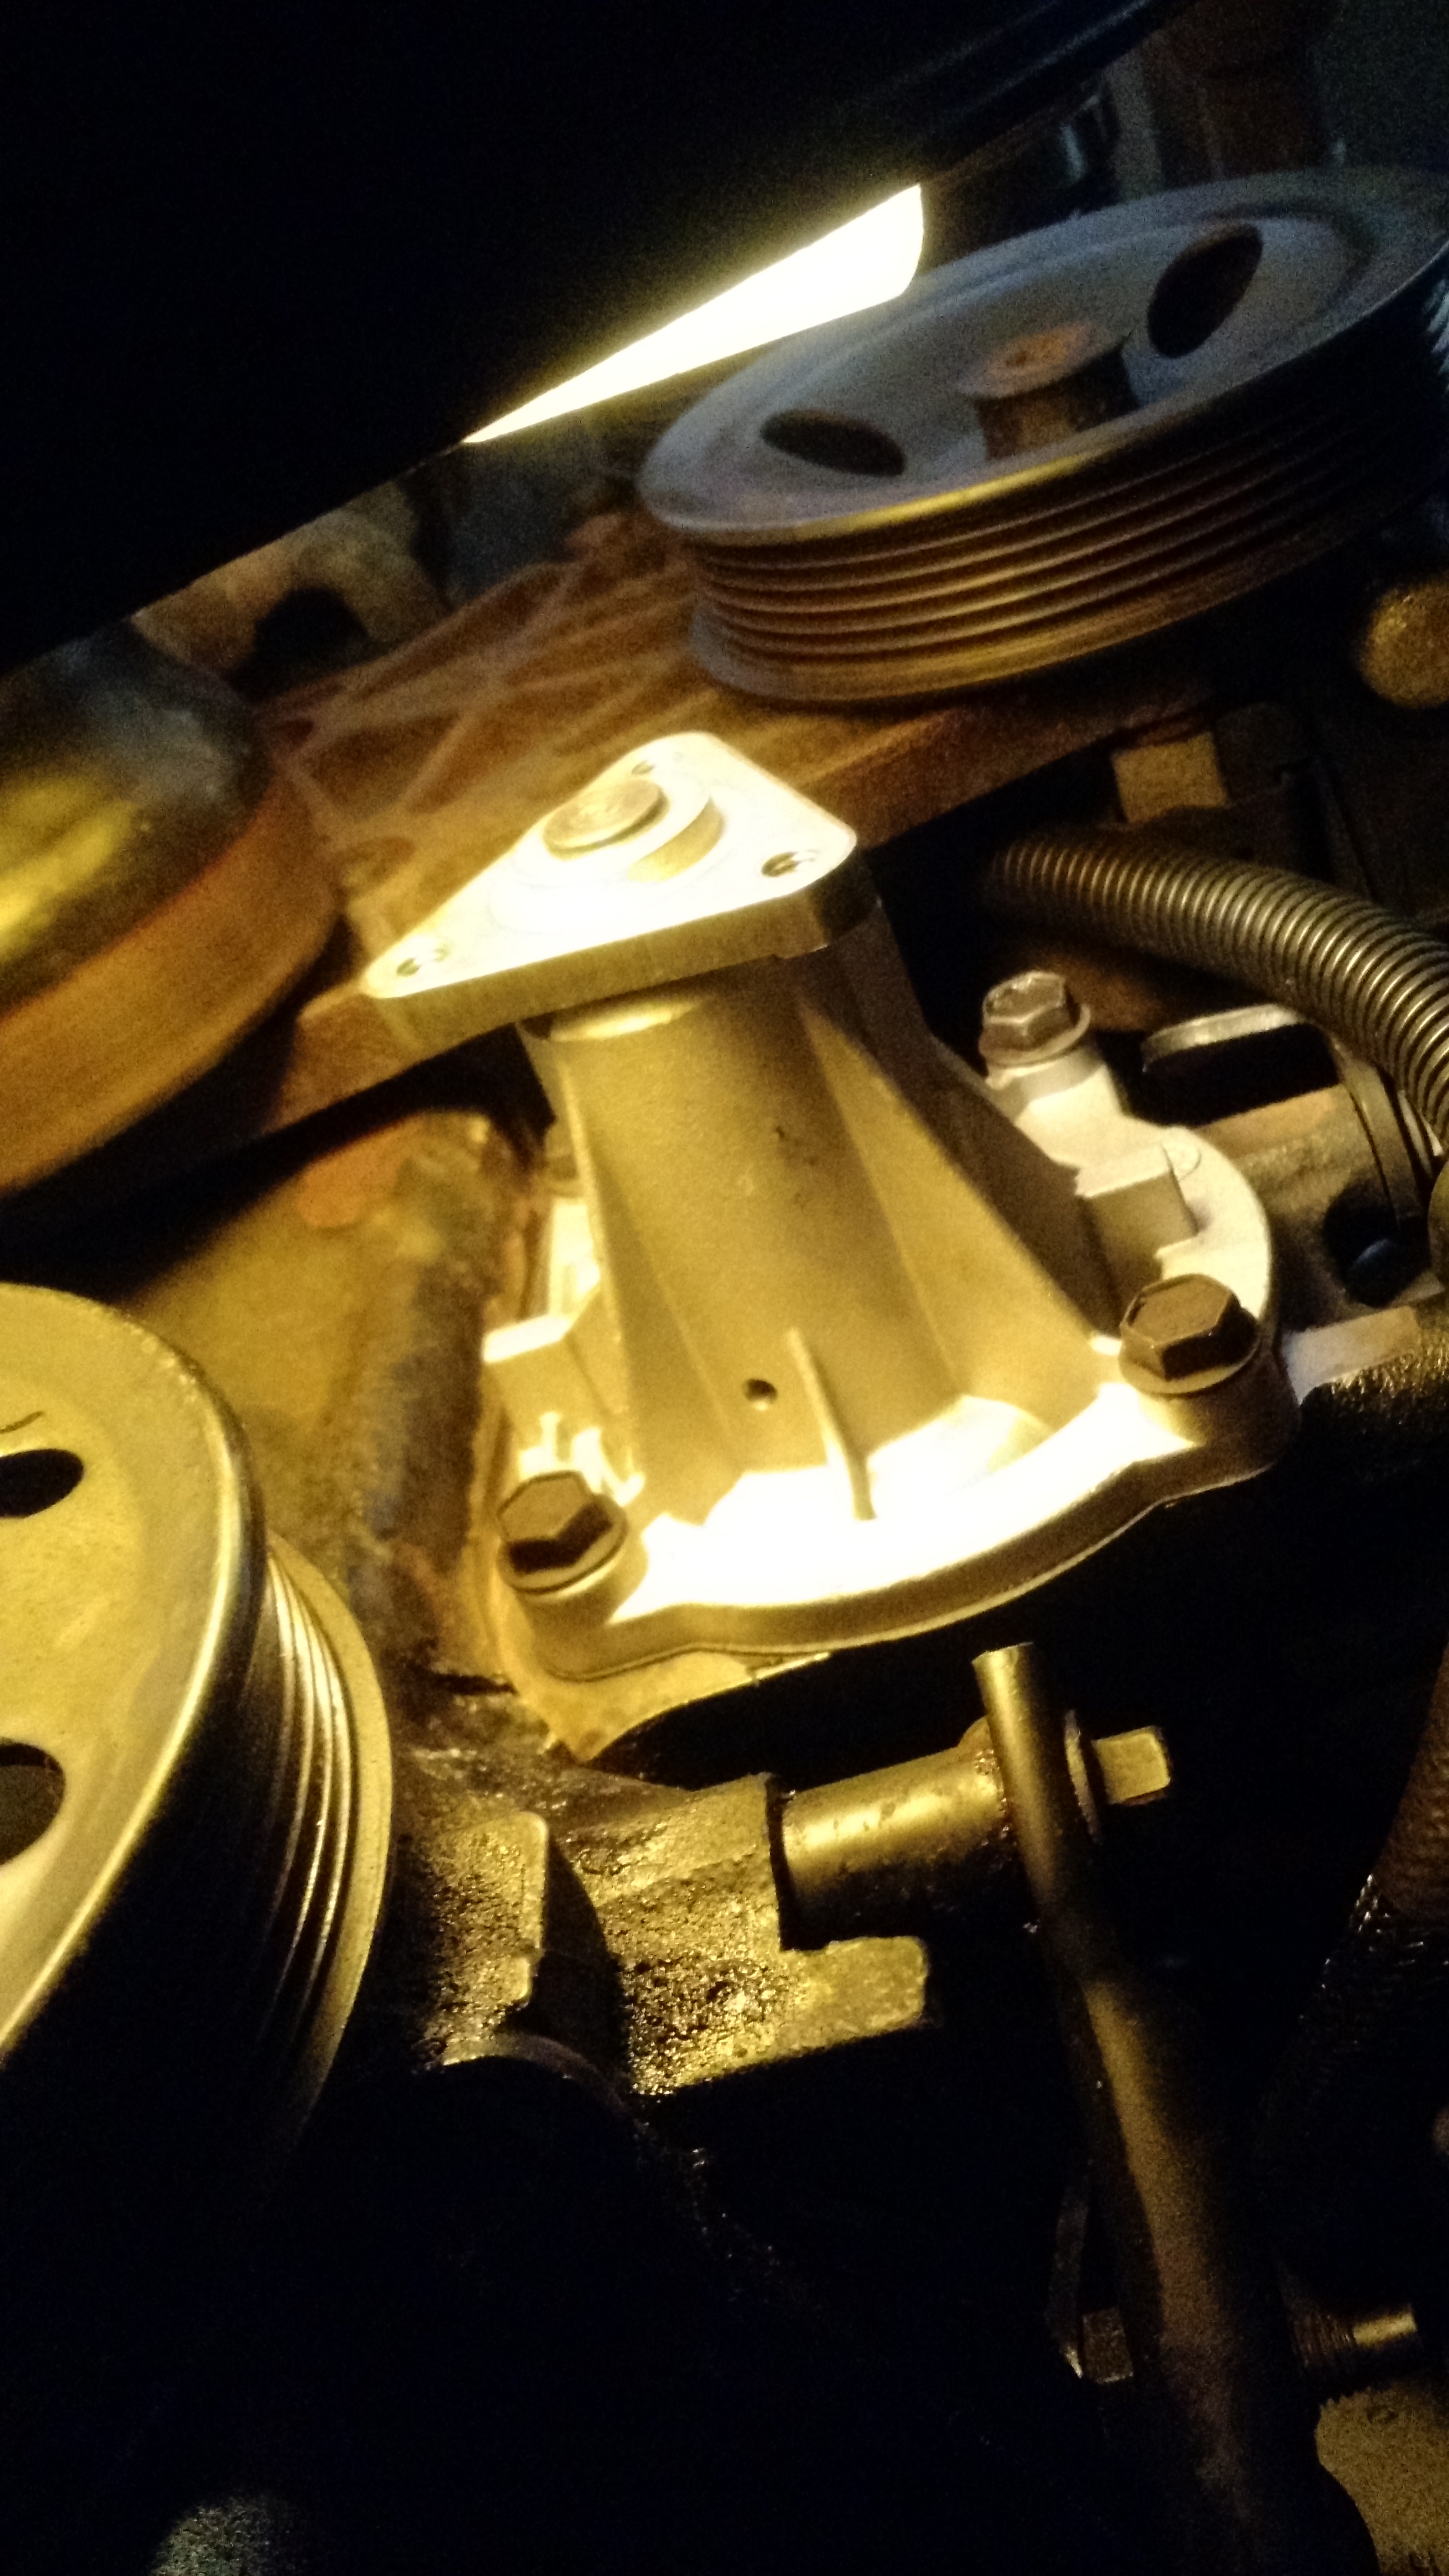
Water pump mischief managed!
Cheers!
BBBC Farm Report
The Hops…
-

- Tettanang Hops
-
- Columbus Hops
-

- Centennial Hops
So I figure I’m going to make a lager at the end of summer when those Tettanang hops are ready.
The Brewery
I was reading up in Mastering Homebrew and noticed that the Wortsplosion was probably caused, in part by using vinyl tube instead of silicone tube… I think. I need to check, and probably still need to see about either getting some hose clamps or just replacing the fittings with something more heat resistant.
I’ve been at work on a fermentation chamber controller.
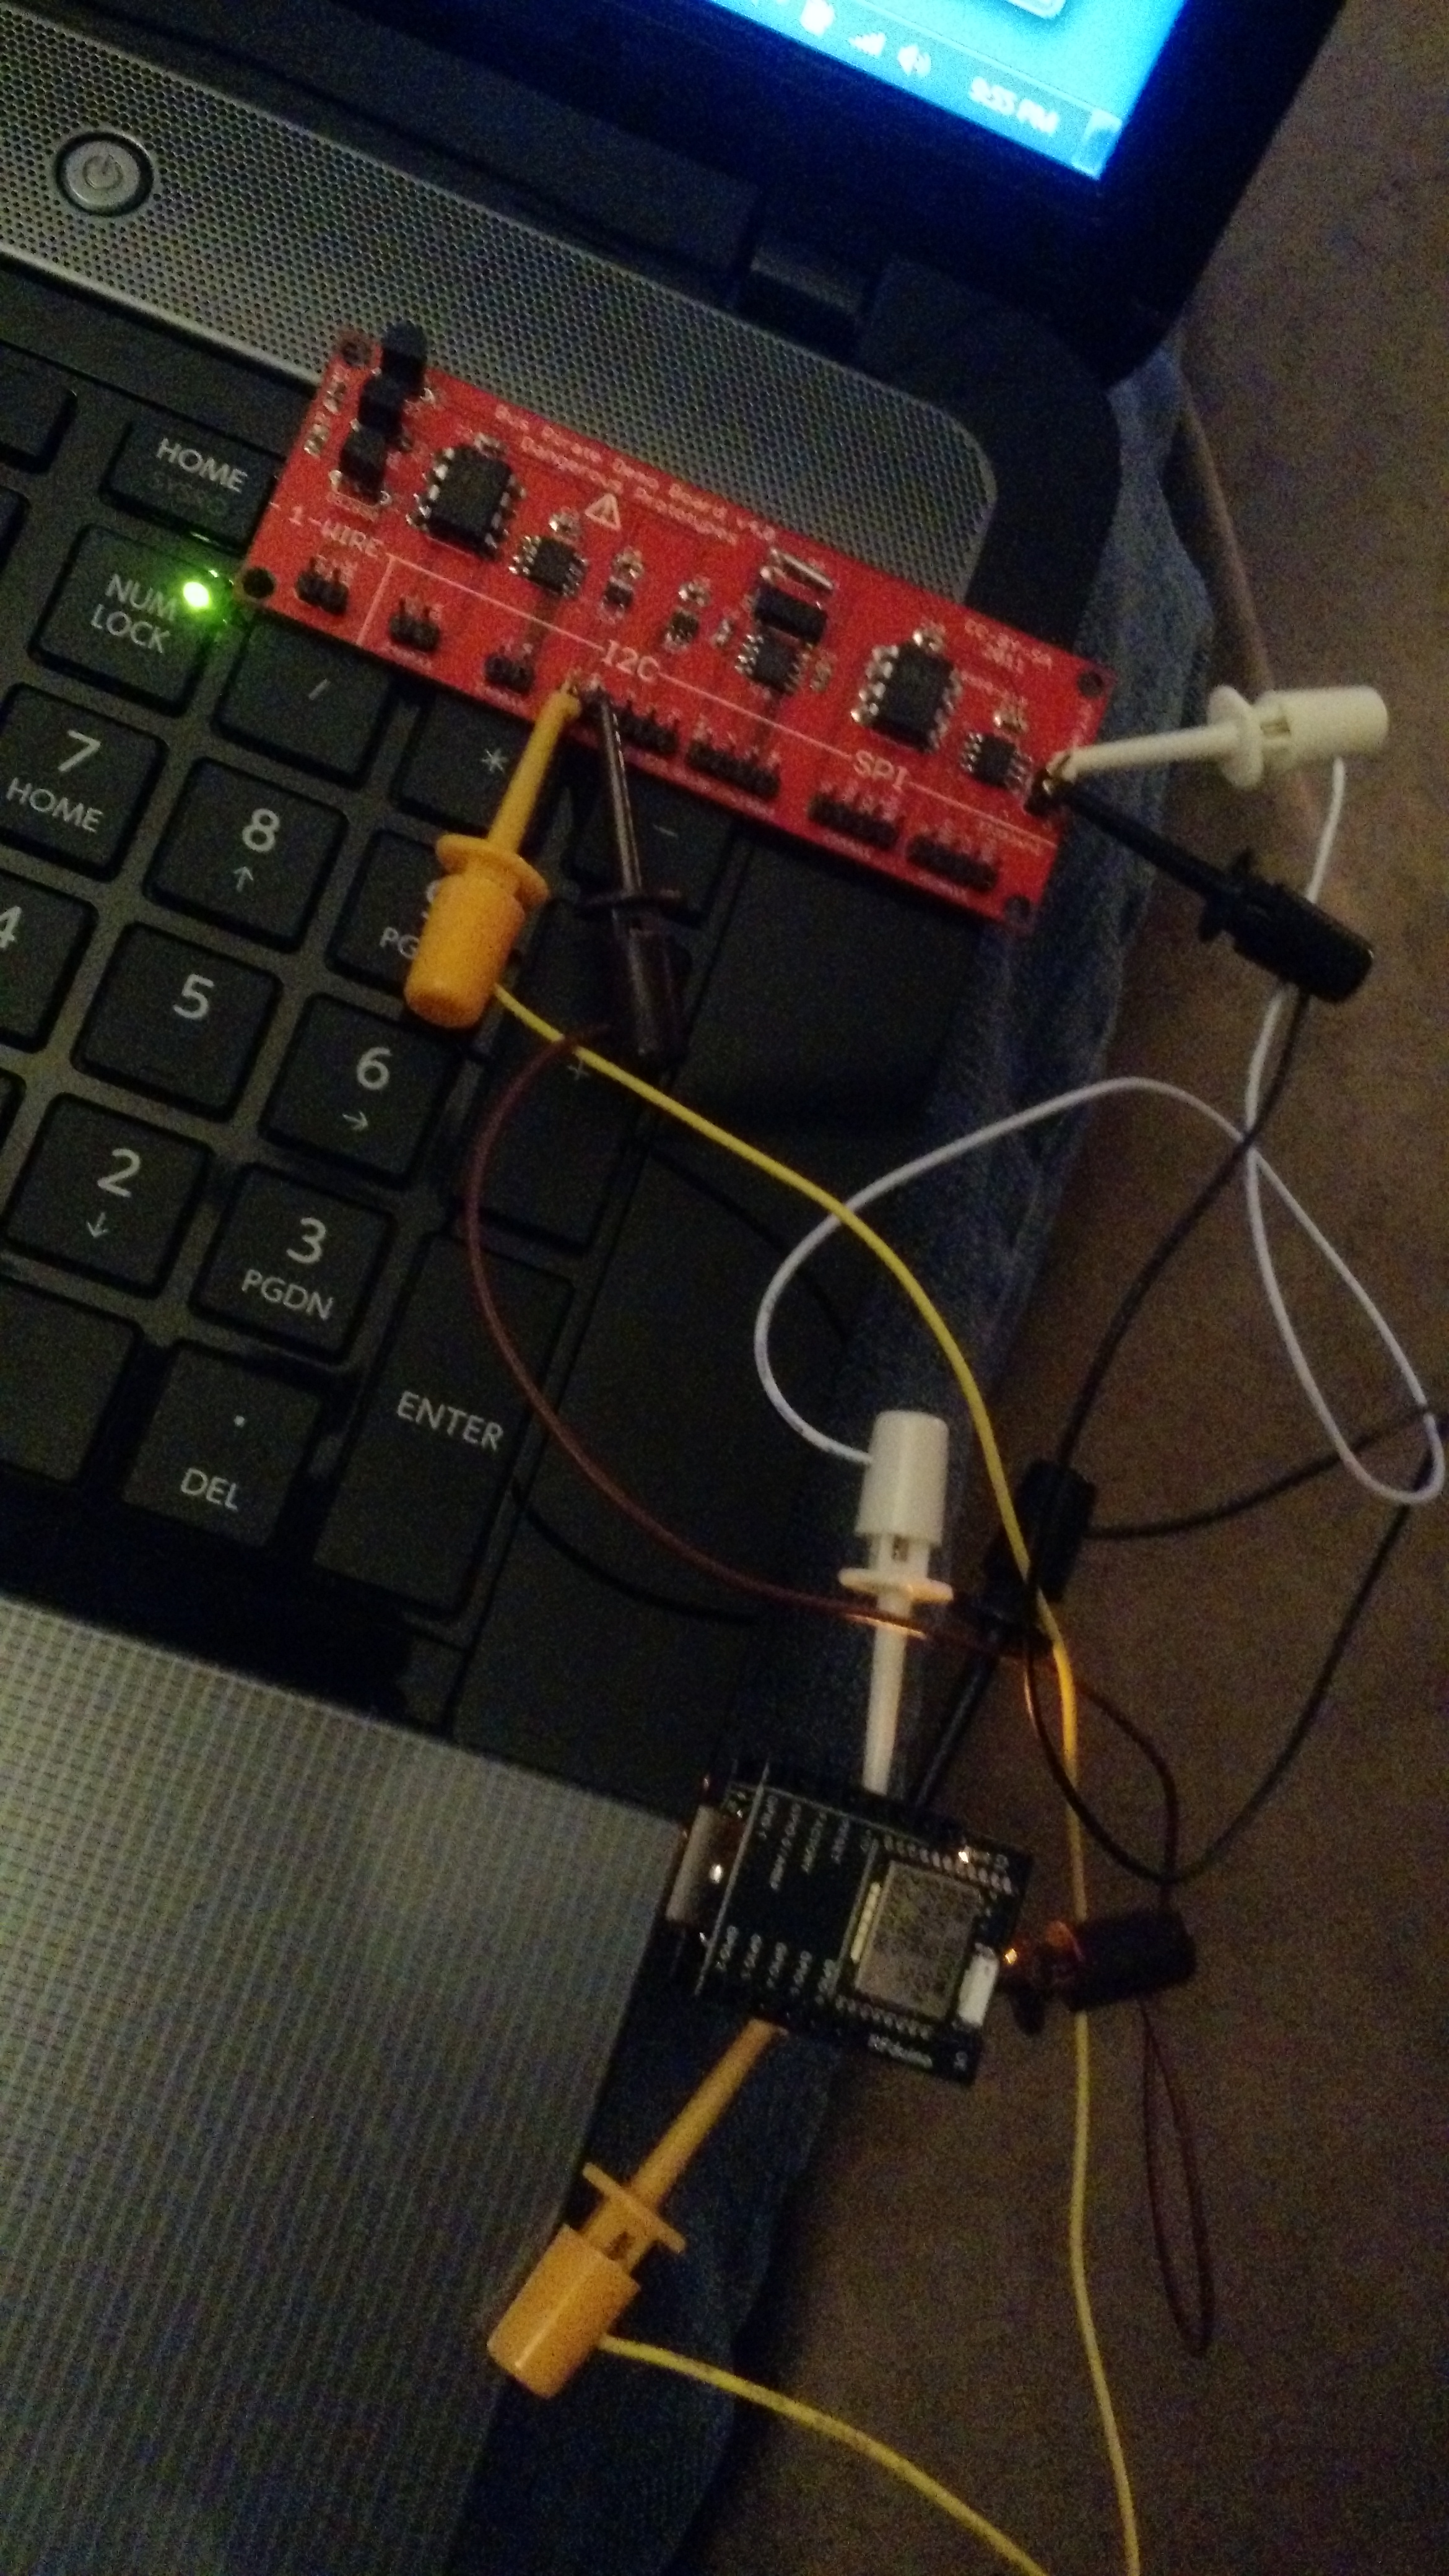
Test setup with an RFduino and a TC74 temperature sensor.
After a little false start with a sensor that absolutely will not work with 3.3v, I found a sensor that does work and I think I have a solution in mind. The RFduino might be a better way than an ESP-8266, but we’ll see. I still have the option to use this sensor and the Raspberry Pi. Also on that thought, I updated the Brewery IoT page. Even more so, the behind-the-scenes stuff works, too – with encryption, even.
Brewing
Tomorrow (by the time this posts) is Brew Day. It’s also the day between the Little King’s Mile and the Flying Pig Half Marathon. I am going to be resting, since I already figure that a lingering injury may make my half a very painful experience and if there’s a snowball’s chance in Hell that I might be miraculously healed I want to be at my best. I might see about brewing the following weekend. I hope everyone taking part in Brew Day has a wonderful time.
In related thoughts, I just (before typing this) drank an amber ale that I think had too much caramel malt in it. I also saw something recently (I don’t recall where) that indicated an over-reliance on caramel malts in general, so I think my next brew – probably another IPA – will have no caramel malt.
Another thing I want to do is to dry hop Bud Light to try some hops by themselves. I know for sure I’d want Amarillo, Chinook, Columbus, Centennial, Cascade, Mosaic, Equinox, Fuggle, Liberty, Northern Brewer, Simcoe, Williamette, and Green Bullet (list subject to change). Bud Light has so little flavor that the hops shine through really well ;-).
Cheers!
Dangerous Electric Boil Kettle DONE!
I had some free time over the weekend and was able to work on the brew kettle. As of Saturday afternoon, I was boiling water and if it wasn’t for having a few things to do I would have probably ran over to my LHBS and got a few pounds of malt and hops.
The things I did dangerously was that I used all green wire (the standard AC convention is red or black for hot, white for neutral, and green for ground). Also, I have no enclosure around all that power. I also do not have a way to disconnect this from power (other than a breaker, which is currently switched off since I’m not brewing anything).
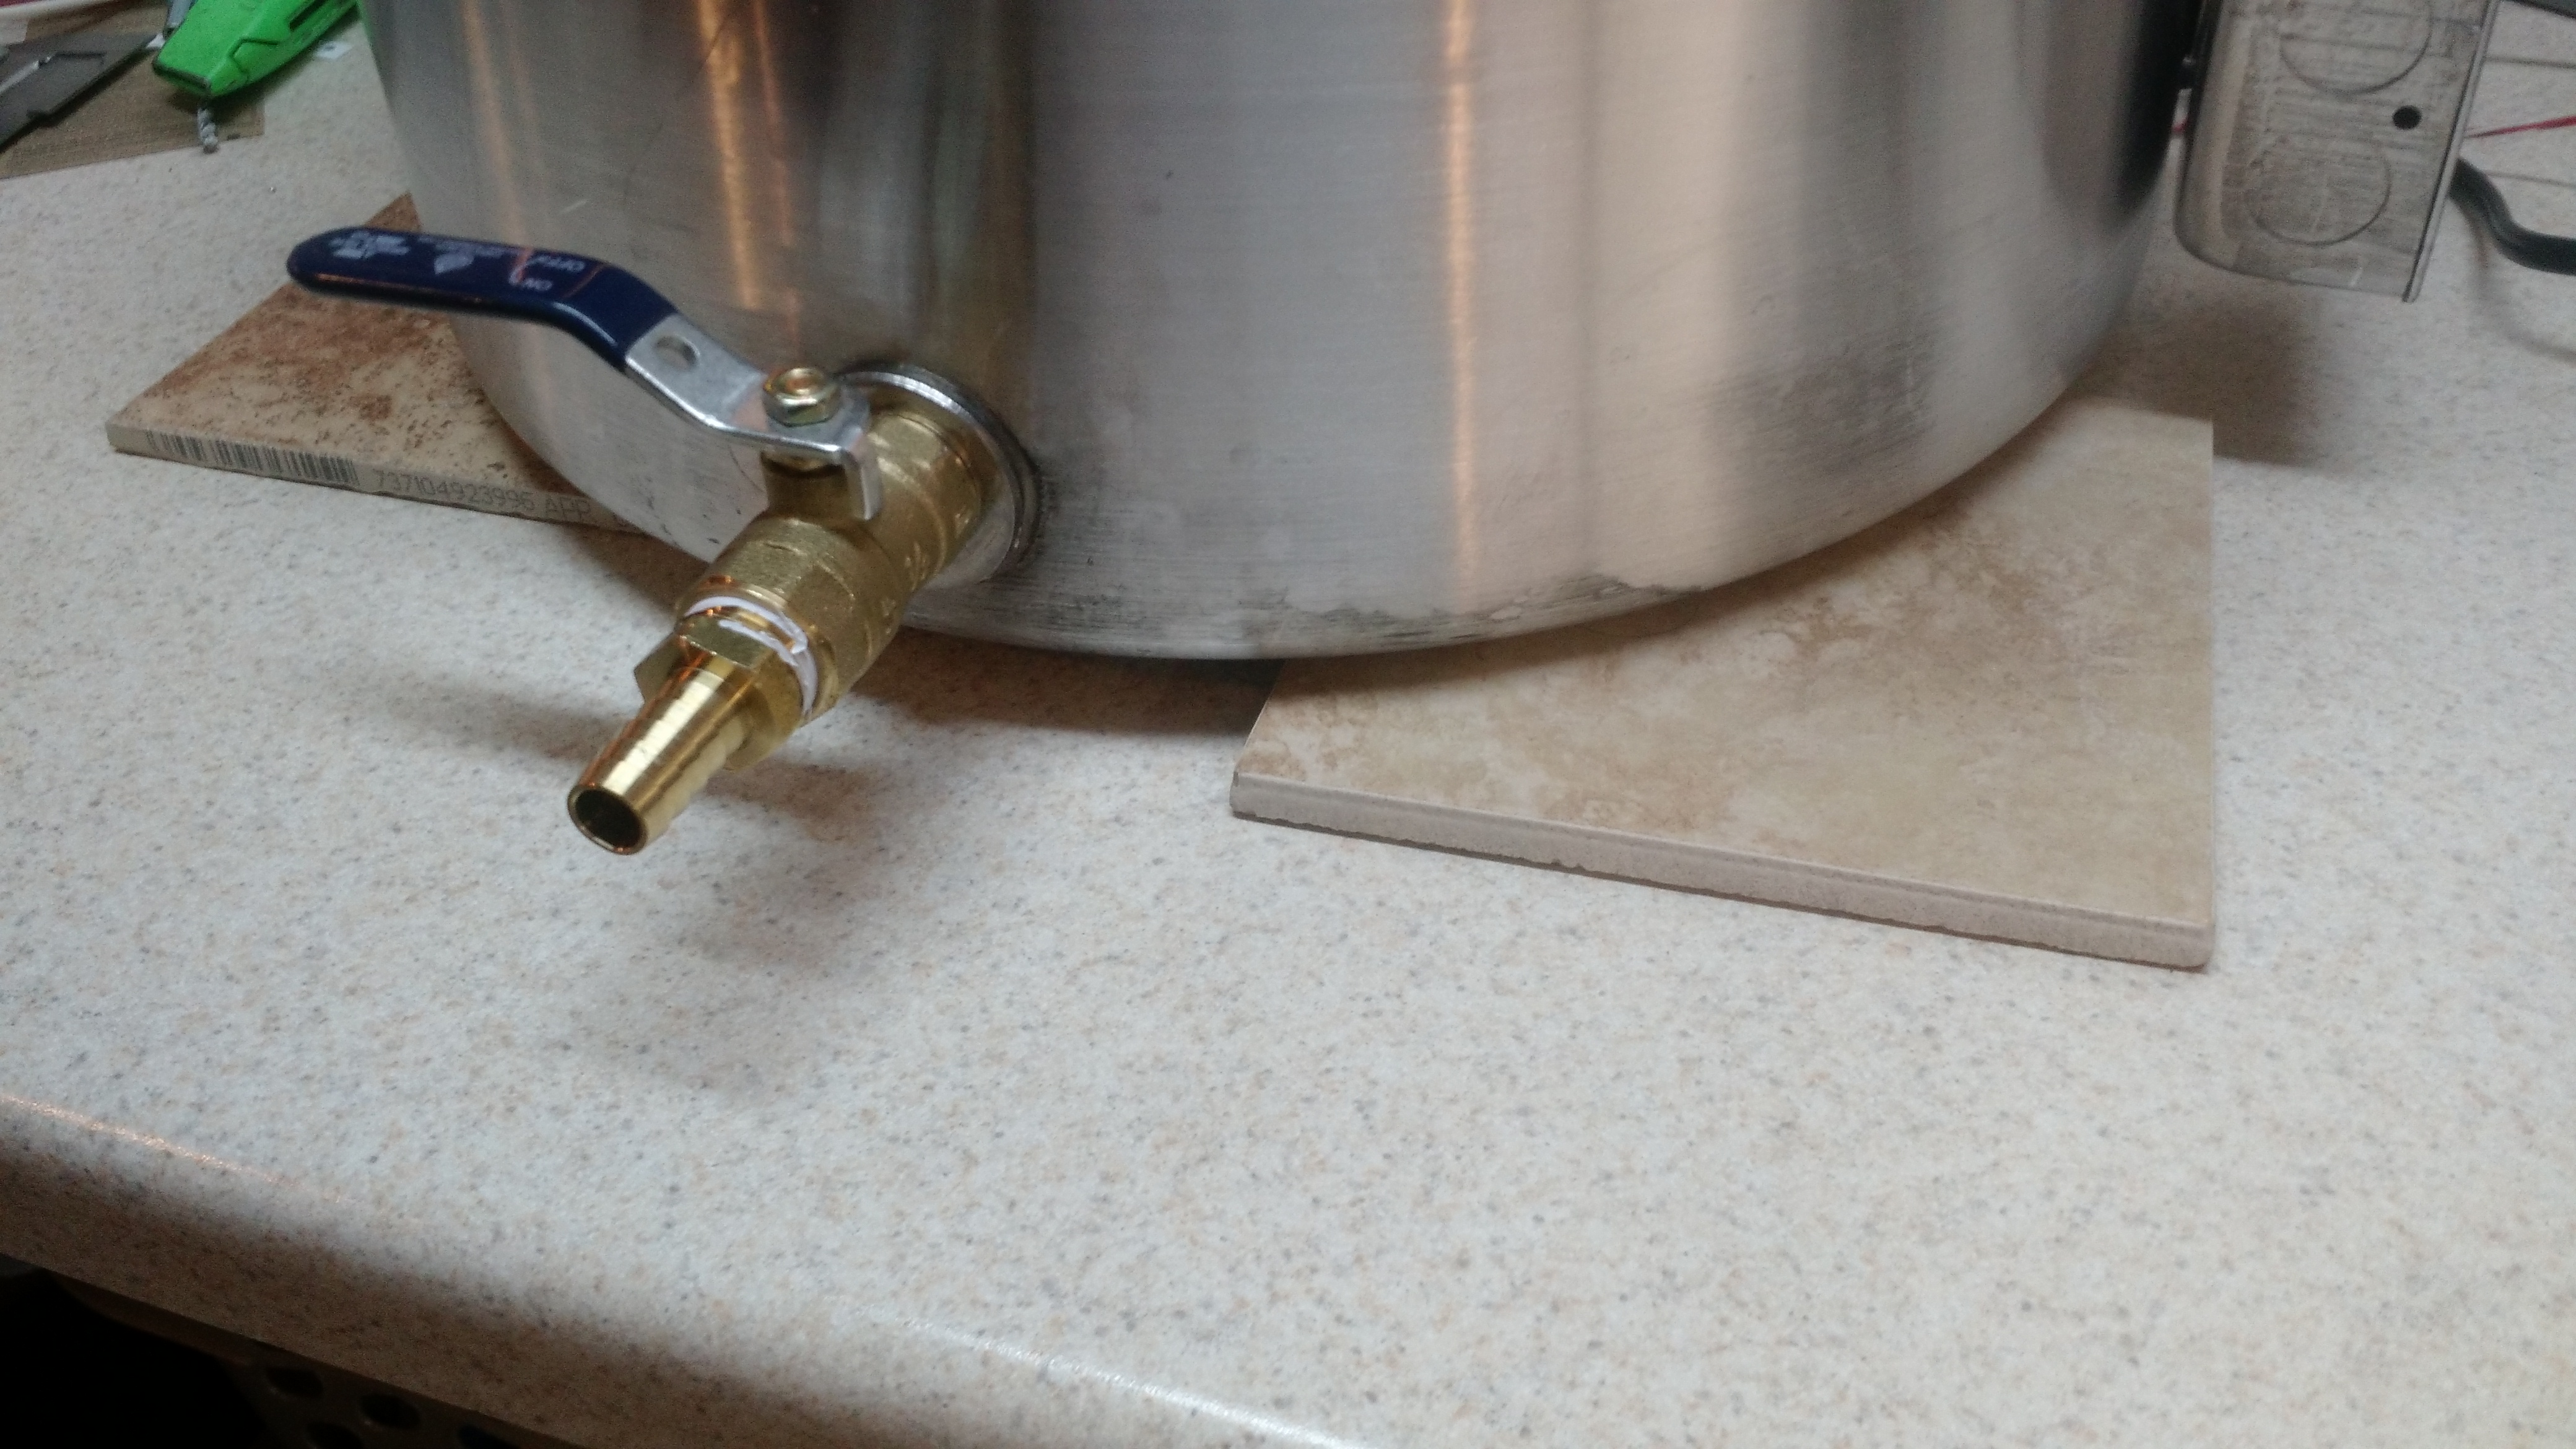
While I was at it, I replaced my valve with a non-leaking valve (my previous valve was actually for a compression fitting, so it leaked). There is a remaining issue – I have to replace the fitting on the thermocouple because right now I have a compression nut (which leaves a place for bacteria to sit and harvest).
This is the setup. Not perfect, but it works. The switch is for the PID controller (the black box). The SSR is hiding behind the boiler.
This is my counter protection – 3 6″x6″ ceramic tiles. I don’t think the kettle would damage my Formica countertop, but I don’t want to find out if I’m wrong.

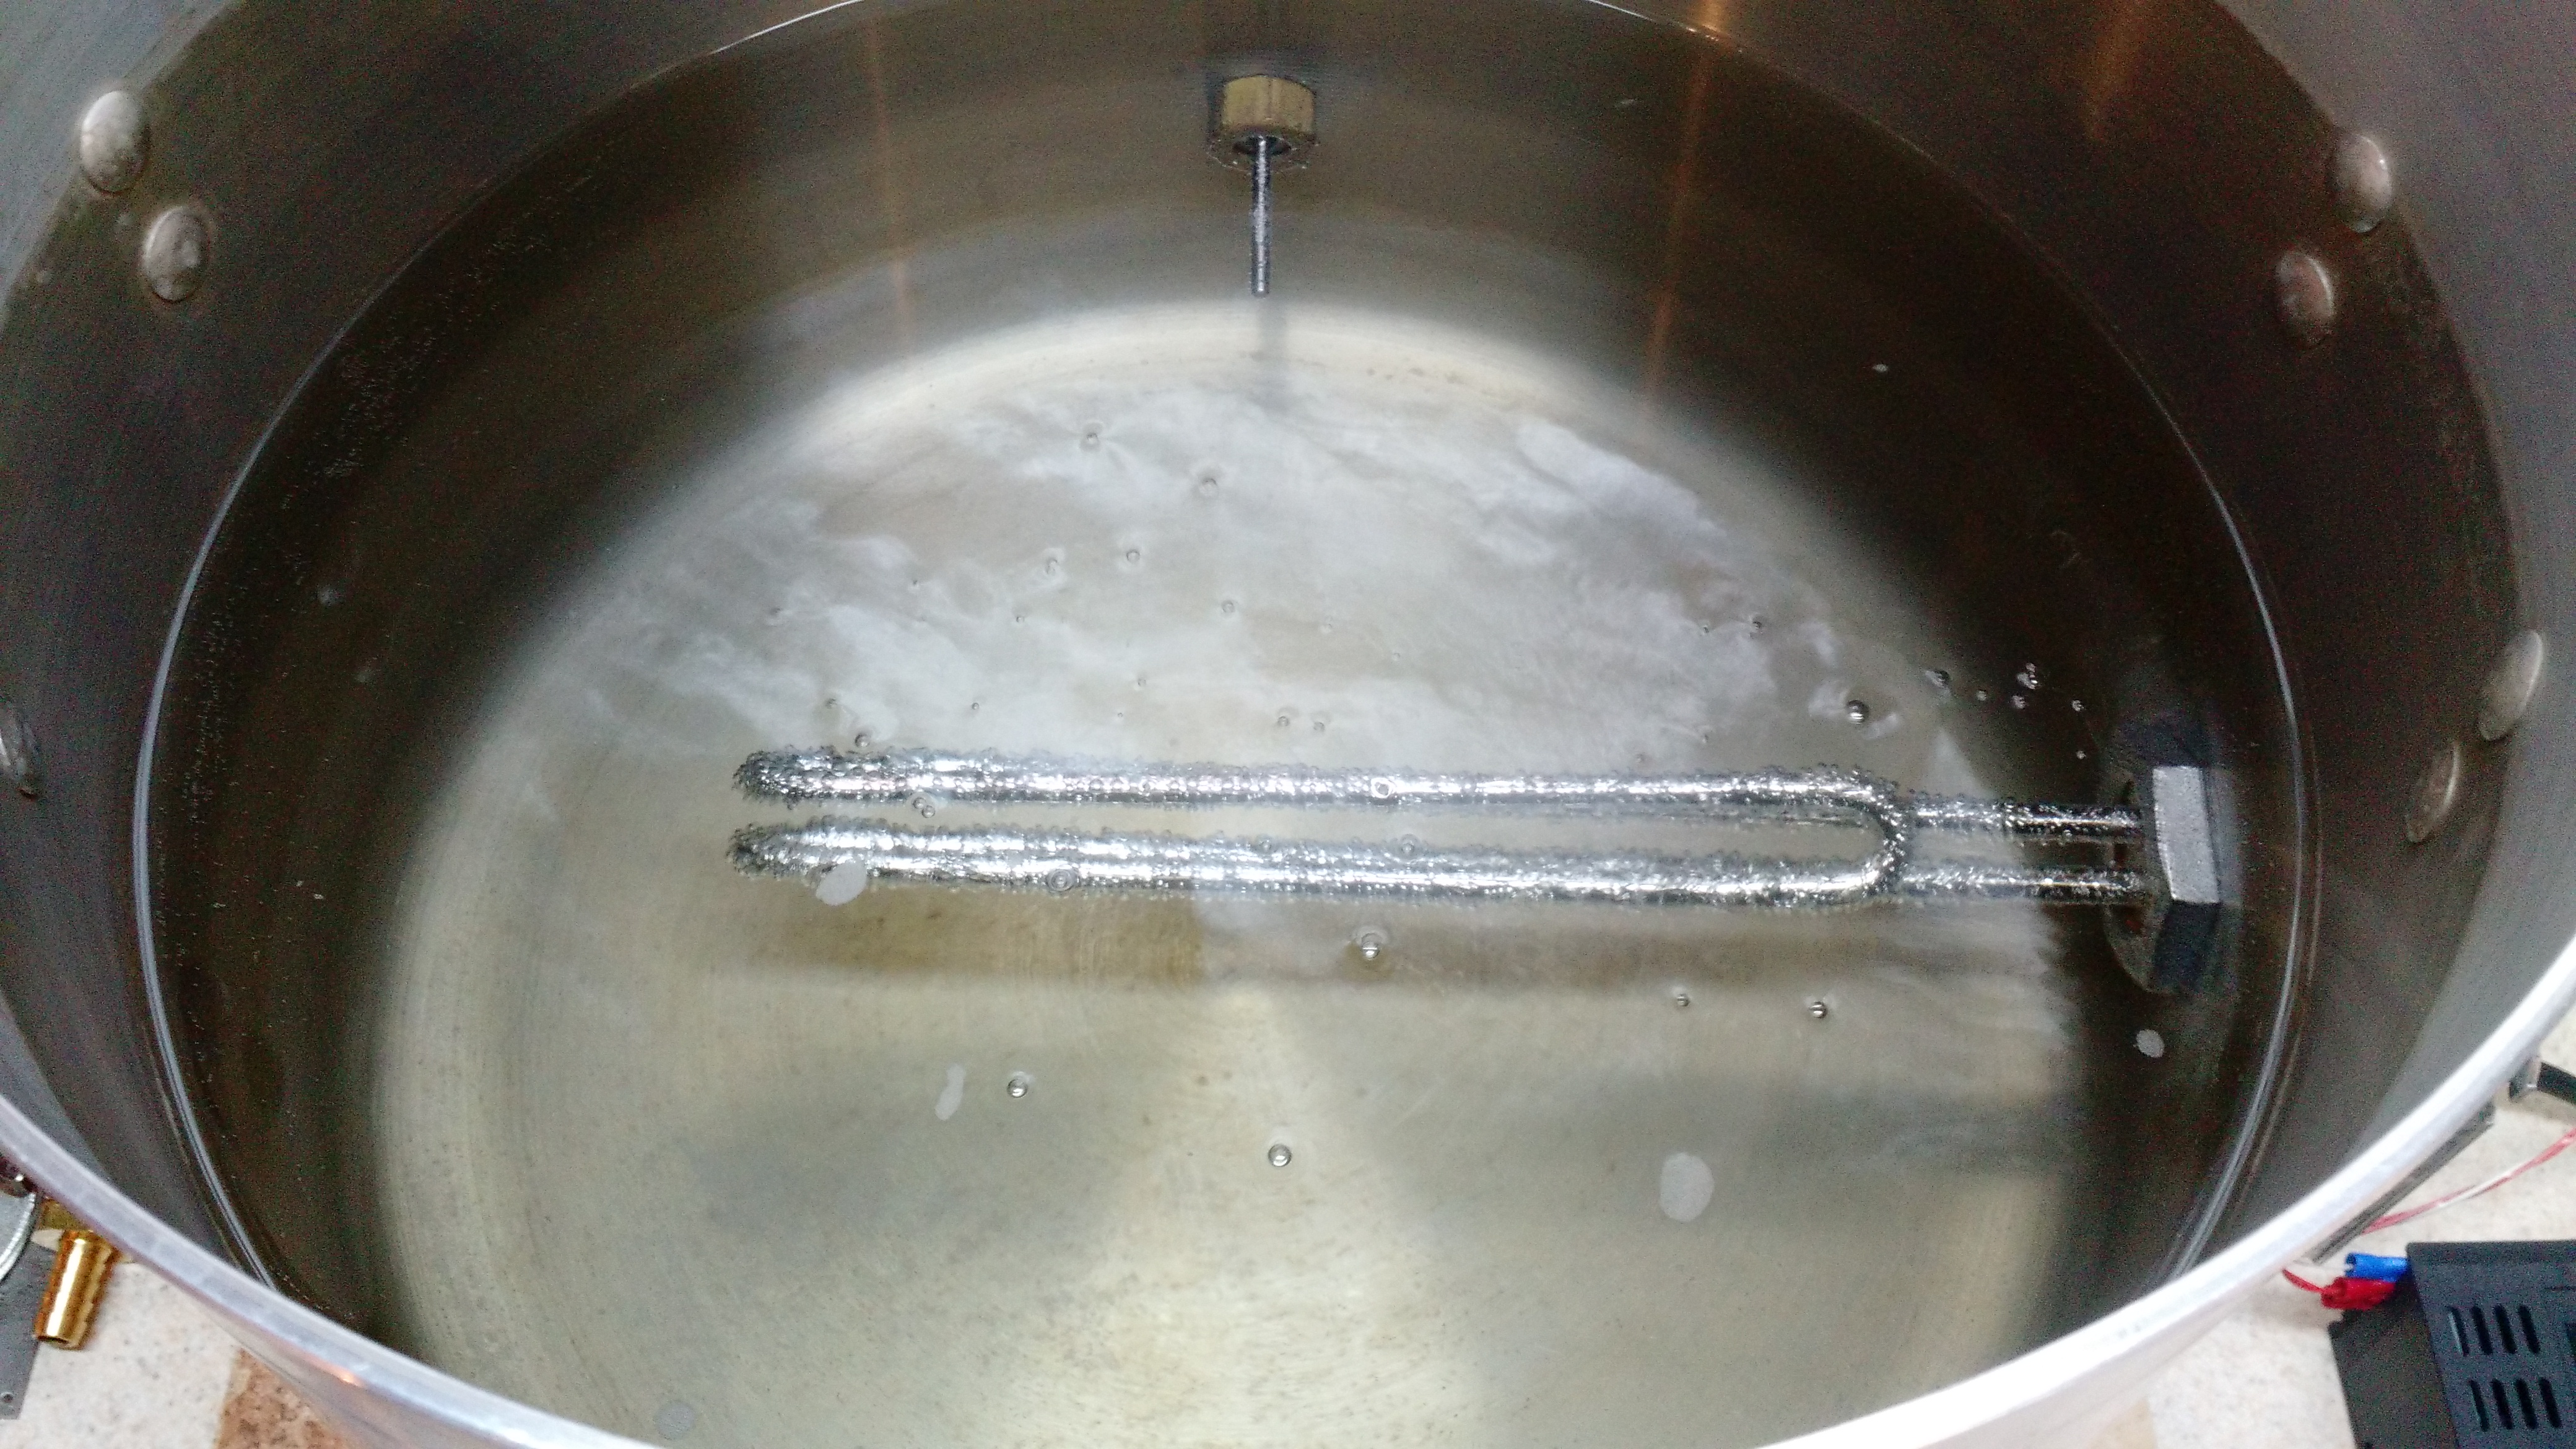
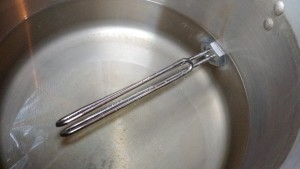
This is the element running and boiling water.
Other Happenings
My cousin was selling a small freezer that would be perfect for us and would replace my current chest freezer with a small upright (and replace a non-energy-star freezer with one that is). Initially I was thinking KEGERATOR!, but after a night’s sleep I thought it might be better to do some fermentation temperature control. That means eventually I will make a schwarzbier, possibly a kolsch, and probably a bock beer early next year.
Cheers!
Brewery Upgrade Phase 2
In the upgrade process, phase 2 is running the 240V line to run the heating elements. This is a hard post to make exciting, because it’s basically all about a wire. And at one time after reading about the death of craft beer on some linkbaitey website (damn you Gose!!! :-D), I thought that I should only make posts that are informative or truly funny, and occasionally respectfully opinionated.
This post is about a boring orange wire.
IMPORTANT NOTE: NOTHING IN THIS IS ADVICE OR A HOW-TO. The voltages involved with an electric brewery are extremely dangerous, and doing things wrong can result in FIRE or DEATH (and it will hurt like Hell the entire time you are dying).
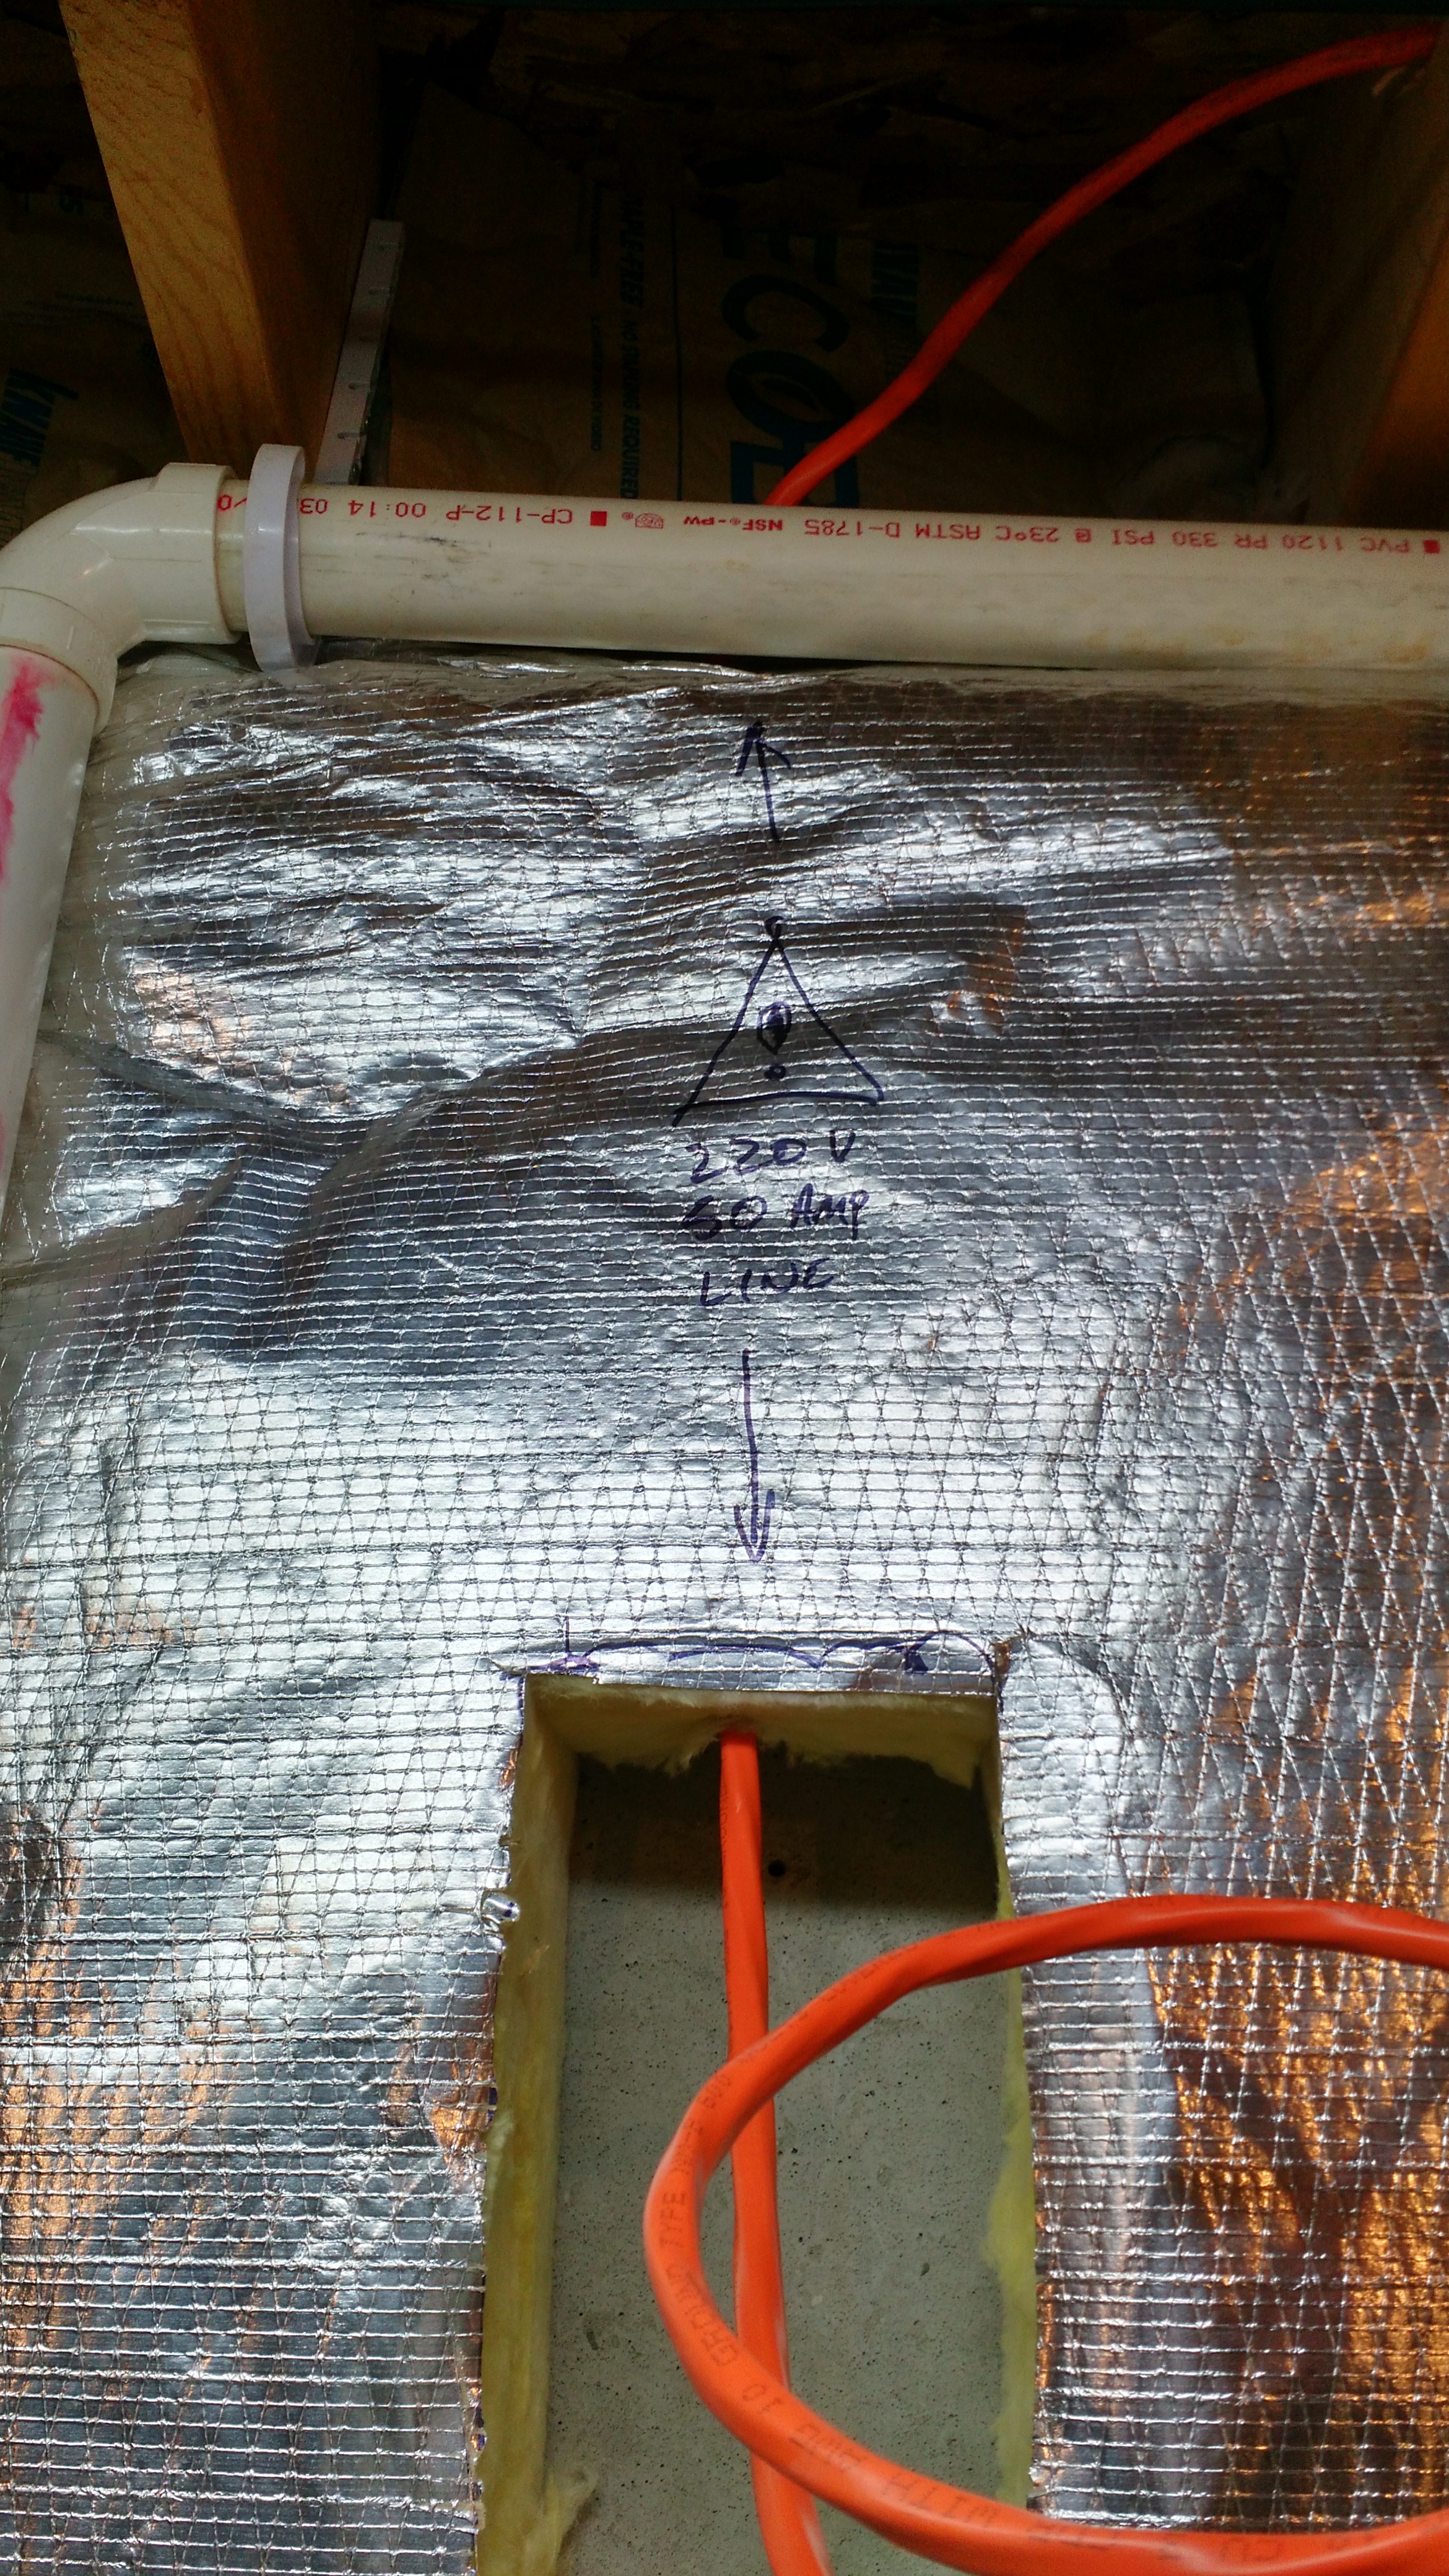
Yay, a boring hole in the insulation.
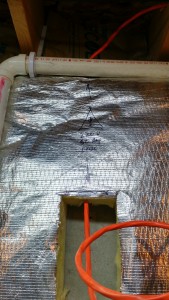
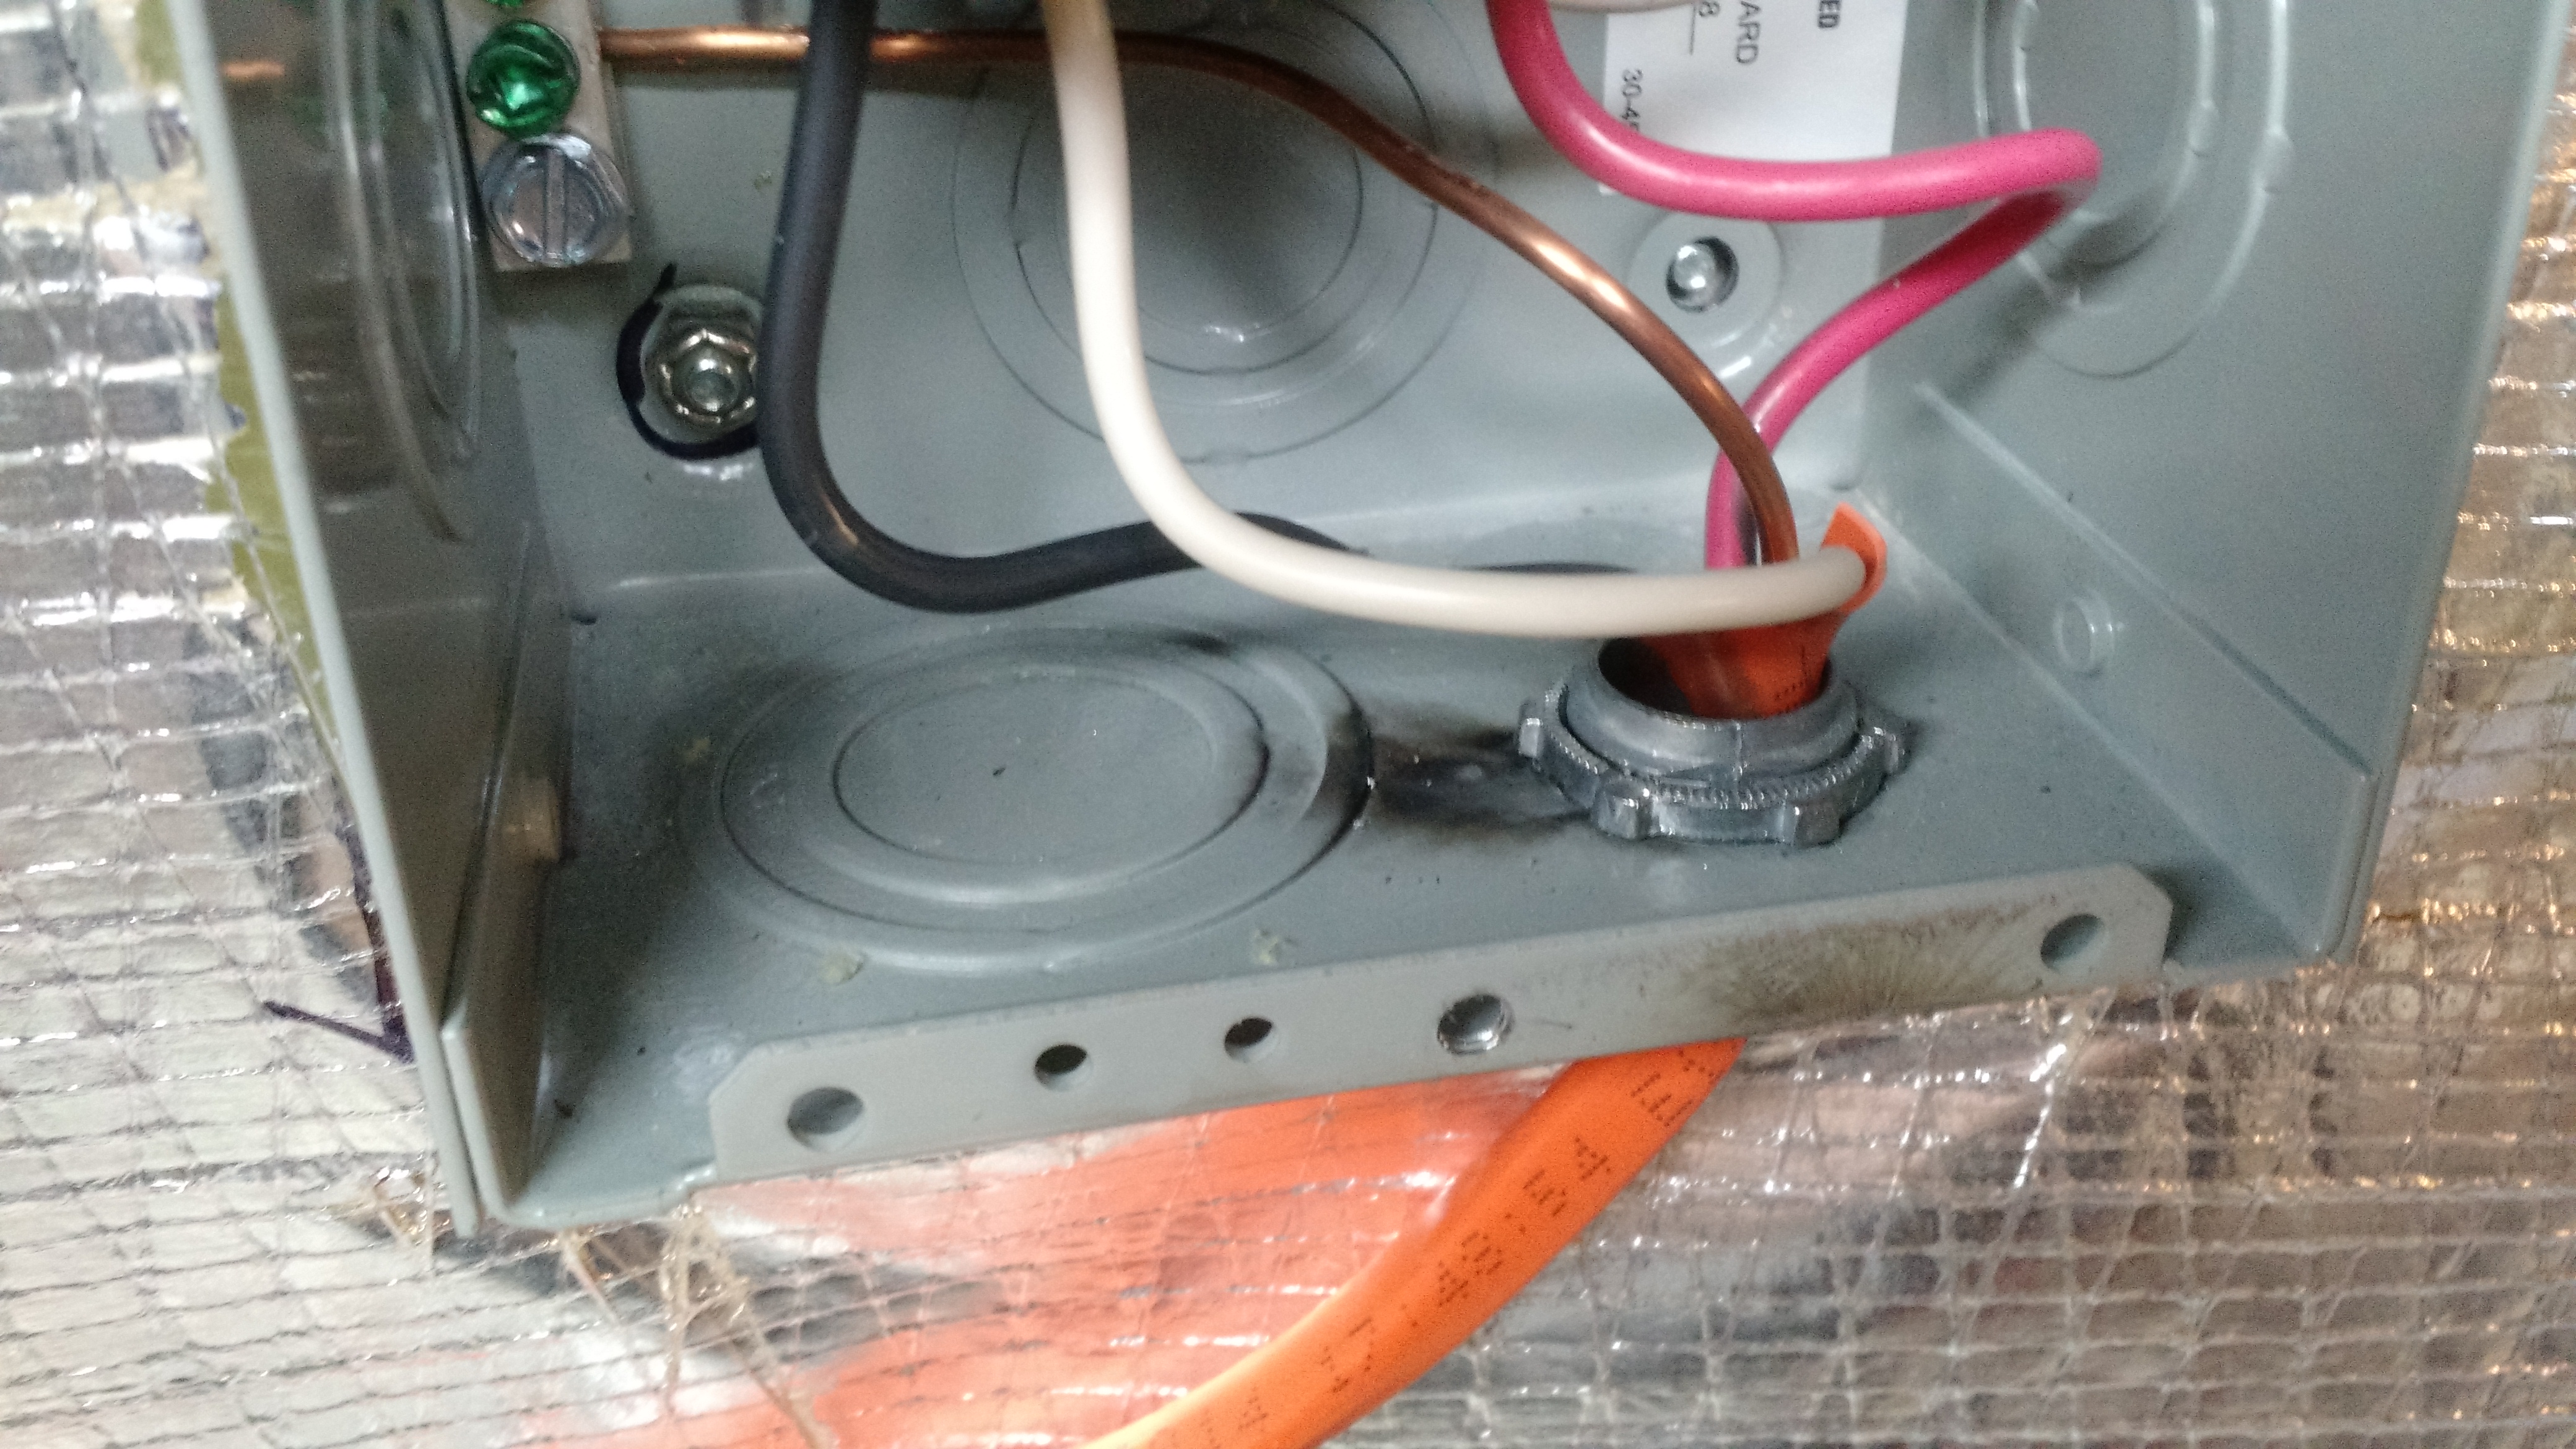
A boring hole with a wire. I couldn’t get conduit behind the drainpipe above, and that drainpipe is NOT getting moved, so I wrote on the insulation that there is a wire there.
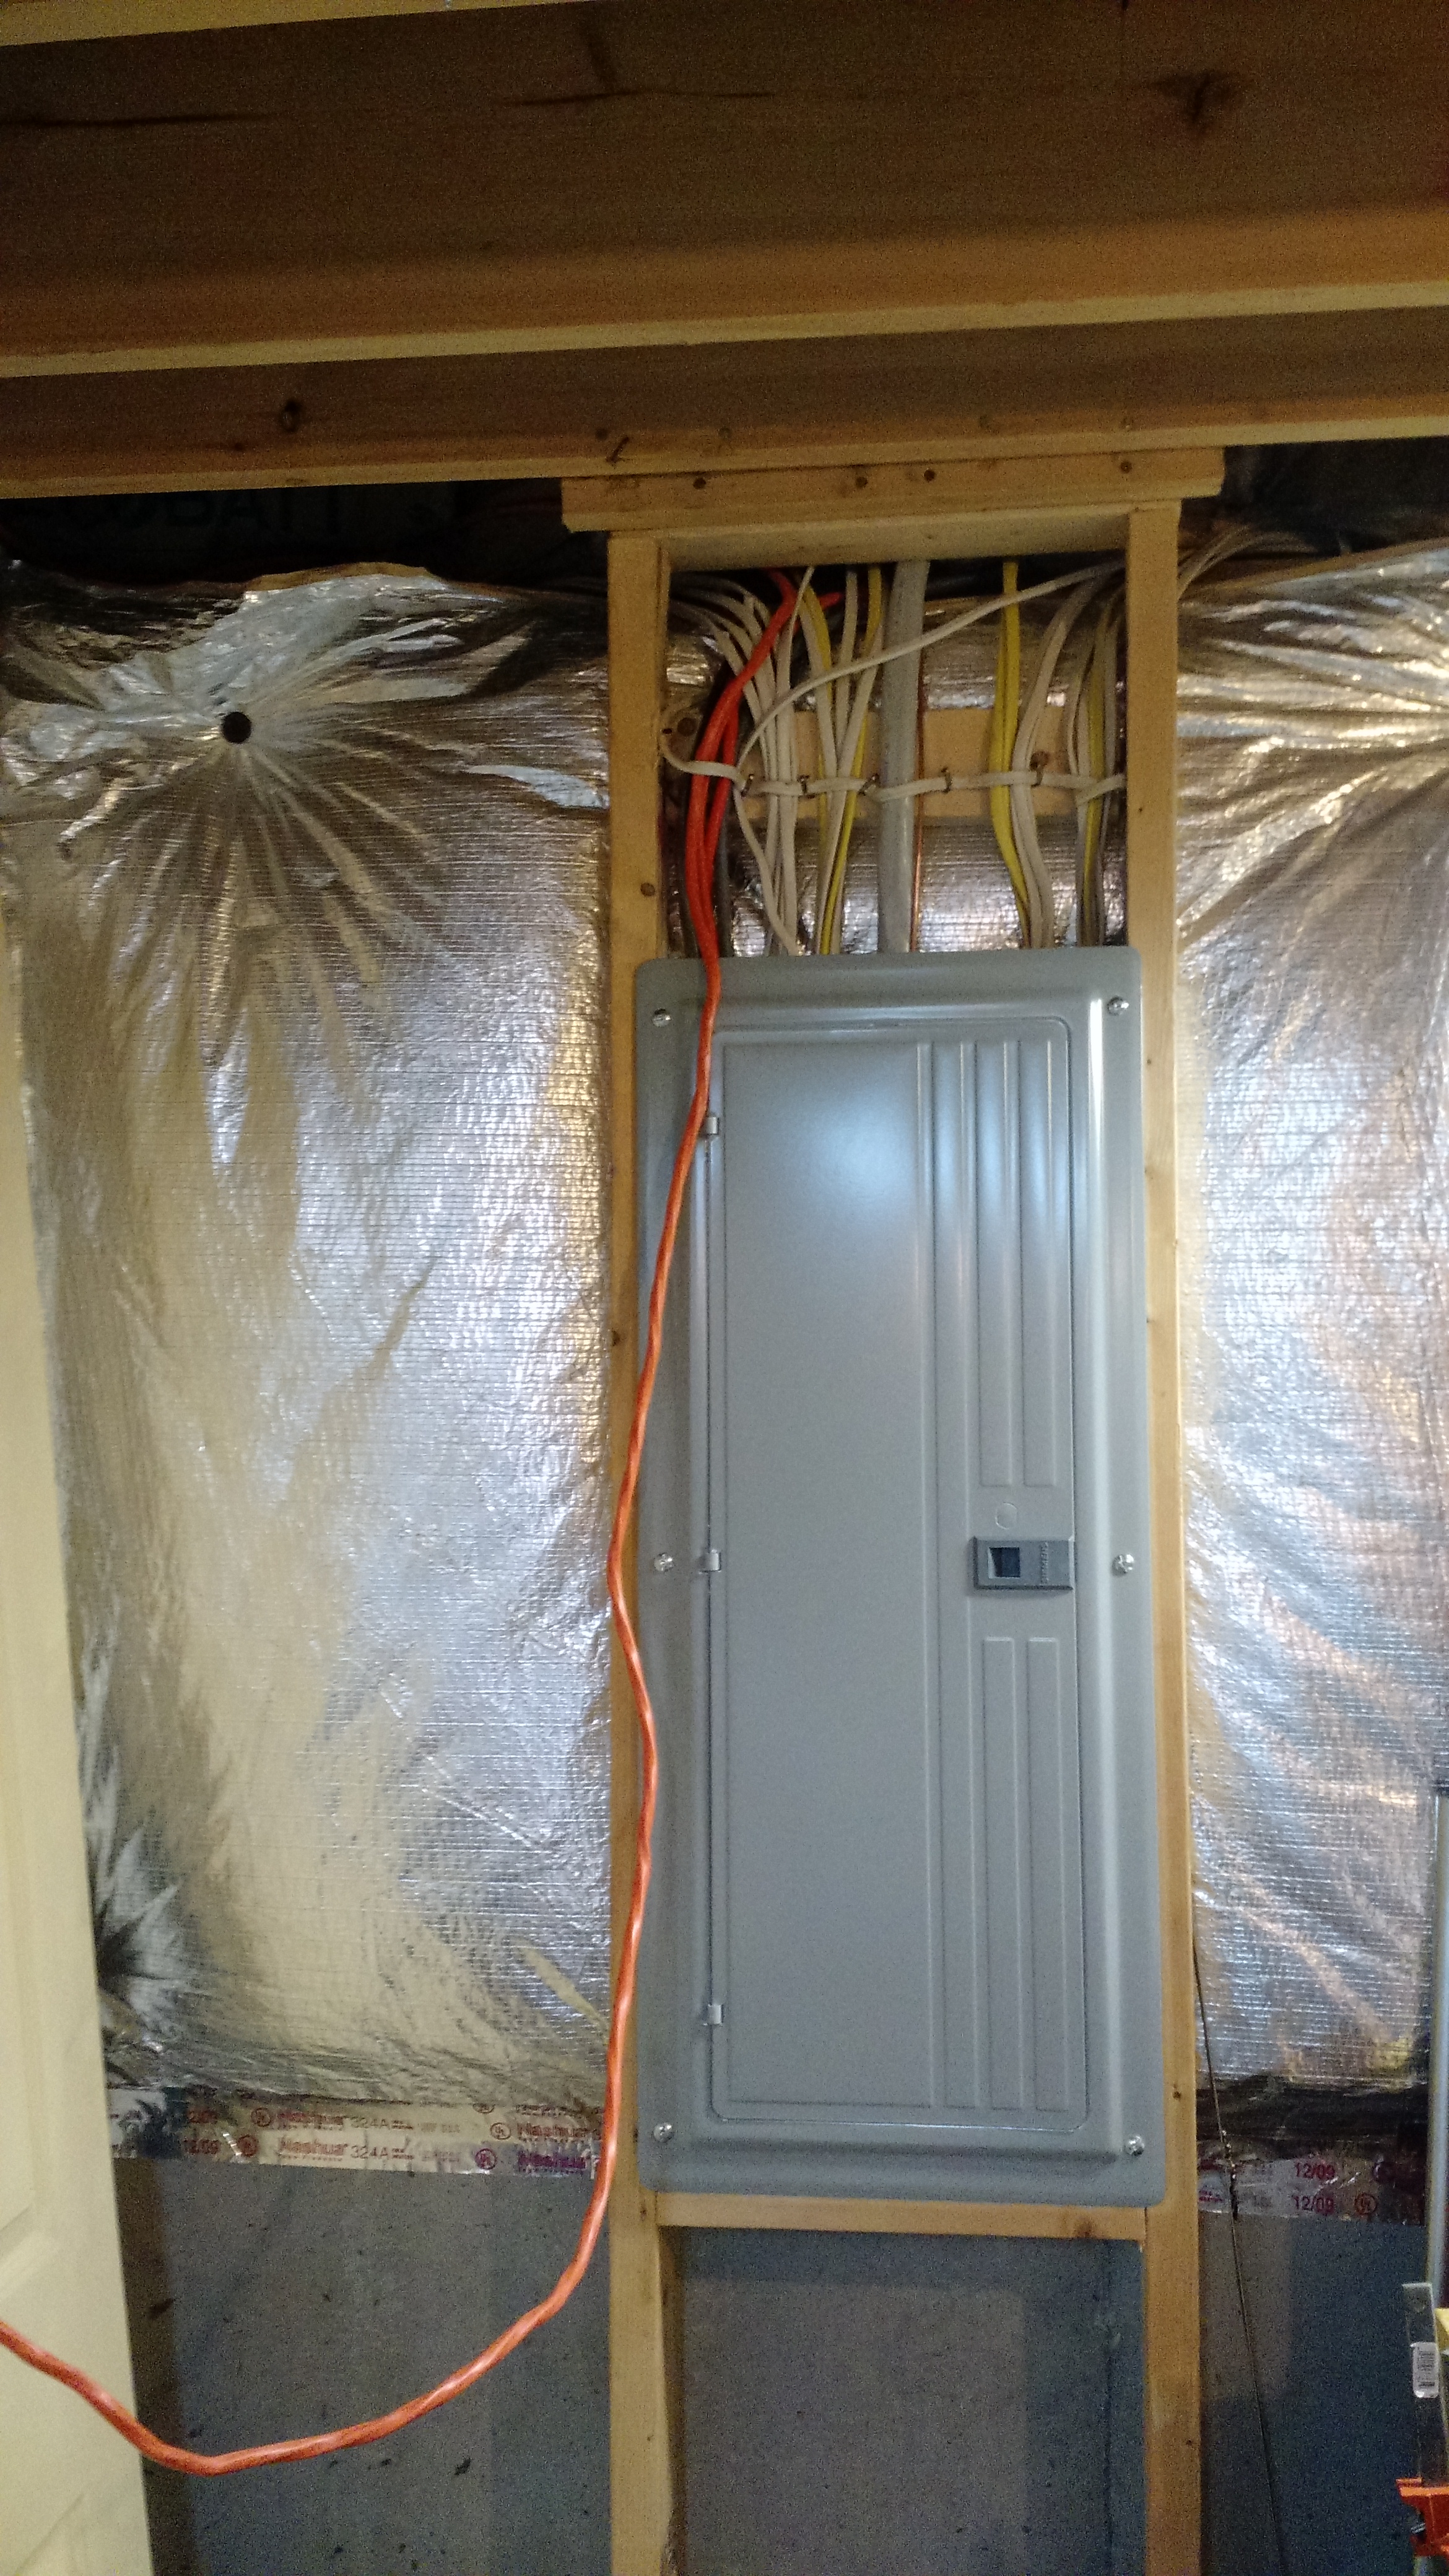
And… a wire. It’s pulled down near the circuit breaker panel in preparation to be run in the panel to a breaker.
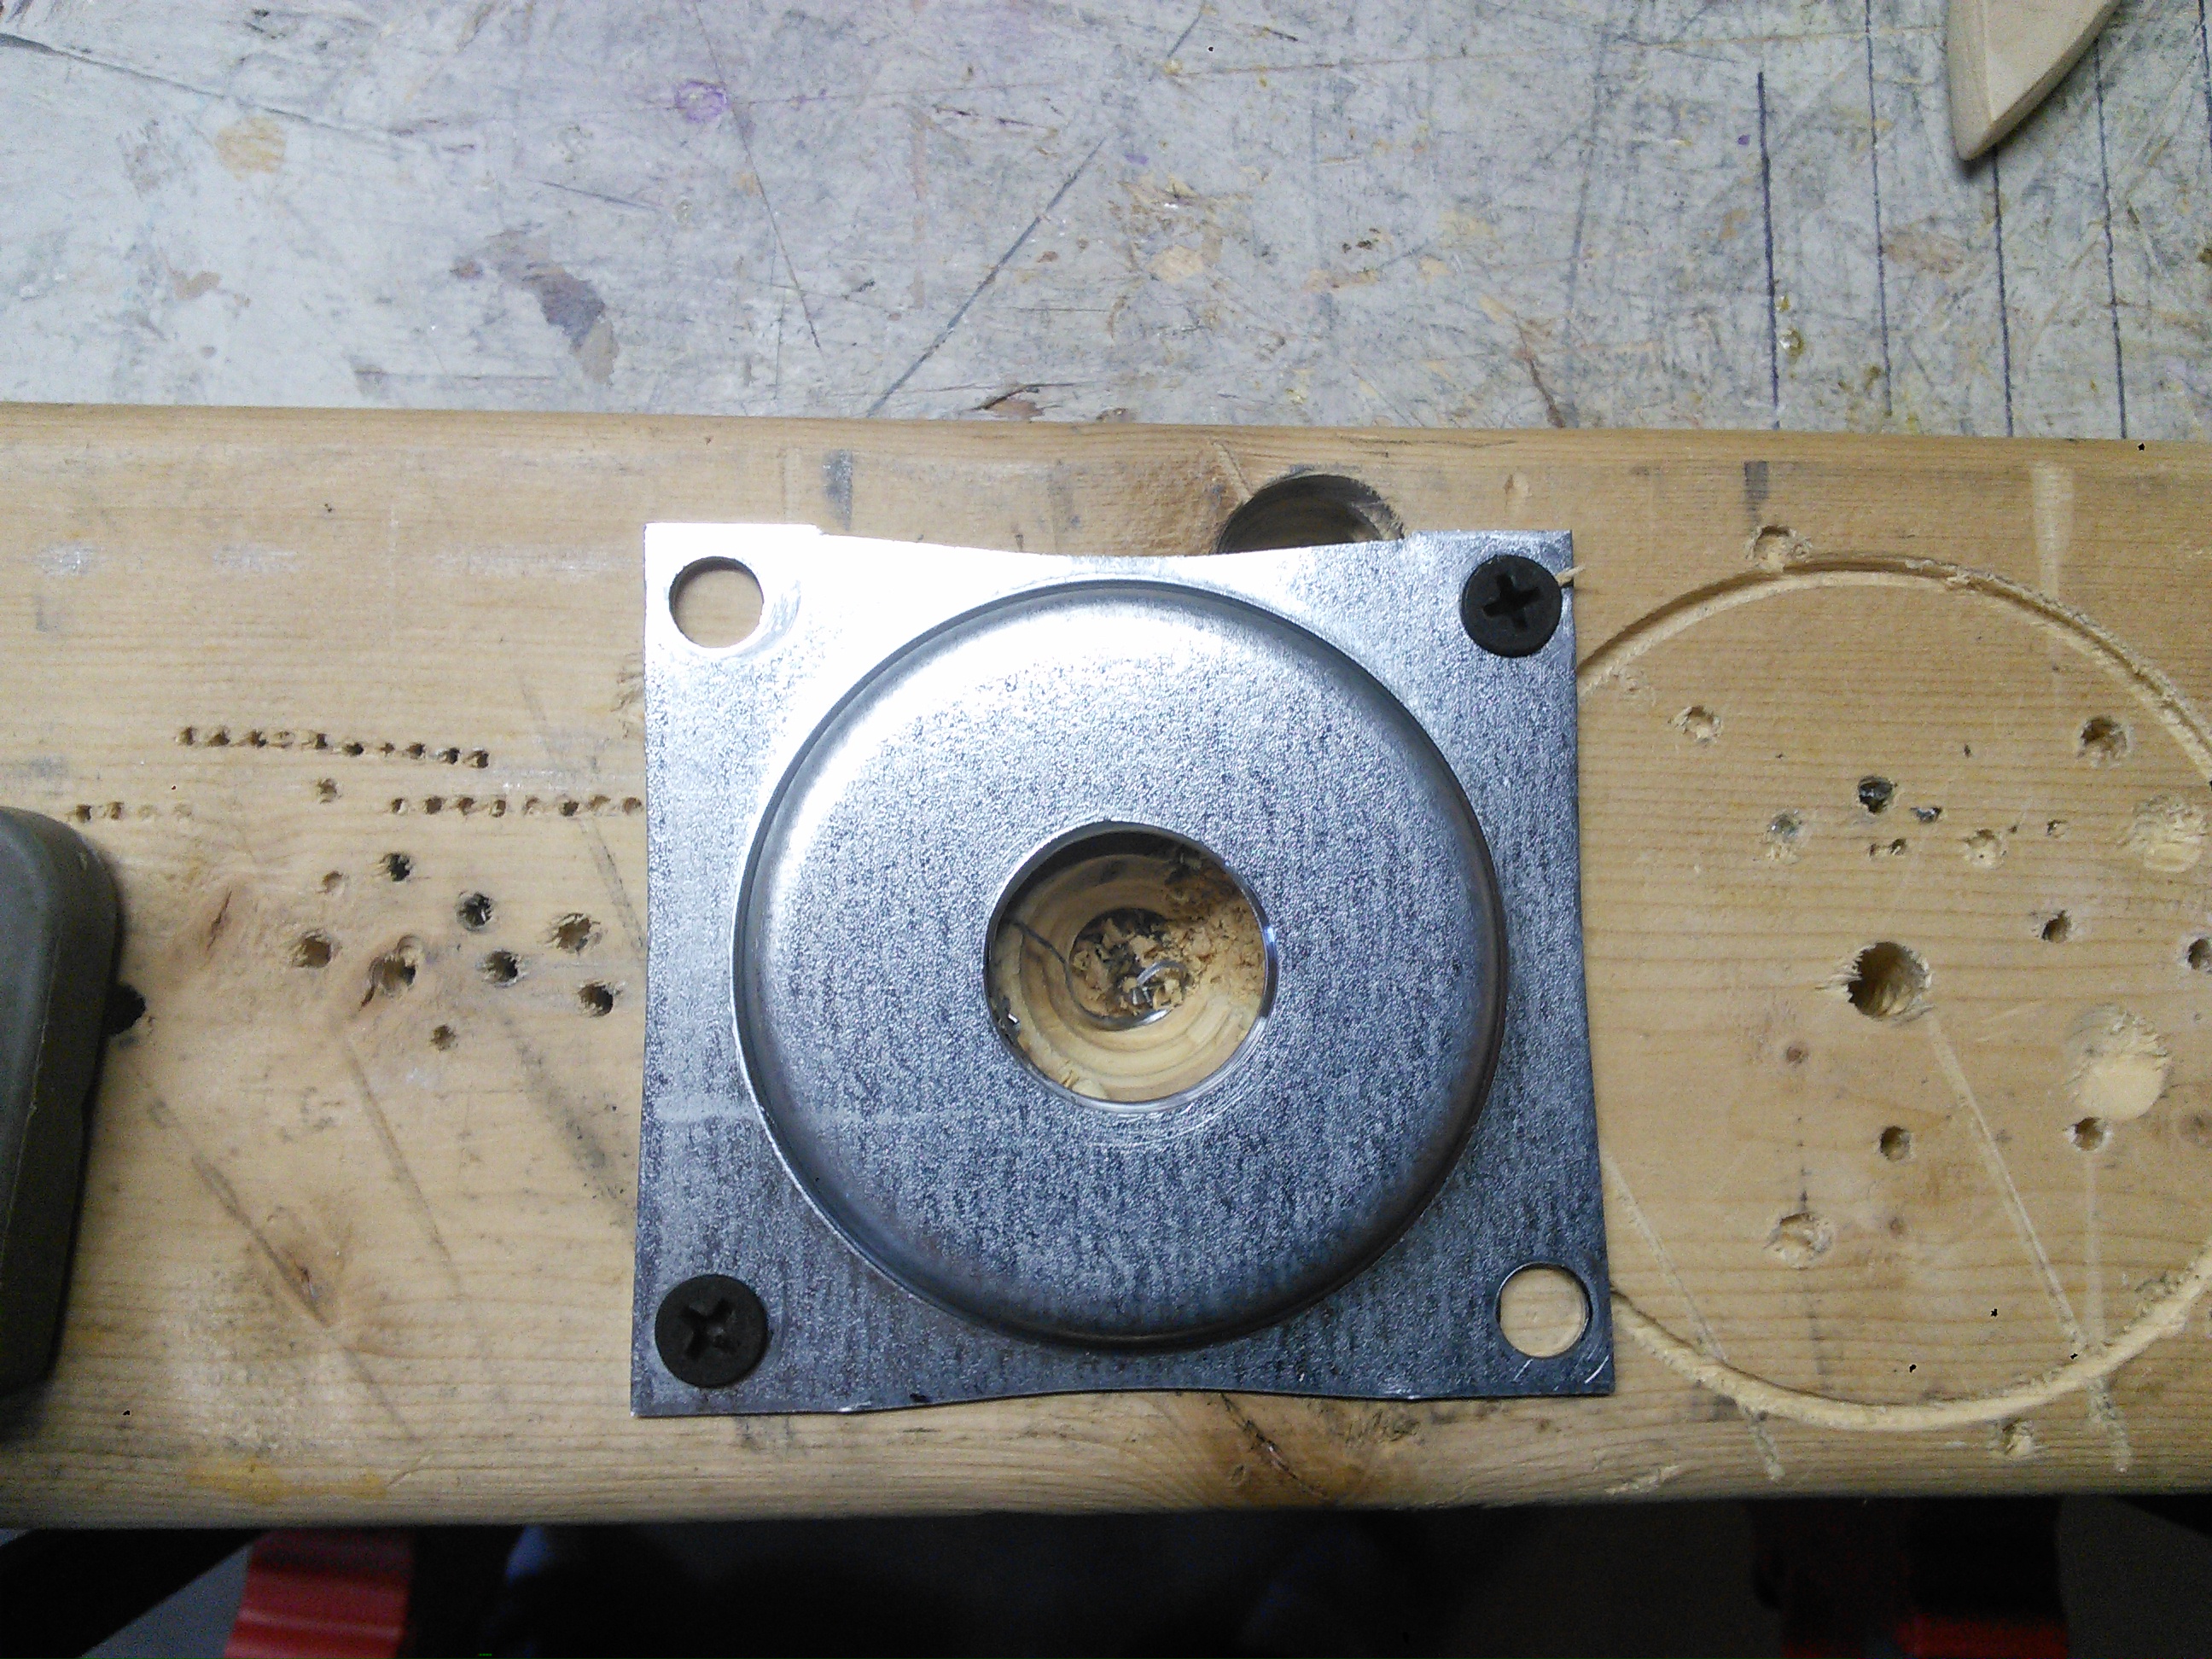
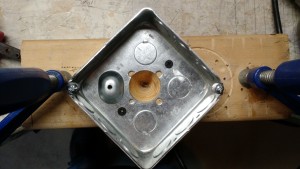
I sometimes have good ideas. Like bolting this piece down to a scrap piece of 2×4 to drill it for a cable connector.
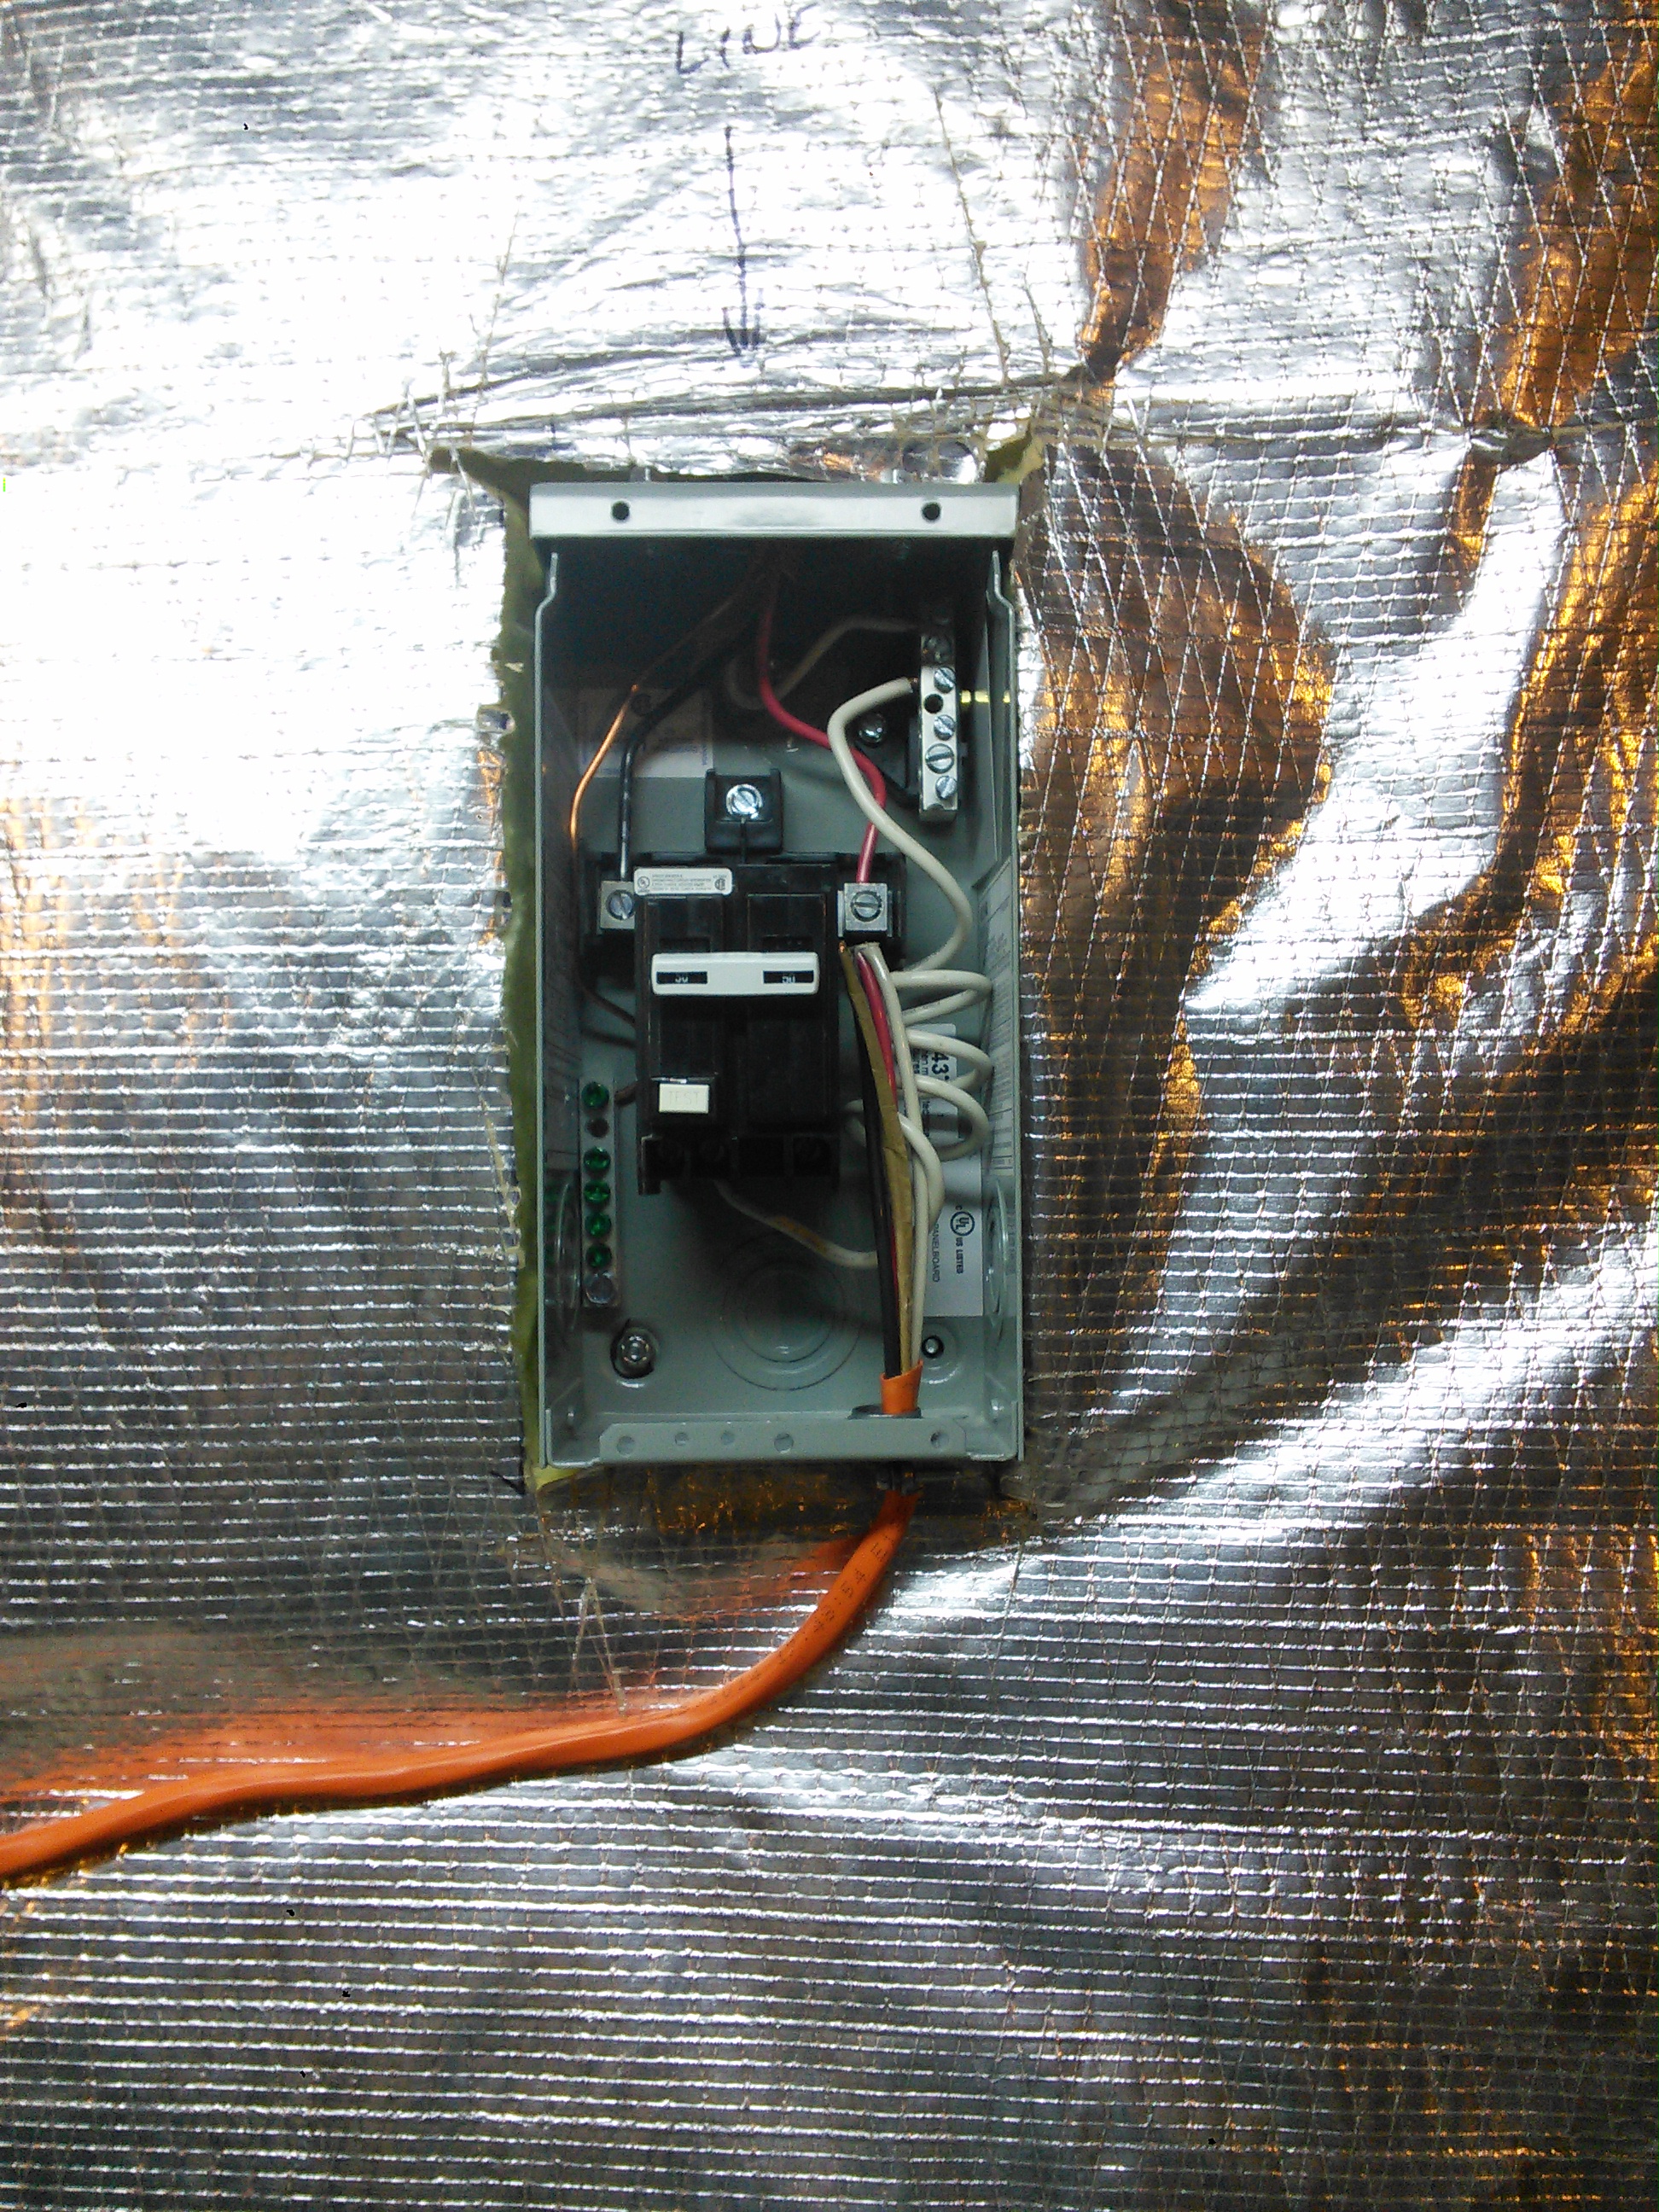
All wired in!
Finish up.
Around this point, I shut off the power and installed the 50-amp breaker.
Drilling the enclosure for the side of the kettle.
Installed heating element. This took three or four tries to get it installed, and ultimately the wrong washer was the one that came with it and the correct one was a red 1 11/16 o-ring I bought from Amazon.
After this, I decided to turn things on. Unfortunately, I was greeted with a shit ton of sparks.
Not good. Lots of sparks

Bottom side of sparks.
After shutting stuff down and looking into WHY I had a little explosion, I found that I must have pulled the cable too tight and sliced into one of the hot wires. When it connected to ground… BOOM.
This is the strain relief that the cable was sliced through. This did come right out, fortunately, as the heat from the arcing was enough to do some damage to the threads. Had it been longer, it could have welded in place.
While a large part of this post was quite boring (seriously, it’s a wire!), I’m really excited about it. Not the wire (even I think the wire’s pretty darn boring), what will happen when I get the rest of the stuff wired in and I can brew beer in the basement.
Cheers!
Brewery Upgrade Phase 1
I did the first phase of upgrades. This wasn’t a whole lot of work, but after spending quite some time at the hardware store, it was enough to cap off the rest of a day.
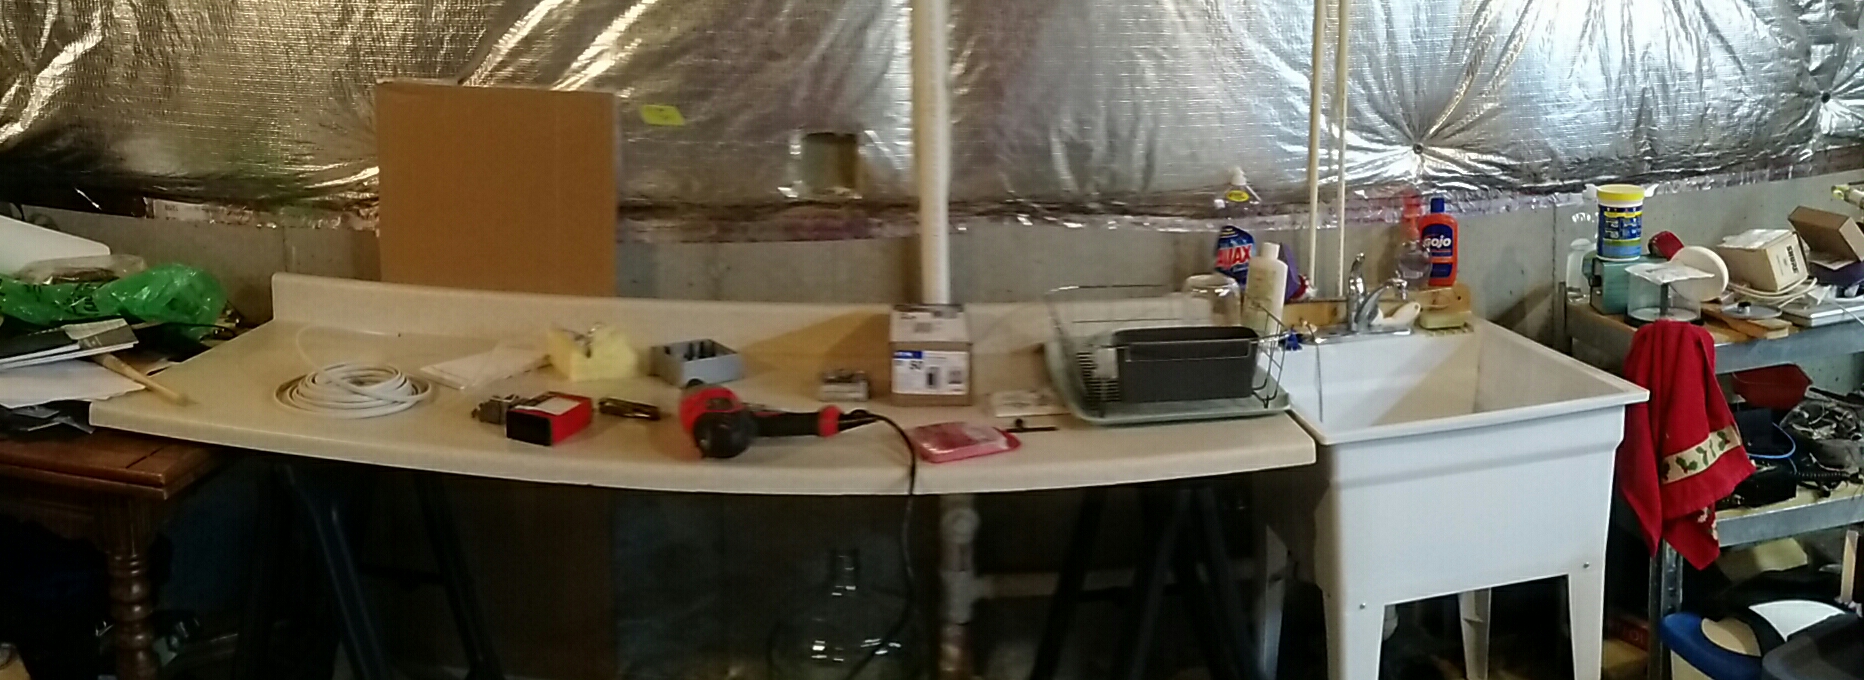
Semi-before
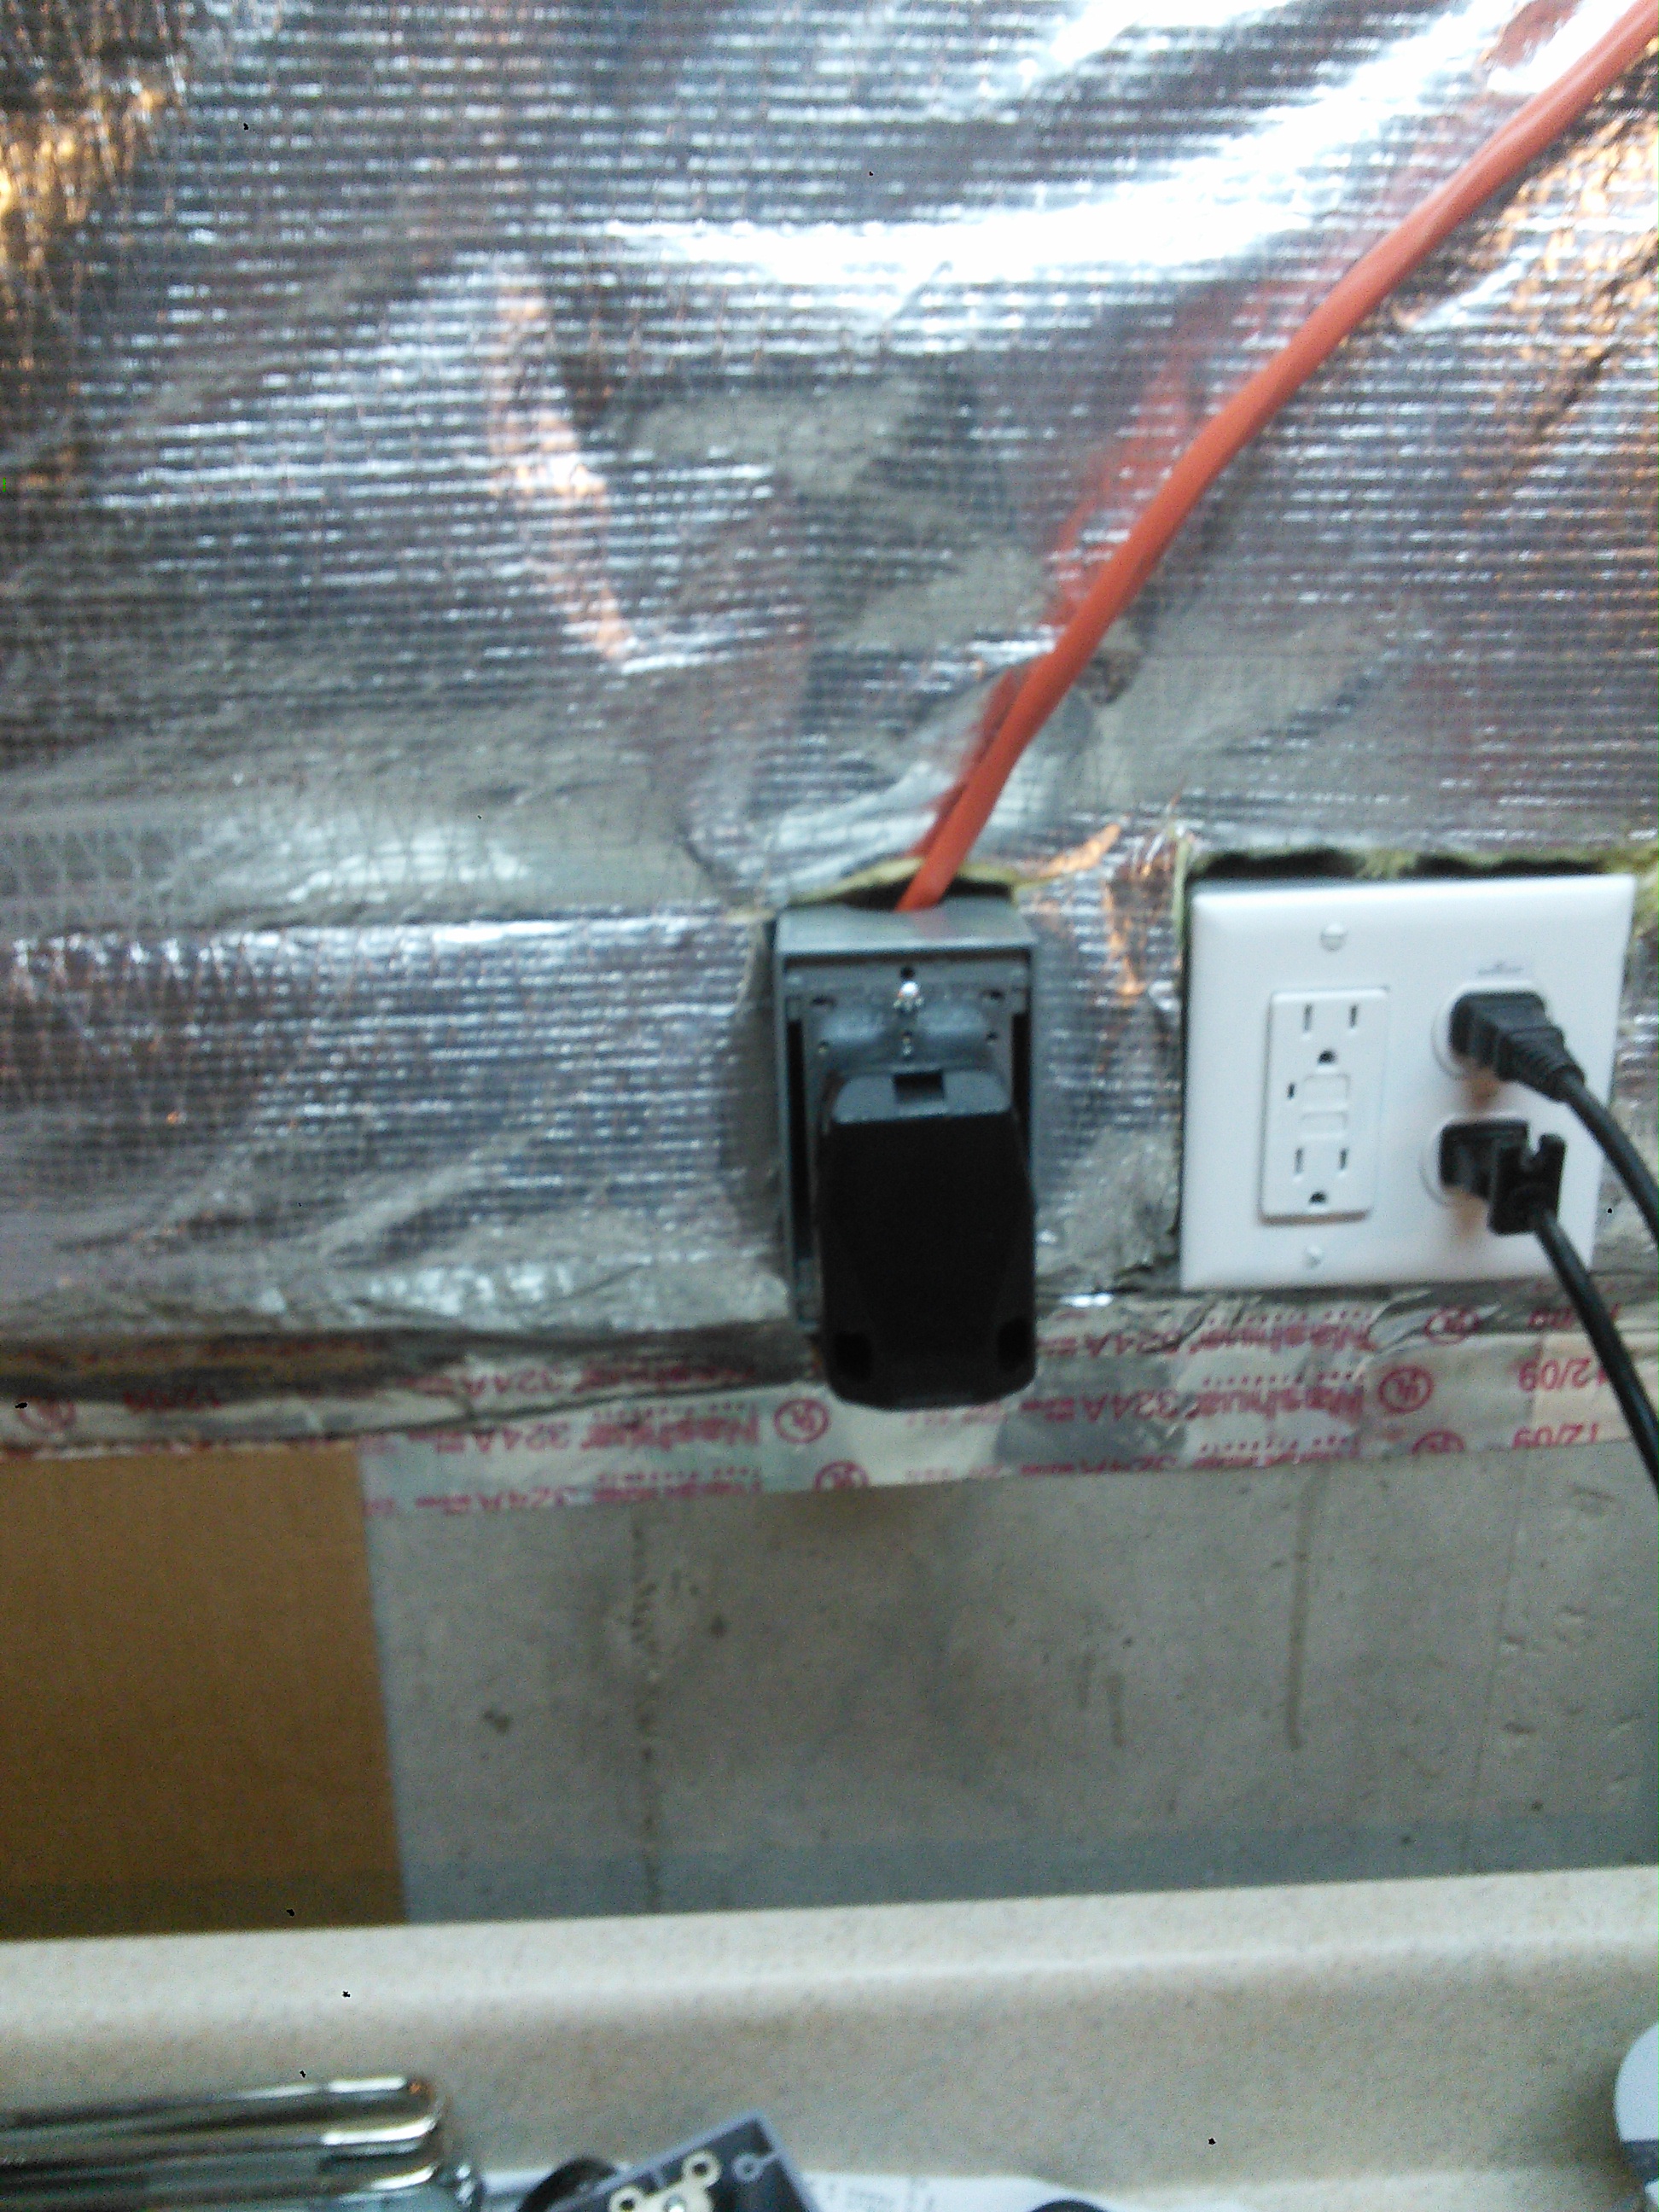
So the first part was an outlet somewhere near the brewing area. I’ve never actually needed an outlet for brewing, but the counter sometimes serves other purposes (my food dehydrator, for example), so having some outlet space is useful. Plus, if I want to plug in a radio, my phone, or something like that, I don’t want to run an extension cord across the basement. Safety first and all that!
DISCLAIMER: I am not an electrician. What I’m documenting here is a result of research mixed with a little bit of theoretical knowledge and some experience. This is not a guide or how-to on how to do this.
So extending the outlet isn’t difficult. Black to brass, silver to silver, and bare to bare. Running it is a pain, but hooking up wires is easy. Testing is easy.

Test
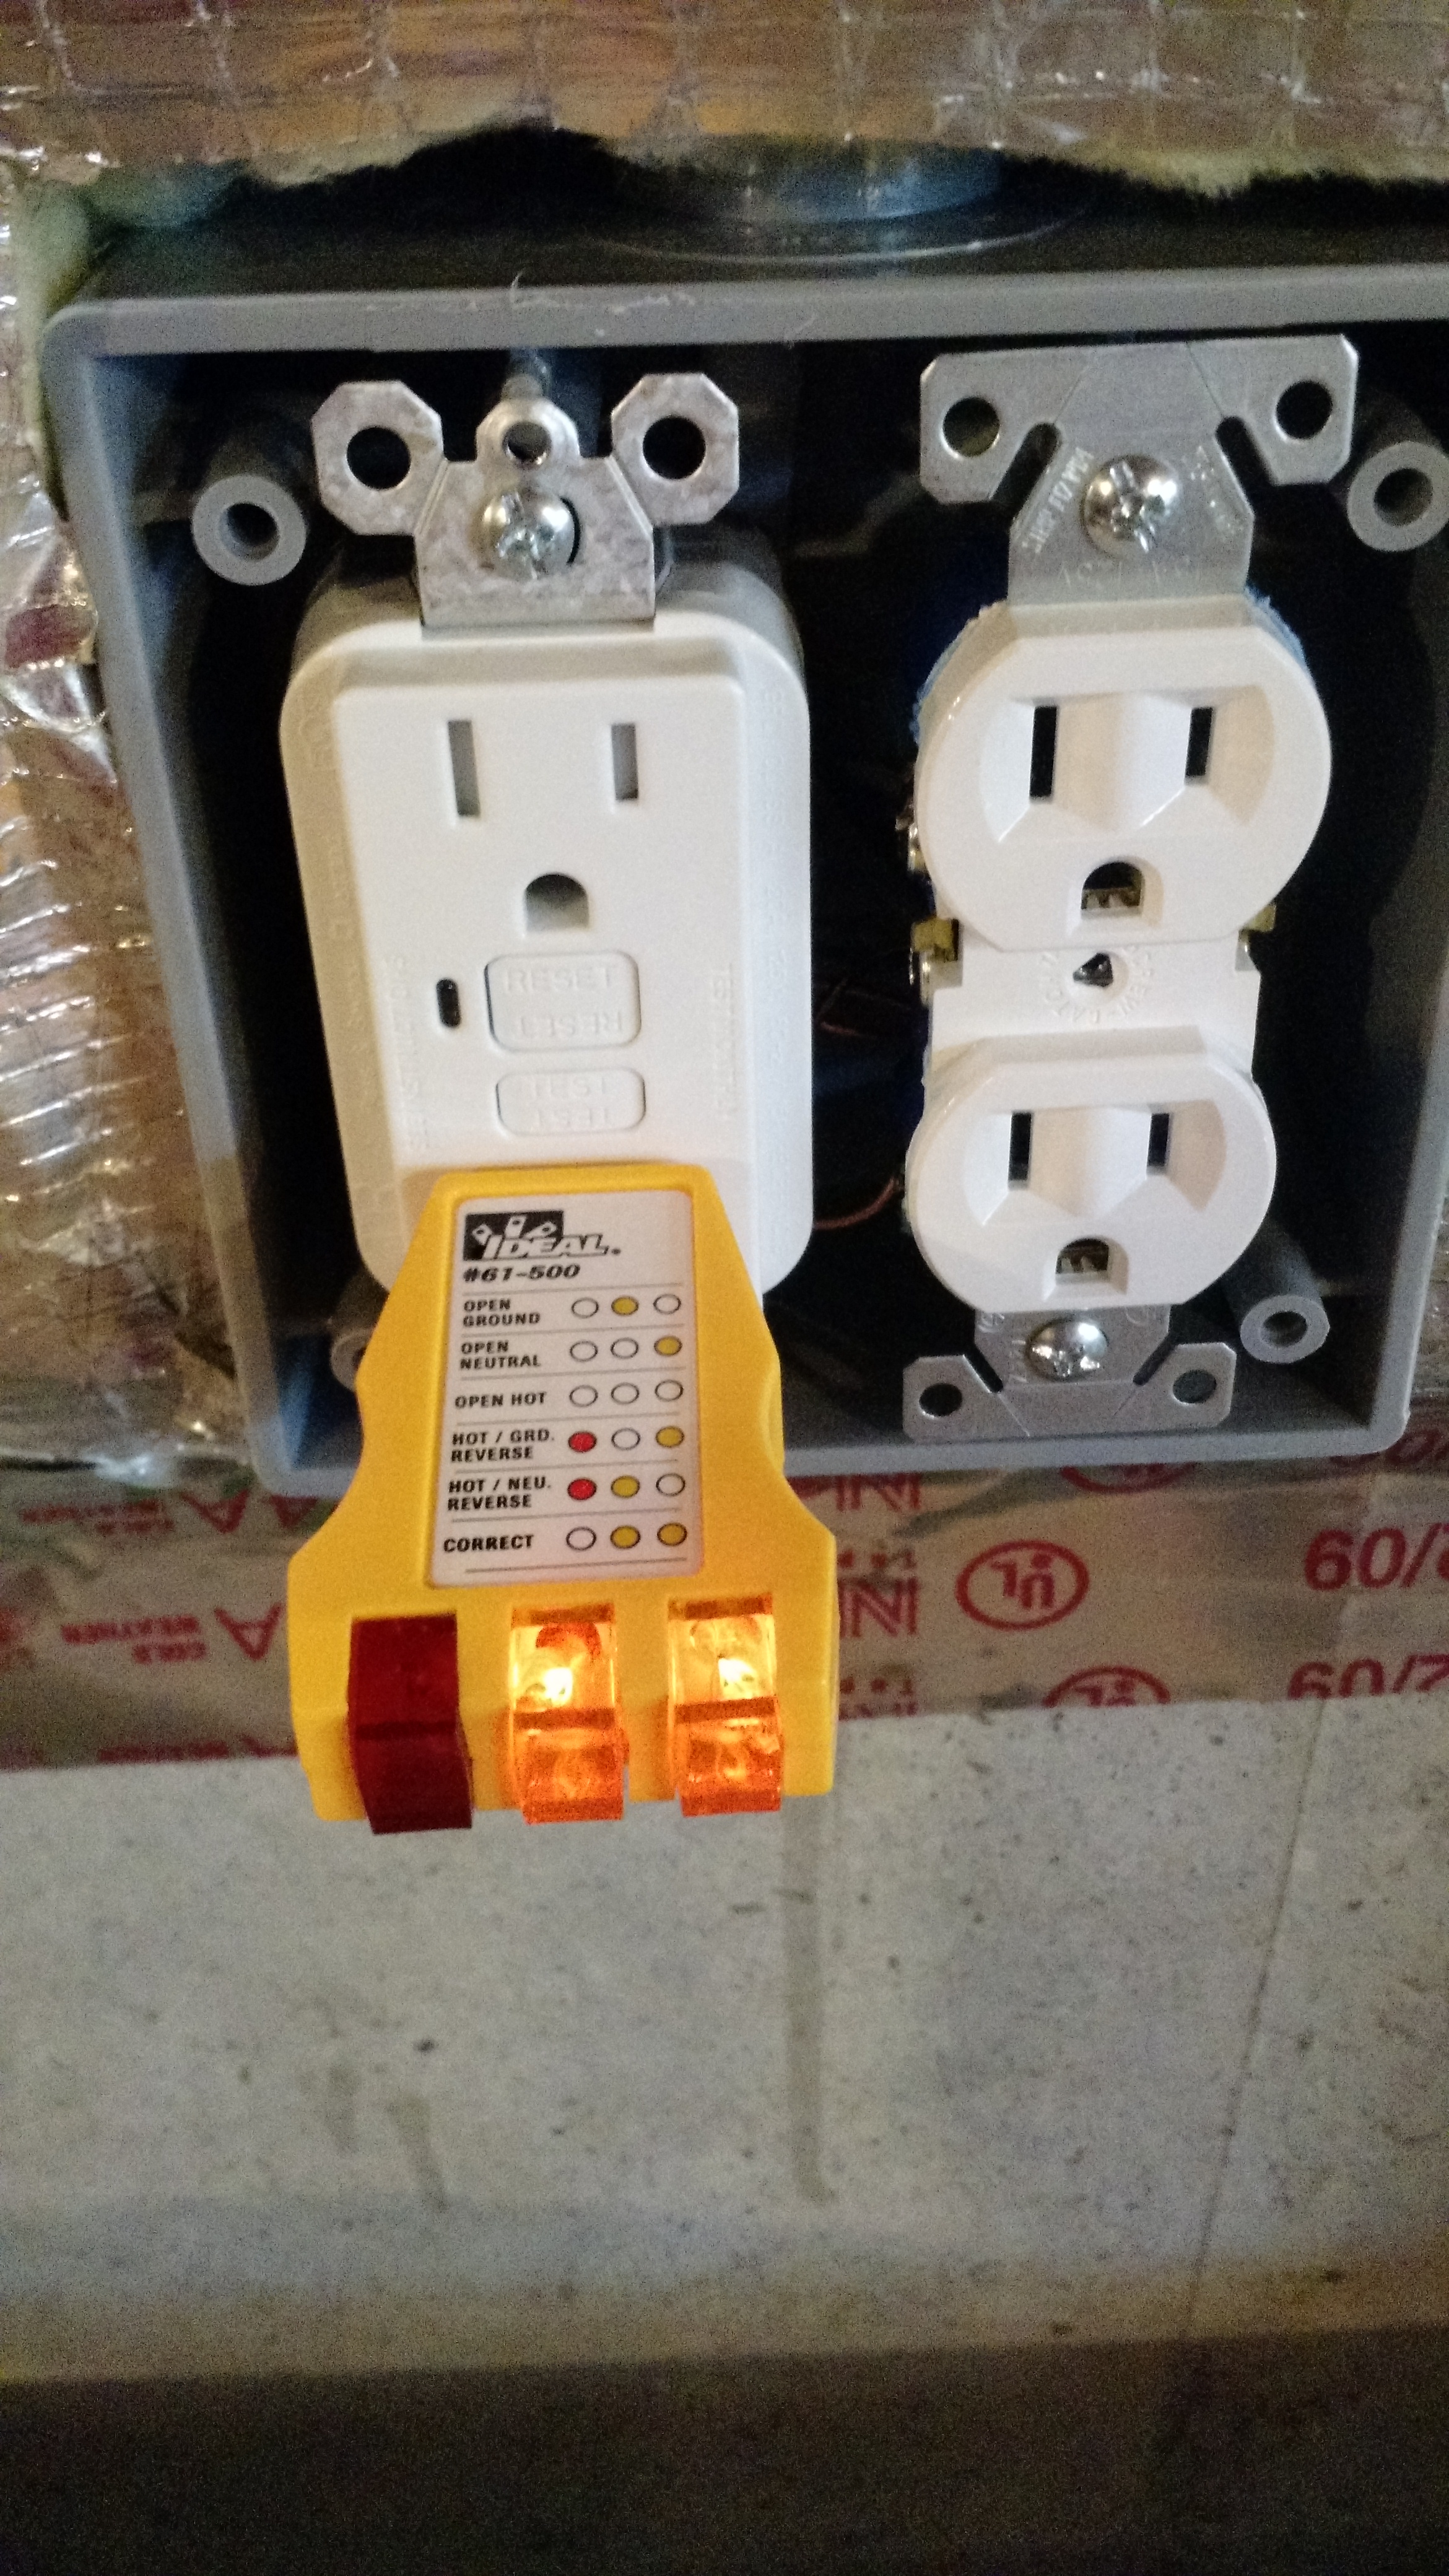
Every

Outlet
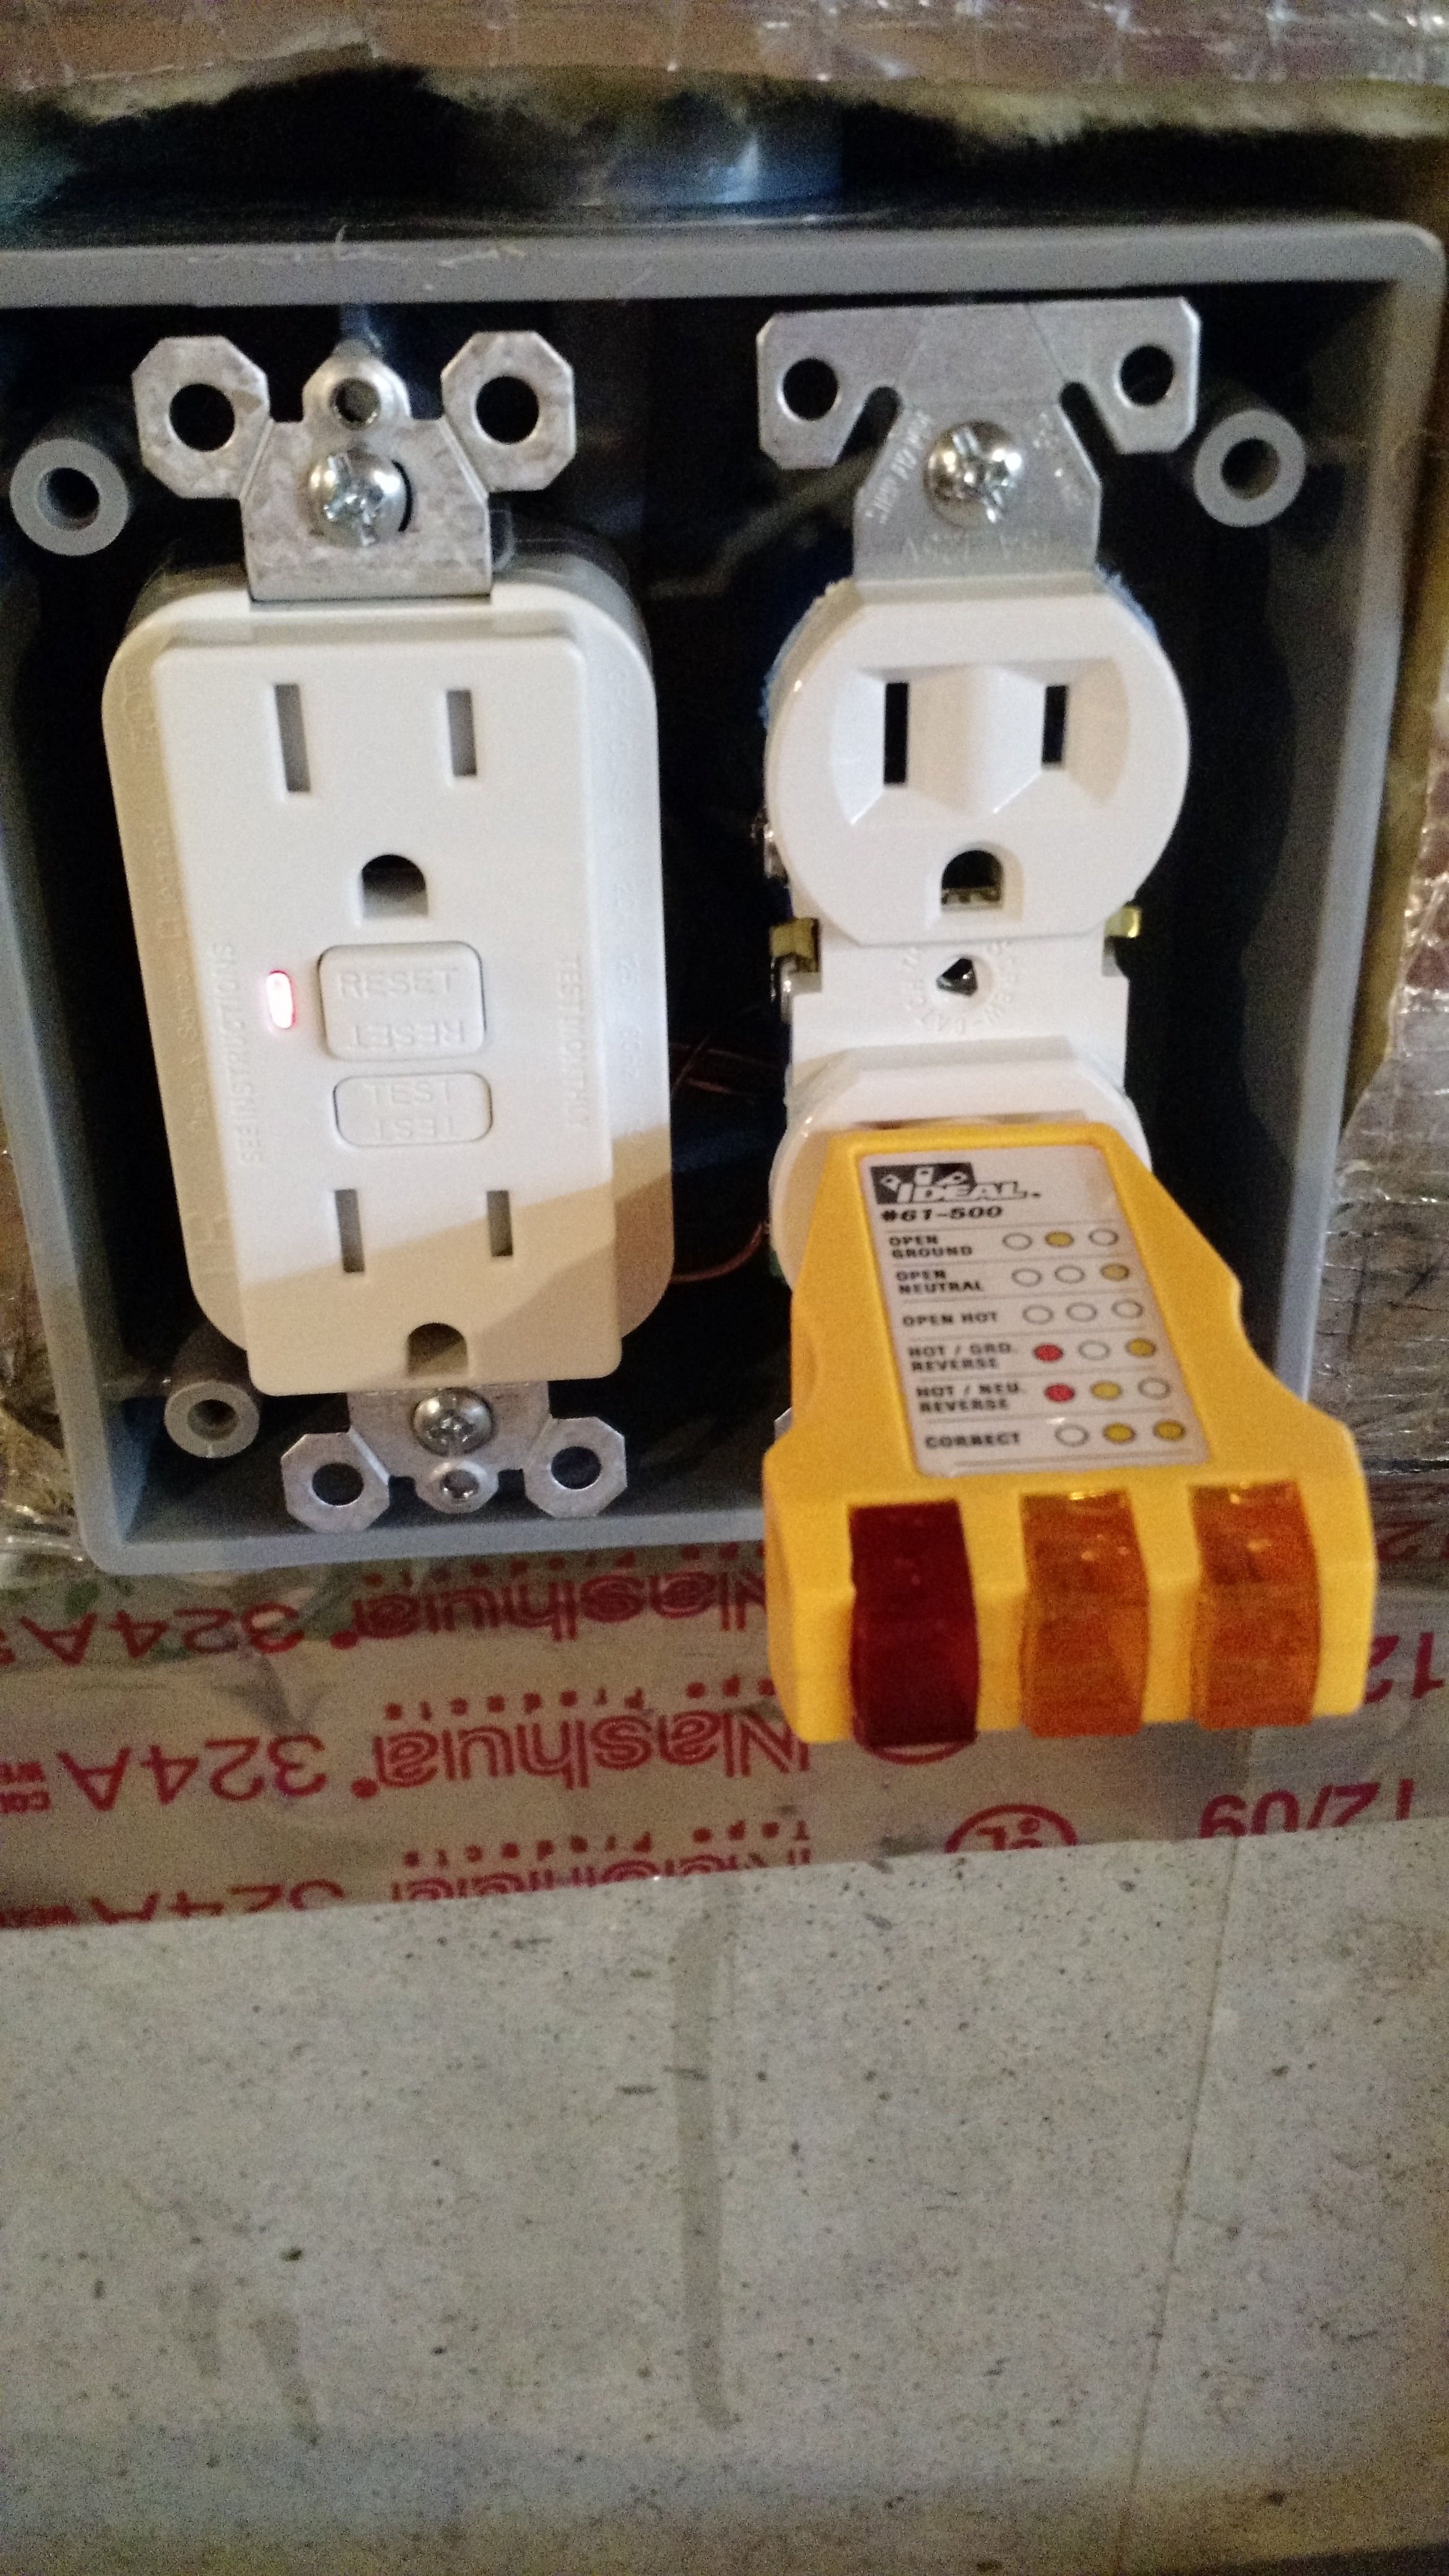
Sometimes twice (note the GFCI light is on, I pressed the test button and wanted to ensure that the other outlet was actually protected)
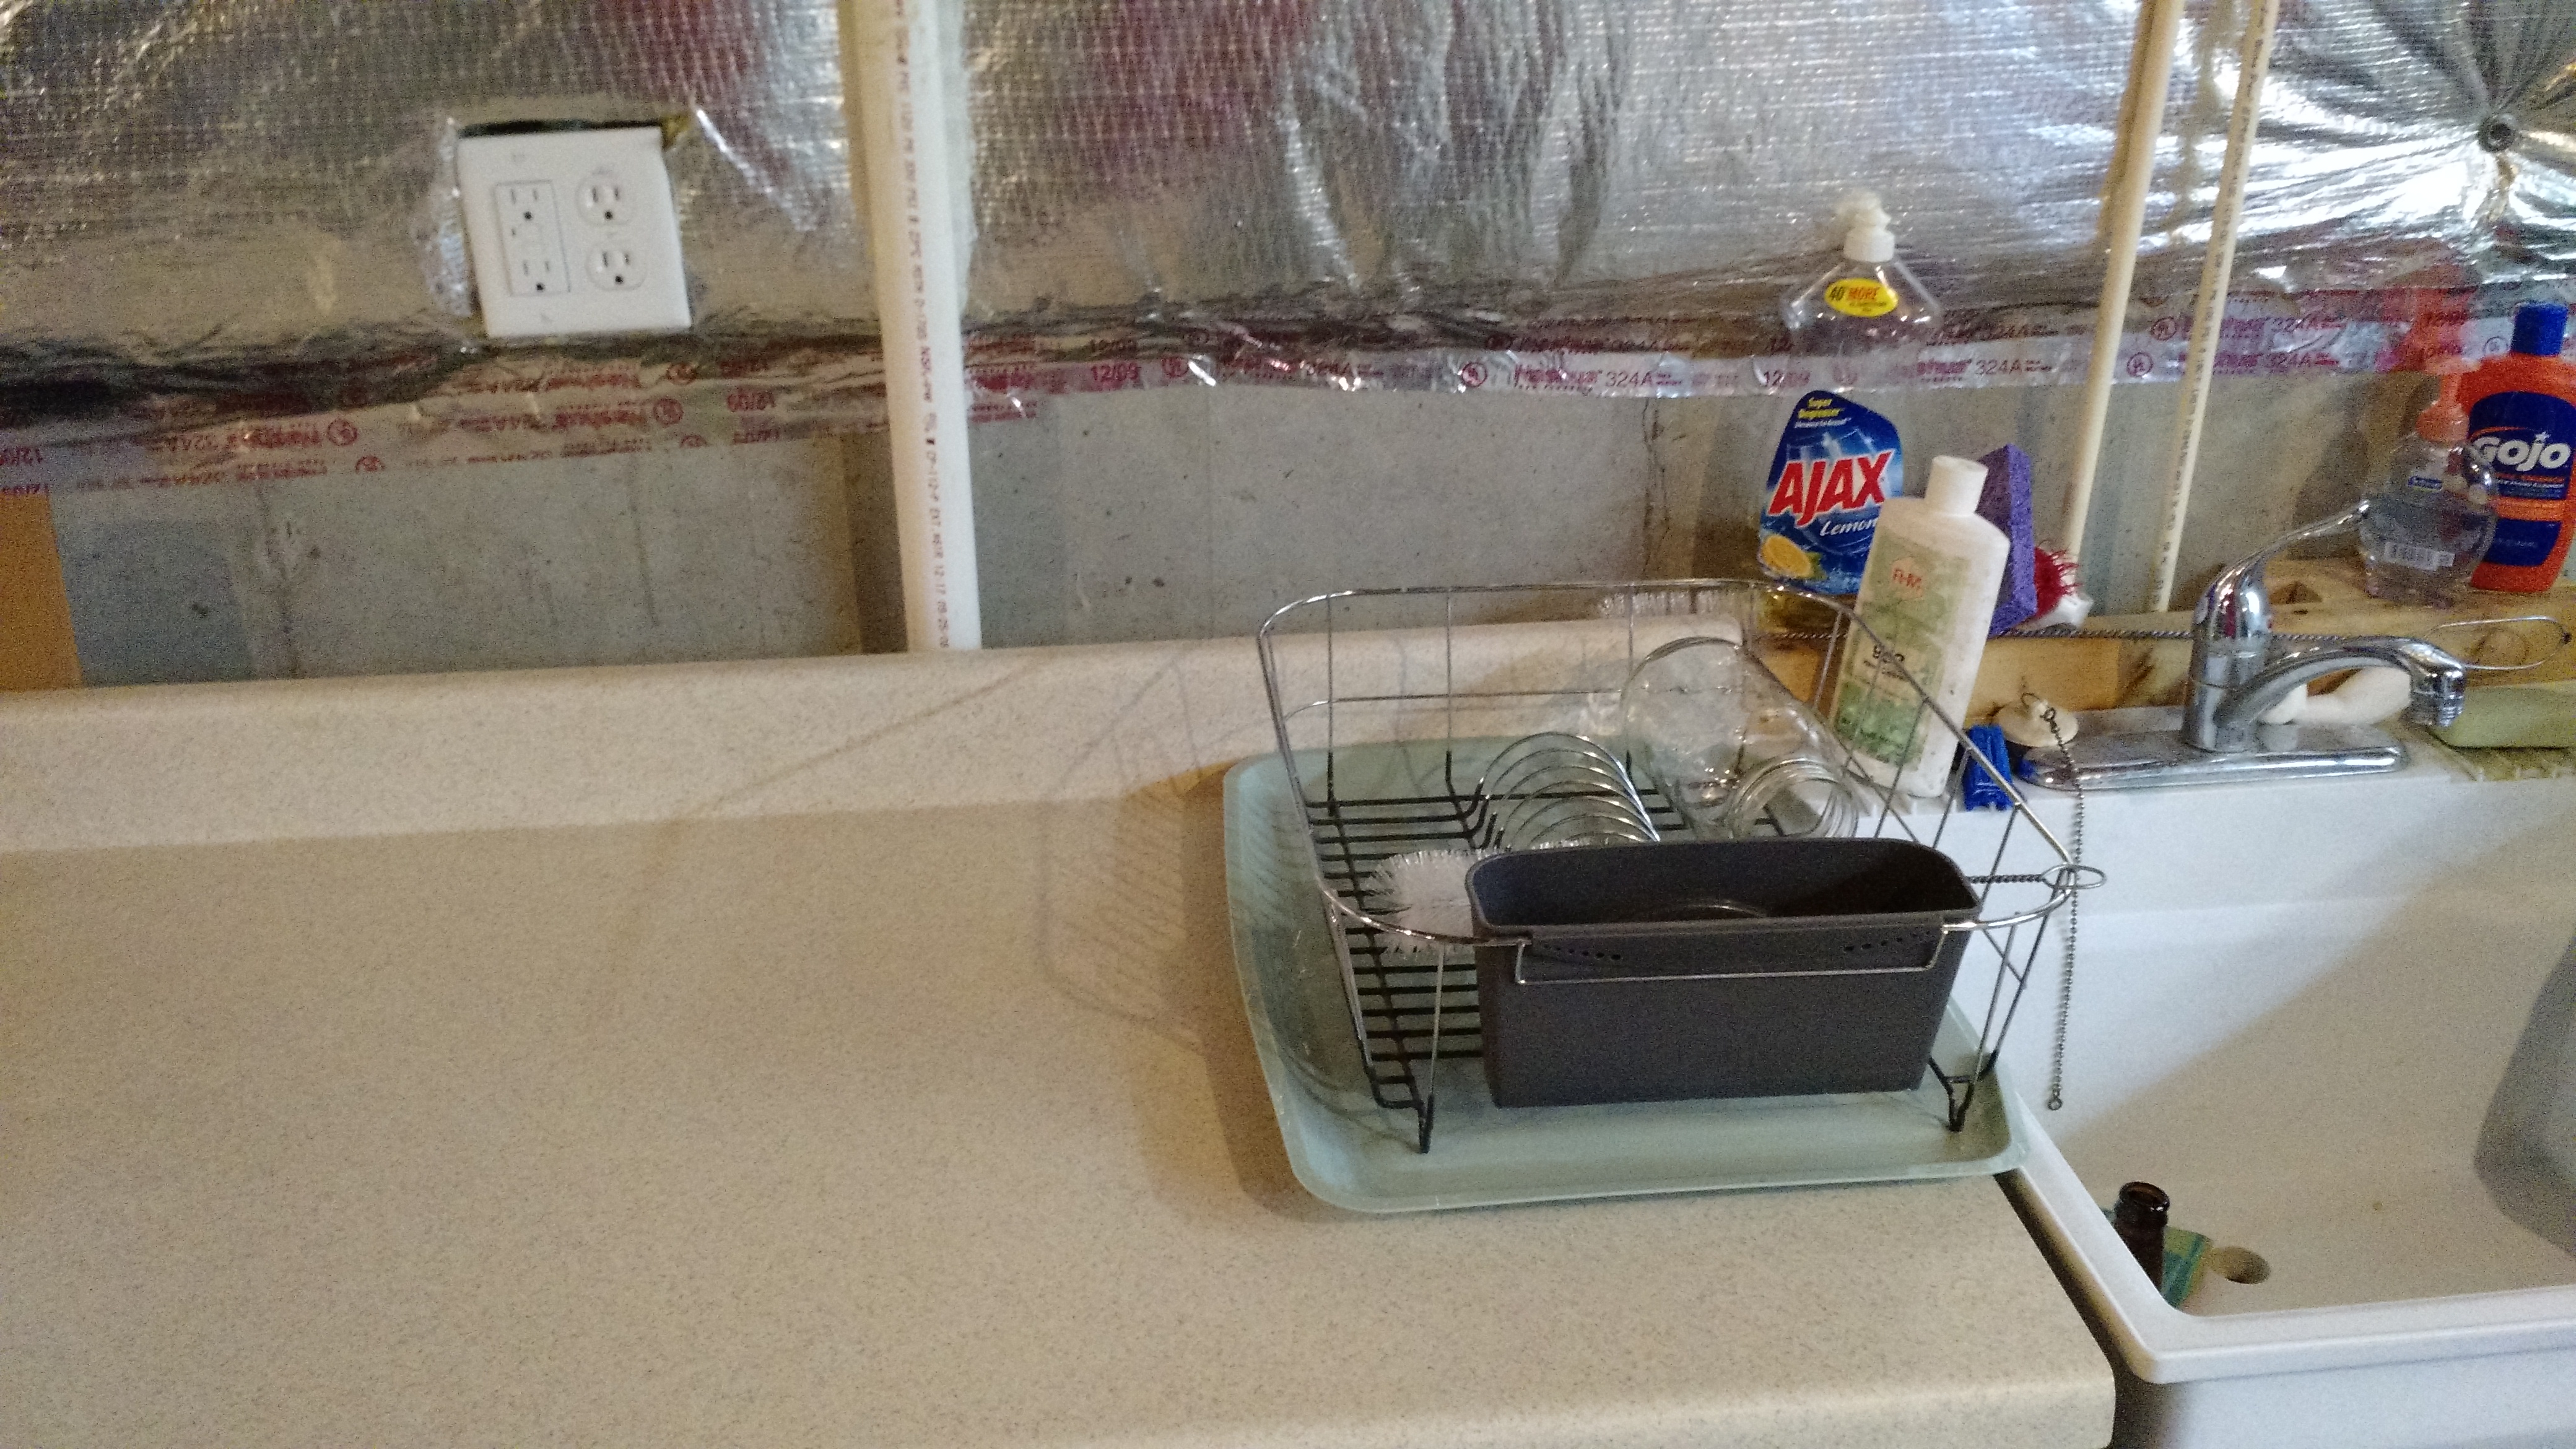
Finished outlet
That was the first part of the improvements. The second part was another outlet, but this one was for a light. I tied it into a light socket nearby.
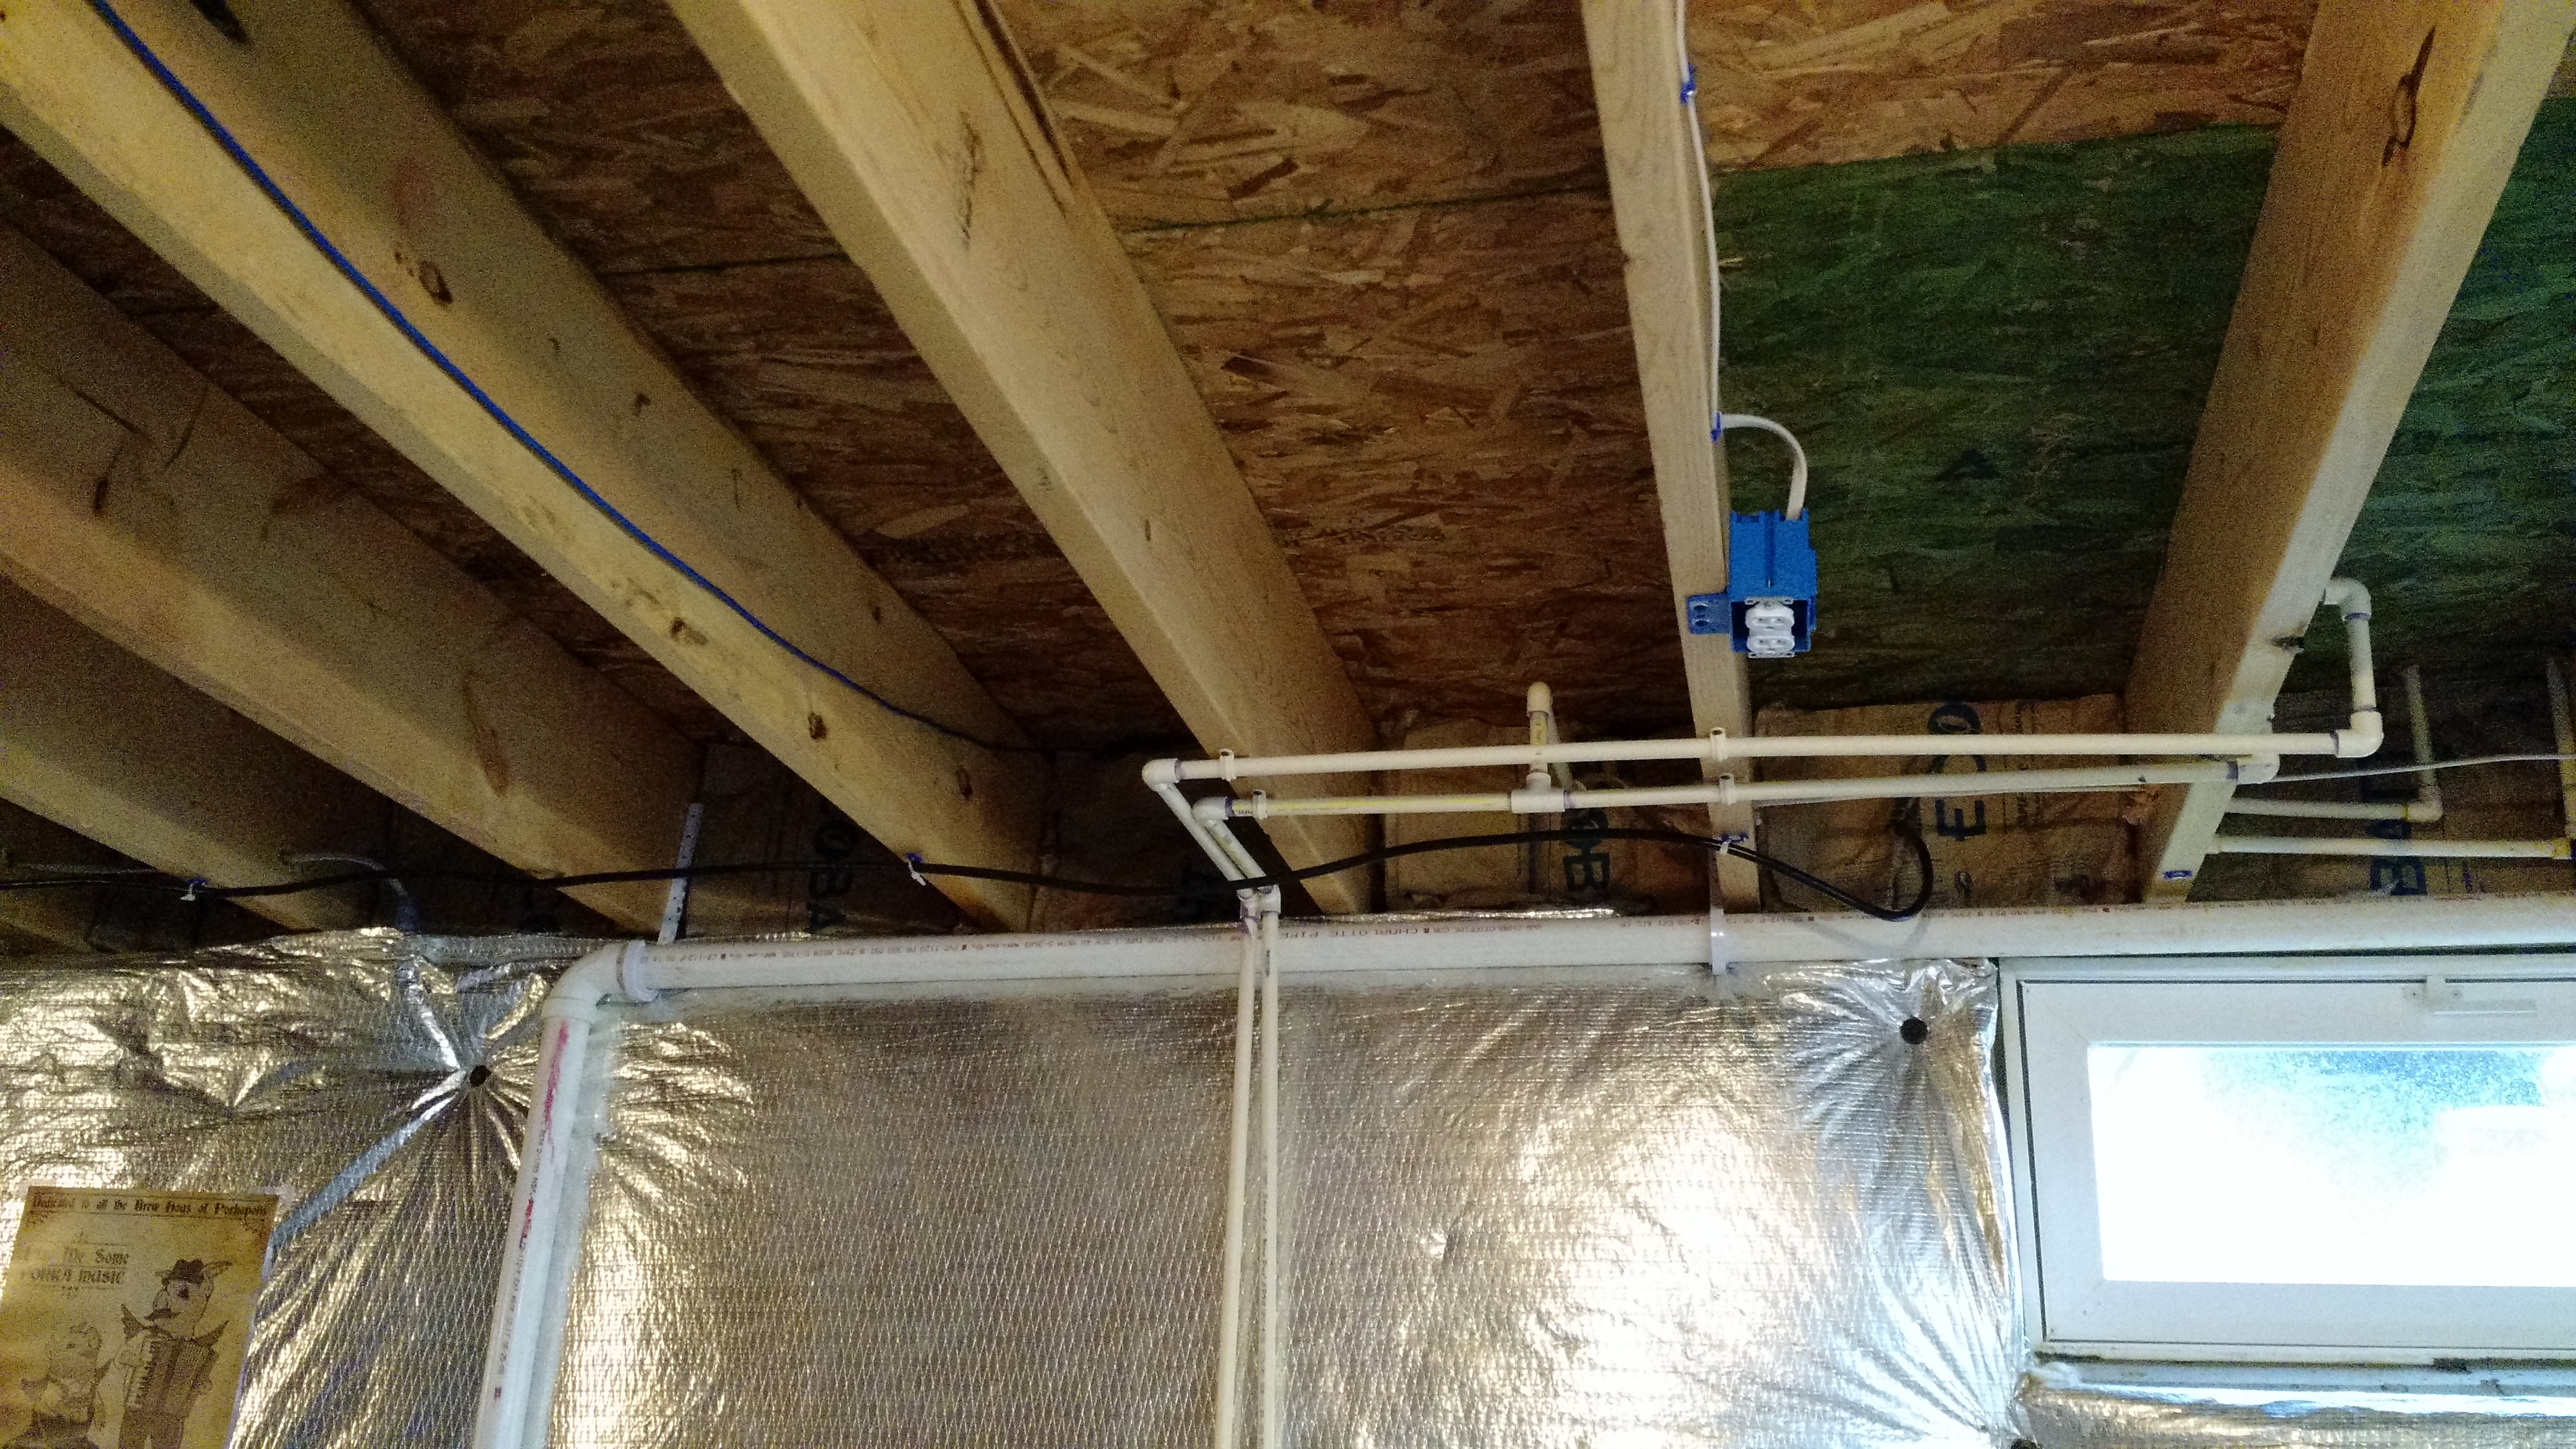
The outlet.
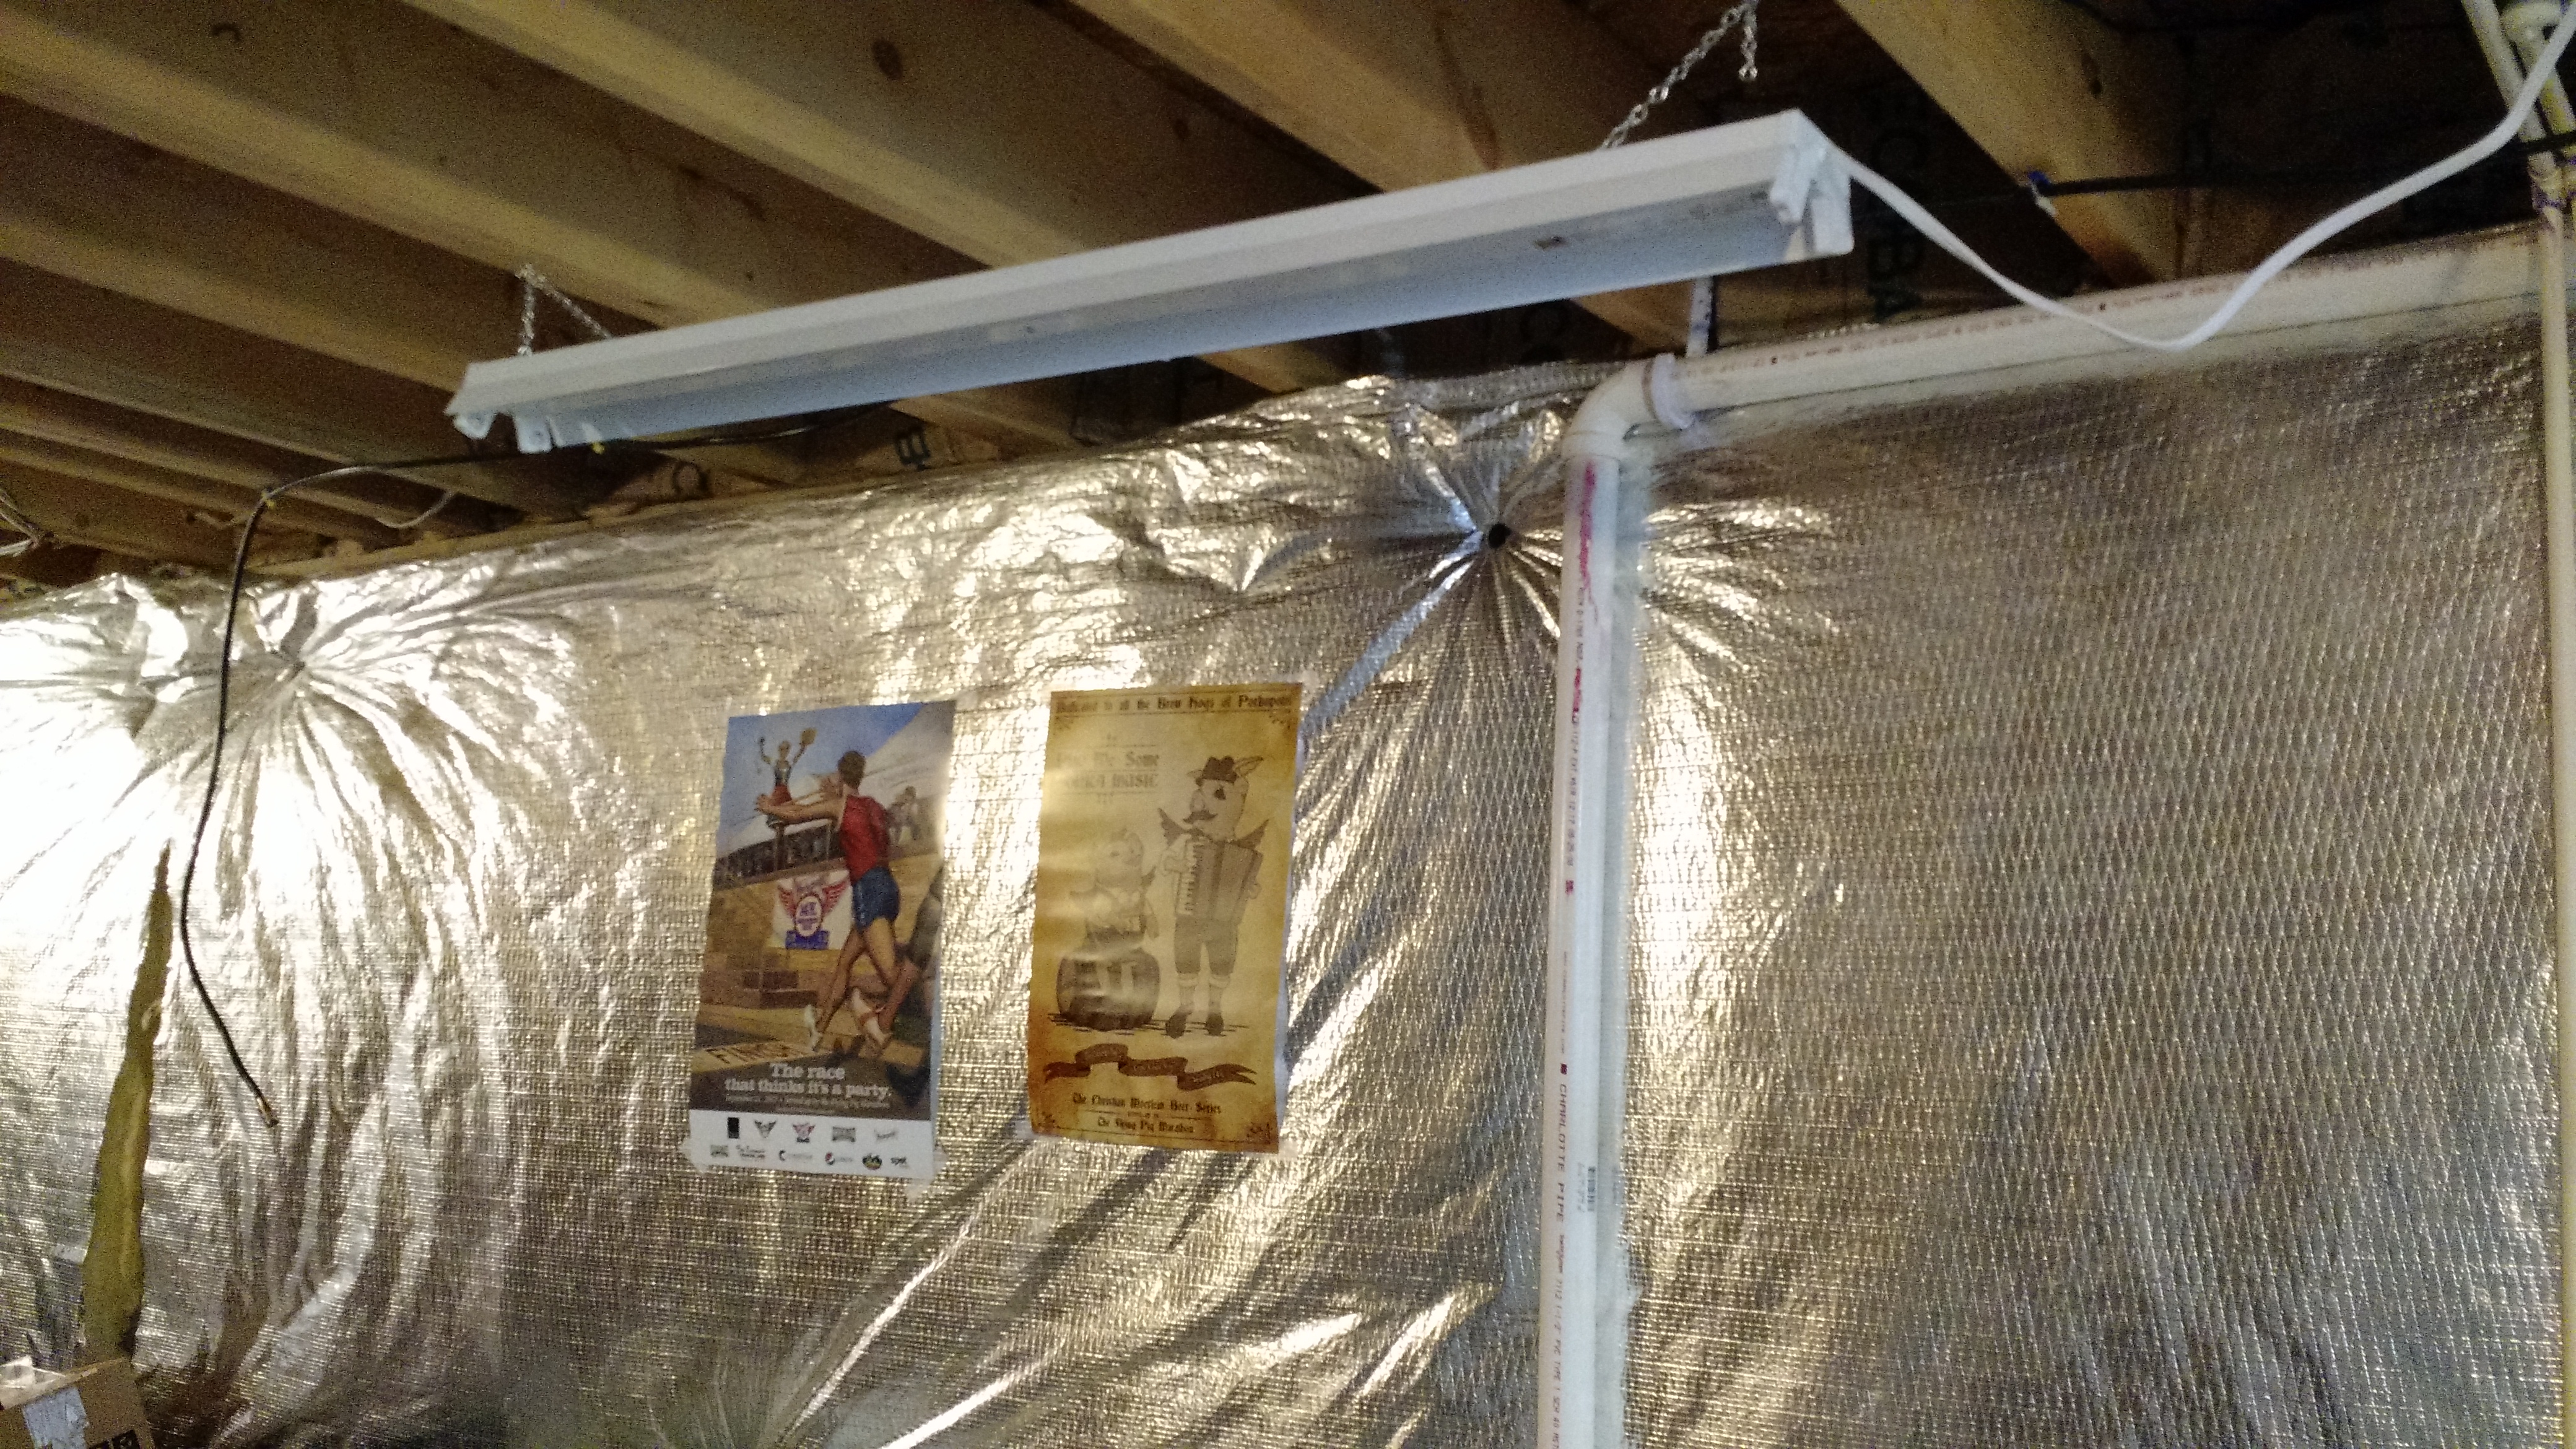
The finished light, sans bulbs (they didn’t come with the kit). This will operate with the switch to turn on all the basement lights.
So that’s phase 1.
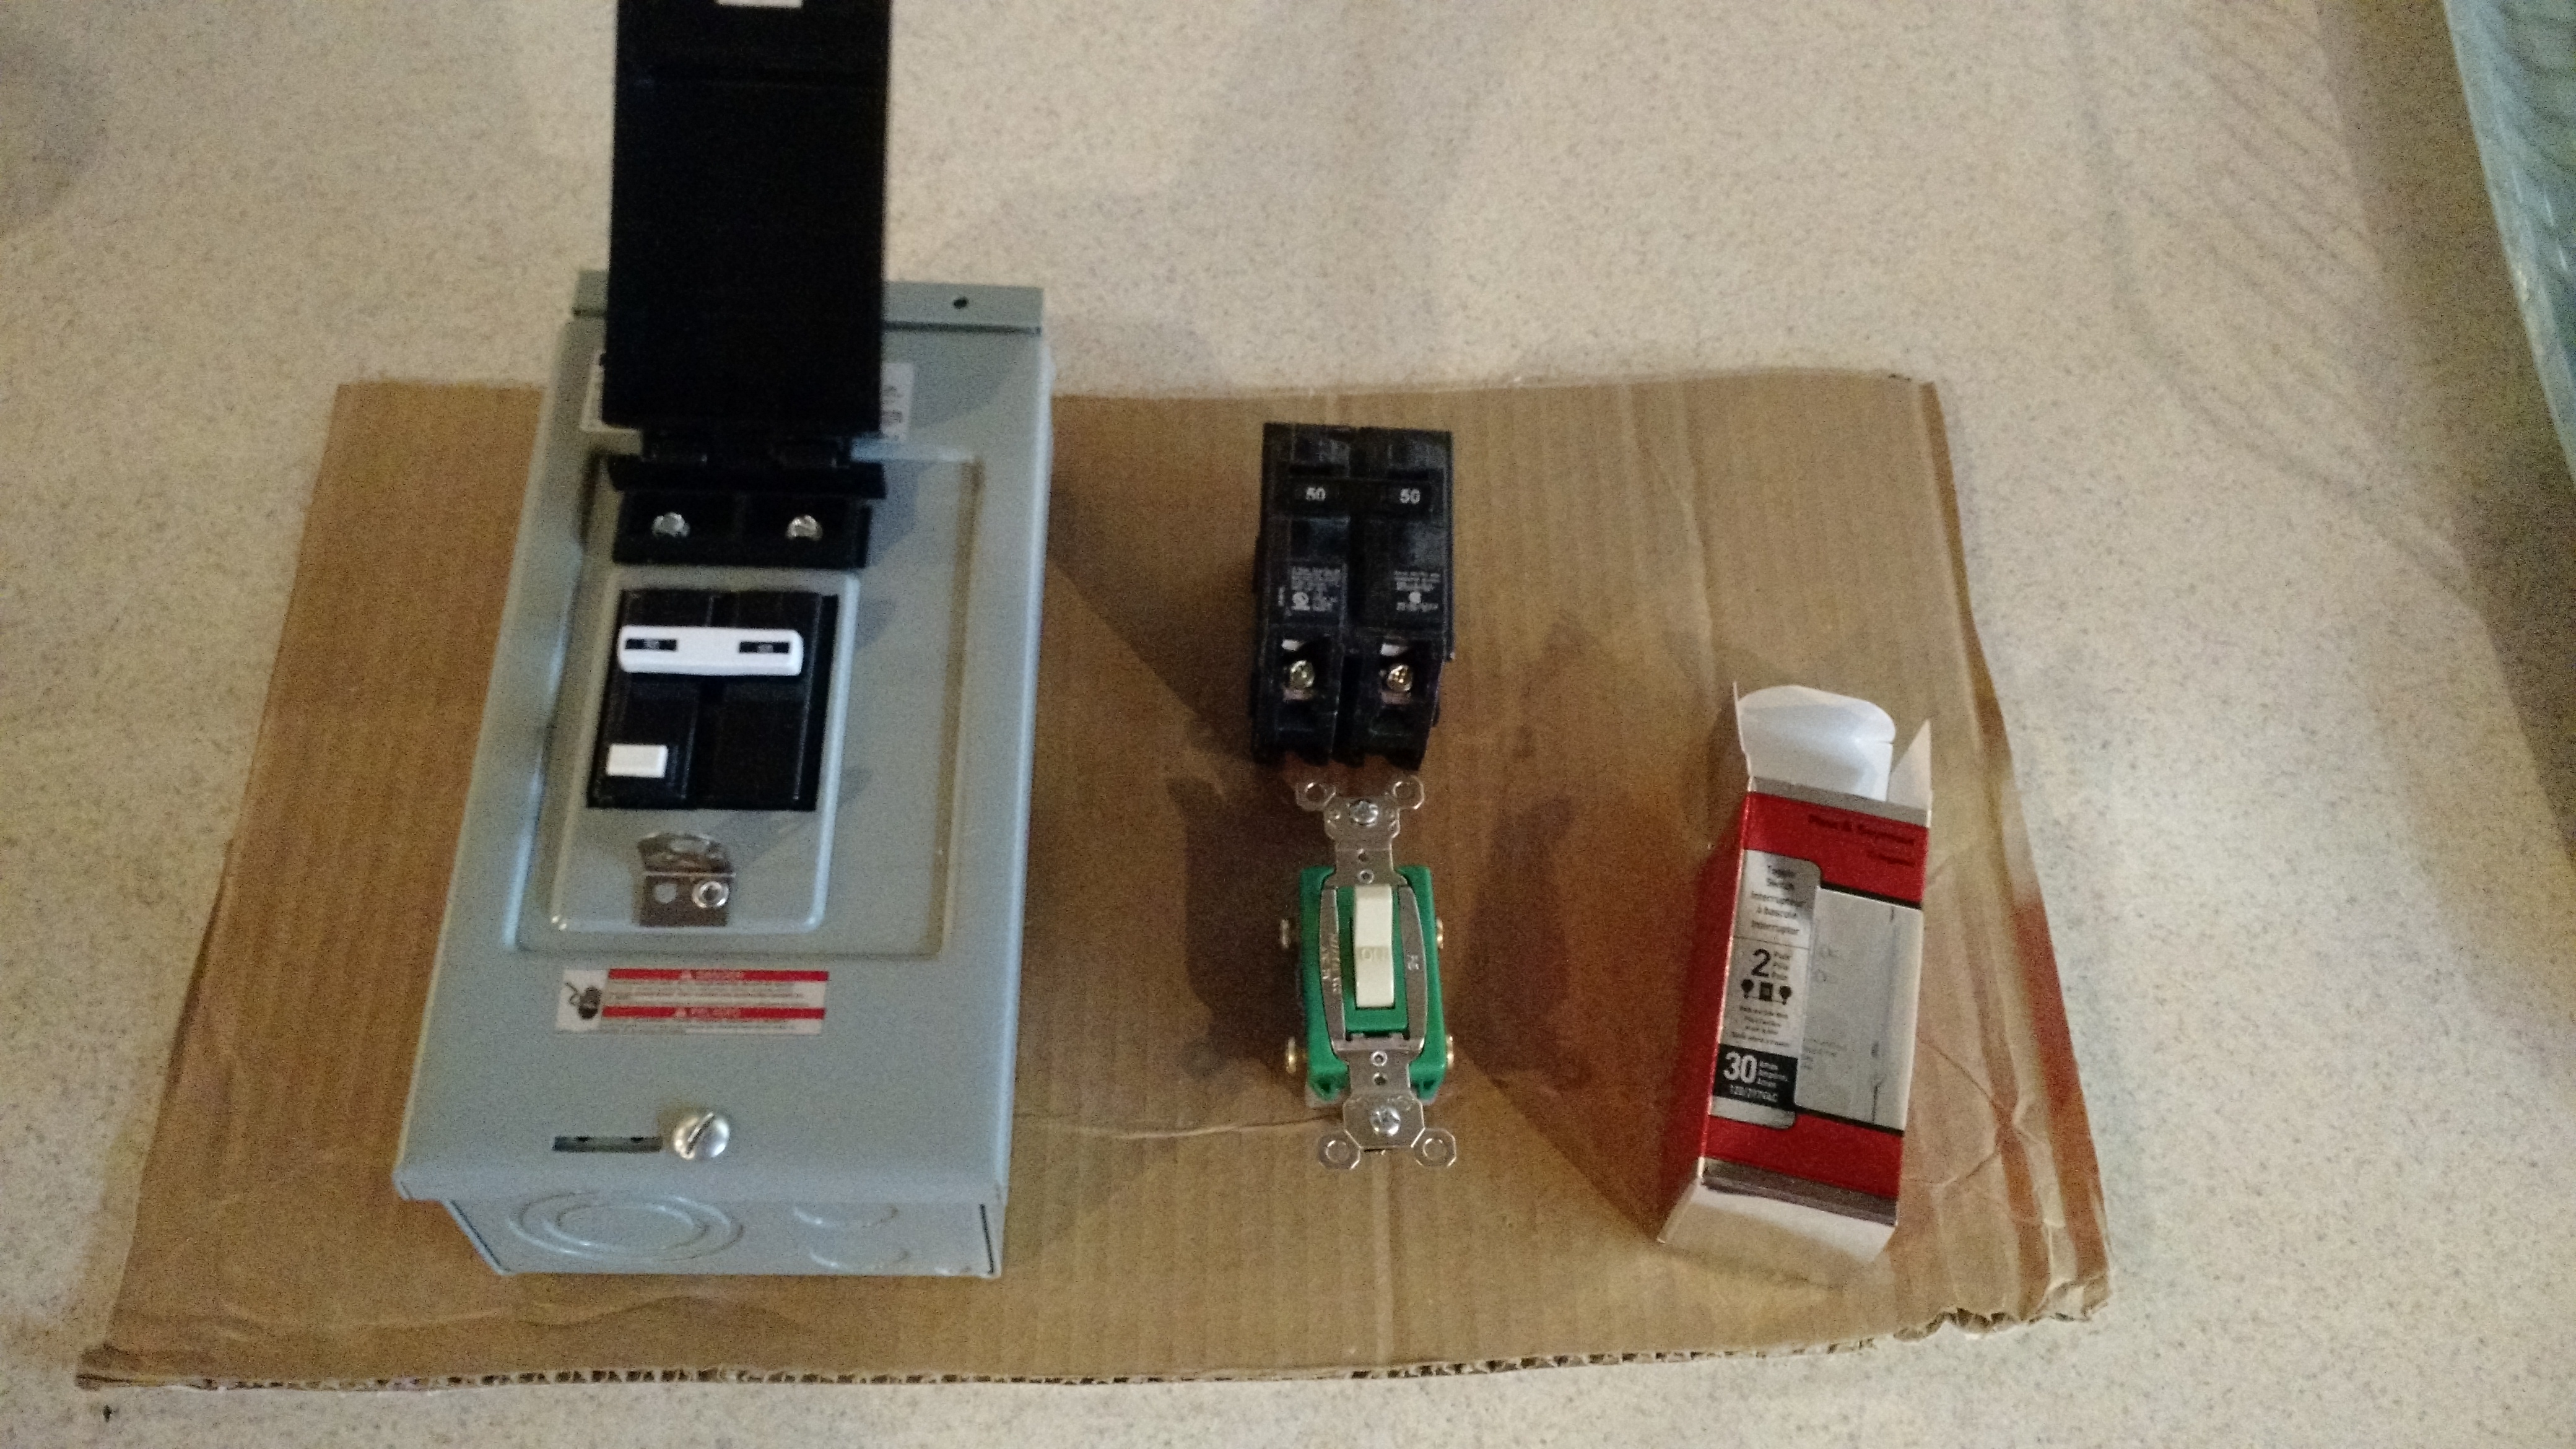
Components of Phase 2
Stay tuned for phase 2
Cheers!
New Brewing Setup Plan
After the last beast of a brew day, I want to fix my setup to make the next brew (soon, hopefully) easier. I don’t need all the fancy-pants pumps and stuff, but I do need a good way to heat water quickly and safely. Convenience is pretty important to me as well, so I’m not going to brew in my garage (no sink and poor electrical and poor lighting).
So I drew (literally) my plan.
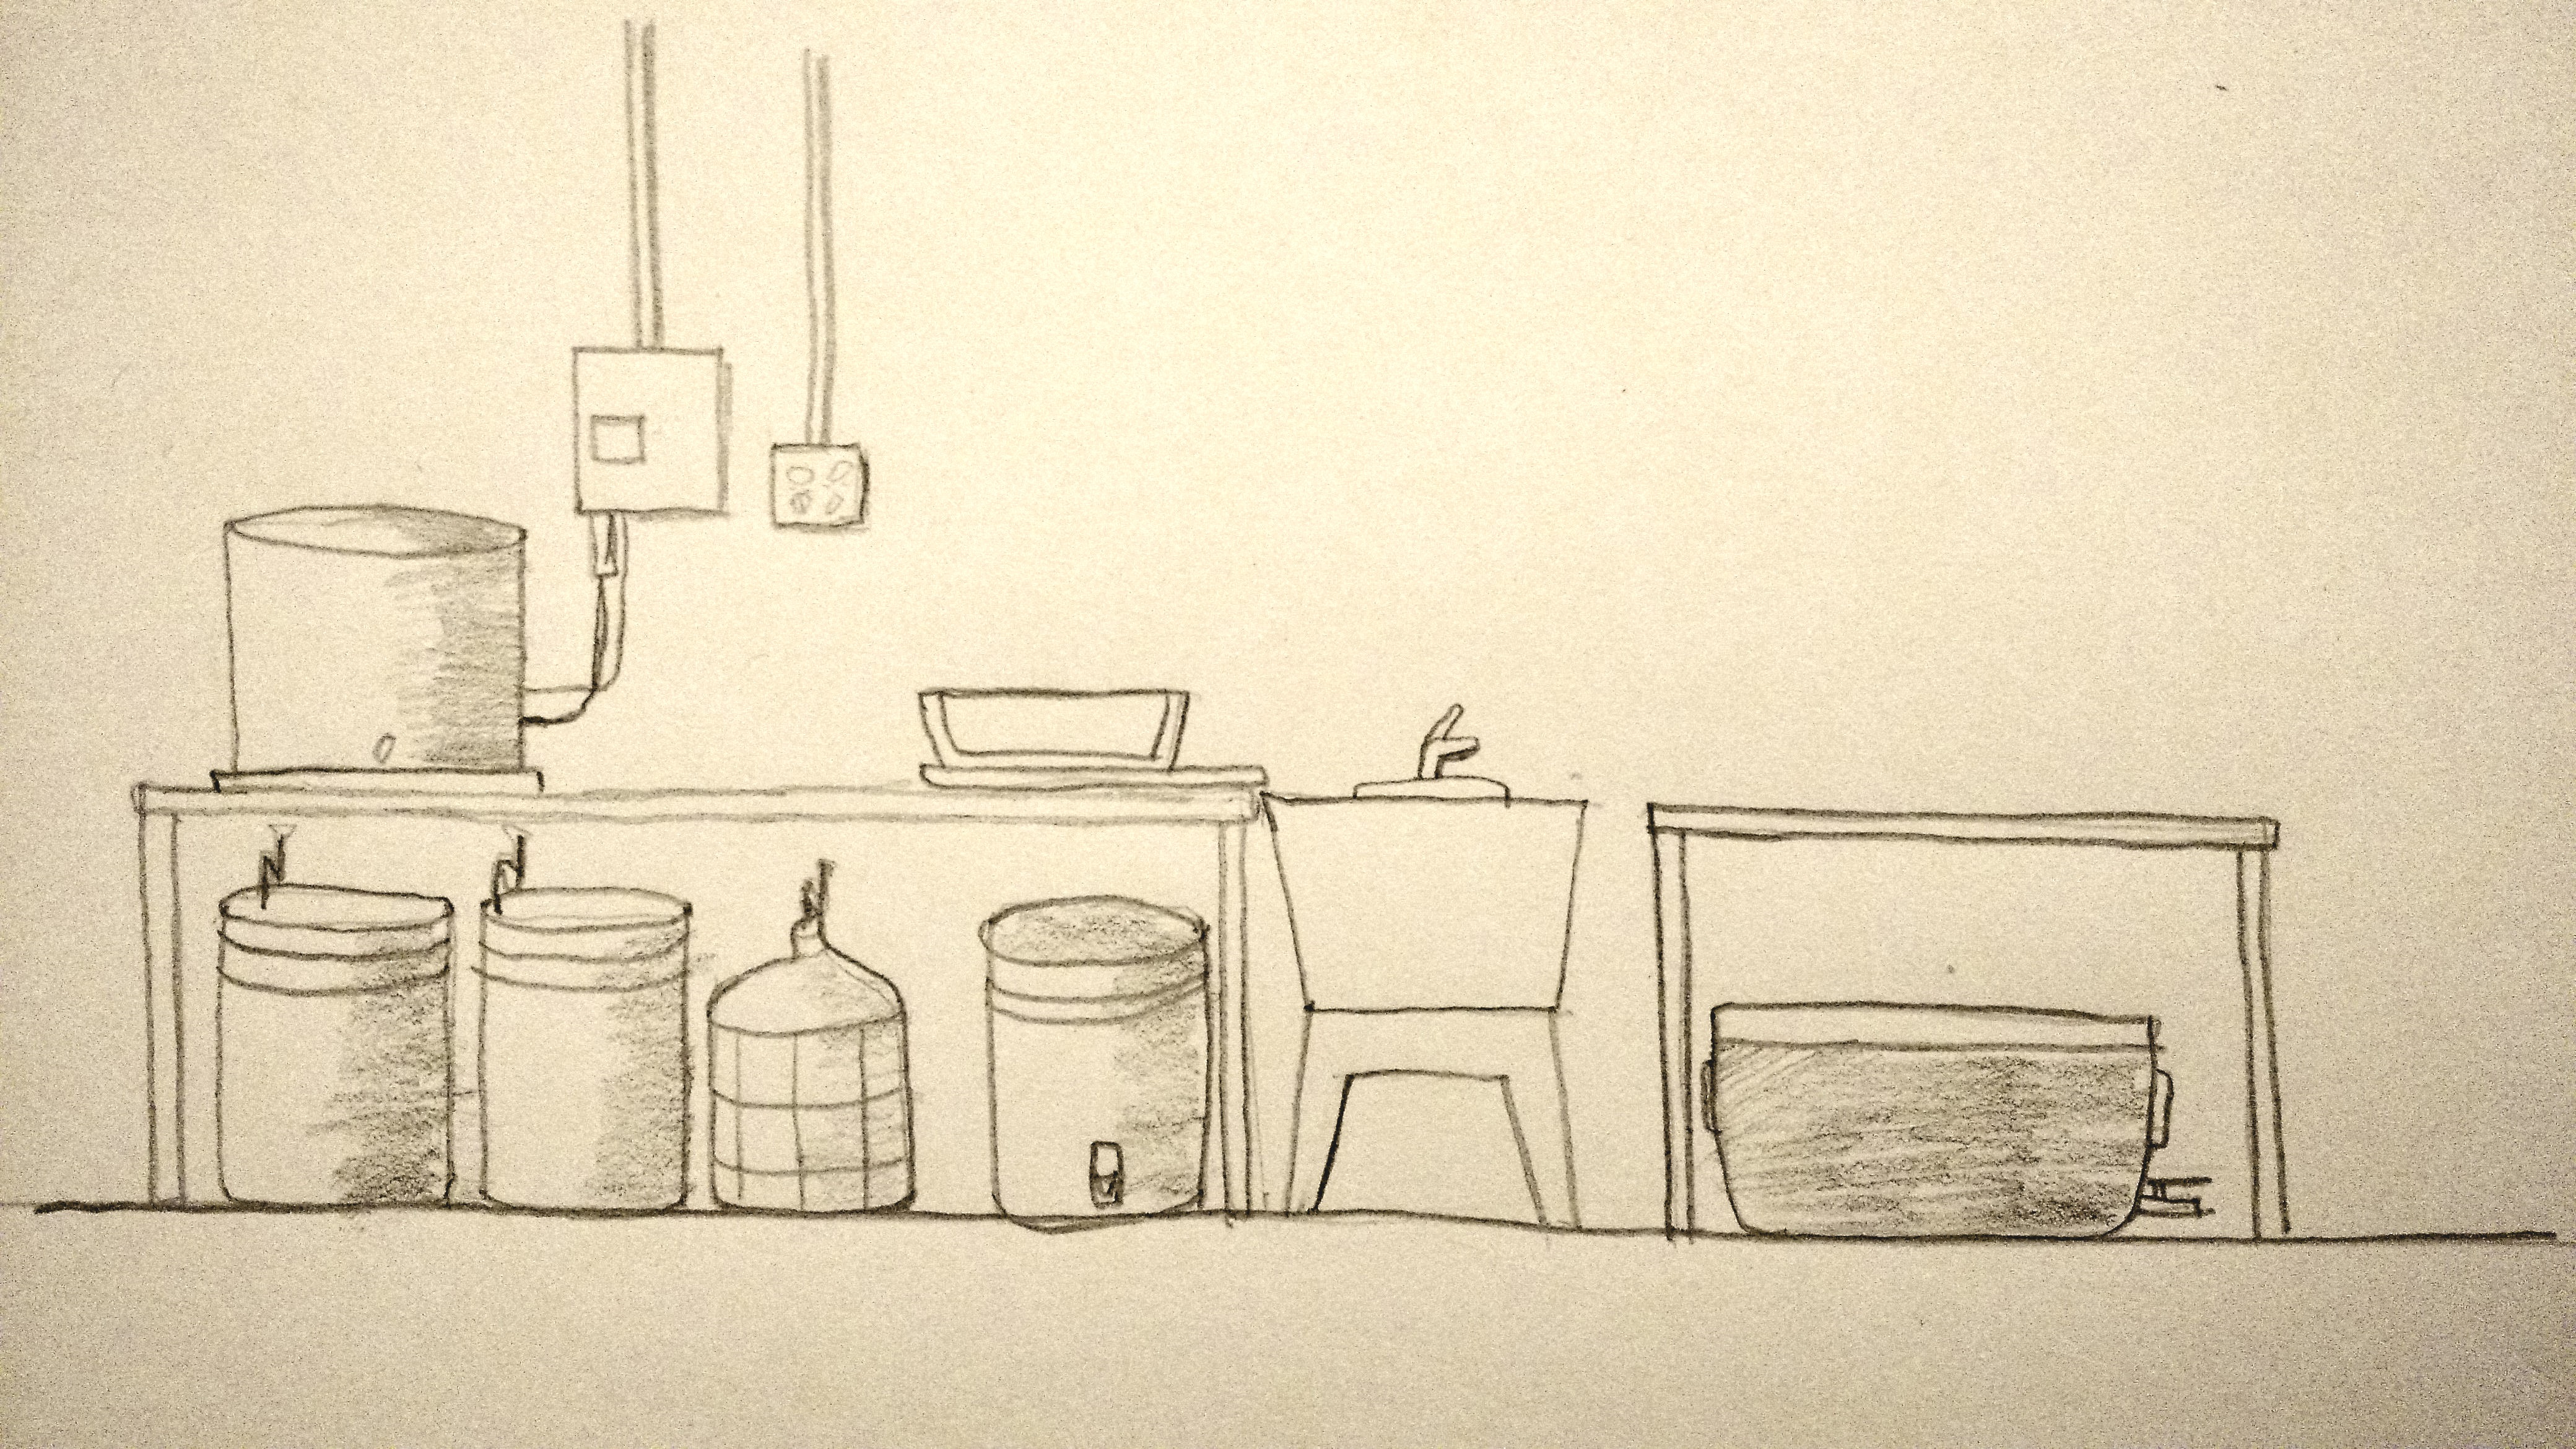
New Setup!
This is a plan in four phases, and since I’m looking for content, I’m going to have a post for each phase.
Phase 1: 120v Upgrades This is minor upgrades to the electric at my brewing area including an outlet at the brewing station and a better light.
Phase 2: 240v Wiring This is the major part of the wiring. I’m not afraid of electricity at all (I’ve been shocked a few times), but I do take care (which is probably why those shocks weren’t enough to kill me).
Phase 3: Control Box Since I don’t have hundreds or thousands of dollars sitting around, I’m making my control box myself.
Phase 4: Finish Up and Testing I’m not doing all this stuff for my health! There’s a few things that will have to be added in, like a pump. Realistically, I’m going to need to another kettle, too, but that will be a while.
Cheers!