Tag Archive: fermentation chamber controller
Raspberry Pi Fermentation Temp Controller III: Server APIs
This is the optional part of the Raspberry Pi Fermentation Controller, but it’s the part that I used to roll into the Brewery IoT page.
There are three PHP scripts that run on the server:
- Index.php – collects data
- getRows.php – lists data from the database
- getLast.php – gets the last temperature entered in the database
There are also two prerequisites:
- A pre-shared .pem key on the server. This should match the one on the Raspberry Pi.
- A MySQL table (I’ve called it FermChamber, but if you know SQL, you can change it) with two columns: TimeStamp (datetime) and Temp (float).
With that out of the way…
Index.php – Data Collection
The data collection script is below. It expects post form data with a JSON formatted file. If you’ve followed the first post in this series, you’re good.
Note that you will need to change the code to use your correct server, username, password, and database.
getRows.php – List of Data (for the bar graph)
This script gets the temperatures in the database for the line chart.
getLast.php – Get Last Temperature Reading
This is just a simple script to get the last temperature in the database. This is for display on the dial gauge.
One of the next parts in this will be the code to display on the page.
Cheers!
Raspberry Pi Fermentation Controller II: Power
I started on building a Raspberry Pi based fermentation controller. This is a device that turns my chest freezer on and off based on the temperature of the freezer and what the Raspberry Pi thinks (which is essentially what I programmed it to do).
This is one of those posts that gets a disclaimer: BE CAREFUL IF YOU DO SOMETHING LIKE THIS. You can get killed by touching the wrong thing here, and it will hurt then entire time you’re dying. People will not be able to see your bones as you flash from electrocution. Marv wouldn’t have lived. I’m not an expert or licensed or even qualified to do this (and since I’m doing this, does that make me a Redneck)? Your mileage may vary, of course.
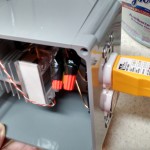
There are really only two major parts to this, a solid-state relay (SSR) and an outlet. I removed the little tab connecting the two hot-sides of the outlet together to allow for one to be on always and the other to be on just when the SSR says it should be. This is all wired to a plug (I used an old computer cord that was conveniently colored on the inside. A diagram of the connections is below.
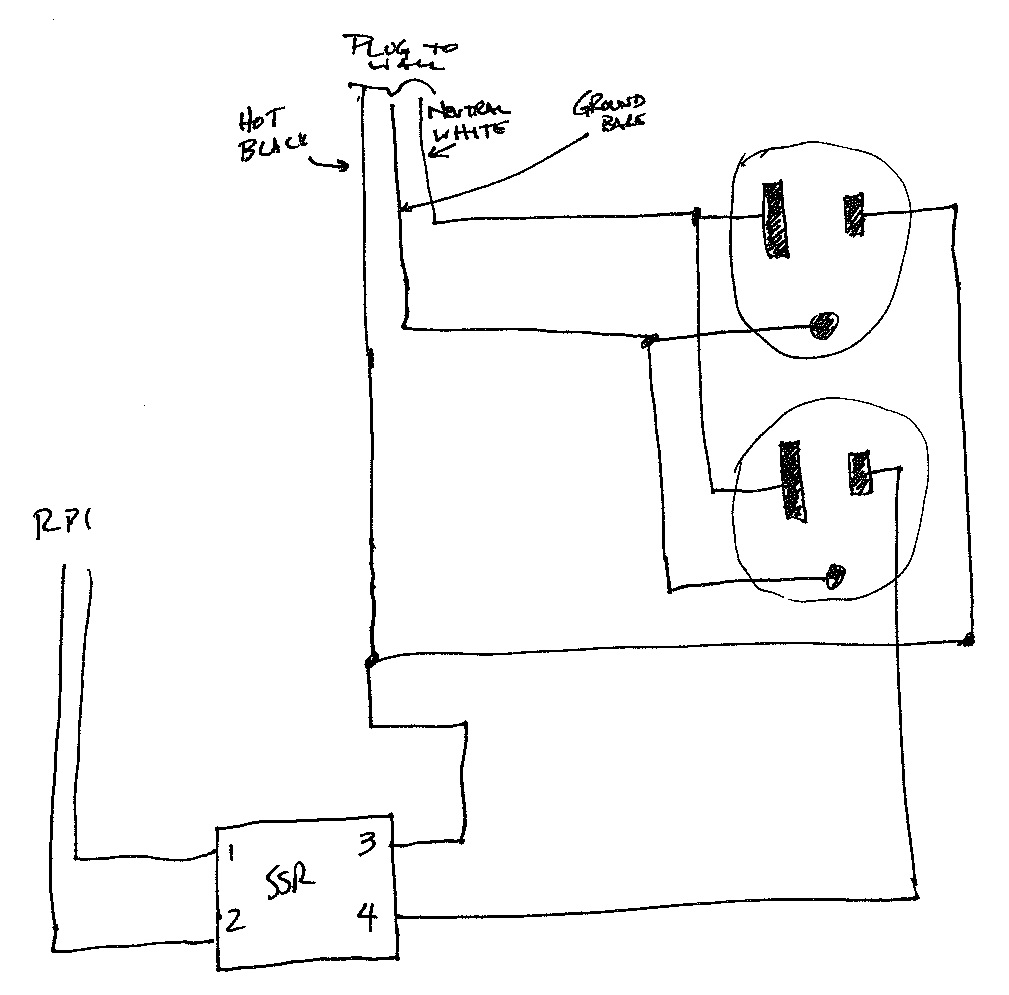
Wiring diagram. Not to scale. Don’t trust the numbers on the SSR – they’re from memory.
Some notes:
- This should not be hard-wired into the electrical system. It is probably code to have things like this be easily able to be disconnected, and the plug allows for that. Also, intelligence dictates that things like this should be able to be unplugged should some failure happen down the line (and since electricity is involved, those failures can be spectacular and bright… and deadly).
- One could make the case for needing a fuse in this. I don’t think it needs one. However, this is protected by both a circuit breaker (as is everything in the house) and a GFCI (because the plug it will use is near a sink). I’m truthfully not concerned, but I don’t know if I’m right to be unconcerned.
- Solid state relays should ALWAYS have heat sinks, and thermal grease between the sink and the SSR.
- SSRs are rated. It needs to be able to handle at least enough current as the freezer, although I recommend double. My freezer claims 2.5 amps, my SSR is 40 amps. Should be safe.
- Test everything using a safe tester and test method. For outlets, the $5 3-prong tester like I use is adequate and safe – much much safer than a multimeter. Truthfully, every homeowner should have one of these (and when my house was built, I used this little tester on every single outlet).
- Everything should be in a box, in case something happens. Said box should be waterproof as much as reasonably possible.
Pictures are below.
-
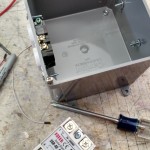
- Near beginning. Added an outlet to the side.
-
- My cat, Mocha, wants me to brew a mocha stout, I guess.
-
- Solid-State Relay in place.
-
- Testing. This is a more dangerous part because I don’t have the covers in place.
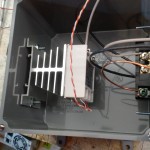
-
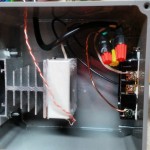
- Internal finished view.
-

- External finished. Complete with some stickers!
-
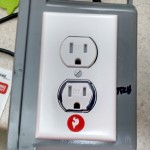
- Side. The lower outlet is on the relay, the upper outlet is always on.
The only problem I ran into was that the $3 Chinese solid-state relay is bad. The switched outlet is on regardless of the input (although I’m still testing things, so not 100% sure if I’m right, but I’m ordering like 3 more… after all, they’re like $3 and out of the last two I purchased, one is probably bad). I’ve tested (with the unit unplugged) across the SSR terminals and did not find a short, and across the two hot sides of the receptacle and did not find a short. But in the case of the SSR, it may not display a short to my tester because it is a much lower voltage than the outlet.
EDIT
The relay was probably fine. It appears that there is a minimum current required to turn on/off the SSR, and the 1/4 watt tester was not enough of a load. I replaced the relay (with one of the FIVE I bought), and plugged the freezer into it, despite the new one showing the same signs as the old one. The freezer did not turn on when I powered-on the Raspberry Pi (I had turned it off to plug it into the box’s unswitched outlet). I made a quick administrative code edit, and it worked.
Cheers!