Beer
Homebrewery Improvements: Grain Milling Cart
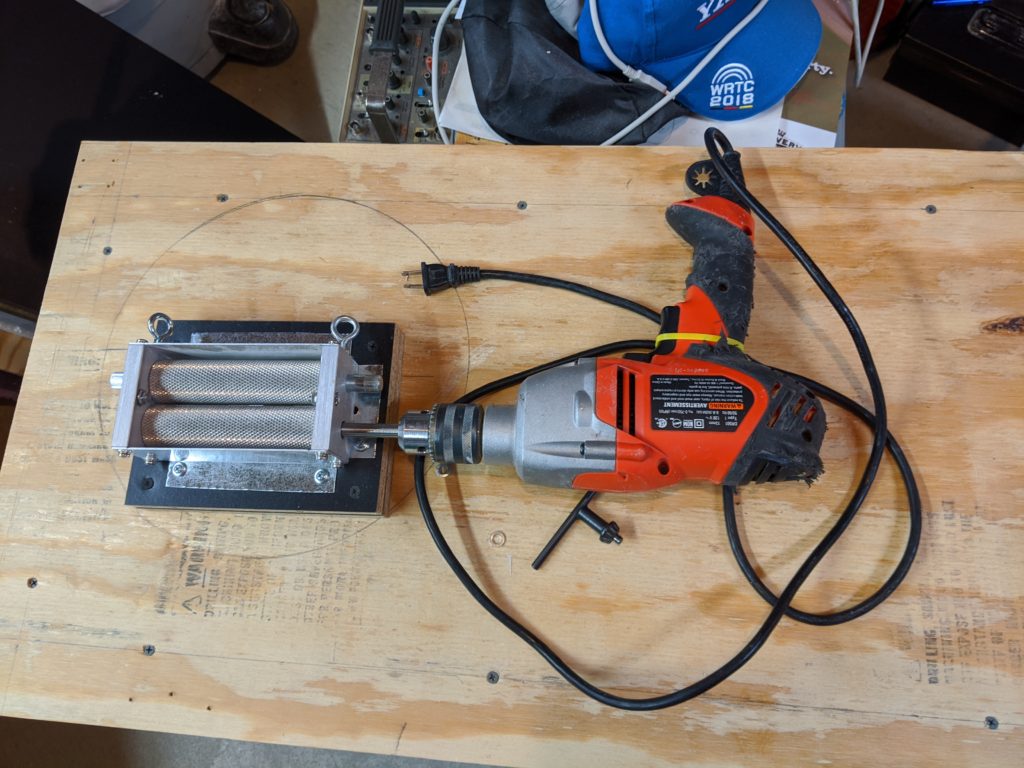
After a wortsplosion caused me to need to clean part of my mill and the cheap drawer-bottom not-even-particleboard piece that I was using to attempt to hold my drill and mill as I milled grain, I decided that an improvement was in order.
Specifically, I wanted to improve three things:
- I don’t want to use my foot to keep the mill from moving off the bucket
- I don’t want milled grain to get ‘stuck’ in the wood frame the mill is attached to
- I don’t want my drill to bind on the platform and I want both hands free of controlling the drill
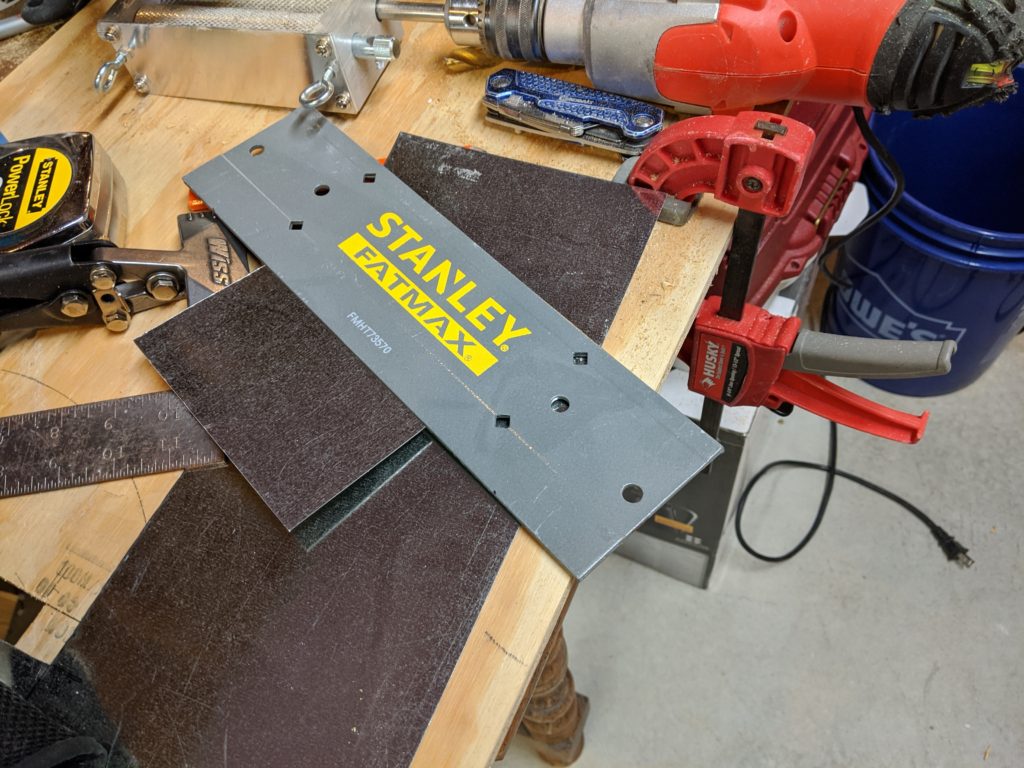
While it isn’t a criteria, I didn’t want to spend a ton of money on this, so I used a lot of recycled materials. I started with getting a more substantial piece of wood – some half-inch plywood from what was going to be a lagering chamber (I’m going to stick to the water bath method used in the last post) and some shelf pieces from an old stereo cabinet.
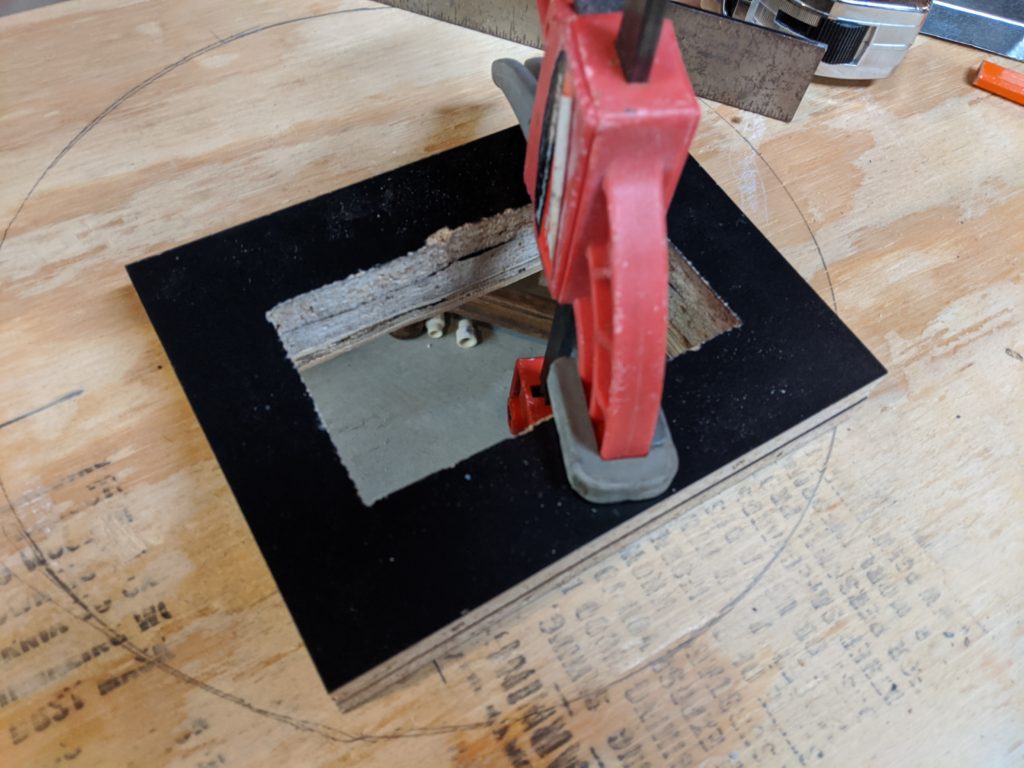
Since I didn’t want a way for milled grain to stick into the ‘chute’, I used some leftover duct metal to build a chute.
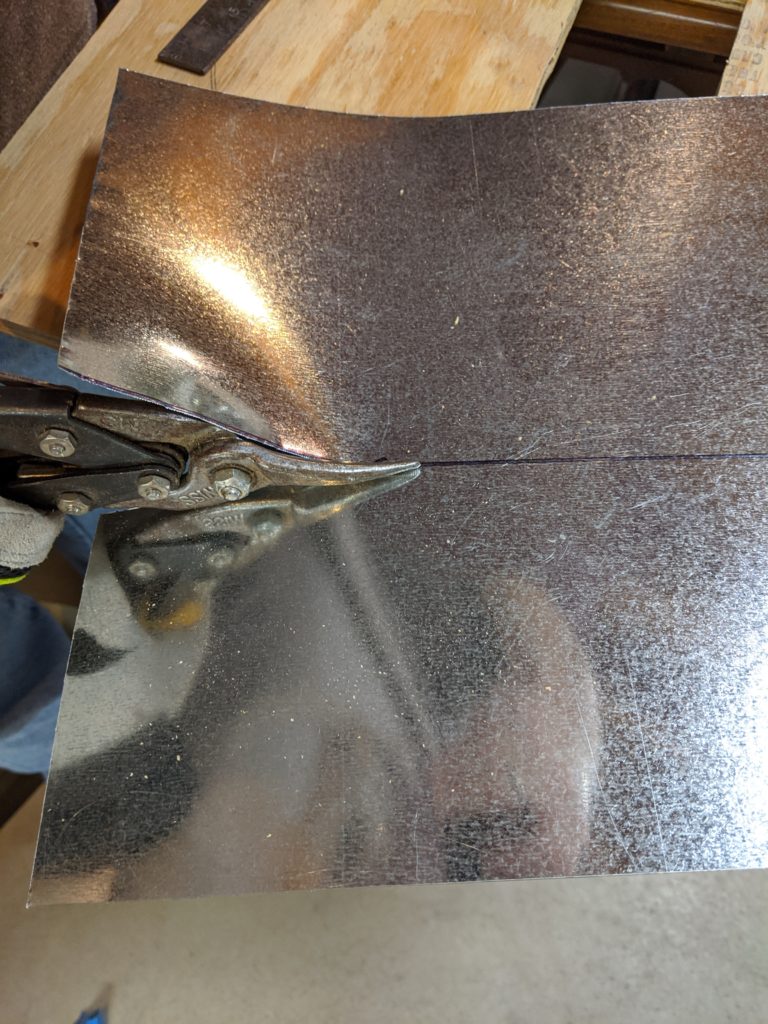
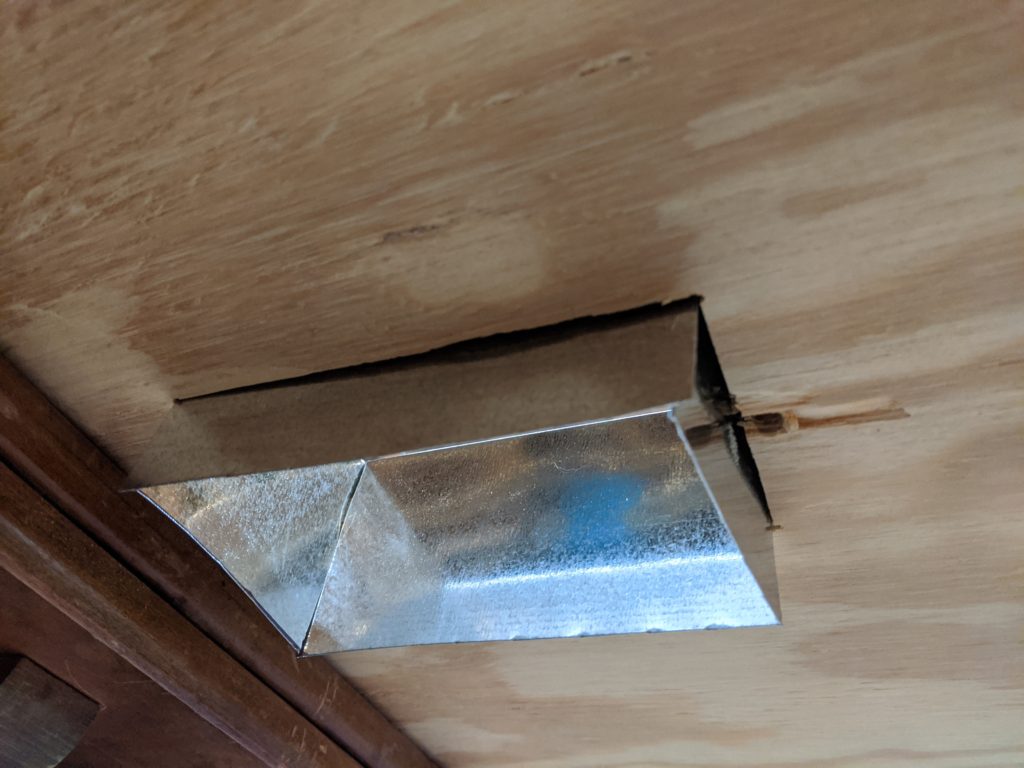
Even better, I still have leftover metal for an exhaust hood that I desperately need to build.
After making the chute, I added some legs. I had some leftover casters, so I added those to the legs, although I’m not 100% sure I’m going to keep them (or all four of them – I might change two of the legs to adjustable feet).

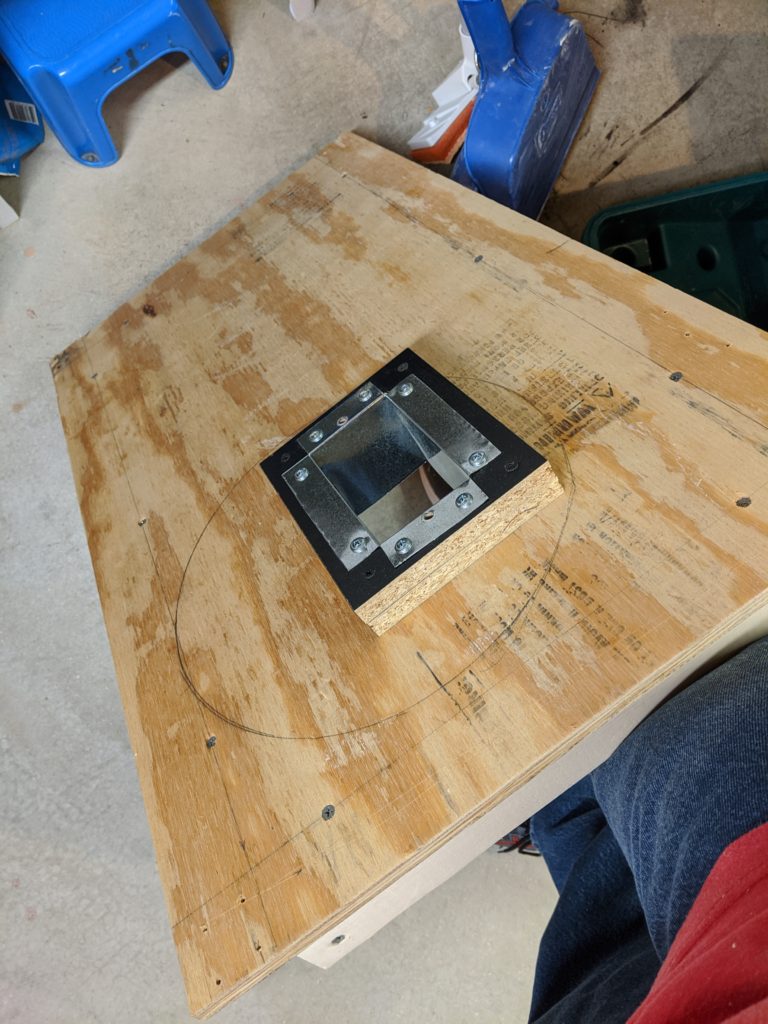
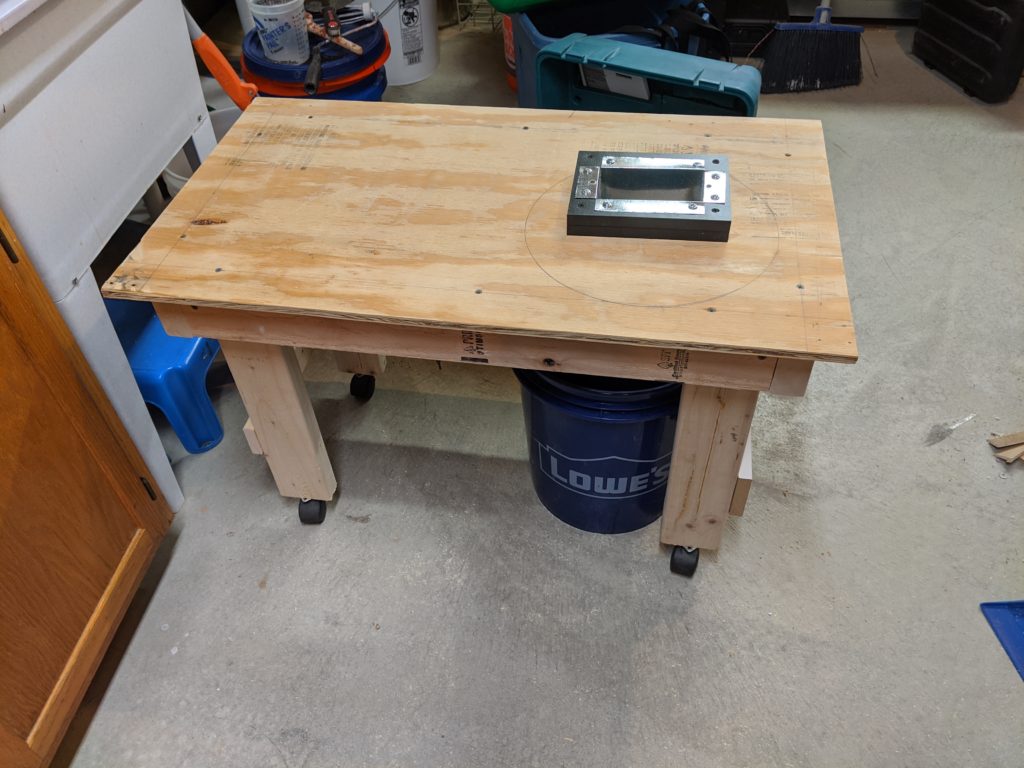
At this point, the only materials taken from new are some cabinet kickplate material (I’m not even sure why I have some) and two 2x4s. Everything was already purchased and was “extra” material except the 2x4s. I will need to purchase a few bolts to hold the mill on, but that is it. I may paint the top also, in case the plywood gets splashed. 🍻
First Holiday Homebrew!
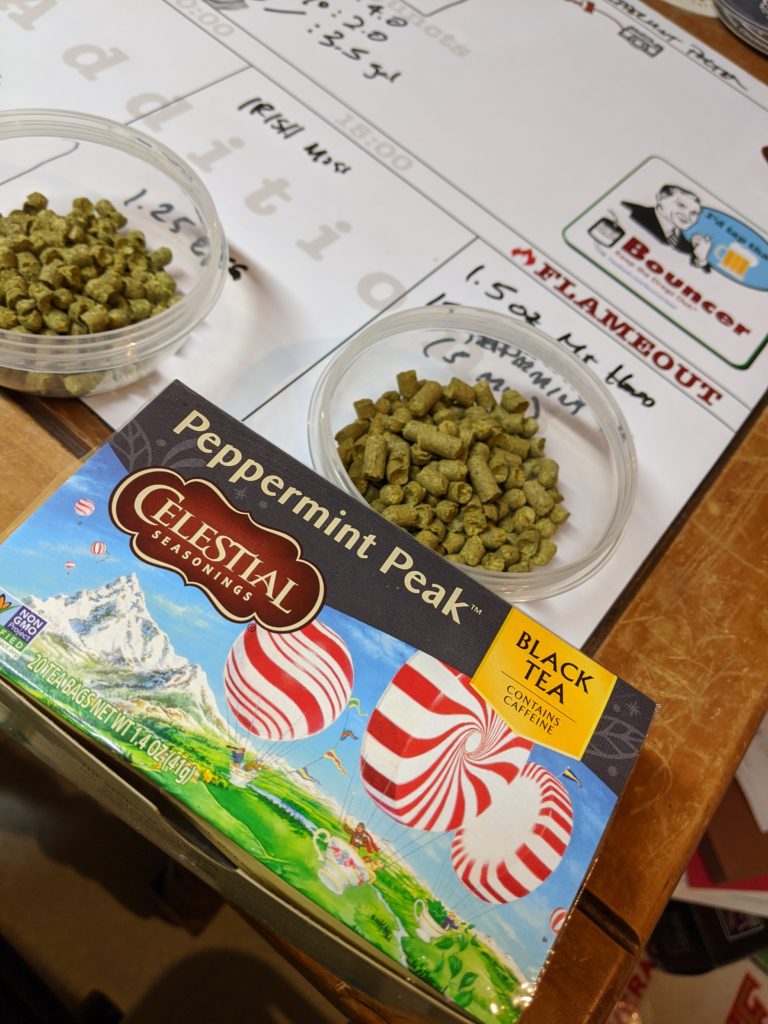
In five years of homebrewing, I have never made a holiday beer. Then, while looking through Zymurgy I saw a Peppermint Porter that caught my eye.
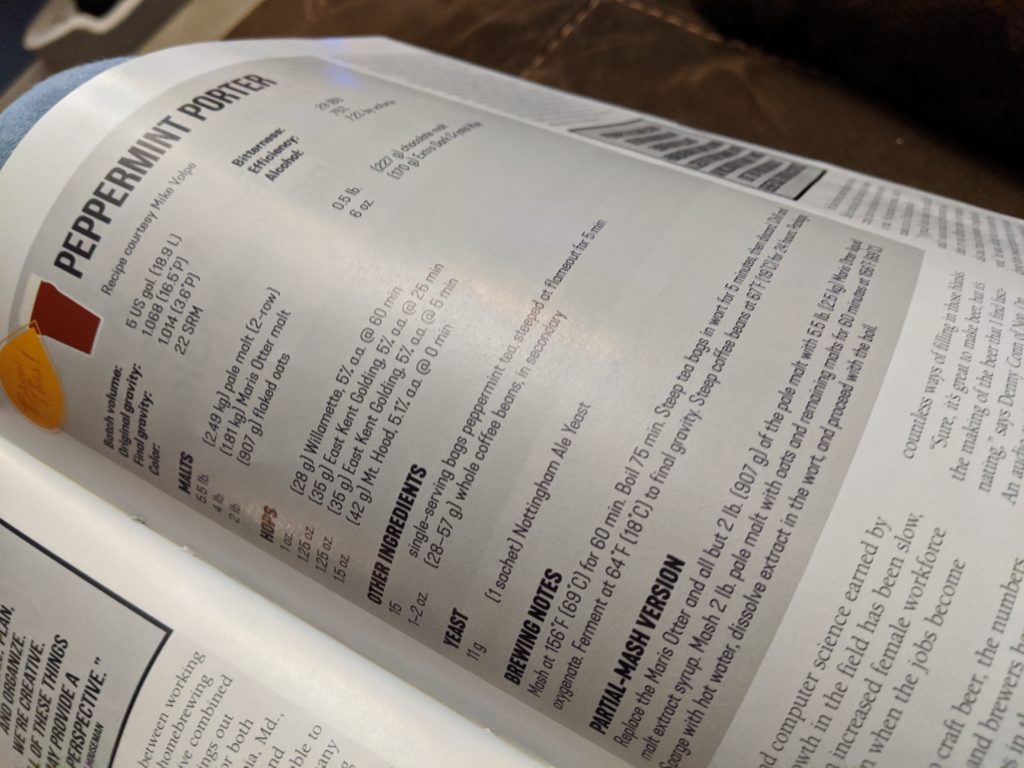
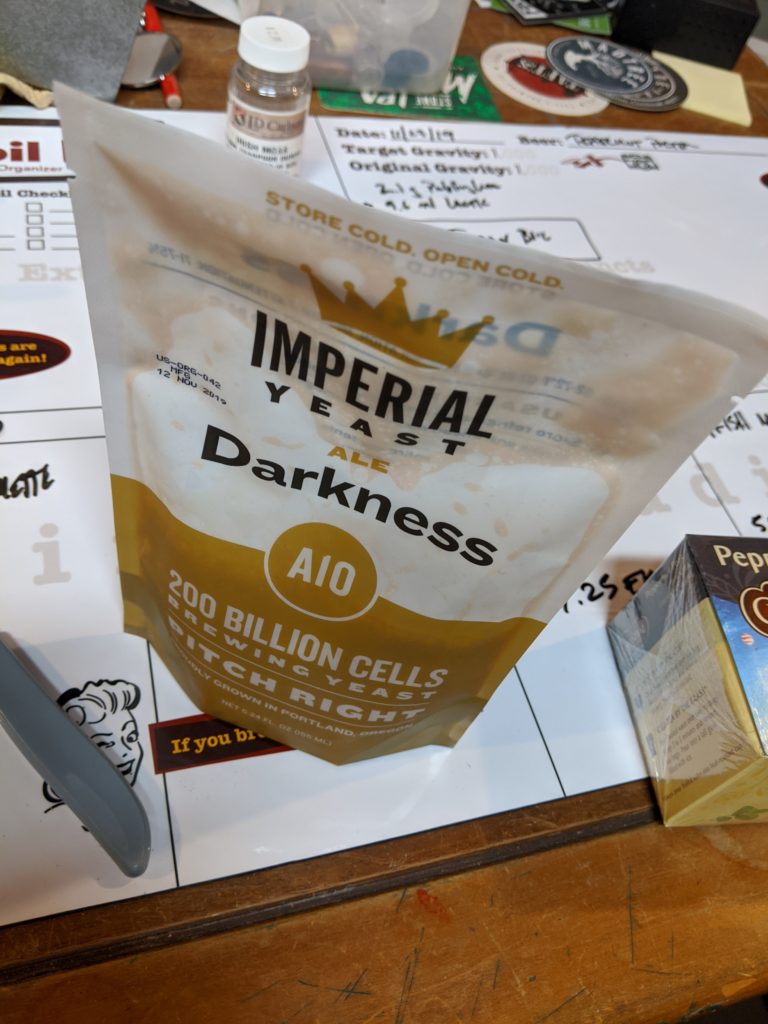
I didn’t make a bunch of changes to the recipe from the magazine – I did change the yeast (I used Imperial A10 Darkness instead of Nottingham), and I used Chocolate 350L instead of what appears to be Chocolate 450L, and I used a peppermint holiday tea blend instead of straight peppermint tea. Otherwise, I used the recipe as-is.
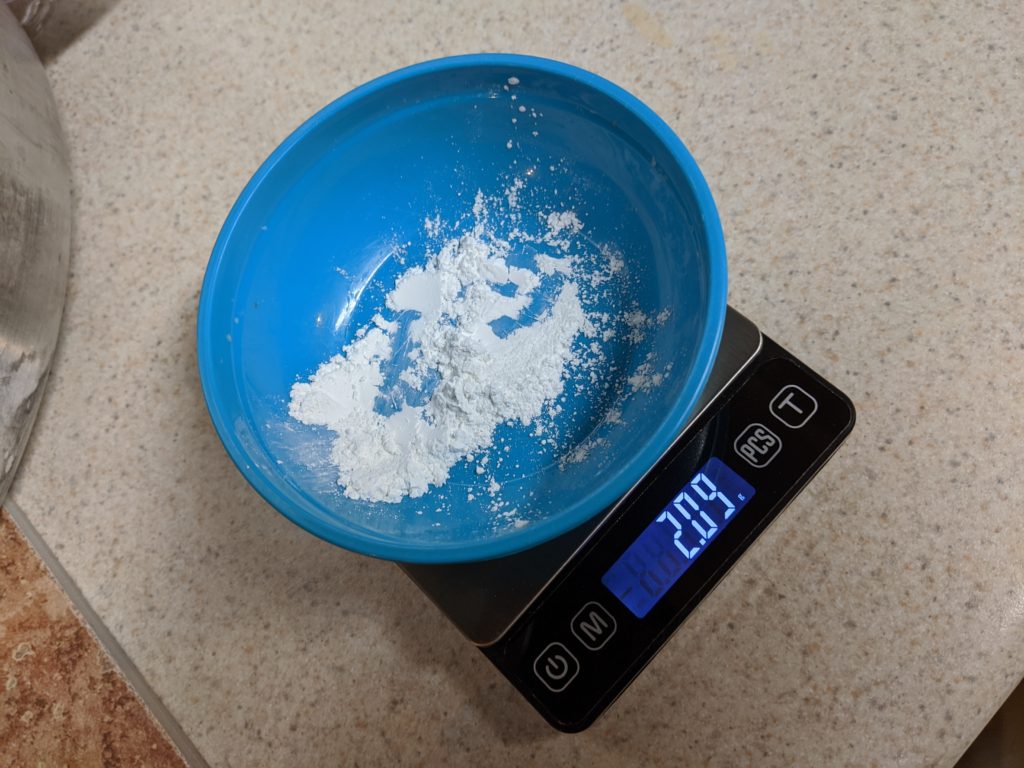
I did use some water adjustments. The dark grains and my alkaline water tends to push the pH high and it’s low on bicarbonates for a brown balanced beer so I added some pickling lime (I didn’t want to bring sodium up with baking soda).
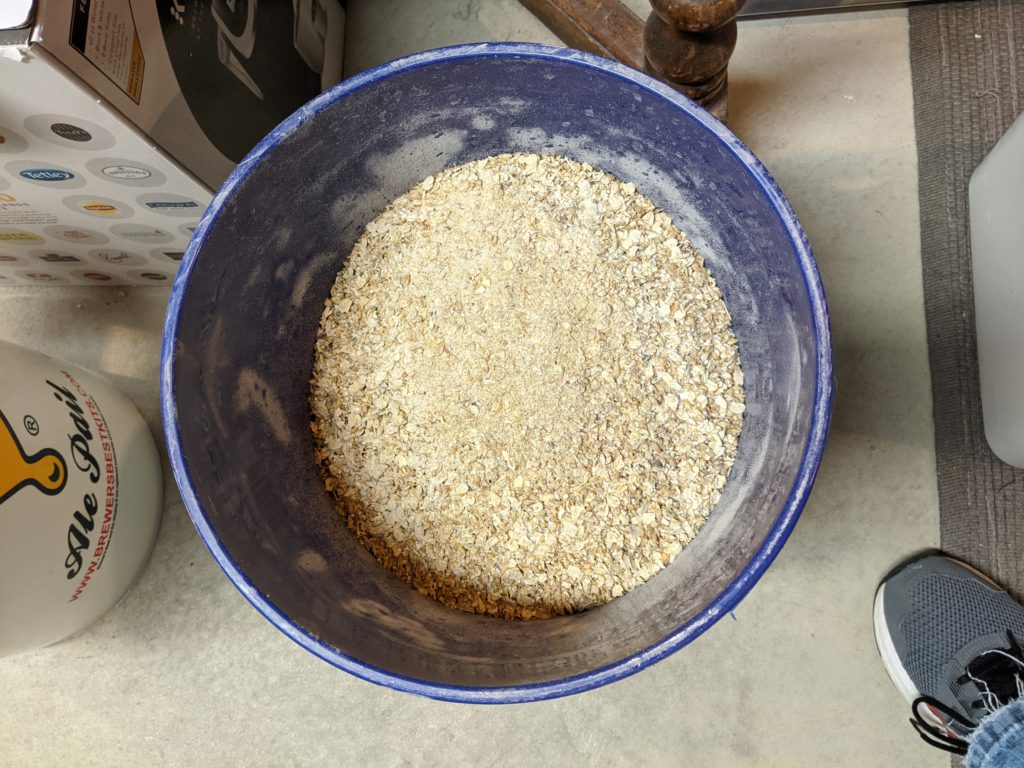
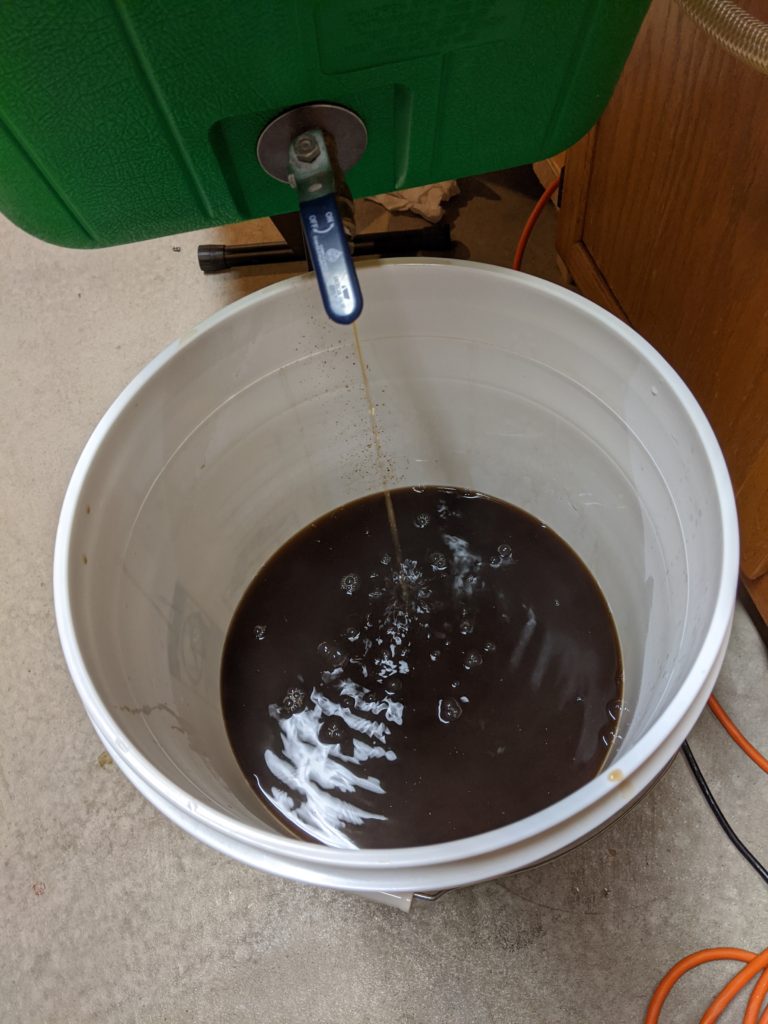
With the grain milled, mashed, boiled, and hops measured, everything proceeded as normal…

After getting the boil setup, I realized that I forgot to change out the upper port on my kettle with the dip tube that I use for whirlpooling. I was able to tilt the kettle towards the end of the boil and replace it. After that I didn’t stop to think what else could go wrong.
Little did he know, something else would go wrong
–Narrator
I got to the end of the boil and brought the temp down to about 185-190, which was my recollection of the proper tea steeping temperature (it was black tea, it should have been higher, but whatever). I added in the tea bags, which had no strings or tags (this was swanky mass-produced tea, not low-class-Lipton mass-produced tea!). The screen was full of hops (this recipe calls for 4 oz of hops) In hindsight, I should have thought about the fact that those things could sink and clog the dip tube.
And clog the dip tube, they did
–Fucking Narrator
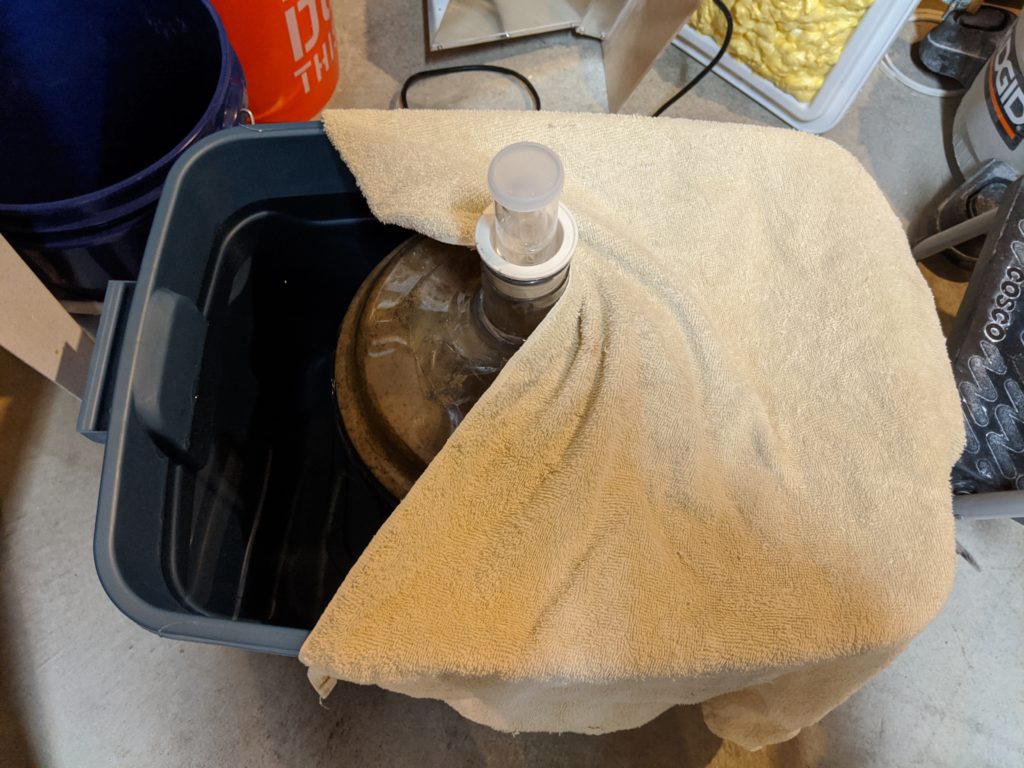
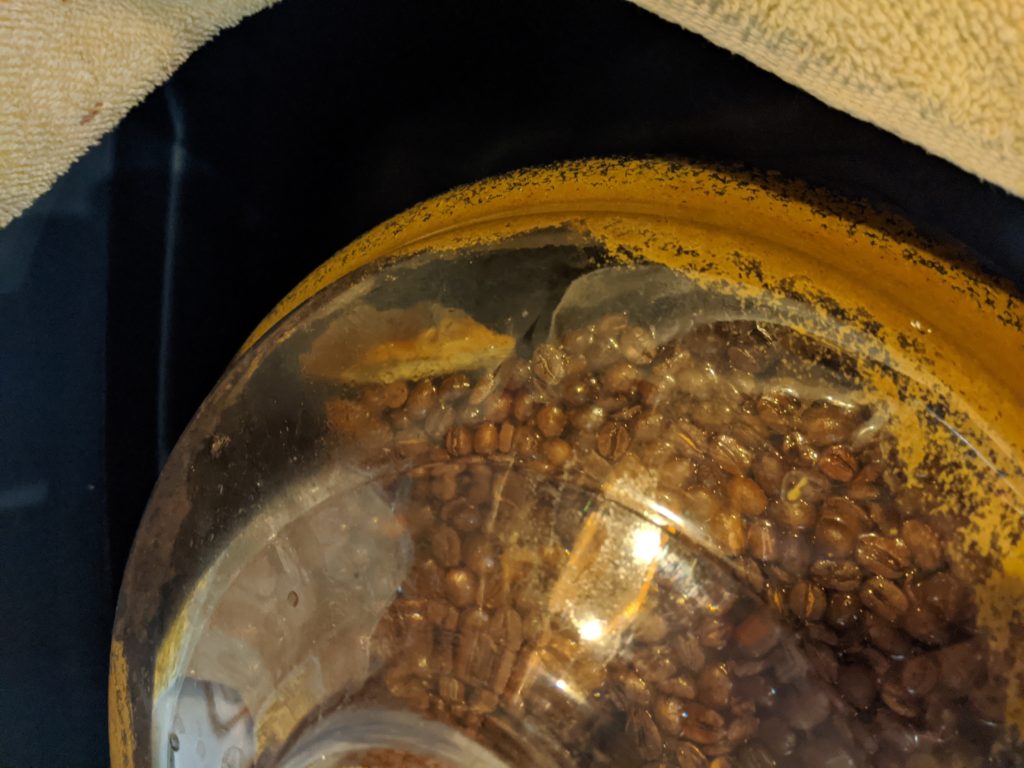
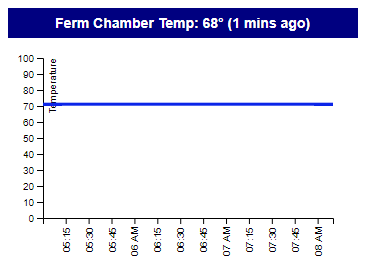
After dealing with the clog from Hell (aren’t they all?), I got the wort down to 68F and added the yeast. I let it rock for a day and saw that it was getting a little too warm, so I moved it to a water bath (something I will likely do more of). This brought the temperature back down to 68F. Fermentation went QUICK. I brewed on Saturday, by Monday evening, it was at 1.012, and Tuesday evening it was at 1.010 I added around 2 oz of Kona coffee beans on Tuesday evening and noticed something in the fermenter. I don’t taste any off-flavors, so I’m hoping it’s just some krausen or tea bag that made it through or something.
Fortunately, it was just a part of a tea bag
That damn narrator again
The numbers:
OG: 1.059
FG: 1.011
ABV: 6.4%
Taste
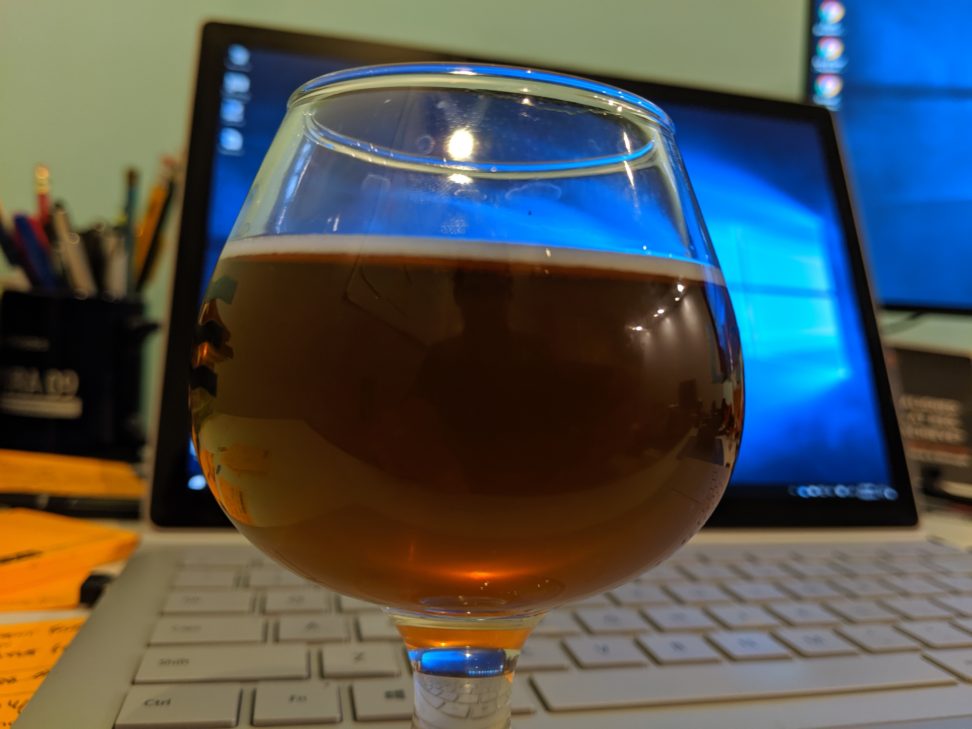
Aroma and flavor are light peppermint and coffee. The flavor also adds some cream and a hint of smoke. It’s very pleasing and very festive. 🍻
Top Ni… Whatever. (Back/Forward 2019/2020)
Apparently, there’s a thing going on with Instagram that people are posting “Top 9s”. I’ve had a mostly-hate relationship with Instagram because of a variety of reasons… not limited to the lack of a chronological and un-curated feed and a shit ton of newlines ending with a list of hashtags for reasons I don’t care to give a shit about.
I looked back at my post list for the end-of-2018 post, but it wasn’t there. Apparently I care a lot about resolutions! Well, to be fair, I was building out my office as I had just changed jobs from one that required me to drive to downtown Cincinnati every day to one where I work from home.
There was a post at the beginning of 2018… my how things have changed since then! I was complaining about blowing up cheap $20 pumps from eBay and doorbell transformers (and other power supplies). I’ve since graduated to the real world of a pump that plugs into the wall (and thank God I haven’t blown that one up!)
I also talked about building a wall. I’m not sure how my speed relates to that of the Federal Government, but I’m close. I have about two feet built.
Last Year’s Progress
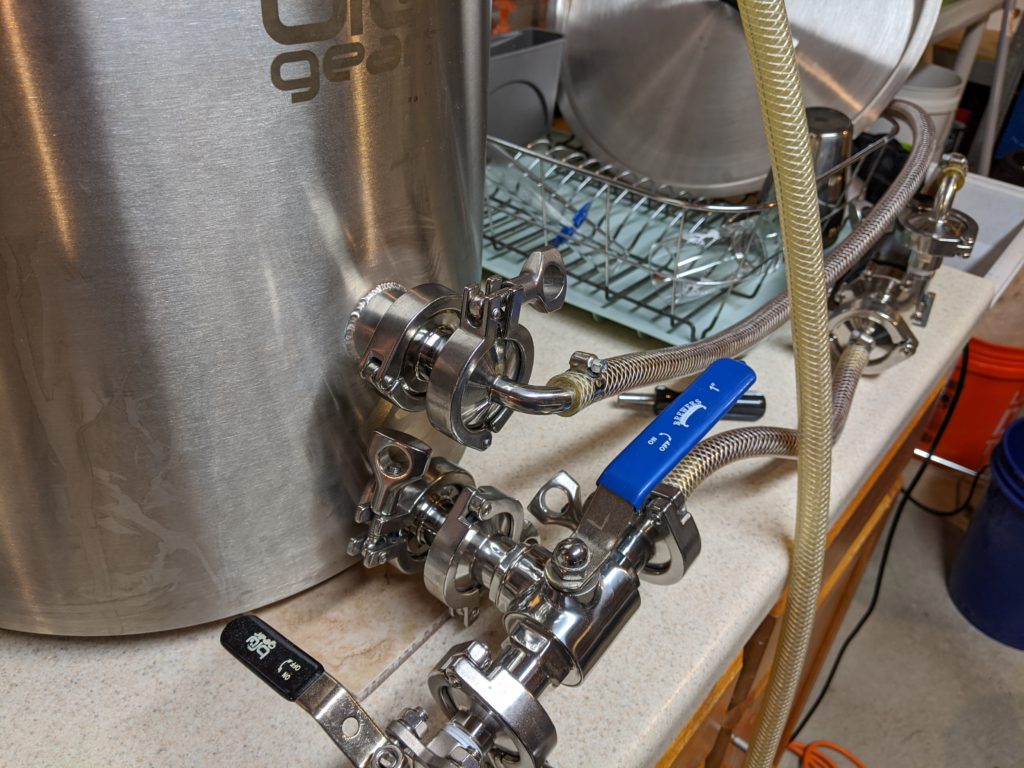
On the equipment front, I bought some stainless stuff. I got sick of dealing with barbed connectors and began moving towards tri-clamp fittings on everything. Also, I decided to use an upper port on my kettle for whirlpooling.
I also got extremely angry at my plate chiller and decided to buy a counterflow chiller. I’m pleased with it (even more pleased that I didn’t clog it in a recent brew).
I decided I’d build a spunding valve setup. I haven’t used it yet, though.
The last equipment news is that I bought a Blichman Beergun. I entered the SJ Poor Challenge and wanted a better way to bottle beer, this was particularly due to some differences in scores between the only two competitions I entered.
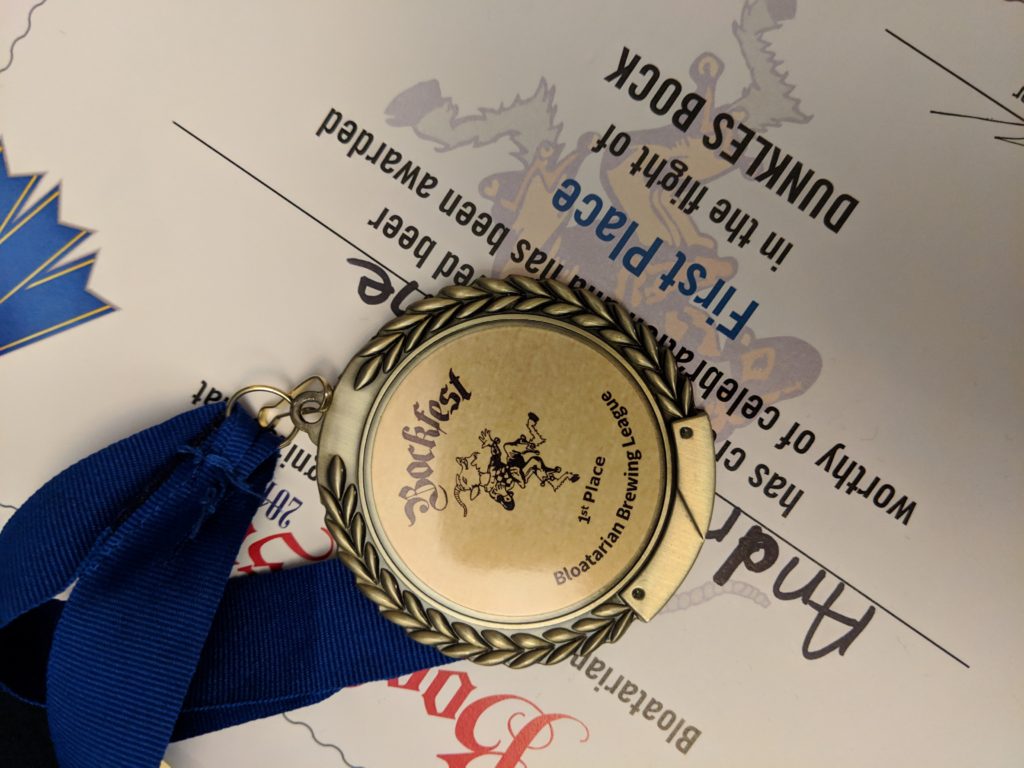
On the brewing front, I won a gold medal in one of the competitions I entered, with a Dunkles Bock. The same beer went into a second competition a week or two later and the scores were not as good. When I entered the SJ Poor Challenge with a fruited milkshake IPA, I decided I wanted to ensure oxidization was not a factor.
2020 Stuff
There’s a few things I want to do in 2020 (other than brew more).
I want to get started on being a BJCP Judge. I want to get my Provisional (I think… it’s hard to figure out which/what when their websites have been a hot mess for the past three years). The other side of that is trying to ensure I can actually USE the certification (e.g. SWMBO will let me go drink beer all day).
I want to continue improving my homebrewery. There’s already a few improvements that haven’t been posted by this blog, and there’s one big one that I still need to do – an exhaust hood. I run a dehumidifier in my basement, which generally runs for two days following a brew session. I do need to change that. I also have some drywall that can be installed, although I need to add insulation and studs first.
I want to try to post more on this blog. I posted six things last year. I want to try for more. I do have a backlog, so every week in January (on Wednesdays) will have a post. I also want to fix the format/look/feel of this blog. The one I have is free (and feels like it). I’m not really all that pleased with it, and I have a ton of WordPress experience from the other sites I work on.
Finally, I want to do more with video. I’ve always had a mild interest in doing video ever since working in 3D Visualization in the early 2000s. I’ve been kinda following along with a few people, and probably overthinking the video thing (although I do want good sound, good video, and good everything else too). Video is one of those tough things to get right because a simple YouTube search shows that, like nutrition, everyone is an expert… unlike nutrition, there are many experts with many different approaches that all work!

That’s all for now. Happy New Beer… er, I mean Year! 🍻
Hey, Let’s Make a Lager!

A few weeks ago, I recieved some sample hops courtesy of Exit 12 Brewery, and wanted to make something light-ish that I could drink while watching football.
I didn’t have a specific plan in mind, so I looked back at a previous brew I did, Vampire Dust. Initially, I thought it was a lager, but maybe not (I certainly didn’t lager with London Ale yeast!).
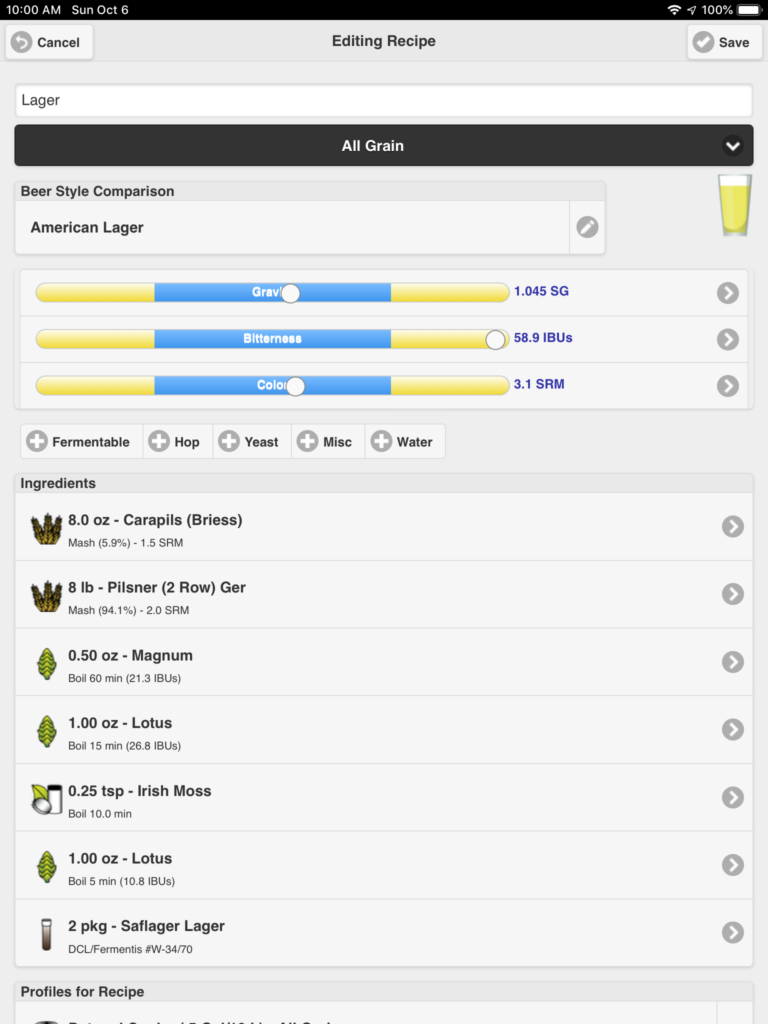
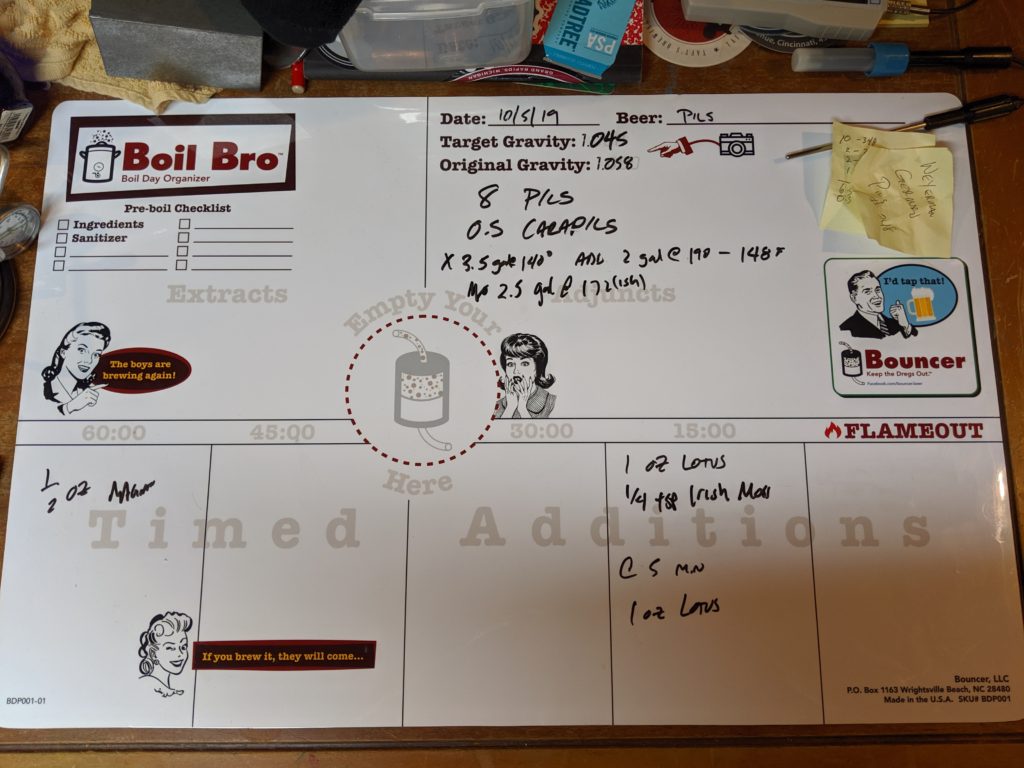
The recipe turned out as below. I was concerned with the bitterness of the beer, but we all know The IBU Is A Lie. I think it’ll be fine.
I had water set out from the night before and got started, but I saw some soapy-looking foam on the top of the first batch. Despite not tasting soap, I didn’t trust it. I dumped it and heated up my second batch of water. Ultimately, some sparge water came from the tap and was treated with Campden.
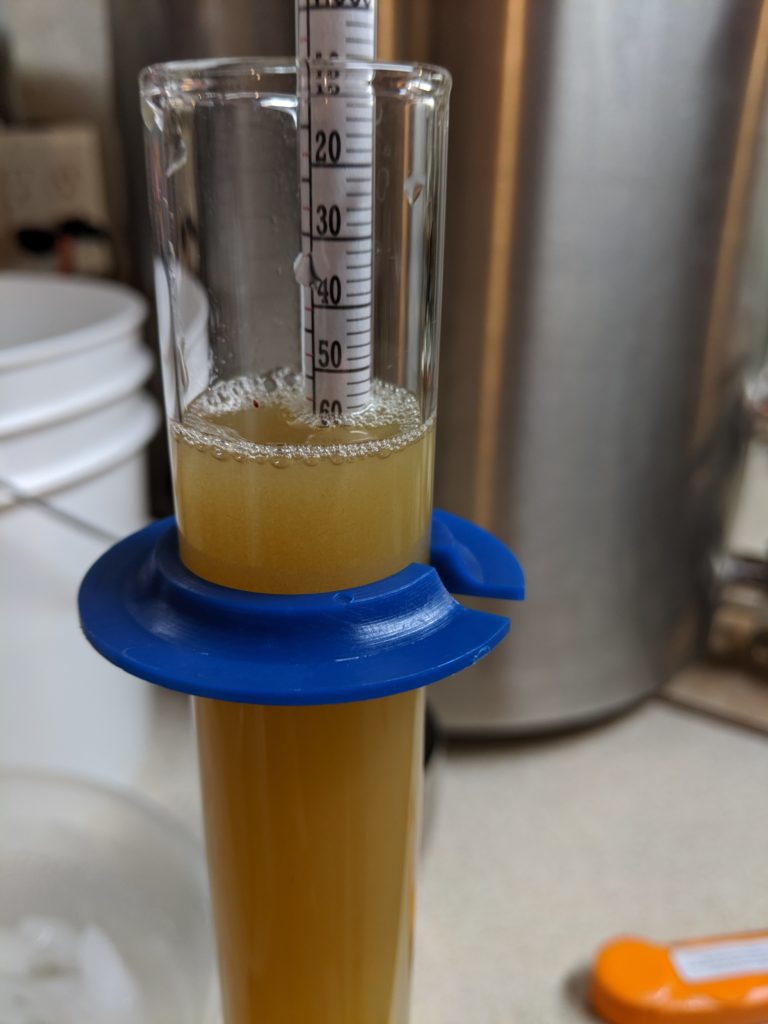
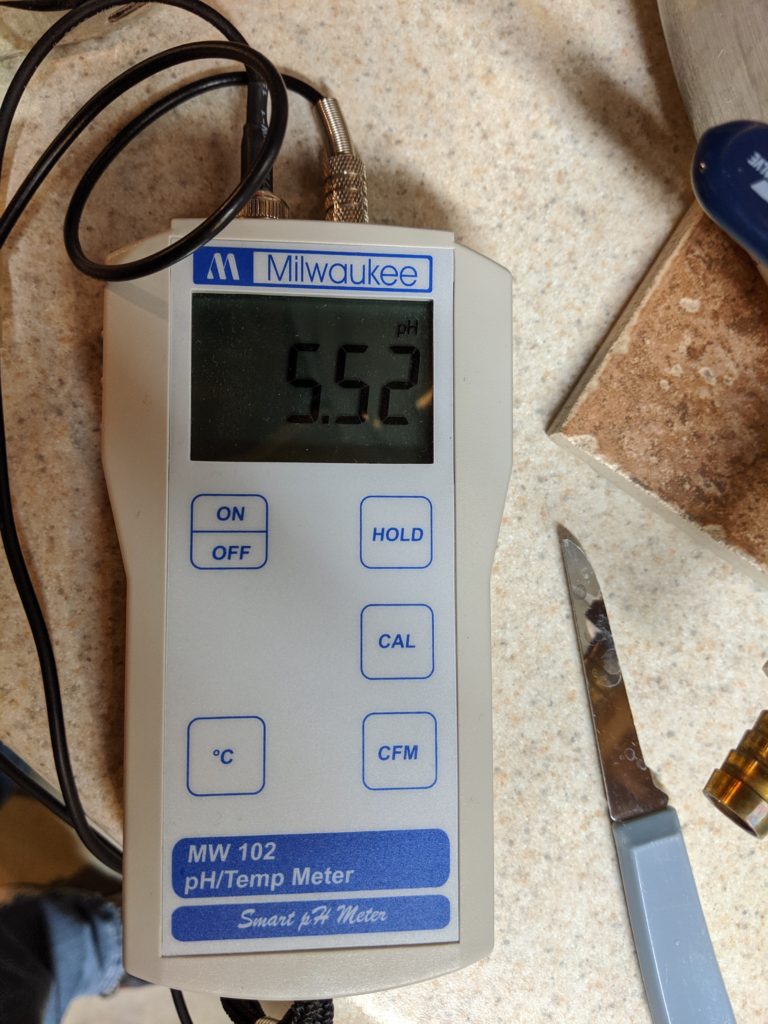
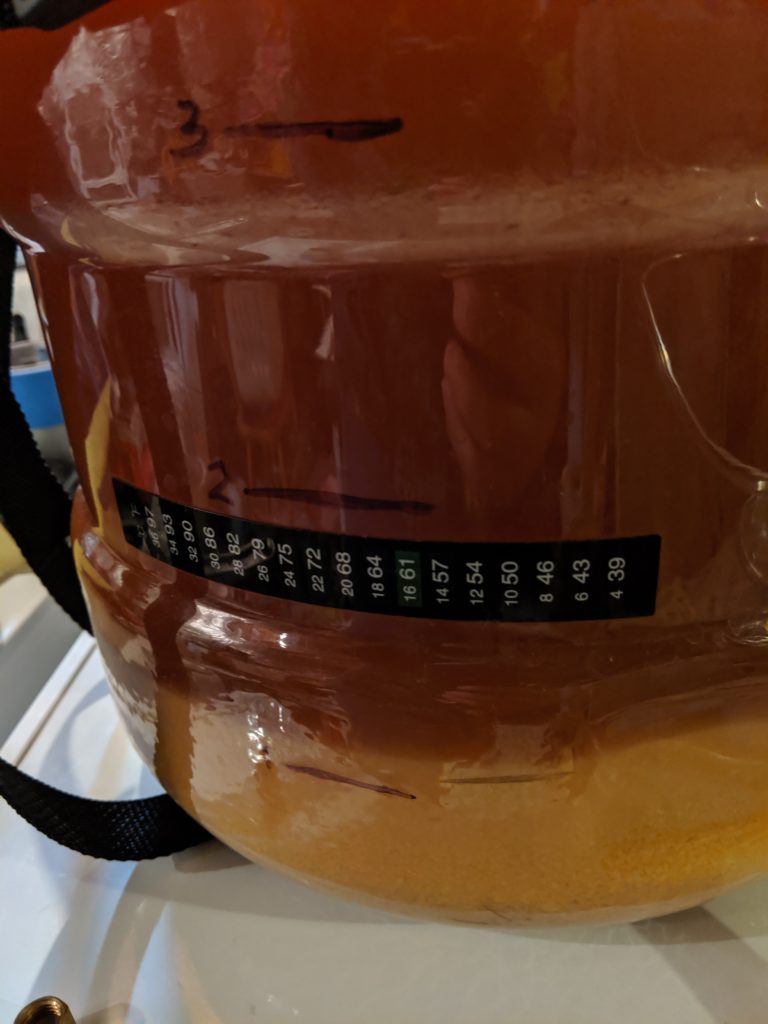
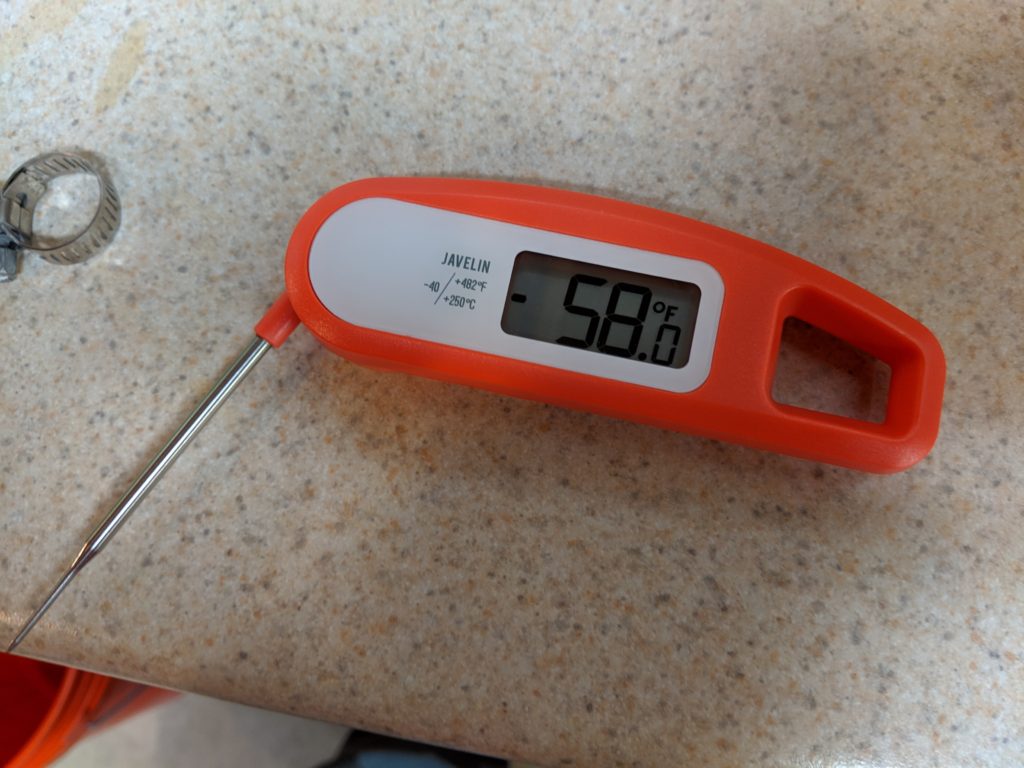
I mashed in without checking my HLT temp and found my mash temp to be down to about 140F, which is much lower than normal. So I heated up more water (which was going to be my sparge water) and added 2 gallons of 172-ish degree water to get the mash temp just up to 148F. I let it go for an hour and pulled a sample at the end to check gravity and pH. Gravity was 1.052 and pH was 5.5.
Boiled for 60 minutes with no issues, adding hops as scheduled above. Pulled a sample of wort at the end of the boil and began chilling and filling the carboy, which ultimately went into my keezer to chill more since groundwater is still a bit warm.
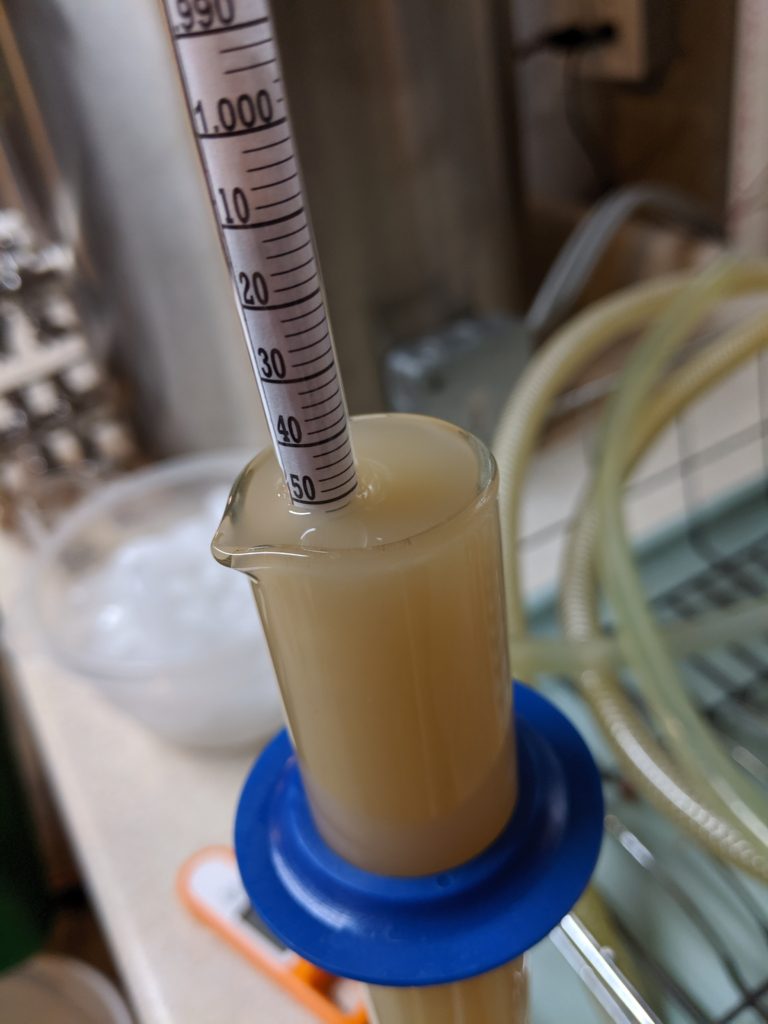
Went to check the OG… 1.056. This entirely baffles me, since I’m never that efficient. It’s making me question my thermometer. Presuming this beer finishes around 1.010, I’m going to end up with close to a 6% lager. Even more so, I’m going to check my thermometer. In addition, I may have mis-measured grain (or paid for an extra half pound). I checked the recipe with an extra half pound of pilsner malt and it bumps the 1.045 OG up to 1.048.
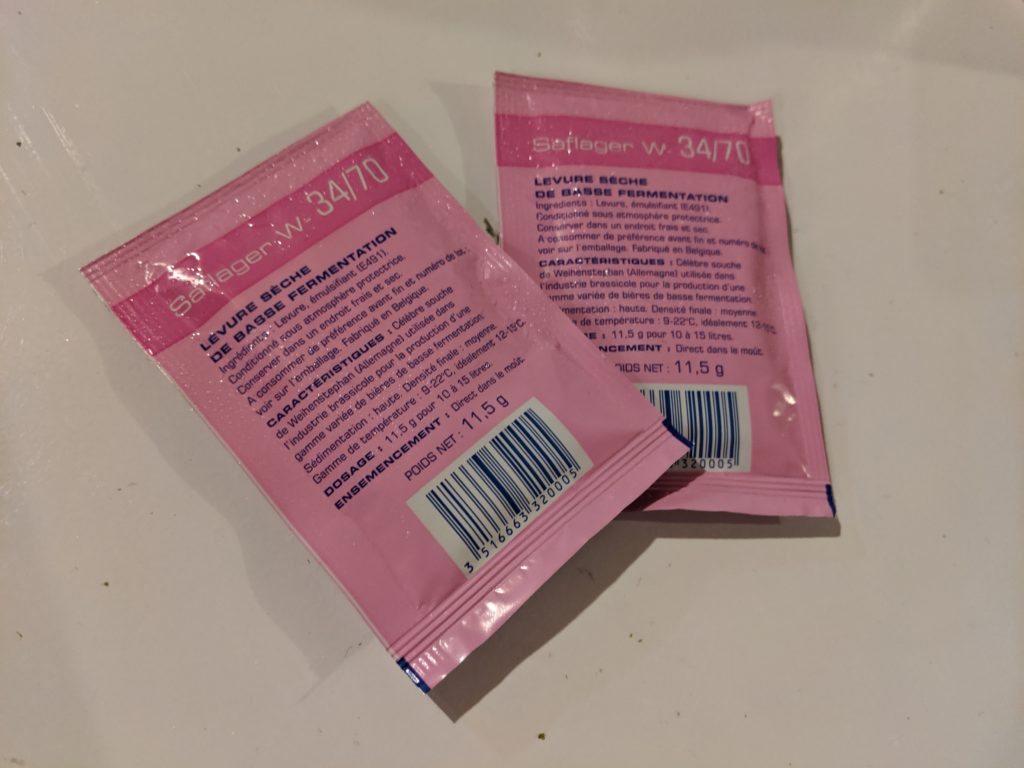
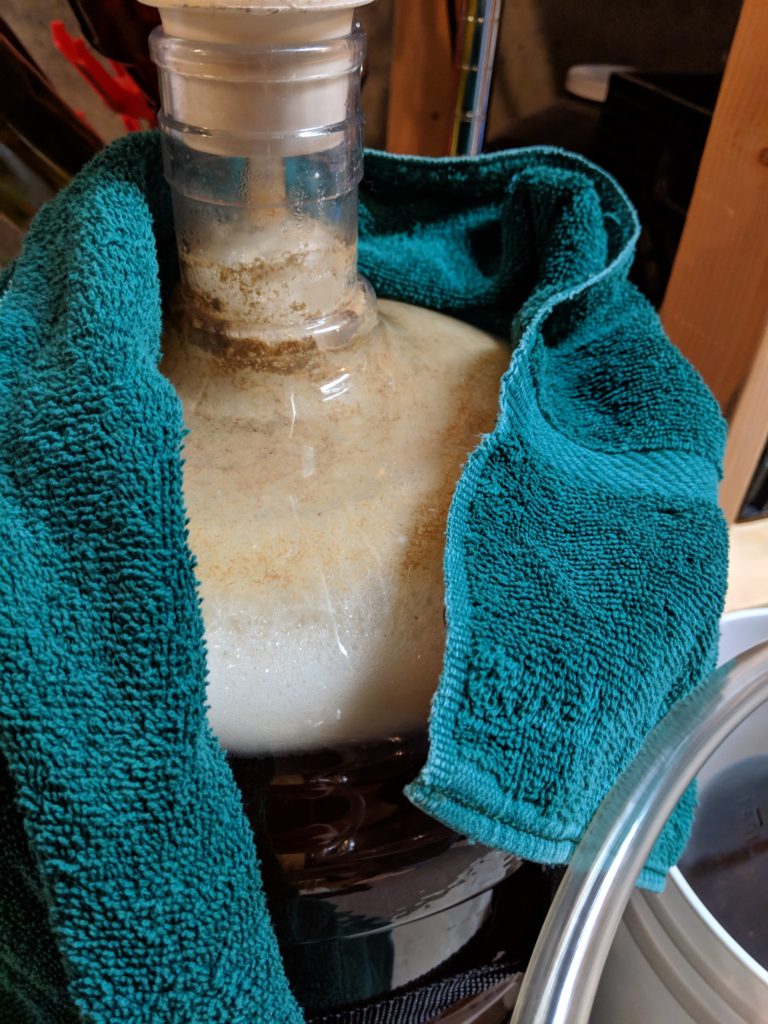
I decided that since W-34/70 tends to work well at room temperature, I’ll try my fermentation chamber that I’ve been building. I quickly added some styrofoam insulation to the top and door and got the peltier element running. Thinking that I might have to deal with issues of it staying a little warm, I didn’t add a temperature probe yet. I chilled the fermenter to 55F and move it to the chamber.

I learned that it isn’t working all that well. After seeing the temperature rise into the 60s F, I added some fans to try to help the situation. It didn’t.
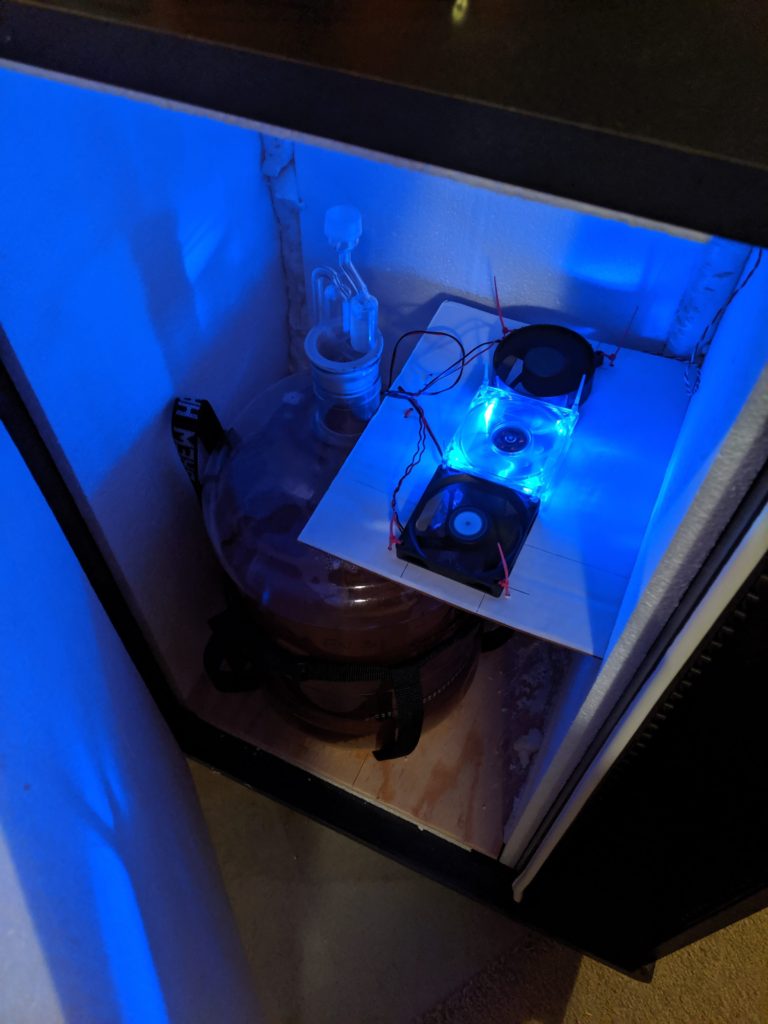
Yes, I had a lighted fan 😎 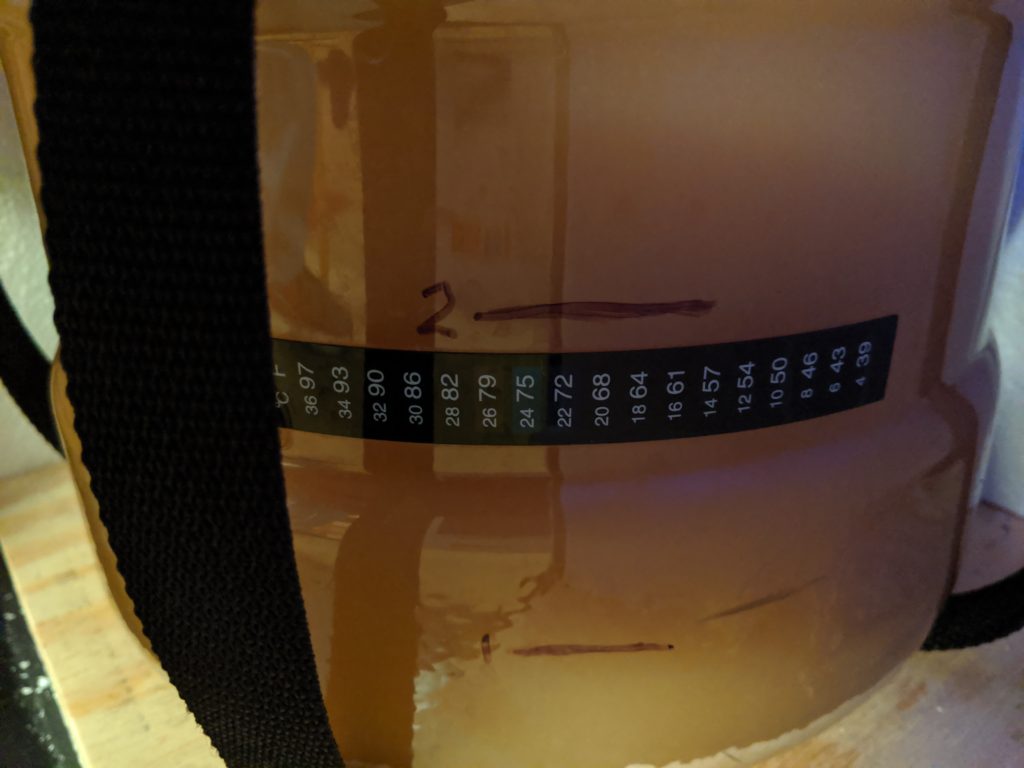
75… uhhh… 😕
Fast forward to Thursday, less than a week after the Saturday brew day. The airlock activity has ceased and the krausen has fallen. I pull a sample for a hydrometer and it’s 1.007. I taste the sample expecting a fruity fusely mess. Nope. It’s slightly fruity, but no fusels detected. I moved the fermenter into the keezer for lagering. My expected FG was 1.011, so clearly my mash temp was a little low… I adjusted the recipe to a light body profile and it dropped the FG to 1.009, so pretty close.
After lagering for a few days, I did pull another sample and it tasted a little green (acetaldehyde). It needs more lagering time than a week, but that’s expected.
After I removed the fermenter, I left the keezer on and put a temperature probe in through the door and left it for around 12 hours. Clearly I need to do some work on things, since it can only keep the chamber down to 68 🤷♂️.
I’ll need to do more work to do some better insulation – part will be an improvement in the sealing around the door, and I’m going to pull out the styrofoam and add better insulation that I have leftover from my office build project.
Review
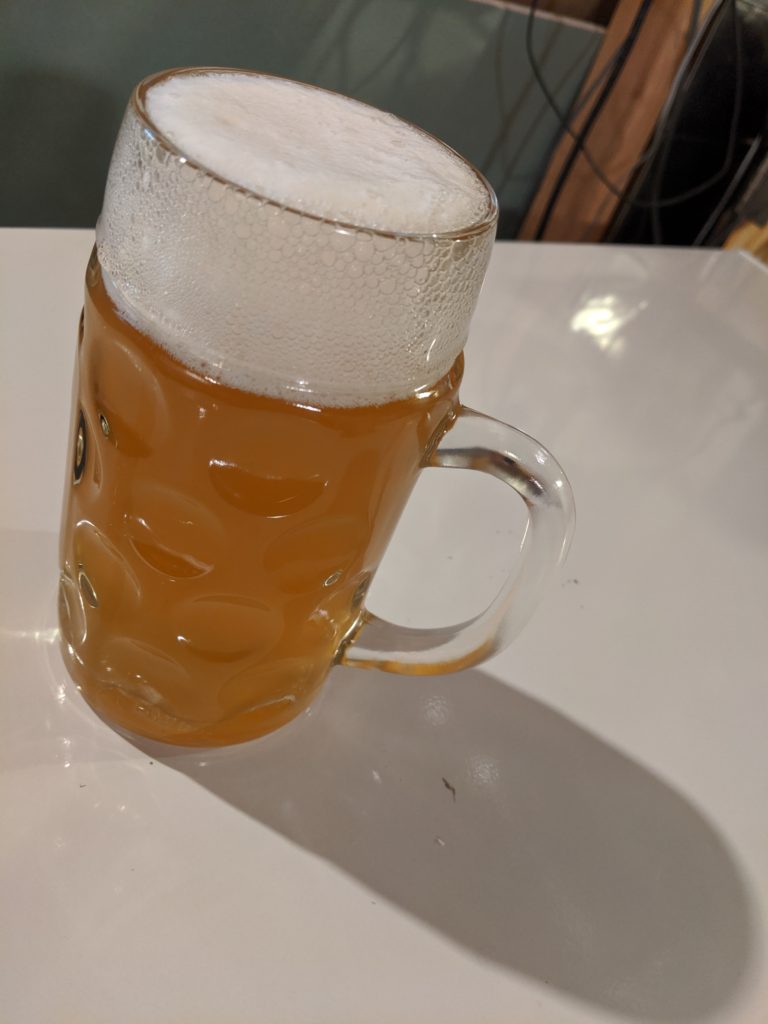
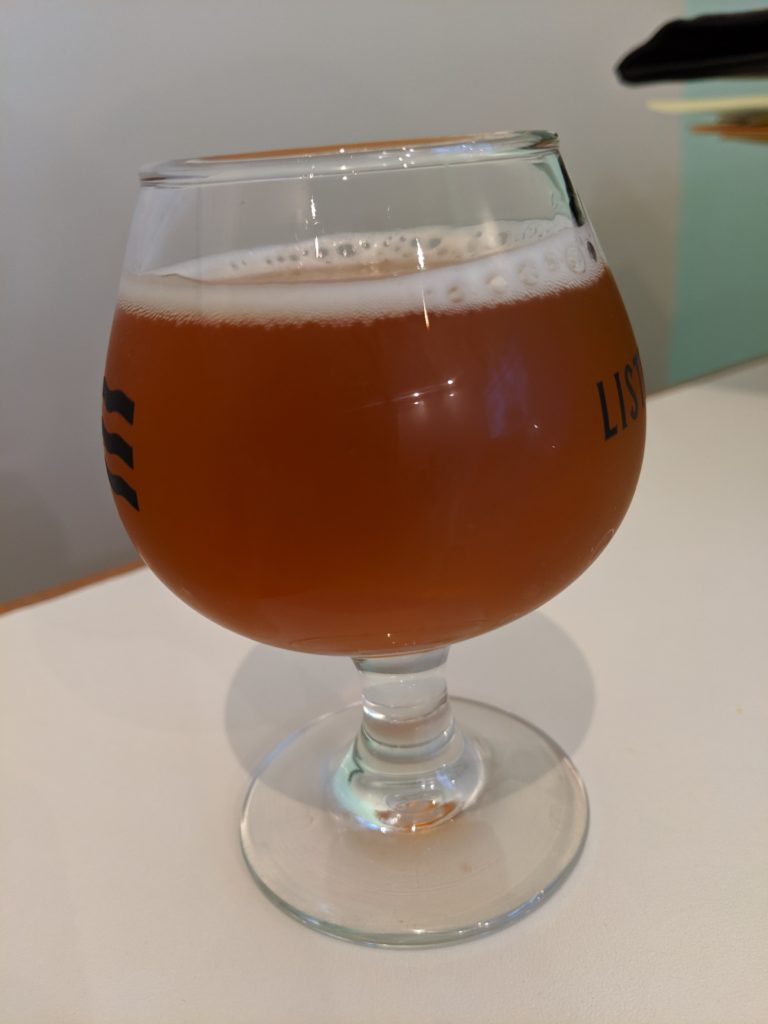
Appearance: Hazy yellow with a fluffy white head
Aroma: Fruity, apple, grainy
Taste: Malty and fruity. Some apple and vanilla. Very restrained bitterness does not represent anything remotely close to the claimed 59 IBU.
Mouthfeel: dry, thirst quenching.
Overall: very easy to drink. Would prefer a tad more bitterness (the fl
Next version: I’m likely going to double-up on the bittering charge, as this just isn’t as bitter as I wanted. I like it, but it’s not what I really was aiming for. 🍻
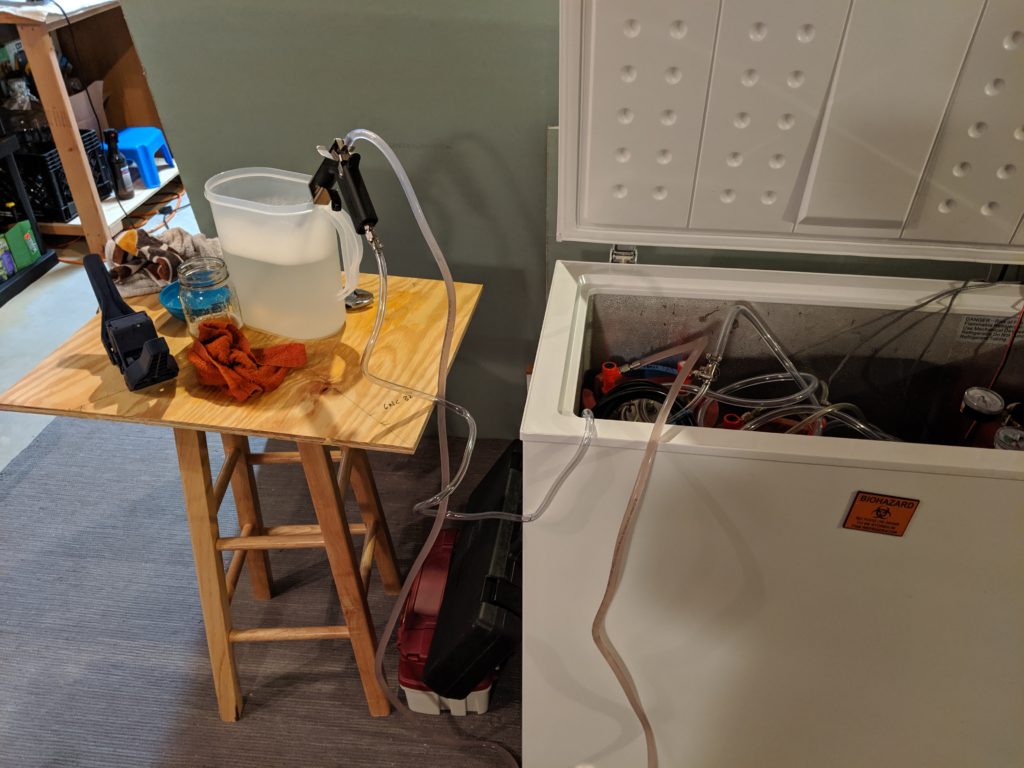
DIY Spunding Valve Setup!
After sitting in a pool drinking a can of Sam ’76 that a friend gave me, I decided that I do want to be able to lager. However, my basement is currently a mess and I don’t have room for anything like another chest freezer. Enter pressure fermentation. There is some scientific evidence that pressure fermentation reduces esters from yeast (although there’s some anecdotal evidence that yeasts like W-34/70 can handle fermentation at room temperature (and I’ve made a Tropical Stout with Wyeast 2124 Bohemian Lager and fermented it at room temperature… which is claimed to be the liquid version of W-34/70).
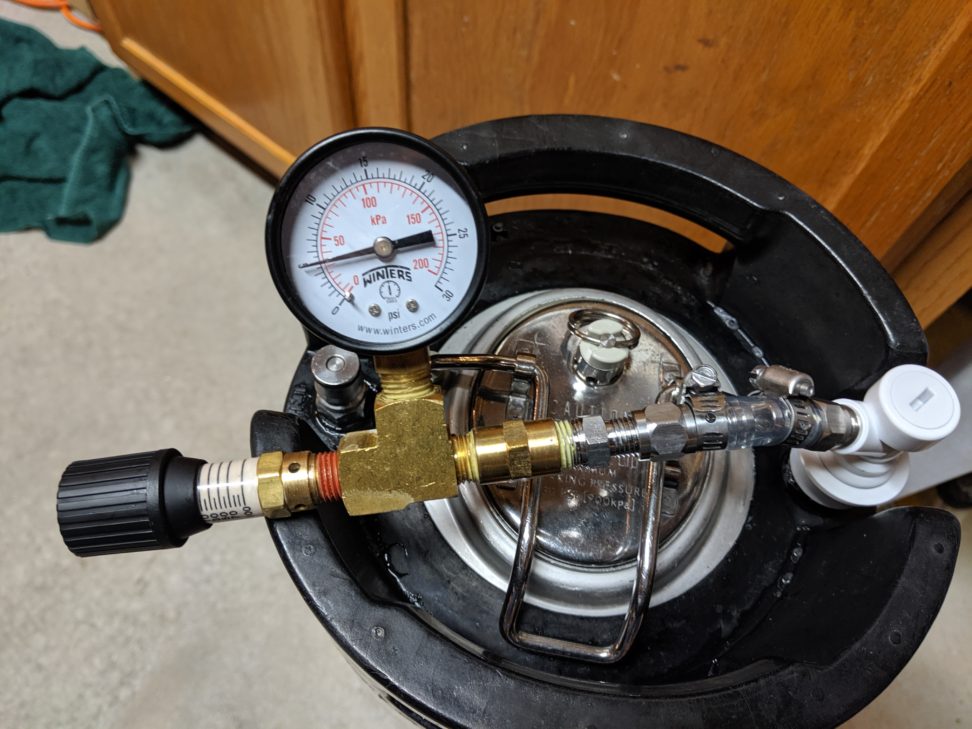
Spunding valve setups are pretty easy to make – at it’s most basic, it’s just a spunding valve connected to a keg post. Since people generally want to know what pressure they’re at (that can become really important), a smart thing to do is add a pressure gauge in the setup.
I happen to have an extra ball-lock keg that I used once in a kettle sour process. I did have to replace the lid with a new one, and I bought new O-rings (I kept the old ones in a bag marked “sour”, because I’m sure I’ll be making more sour beers too). I also had to buy some posts and disconnects.
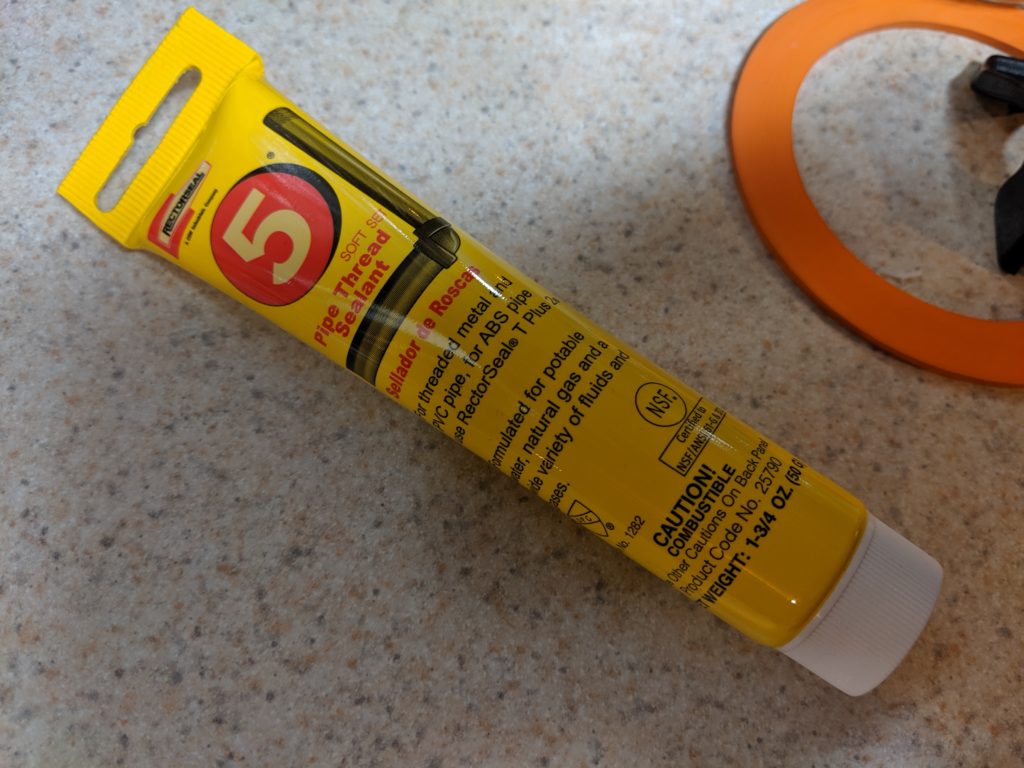
From the post, there’s a short length of hose to connect to some adapters and then to a T connection, which has the pressure gauge off the top and the spunding valve at the side. I used a liquid thread sealant on all threaded joints, although I imagine teflon tape would have been fine as well.
After some false starts with the posts being reversed (I usually use pin-lock kegs), I got it to hold air – it held 5 PSI for quite some time before I started typing this, and it was still at 5 PSI when I finished typing.
Cheers!
Mango Vanilla Milkshake IPA Brew Day
Sometimes you’re Two Hearted. Sometimes you’re Natty Light. This brew day felt more like Natty Light.
I was not actually ready to brew. I had most of the ingredients. I had the yeast I wanted to use. I had most of the hops I wanted to use. I had the mango. I had both vanilla beans and a vanilla tincture. I didn’t have water put out, but I had Campden Tablets… which I had to look for.
I also am trying to make small improvements in my brew day. I’ve been adding tri-clover fittings to everything… the decision to use this type is due to my boil kettle having that type – and I want only one system.

In addition to the tri-clover fittings, I had a three-way valve. Something I’ve never used.
So I start getting the HLT heated up (and it’s temperatures are not reading correctly, as I found in my last brew day), and getting some water started to pre-heat my mash tun. At that point, I decided to mill my grain. My system for this is really shoddy – I have my mill mounted to a too-thin piece of plywood with nothing to ensure that all the milled grains go into a bucket. Usually, I can get all the grist into the bucket. This time was different, I lost a fair bit to the floor.
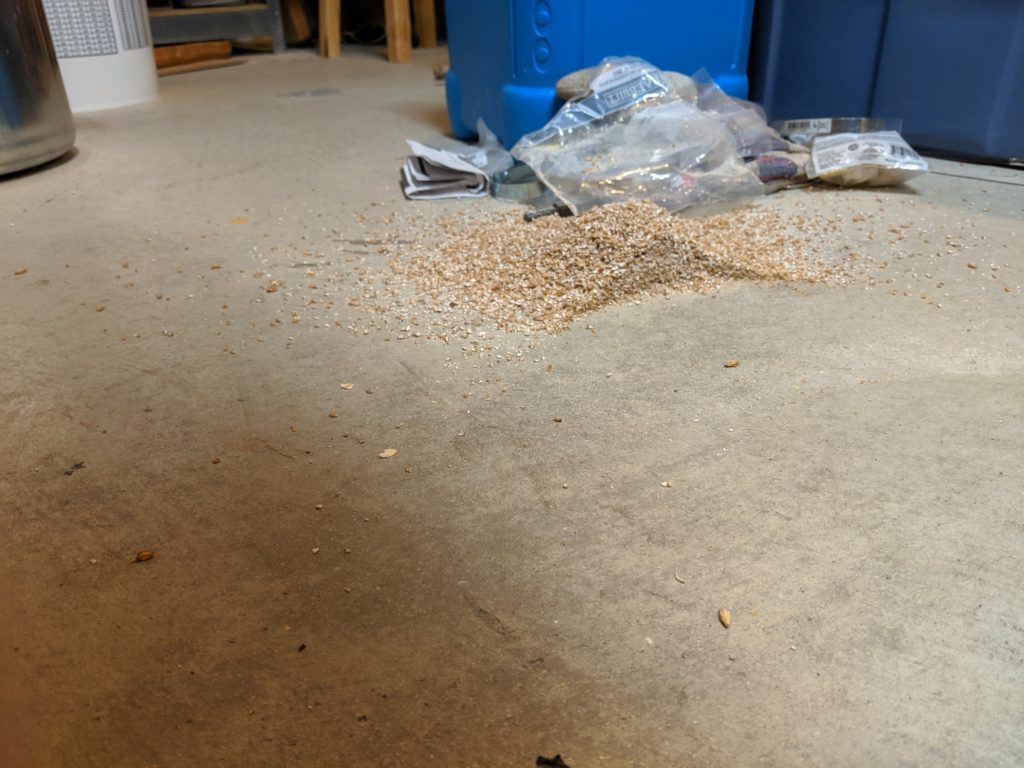
I mashed in and hit my temps and somewhat close to my gravity numbers… given that I had a bit of malt sitting on the ground that went into the trash can.
Then I got to 15 minutes remaining in the boil. I added a late charge of hops and started setting up for a whirlpool and to run hot wort through my new counterflow chiller… and I was one tri-clover clamp short. I tried to adapt by attaching my pump directly to that new three-way valve. As soon as I powered up the pump, it started squealing so I turned it back off. After much finagling, I got the pump running on the “wrong” side of the chiller. I would have preferred to have the pump between the kettle and the chiller… I was able to get stuff running by having the pump between the chiller and the whirlpool inlet. I then added the whirlpool hops and (oops, late) lactose.
I had a very weak whirlpool that made me concerned, but I let it go… and it did chill. I got the wort down to around 85 and had difficulty getting the three-way valve to send the wort to the fermenter. After finally getting it there, I pitched some Omega Hothead Kveik.
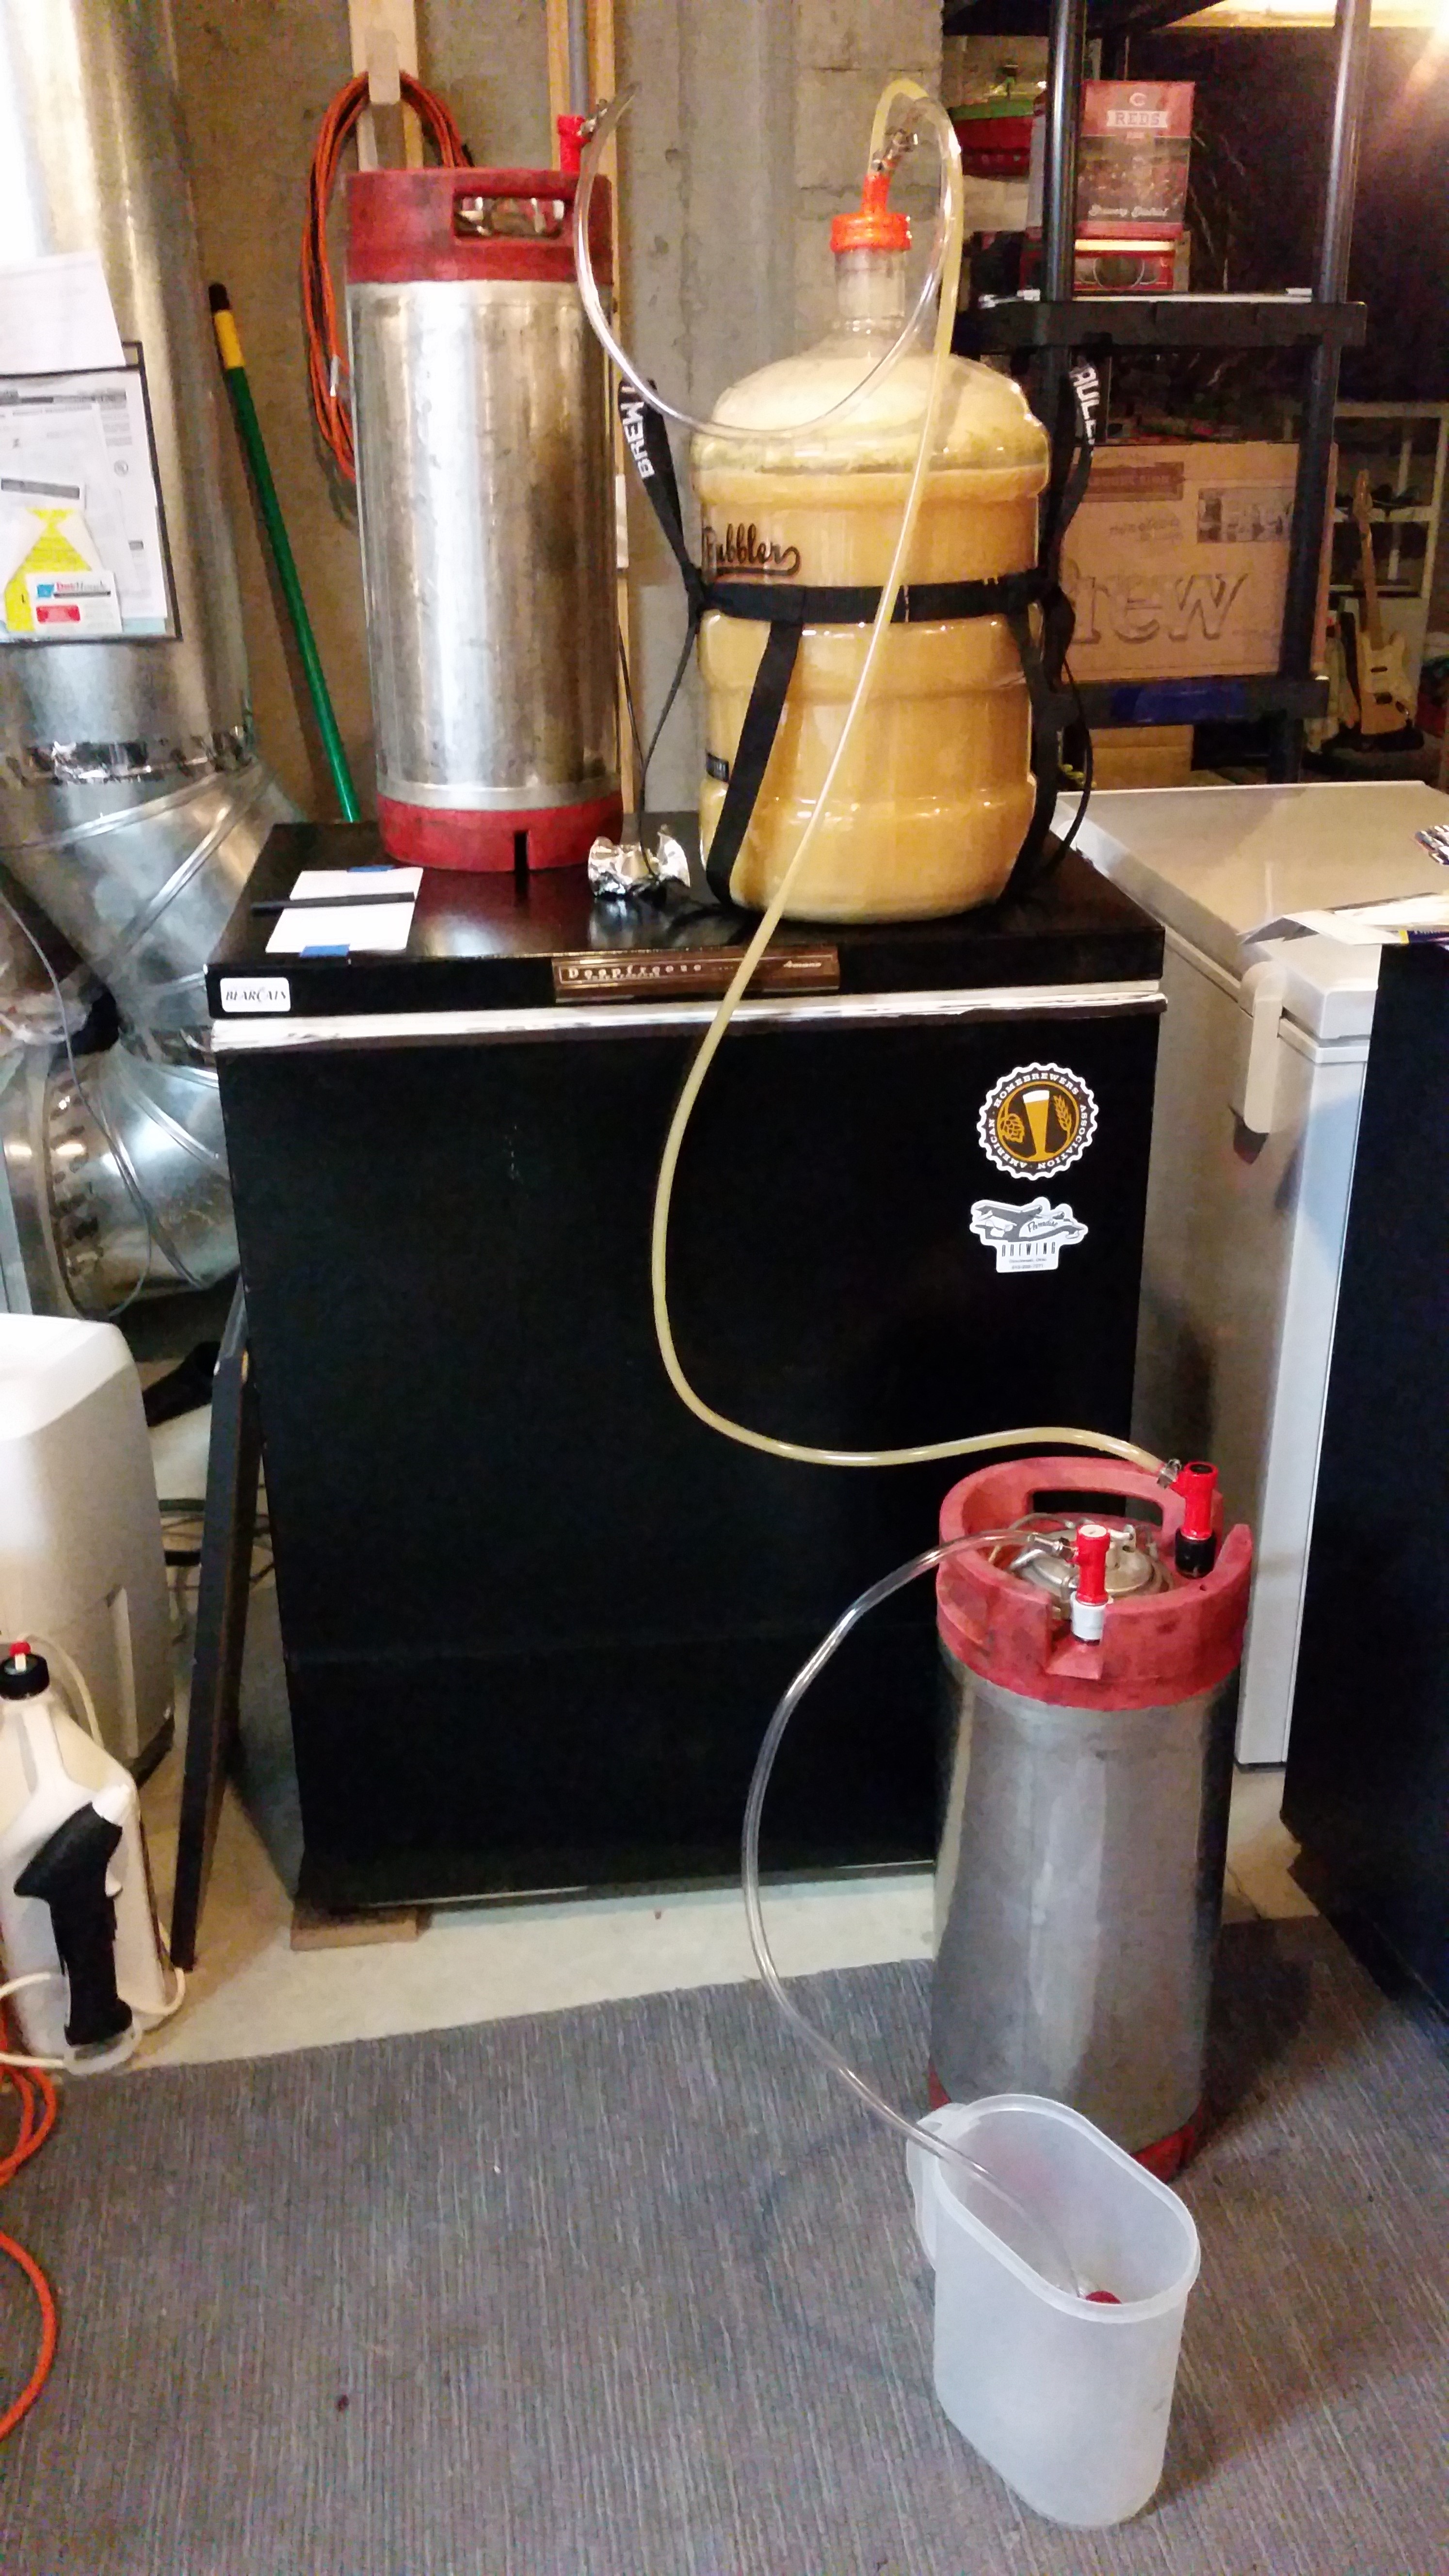
After two weeks in the fermenter, I added mango. I used 5 pounds of frozen cubes that I slightly thawed in my microwave and then pureed in the blender (sanitized, of course) and dumped the puree in via a funnel. A few days later, after the secondary fermentation kicked off, I added around 8 ounces of vanilla bean tincture (cheap vodka aging 4 vanilla beans that were sliced open). I had so much difficulty with getting samples that I cold-crashed the fermenter and kegged without too much tasting. I was half a gallon low into the fermenter (I target 5.5 gallons in the fermenter any time I dry hop). I lost a gallon to fruit. Maybe it would have been better if I cold crashed longer, but I’m not sure.
I kegged it on July 7 with some keg hops. I was hoping that I could take it to a homebrew club meeting on July 11. Between running out of CO2 and green hop flavor, it wasn’t happening.
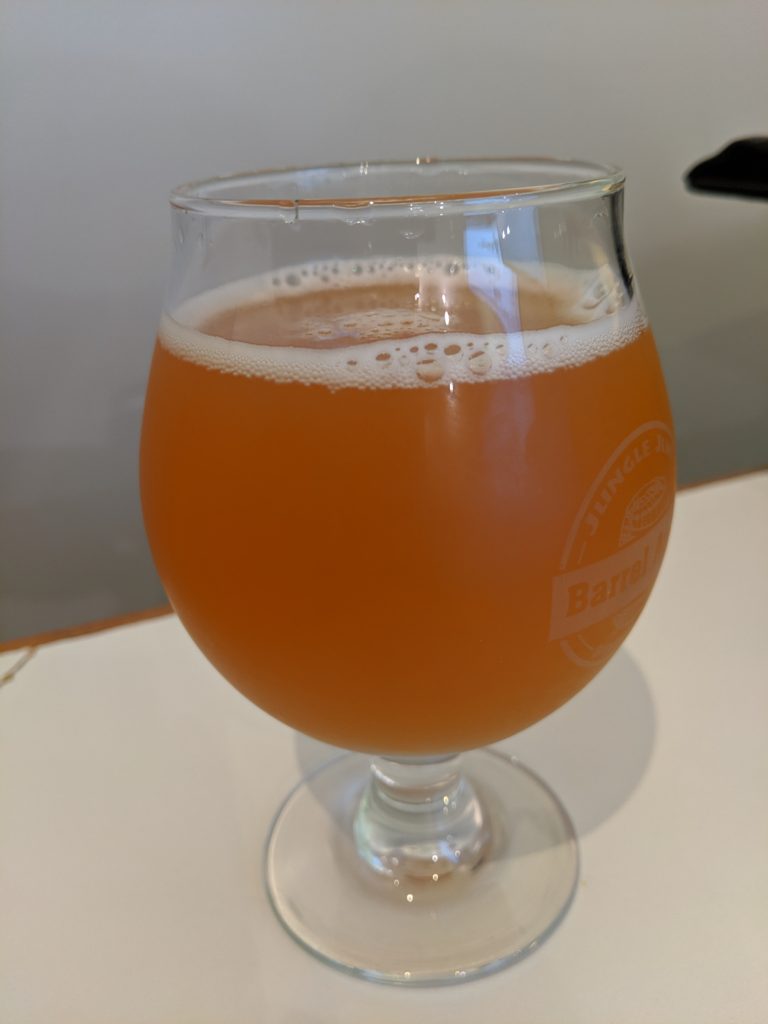
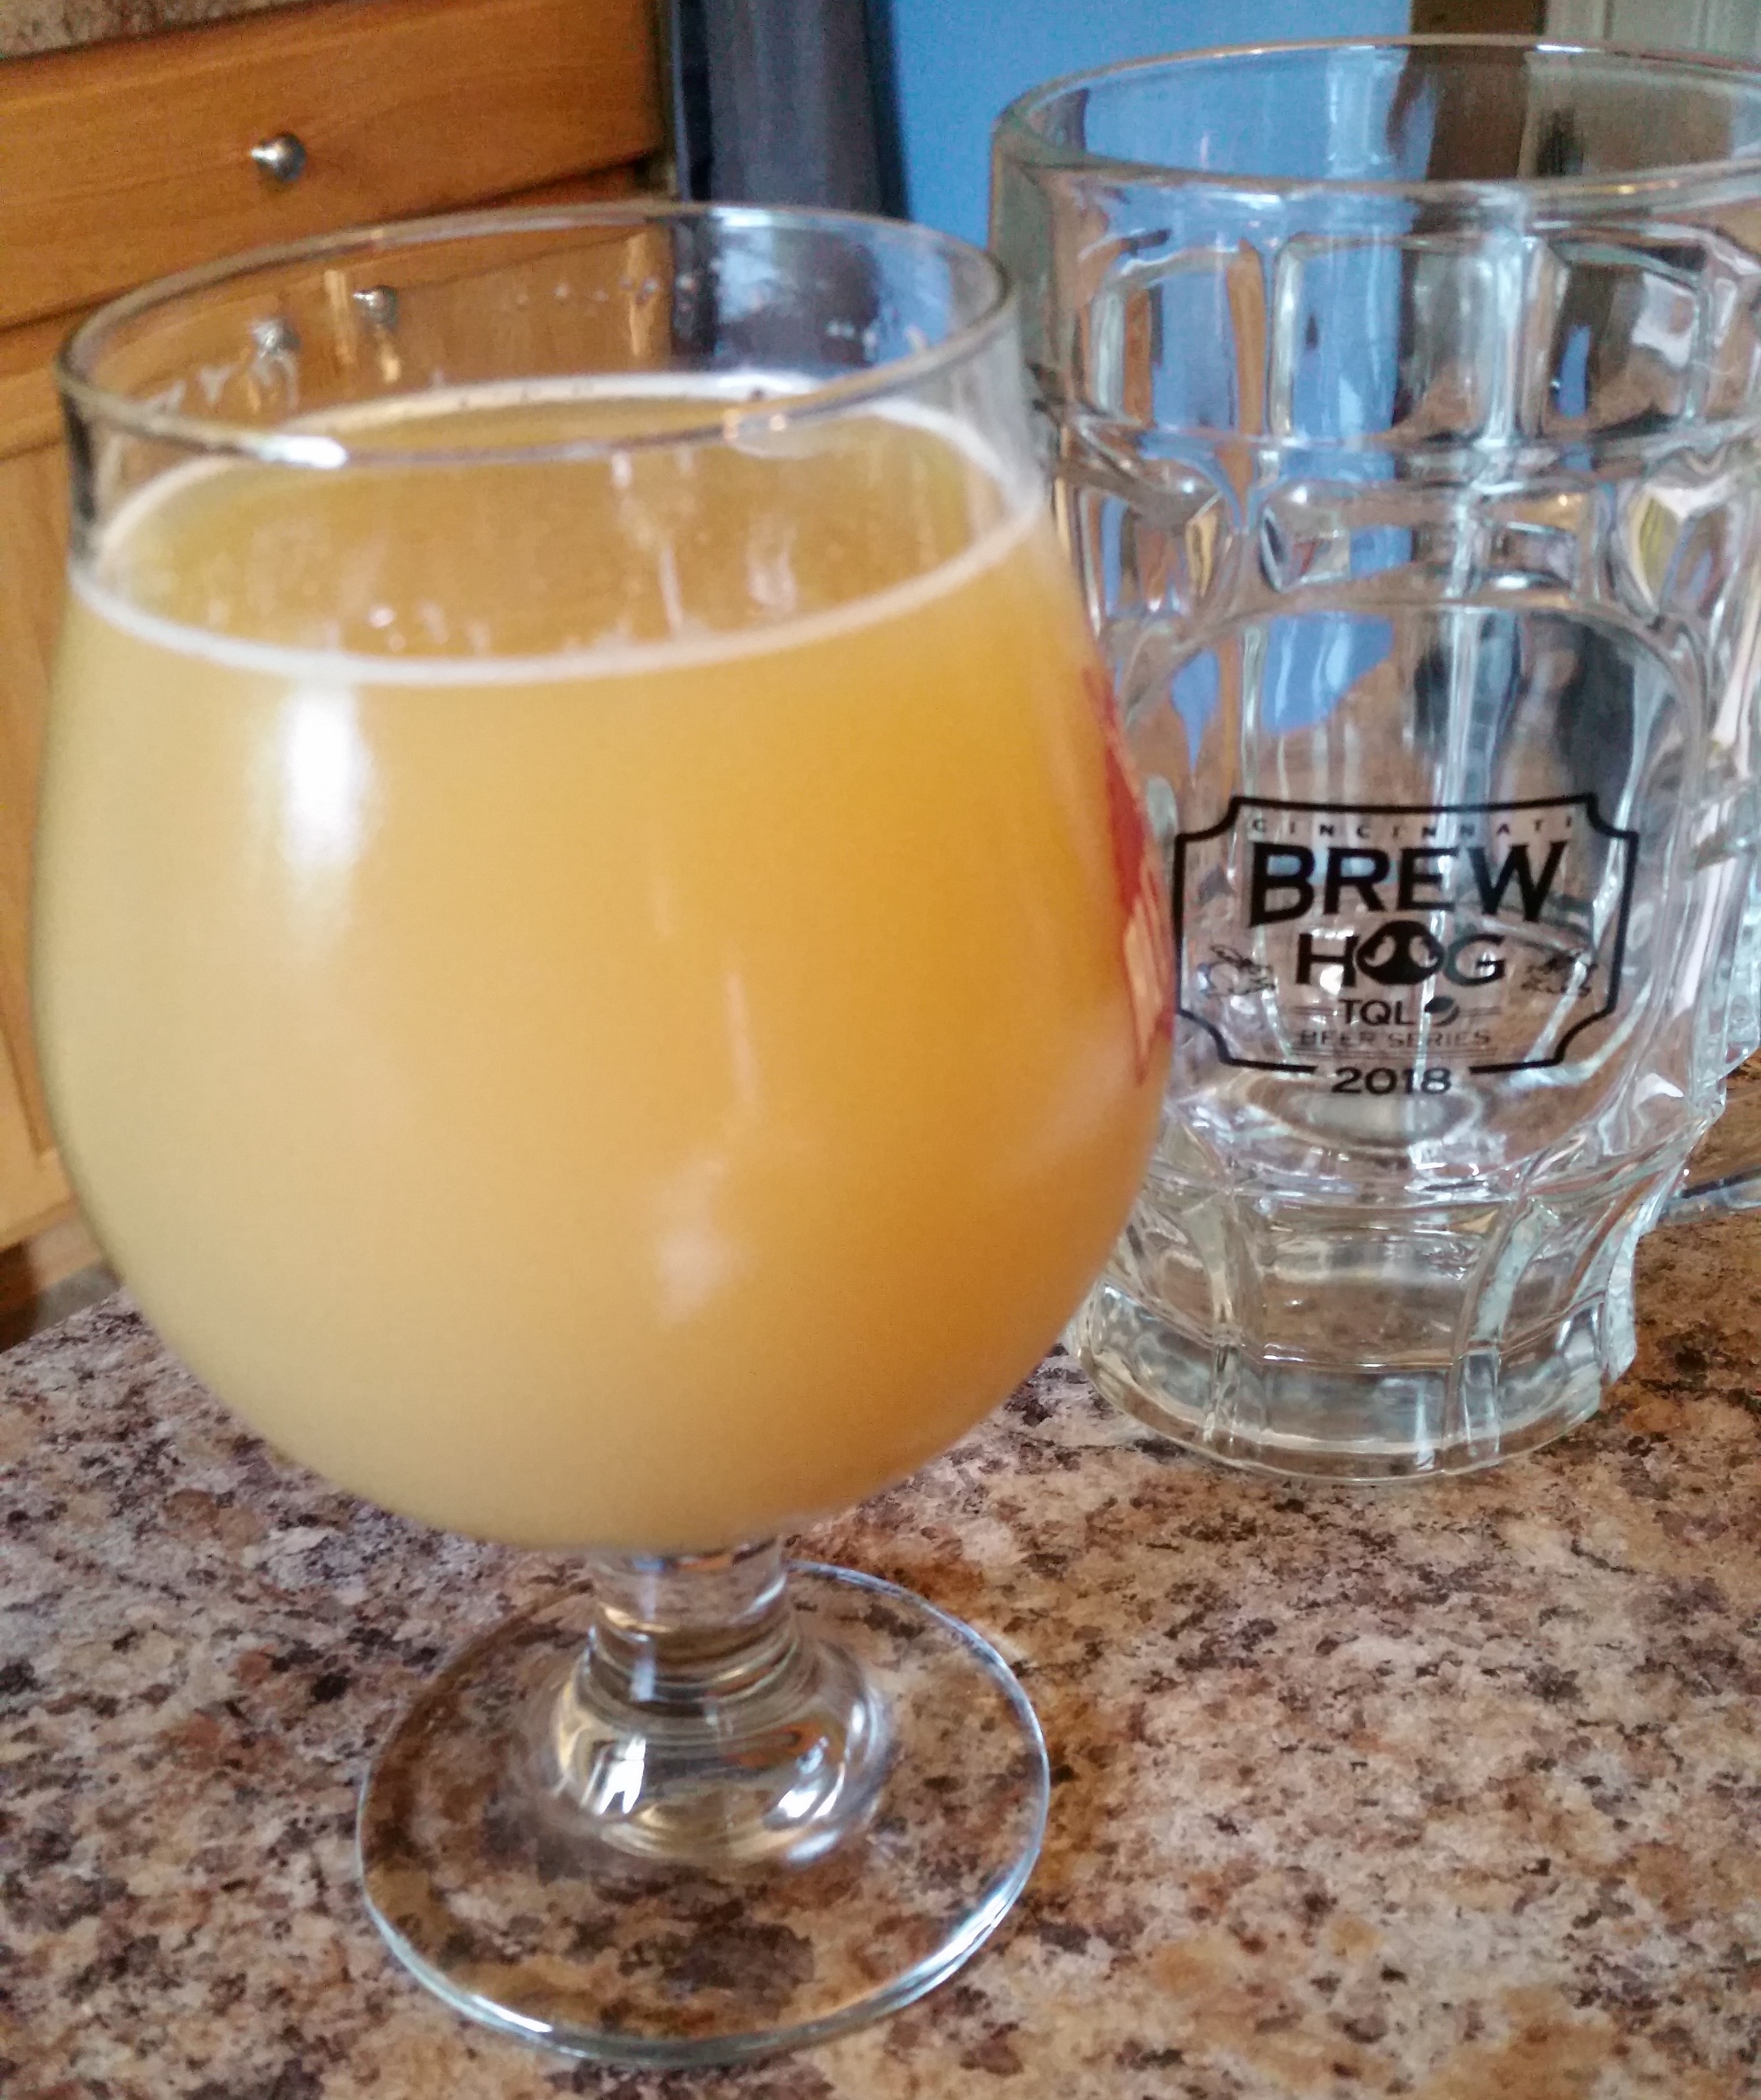
The aroma is vanilla and tropical fruit, obviously dominated by mango. The appearance is opaque copper. Once properly carbonated and aged to allow the hops to meld a little, the flavor is quite nice – the slight carbonic acid bite actually works well here. There’s a lot of hop flavor, little bitterness (but there is some), and some vanilla that comes in late. There is a sweetness to it, which is as expected. The mouthfeel has a slight thickness, which works well for the style but could probably use to be amplified.
Cheers!
Fucking Munich Malt!
Every time I’ve brewed with Munich malt, I’ve had a problem of what seems to be acetaldehyde (or maybe it’s just ‘green’) flavor in the beer. There hasn’t been many, and these have not been brewed consecutively. Brews between these have NOT exhibited the same flavor, and the flavor does fade after time.
Brew 1: British Mild
This was brewed on 9/3/2017 and was supposed to be a partial fresh-hop (Chinook) IPA, propped up with some Chinook pellets. The hop character wasn’t as extreme as an IPA and I ended up using some S-04 mixed with an un-inflated bag of Denny’s Favorite (long story). I noticed the acetaldehyde flavor, as did a judge or two at a competition. I liked the beer, though, and drank the heck out of it.
Brew 2: Dunkelweisen
This was brewed on 12/17/2017. This beer was all over the place, and at one point had a distinct Festbier taste, probably from the aroma hops I shouldn’t have used. I recently (at time of writing) opened an old bottle and it’s way too bitter for a Dunkelweisen.
Between brews 1 and 2, I brewed an IPA. No Munich Malt in that one, and no acetaldehyde-ish flavor.
Brew 3: Bock
This was brewed recently (12/27/2018), and it was a door prize from my homebrew club. It ultimately got over the sweet flavor to end up as a damn good beer that won a gold medal in the Bloatarians Bockfest Competition.
Between brews 2 and 3, I brewed a Flander’s Red (still in the fermenter), a pale ale (had a different off flavor later found to be due to improperly cleaned equipment), a tropical stout (no off-flavor, no Munich Malt), and a pale ale (no off-flavor, no Munich Malt)
Brew 4: Fuck Munich Malt Beer!
The two common threads the above beers have is the same LHBS and Munich Malt. So I decided to test this out with a beer somewhat reminiscent of that British Mild above, but with a little bit more backbone. I purchased the grist from a different LHBS.
Recipe was simple (but not simple to get from BeerSmith on my iPad to WordPress). This is for 5 gallons into the fermenter:
10 lb Maris Otter
1 lb Munich 10
0.5 lb Crystal 60
0.6 oz Magnum @ 60 min
1 oz Fuggle @ 15 min
1 oz Falconers Flight 7Cs @ 5 min
1 pack Wyeast 1318 – London Ale III
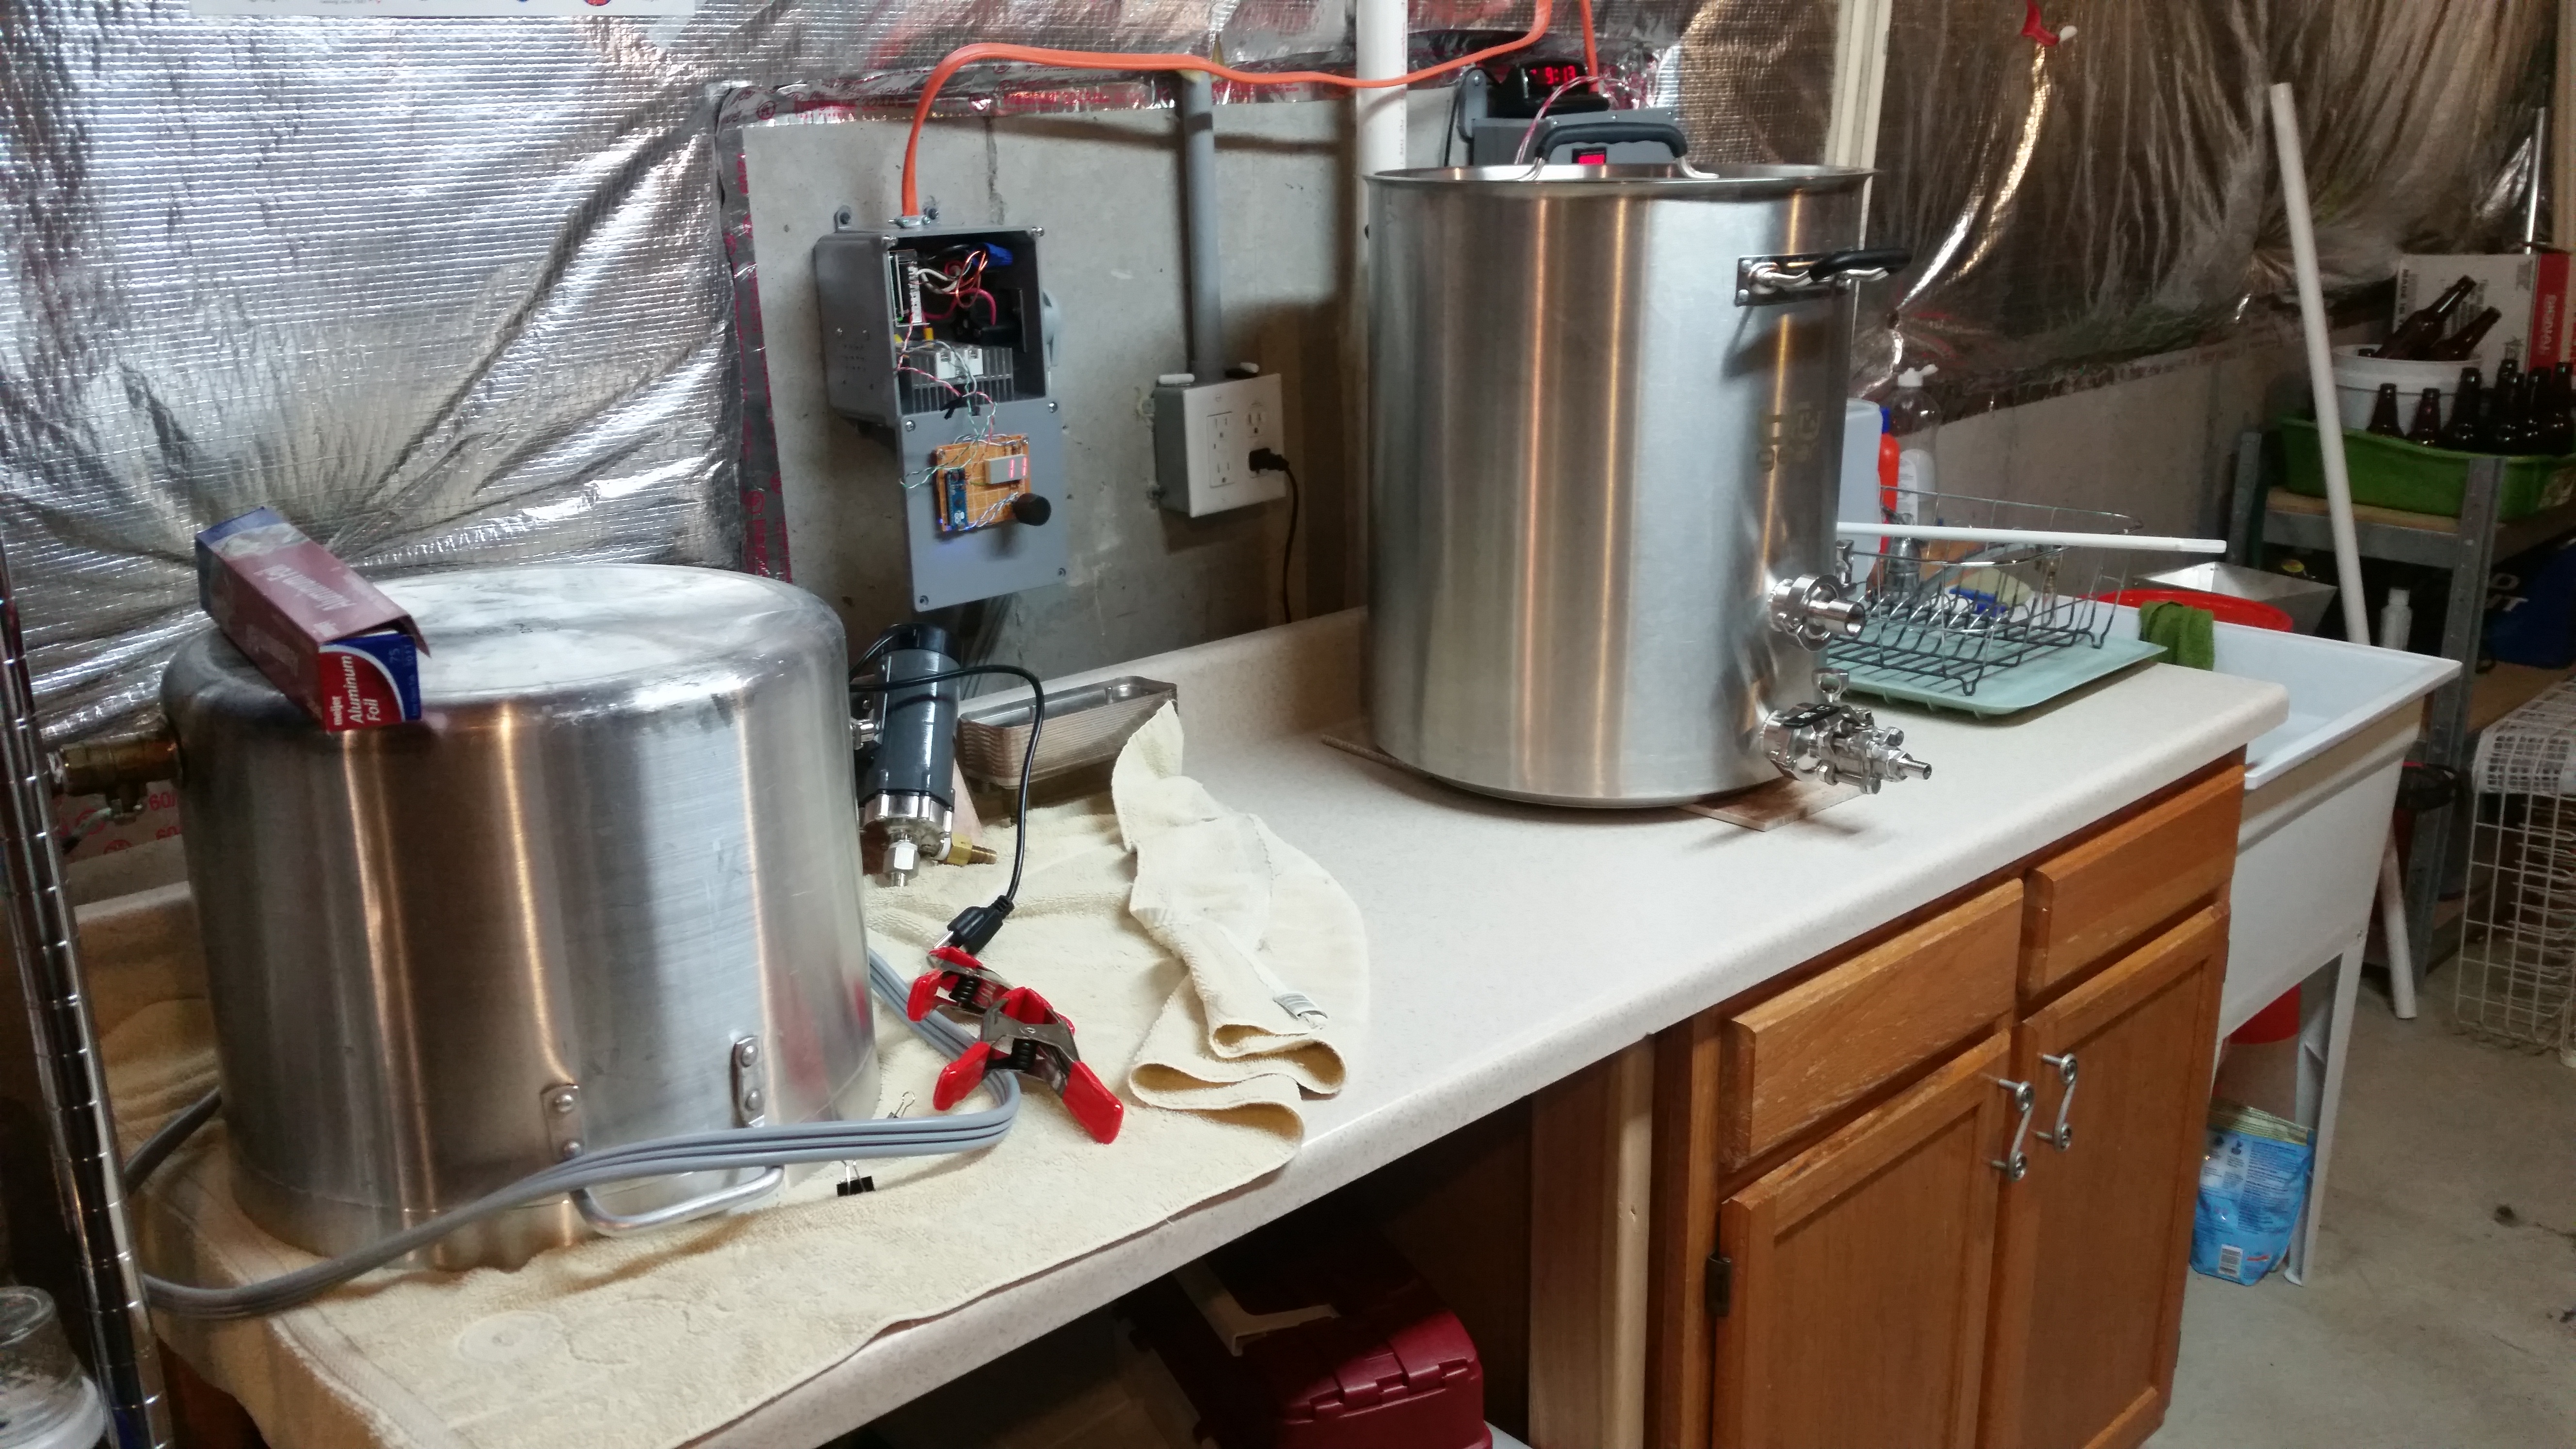
I made a change to this brew day – I added some stainless. I bought two pickup tubes – one for the bottom of my kettle and one for the top. The bottom is to get more wort with less tilting. The top is to form a whirlpool during the final 15 minutes when I recirculate through my plate chiller to sanitize it.
Brew day was somewhat frustrating. First, my thermometer disagreed with my PID… and I’m not 100% sure which one was correct. Ordinarily, I’d go with the thermometer, but later this happened…
Then my plate chiller (which is a 🤬🤬 piece of 🤬🤬 🤬🤬🤬🤬 🤬🤬 🤬 🤬🤬 🤬🤬🤬 🤬🤬🤬🤬… and don’t even ask what a ‘🤬🤬🤬’ is!) clogged. Had it not, that new stainless would have had a damn good whirlpool. Given my frustrations with cleaning it (it likes to hide break material and hop material no matter what I do to clean it), I broke down and bought a counter-flow chiller the day after brew day.

There was another issue. I thought about how I’d make a whirlpool, but did not think about how I would get beer into the fermenter. Oops. I’ve bought more stuff from Brewer’s Hardware to fix that, too.
This ended up staying in the fermenter for a while, and during various tastes, I DID pick up on that overly-sweet flavor. Somewhere (I don’t remember if it was a podcast like Experimental Brewing or talking with a friend+brewer or homebrew club buddy), I got the idea that it might be a yeast phenol. I ended up leaving it in the fermenter for an extra week or two. The flavor faded, which makes me think that it is a yeast-based off-flavor. The British Ordinary Bitter that I ultimately kegged was quite tasty after the extra conditioning time.
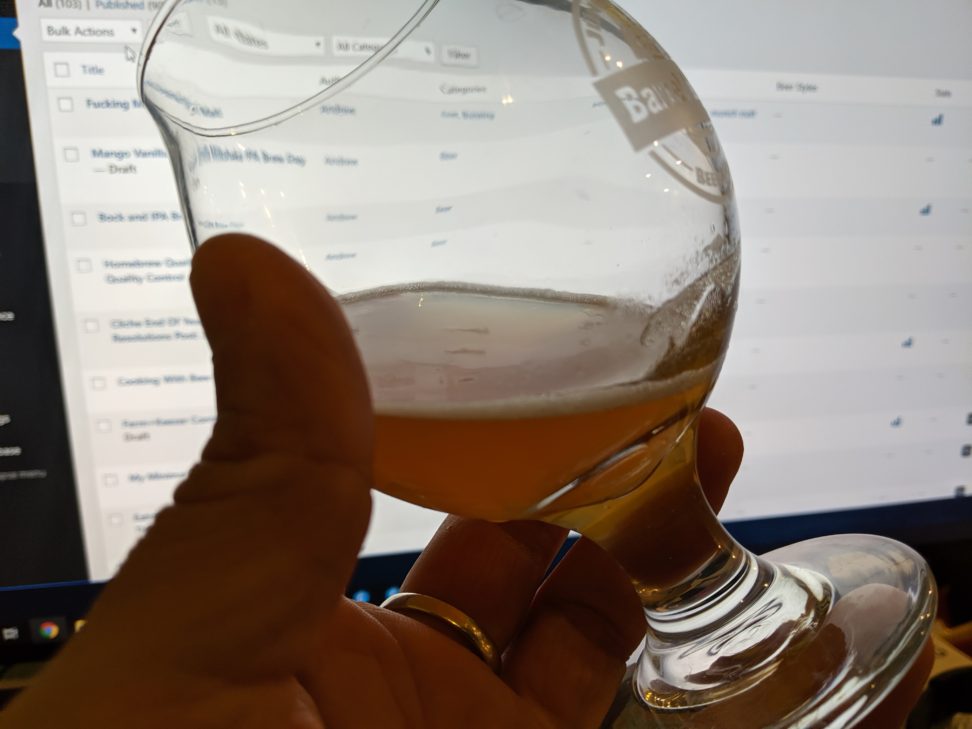
The appearance is hazy with a copper color with a white head. The aroma is slightly hoppy with some nondescript malt. The flavor is bready and cherry, and is really quite nice, and there is a slight bitterness on the end that has a slight woody quality. It was a bit of a hit at a homebrew club meeting.
Back to that “Fuck Munich Malt” Part…
As is similar with the others, I brewed a few things between brews 3 and this brew – an IPA and a Saison, neither have an off-flavor or Munich Malt, and after this brew, I brewed a milkshake IPA with no off-flavor and no Munich Malt (the flavors are pretty strong in that, so this doesn’t tell us anything!)
So one thing to note is that I *did* taste that off flavor with the malt from the different LHBS – so I feel like it is NOT a problem with either LHBS, it’s a ‘thing’ with Munich Malt. There’s a lot of beers that use Munich Malt that are lagers, and the extended lagering should ultimately drive off the flavor.
Cheers!
Bock and IPA Brew Days
My pipeline of homebrew went dry. I had been in a fine position until I needed to build an office in my basement, which took precedence over brewing. However, I work from home now, and my pay increased as a result 🙂. I’ve been enjoying some commercial beers – we’re truly blessed in Ohio to have such wonderful beers to drink!
Bock Brewday
I won a Dunkles Bock kit as a door prize from the homebrew club Christmas Party. I brewed while working, which was stupidly arrogant. I missed my mash temp by 10 degrees and ultimately did no-sparge because of the amount of hot liquor I had to add to get it to 152, which is lower than I wanted still. And I only got 4 hours of working instead of 8. I’m never doing this again. I didn’t take any pictures (because work).
The beer was ultimately a 5.5% Bock, which is a little light. However, it won first at the Bloatarian Bockfest Competition and after the green-ness wore off, it was a damn good beer!
IPA Brewday
This is close to a remake of a previous IPA that I absolutely enjoyed. I’m changing a few things, though- different yeast and no keg hops. Instead of WY Denny’s Favorite, I used Imperial Dry Hop and I used some Citra Cryohops instead of normal Citra. I may have also used less Waimea hops too. This one is not as good as the last one, though.
During the brew day, I overshot my mash temp, starting in the high 150s.
The finishing gravity was way high – like the last time, but higher. I later determined that my mash temp was way too high and likely caused less apparent attenuation (as noted in Zymurgy Nov/Dec 2018 Ask The AHA column, and referenced in the March/April 2019 Dear Zymurgy column.
This isn’t a dumper, though.
Cheers!
My Minimal Oxygen Transfer Method
I made a NEIPA, which I love and hasn’t turned brown… for those unaware, these things oxidize quickly.
I fermented this in a plastic carboy to give me the potential to transfer to a keg with minimum oxygen. This was the first try, so I did have some issues (which are addressed in the procedures, I’m not talking about my screw-ups here).
1: Cold Crash (if possible)
Cold crashing will remove much of the yeast from suspension, and that will likely improve flavor. I skipped this because my fermentation chamber is unable to go below 55 (actually, I’m not even sure if it’ll go below 60, but it can keep an ale at 68).
2: Setup
The basic bare-bones of this is a gravity transfer. That being said, the fermenter needs to be up on something and the destination keg needs to low (like on the floor). You should already have a racking cane in a siphon cap and the other end should be prepared with a CO2 line. Since I don’t have an extra CO2 tank, I fitted mine with a gas post. Make sure you use Oetiker clamps or worm clams on the gas lines!

The destination keg should be purged of oxygen (fill it with CO2 and pull the pressure-release valve or otherwize depressurize the keg (mine are pin-lock, so I fill and then use another gas post to depressurize). Additionally, if you’re like me and don’t want to move your CO2 tank, you can use an empty keg as a temporary tank – purge that keg and then pressurize.
If you keg hop, as I did with this, bag the hops and place in the keg before purging.
The only time the fermenter has any oxygen exposure is if you have to remove a blow-off or airlock to place the carboy cap. That should be done quick, and prior to doing that, the cap, cane, and line should be sanitized and the posts (on the ends of the lines connected to the carboy cap) should be fully assembled. If you’re using a CO2 tank, connect it and push a little CO2 through it before making the switch.
3: Begin Transfer
Connect the lines in this order:
- Fermenter to Keg
- Keg gas out (into a container of sanitizer, like a blow-off tube).
- HOLD ONTO THE FERMENTER CAP!
- Push (DO NOT CONNECT) the CO2 keg (if using a CO2 tank, use a very low pressure)
- DURING THE TRANSFER, make sure to continually supply CO2 to the fermenter – if it is closed it will start to implode and the siphon will slow.
At some point, the flow will stop. It is unlikely that there will be enough pressure to force beer out through the gas line, what tends to happen is that once the beer gets to it, it’ll stop. If there happens to be enough pressure, you’ll see beer getting into the sanitizer – that’s your signal to stop! Disconnect the keg liquid line (be prepared to wipe up some spillage) and the gas line.
Once that’s done, proceed to carbonate as normal. For this beer, I force-carbonated on about 12 PSI for about a week.
Belgian Wit Brew Day
With the semi-success of the White IPA, I decided to re-use the yeast for a Belgian Wit.
Recipe Details
| Batch Size | Boil Time | IBU | SRM | Est. OG | Est. FG | ABV |
|---|---|---|---|---|---|---|
| 5.5 gal | 60 min | 17.0 IBUs | 4.1 SRM | 1.048 | 1.012 | 4.8 % |
Style Details
| Name | Cat. | OG Range | FG Range | IBU | SRM | Carb | ABV |
|---|---|---|---|---|---|---|---|
| Witbier | 24 A | 1.044 - 1.052 | 1.008 - 1.012 | 8 - 20 | 2 - 4 | 2.6 - 3.4 | 4.5 - 5.5 % |
Fermentables
| Name | Amount | % |
|---|---|---|
| Pale Malt (2 Row) Bel | 5 lbs | 50 |
| Wheat, Flaked | 2 lbs | 20 |
| Wheat Malt, Pale (Weyermann) | 3 lbs | 30 |
Hops
| Name | Amount | Time | Use | Form | Alpha % |
|---|---|---|---|---|---|
| Warrior | 0.25 oz | 60 min | Boil | Pellet | 15 |
| Saaz | 0.5 oz | 15 min | Boil | Pellet | 3 |
Miscs
| Name | Amount | Time | Use | Type |
|---|---|---|---|---|
| Coriander Seed | 0.75 oz | 5 min | Boil | Spice |
| Orange Peel, Bitter | 0.75 oz | 5 min | Boil | Spice |
Yeast
| Name | Lab | Attenuation | Temperature |
|---|---|---|---|
| Belgian Witbier (3944) | Wyeast Labs | 74% | 62°F - 75°F |
Mash
| Step | Temperature | Time |
|---|---|---|
| Mash In | 152°F | 60 min |
Download
| Download this recipe's BeerXML file |
Brew prep
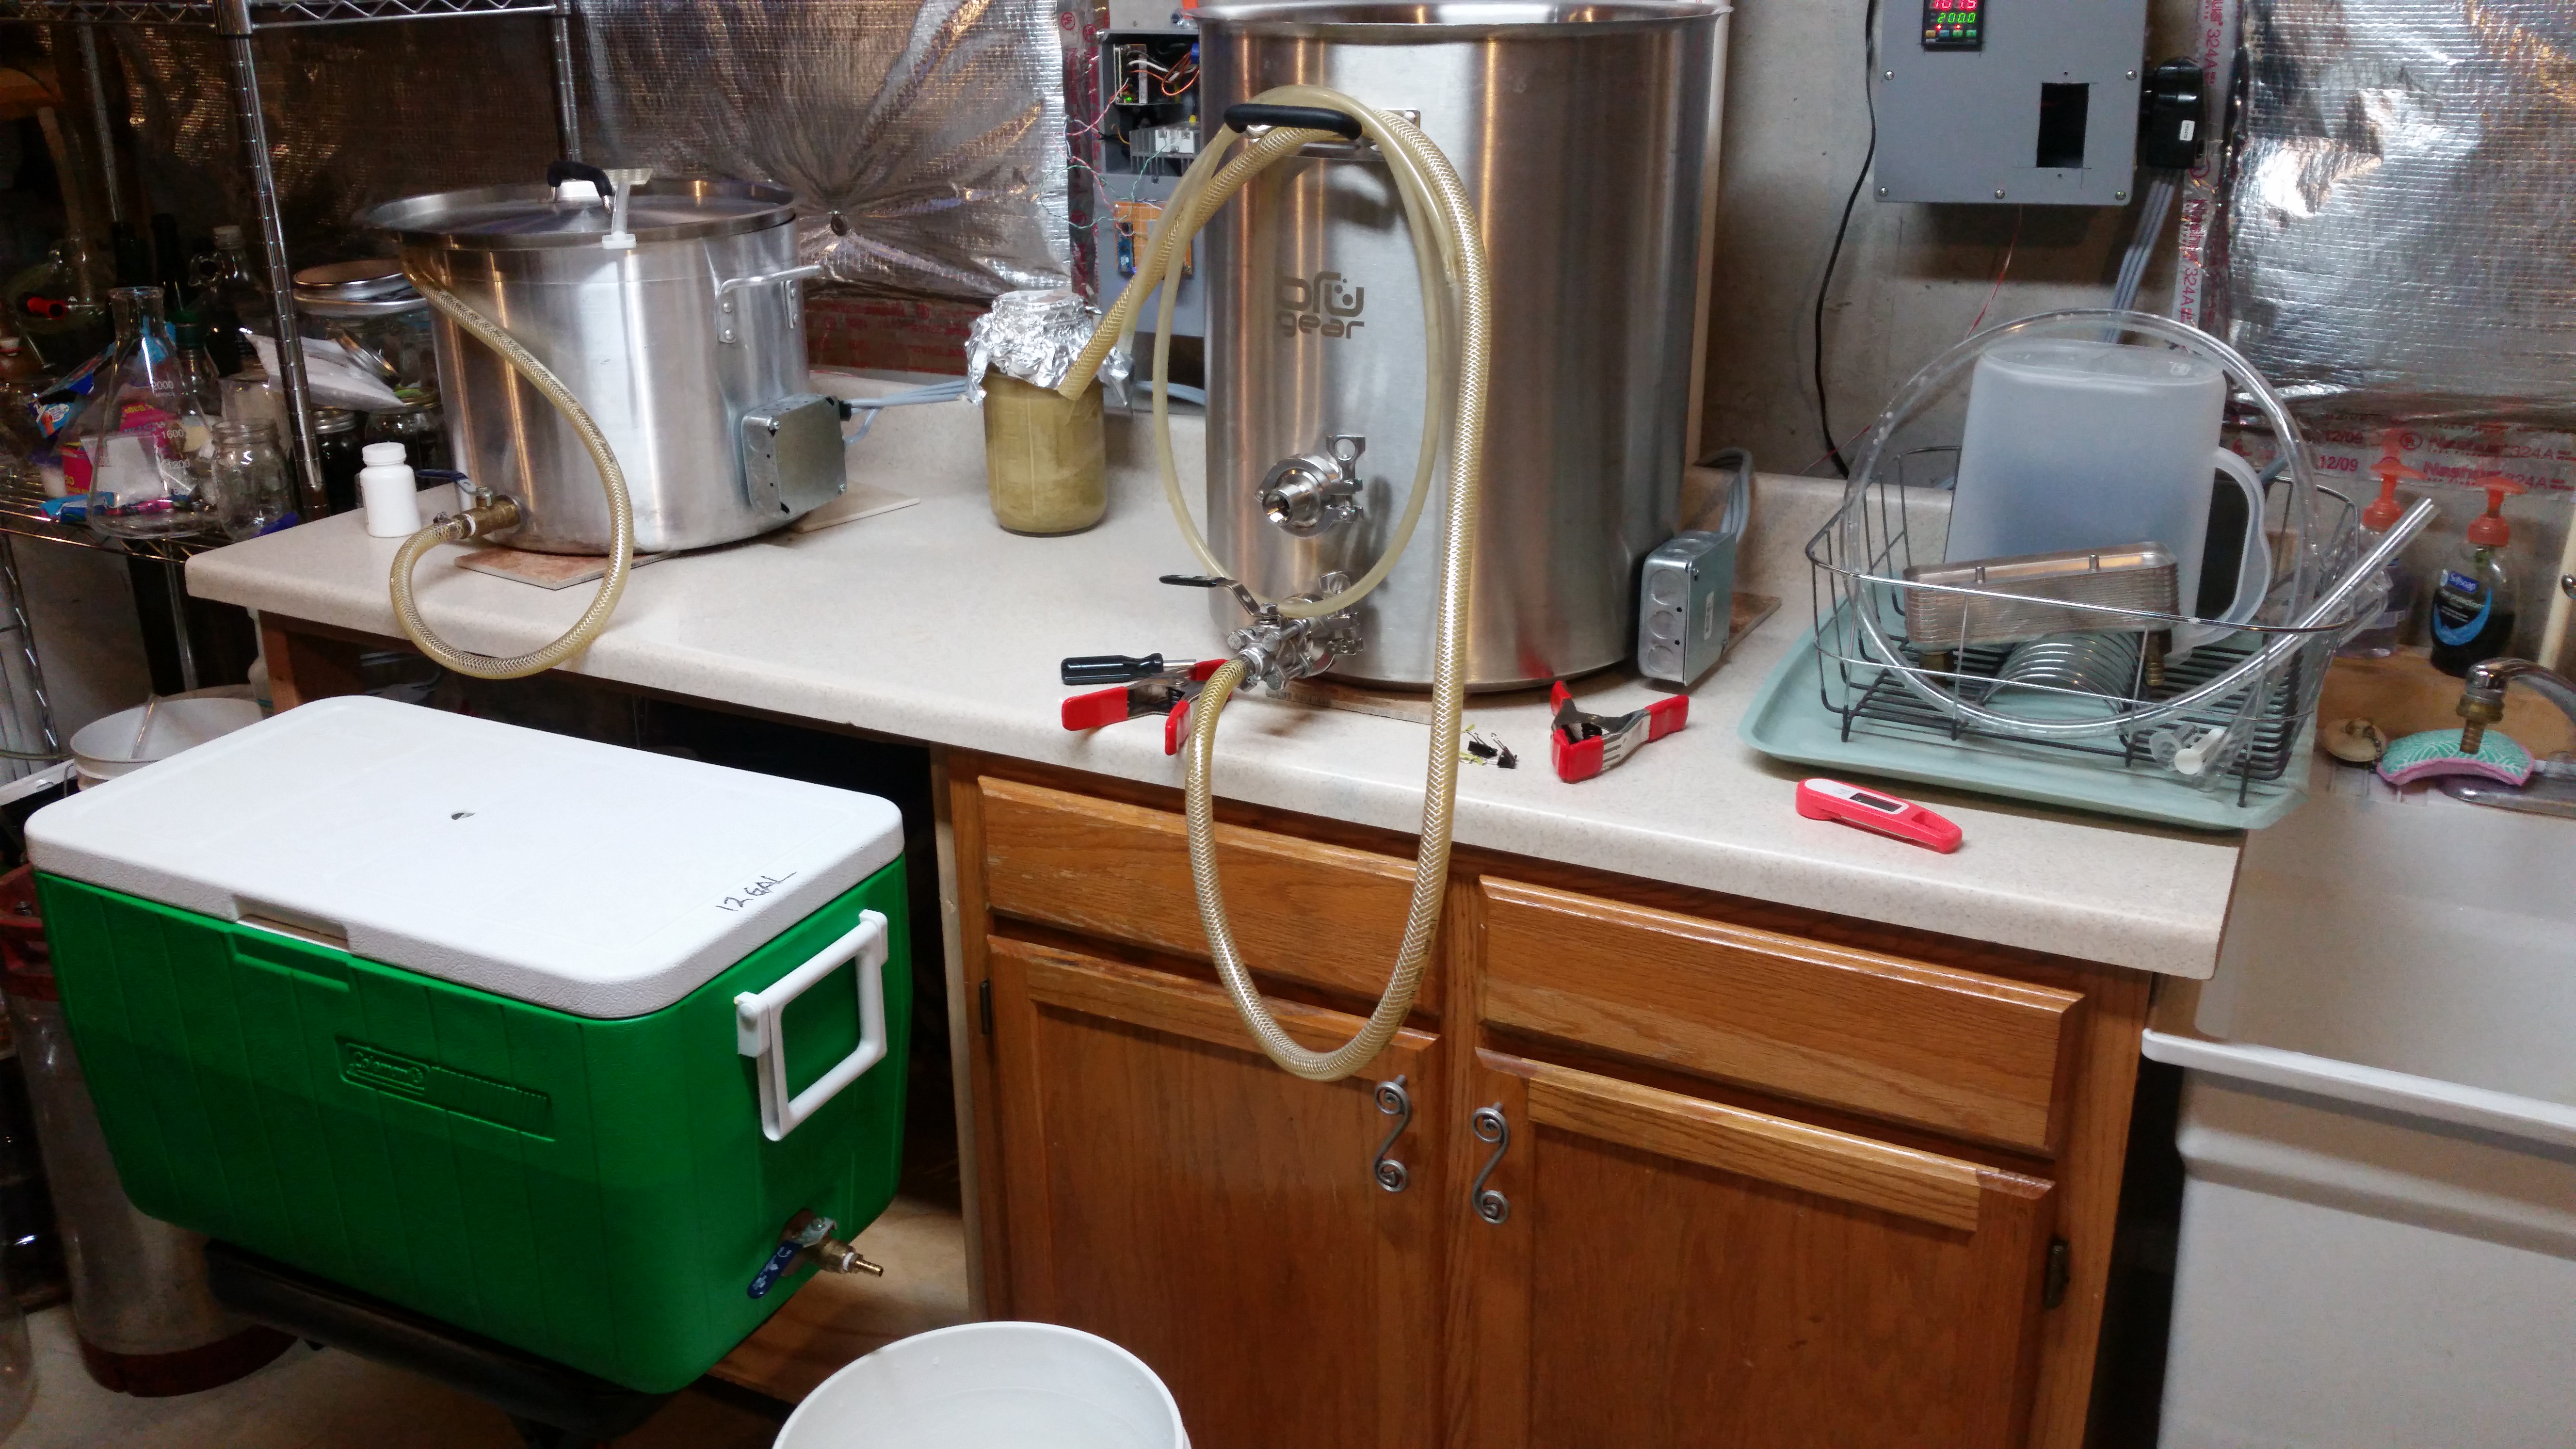
Live action shot of the mash
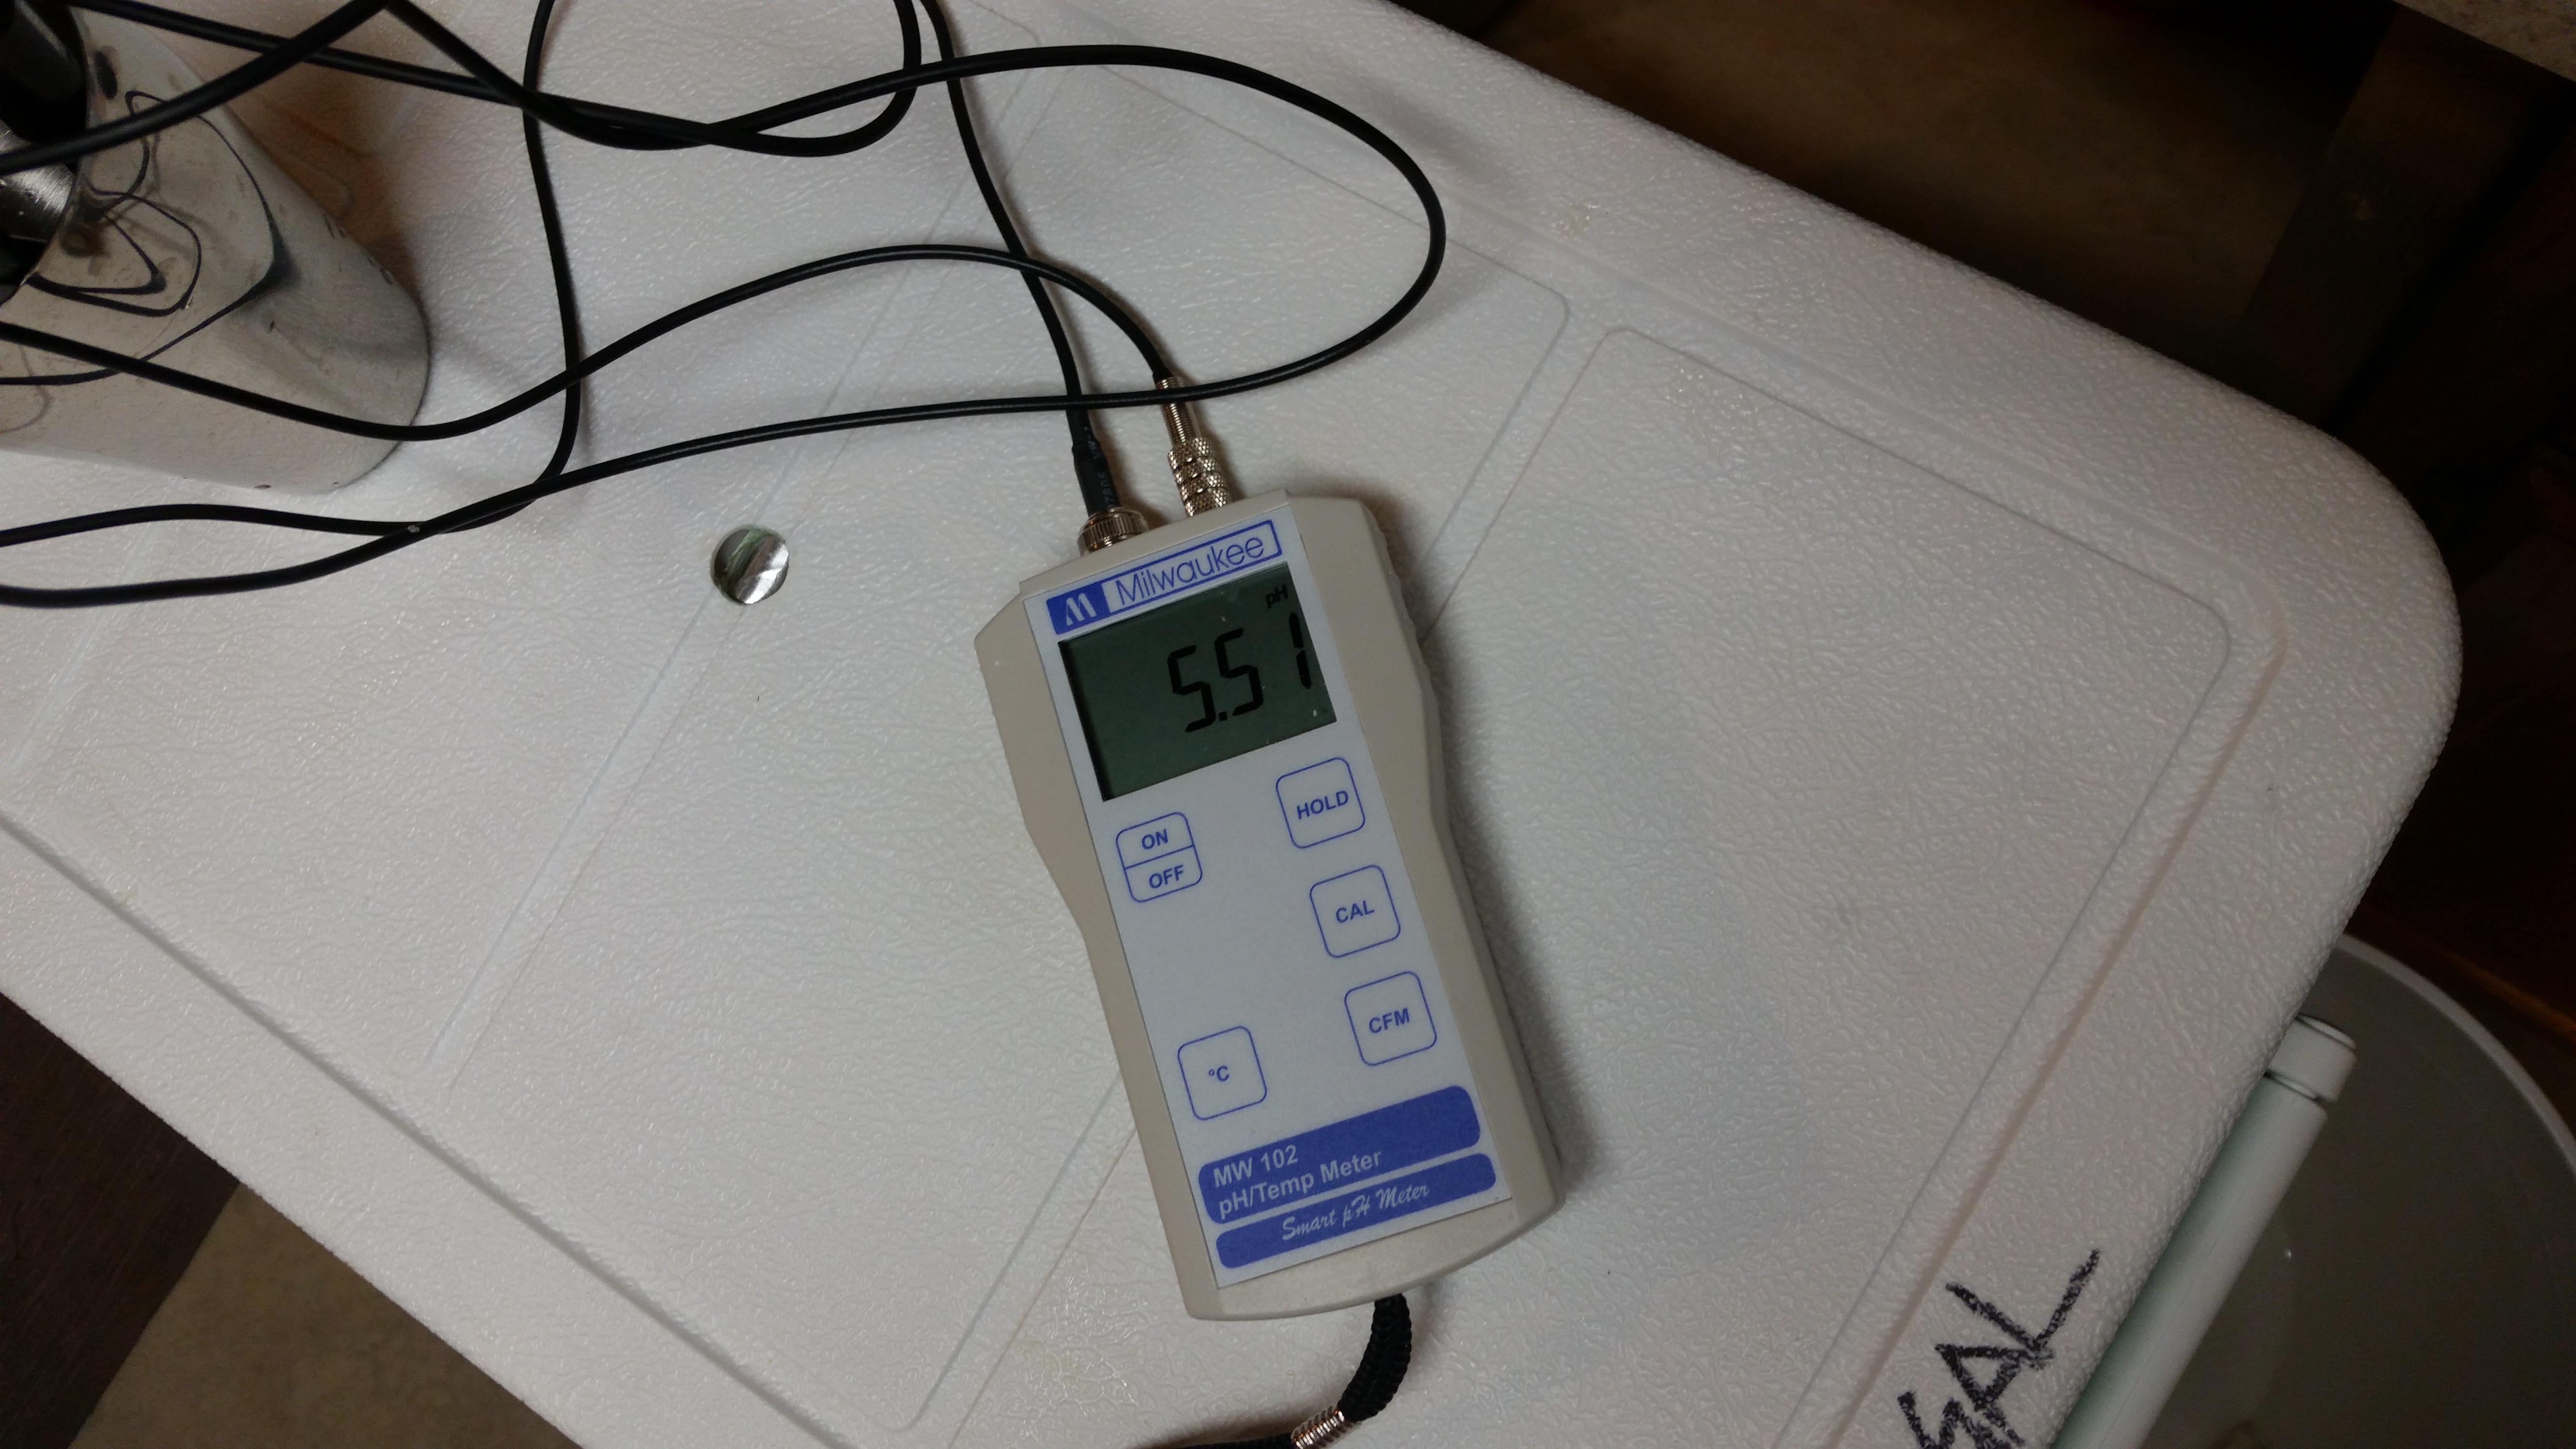
Hit my pH!
Brew day went without much of a hitch. I was close enough to my expected OG, although my volumes were off (again).
I chilled things down to around 70F and when I noticed the fermenter was cold, I heated it up…
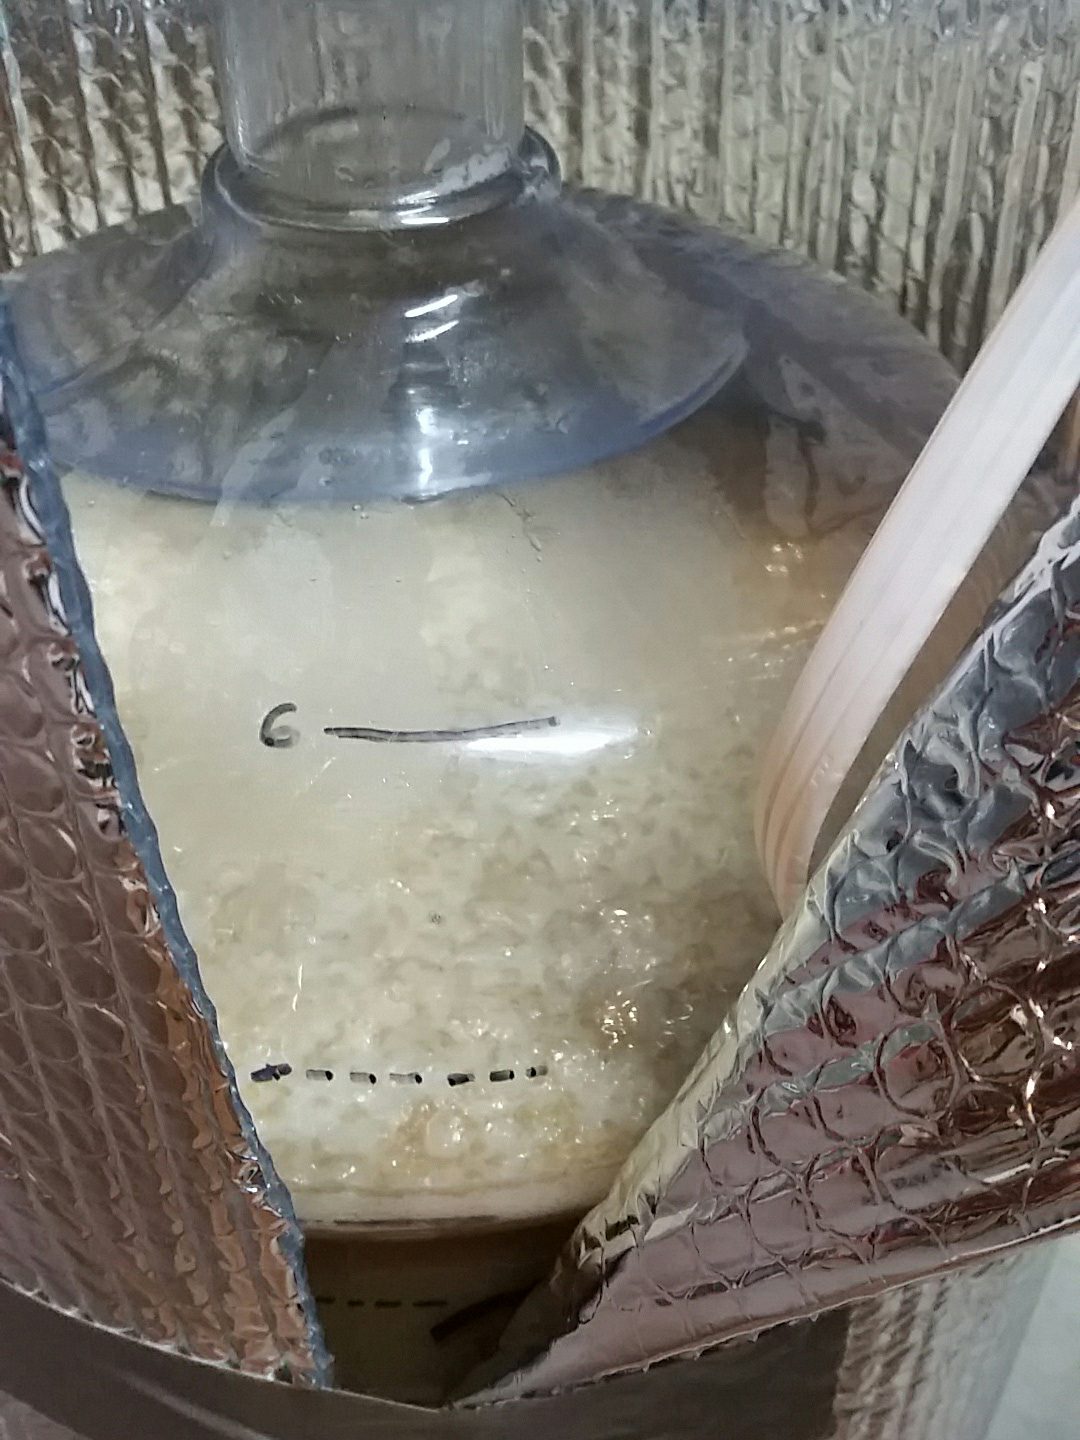
5 hours post-pitch. The yeast was healthy!
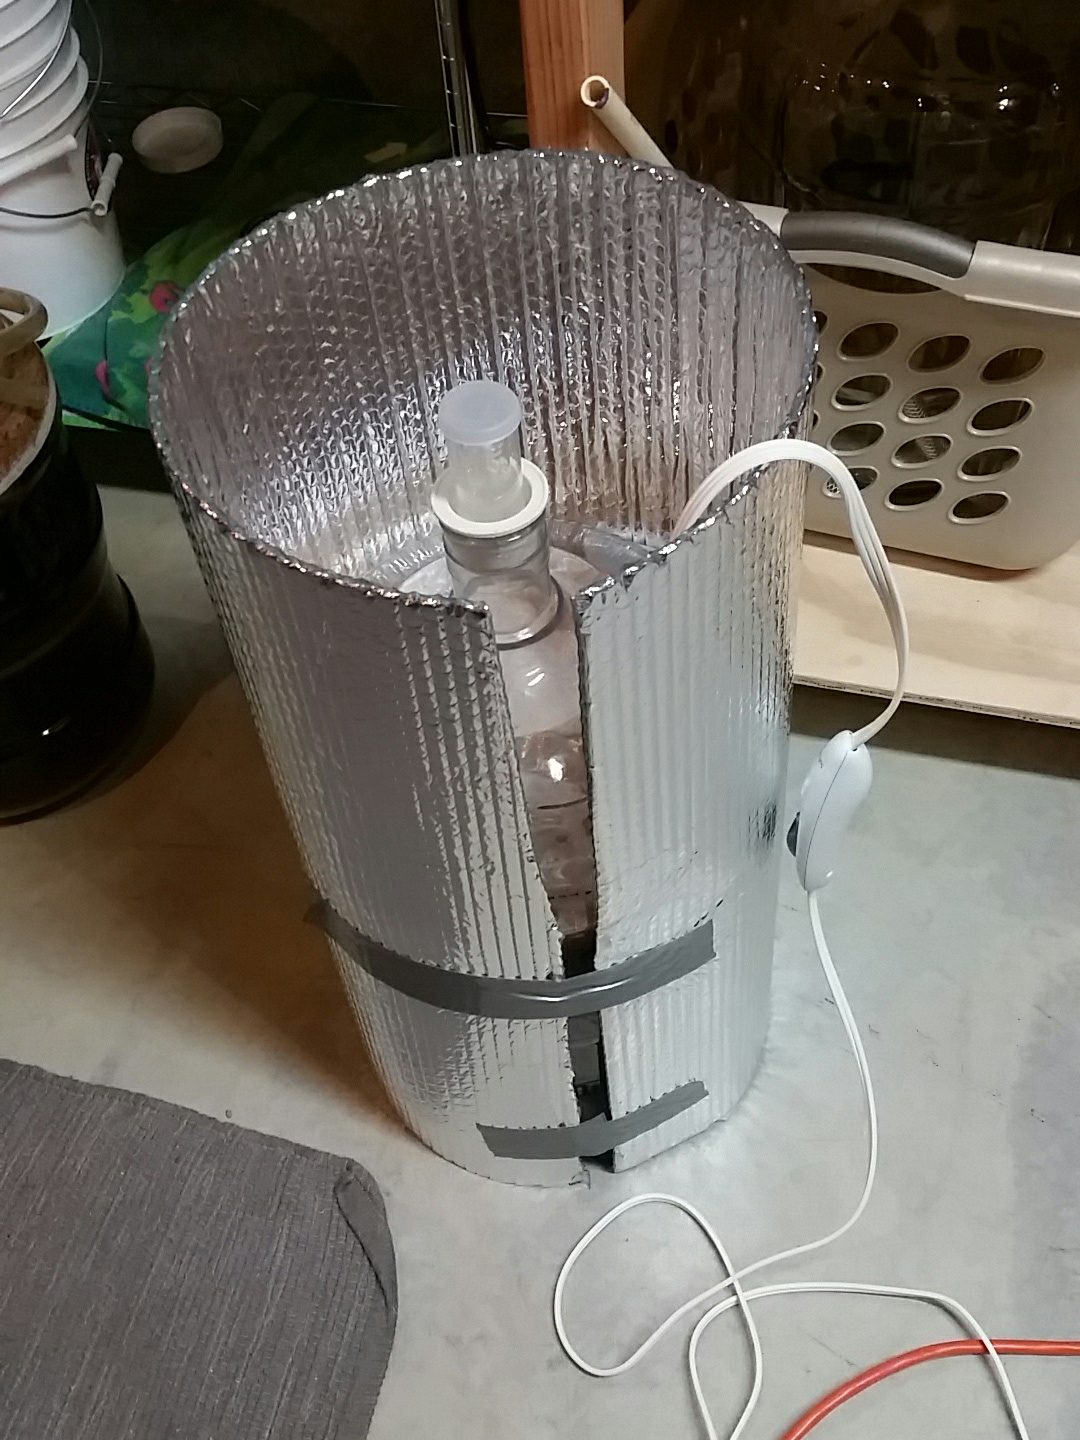
Kept the yeasties warm – heating pad and insulation (and I had the top covered with a towel too).
Log
2018-03-24: Brewed
2018-04-05: Kegged
2018-04-21: Judged at Hammerdown Brewcup, 31 avg score